
In the evolving landscape of automotive technology, the demand for power has surged exponentially. As modern vehicles become more reliant on sophisticated digital interfaces, high-fidelity sound systems, and complex electronic control units (ECUs), the factory-installed electrical infrastructure often struggles to keep pace. For enthusiasts and technicians looking to optimize their vehicle’s performance—particularly when integrating high-draw aftermarket audio hardware—the “Big 3” upgrade stands as the fundamental technical solution.
The Big 3 refers to a critical electrical system overhaul that involves reinforcing three primary cables within the vehicle’s engine bay. By replacing or supplementing factory wiring with high-gauge, low-resistance cabling, users can significantly improve current flow, stabilize voltage, and protect the longevity of sensitive electronic components. This upgrade is not merely a preference for audiophiles; it is a technical necessity for any system that exceeds the original manufacturer’s power overhead.
The Electrical Foundation of Modern Mobile Technology
To understand why the Big 3 upgrade is necessary, one must first understand the limitations of original equipment manufacturer (OEM) electrical systems. Car manufacturers design vehicles with a specific budget and weight profile in mind. Consequently, the wiring used to connect the alternator, battery, and chassis is typically sized to handle only the factory-rated loads with a very slim margin for error.
When a high-power amplifier, a multi-processor digital signal processor (DSP), or advanced lighting systems are added to the circuit, the electrical demand often exceeds what the factory wires can efficiently carry. This leads to a phenomenon known as voltage drop. In a DC (Direct Current) system, electrical resistance increases as the wire’s thickness decreases or its length increases. When resistance is high, the system must work harder to push current through the wires, resulting in heat generation and a drop in the actual voltage reaching the devices.
A drop in voltage can cause digital components to reset, headlights to flicker, and amplifiers to enter “protect” mode. More importantly, it places an immense strain on the vehicle’s alternator, potentially shortening its lifespan. The Big 3 upgrade addresses these bottlenecks by providing a wider, more efficient “pathway” for the current to travel, ensuring that the electrical system can respond to transient peak demands without compromising stability.
Breaking Down the Three Critical Connections
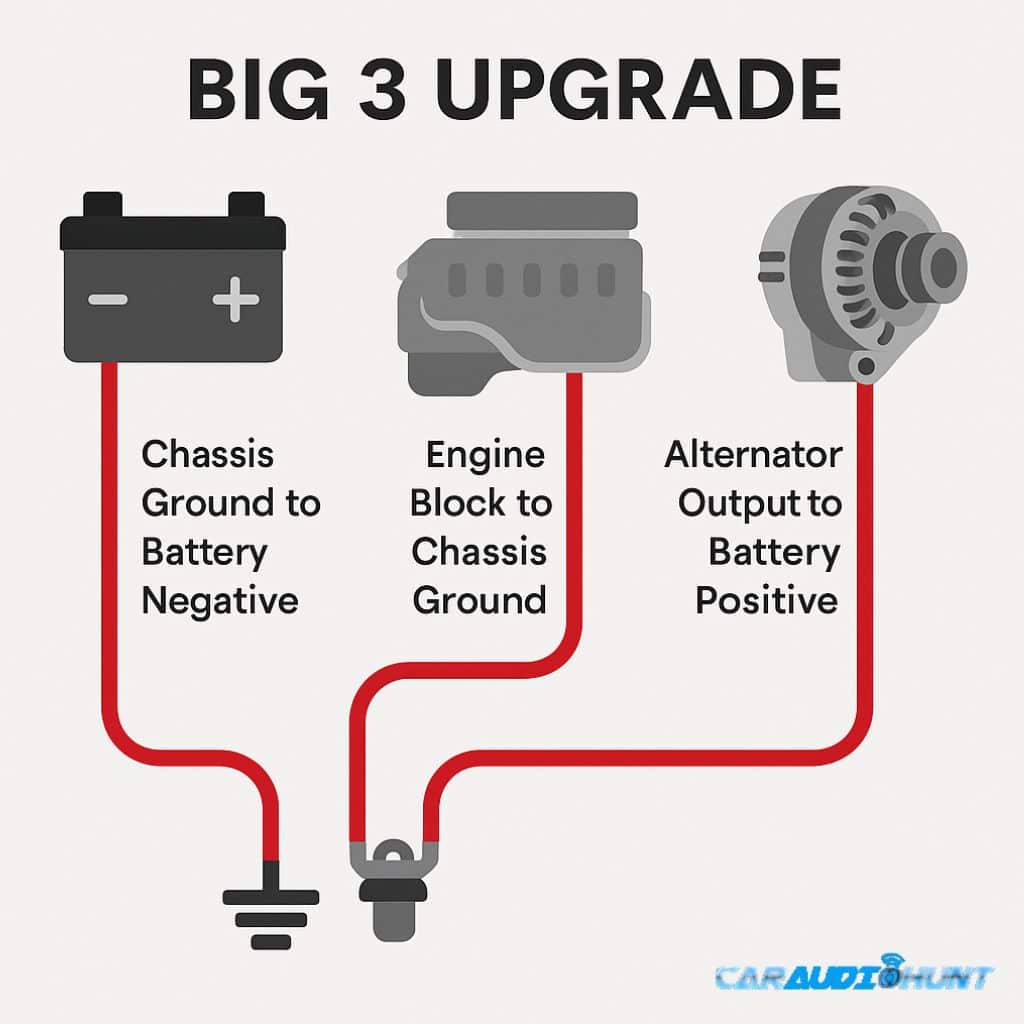
The Big 3 upgrade targets three specific areas where electrical bottlenecks are most likely to occur. These connections form the backbone of the vehicle’s charging and grounding circuits.
Alternator Positive to Battery Positive
The alternator is the primary power plant of the vehicle once the engine is running. It generates the current needed to run the car’s electronics and recharge the battery. In many stock configurations, the wire connecting the alternator’s output post to the battery’s positive terminal is relatively thin—often 8-gauge or even 10-gauge. By adding a 0-gauge or 4-gauge cable in parallel with this factory wire, you reduce the resistance between the power source and the storage unit. This ensures that the battery remains fully charged and that the electrical system has immediate access to the alternator’s full current capacity.
Battery Negative to Chassis Ground
The “ground” side of an electrical circuit is just as important as the positive side. For current to flow, it must have a return path to the power source. In modern vehicles, the metal frame (chassis) acts as a universal ground. The factory cable connecting the battery’s negative terminal to the chassis is frequently undersized. Strengthening this connection ensures that every electronic component grounded to the chassis elsewhere in the vehicle—including high-power audio amplifiers—has a clear, low-resistance path back to the battery. This reduces electrical noise and improves the overall efficiency of the entire DC circuit.
Engine Block to Chassis Ground
This third connection is often overlooked but is technologically vital. Because the alternator is physically bolted to the engine block, the engine block itself becomes part of the electrical return path. However, the engine is typically mounted on rubber bushings to reduce vibration, which are non-conductive. Therefore, the engine must be grounded to the chassis via a dedicated cable. Upgrading this link ensures that the current generated by the alternator can easily transition from the engine block to the chassis and back to the battery. Without this upgrade, the alternator may struggle to deliver its rated amperage, regardless of how thick the positive cable is.
Selecting the Right Hardware for Maximum Conductivity

The success of a Big 3 upgrade depends heavily on the quality of the materials used. Not all wires are created equal, and in the world of high-performance electronics, the technical specifications of the cable are paramount.
OFC vs. CCA: The Material Science
The two primary types of wire used in automotive applications are Oxygen-Free Copper (OFC) and Copper Clad Aluminum (CCA). From a technical standpoint, OFC is the gold standard. Copper has a much higher conductivity than aluminum, meaning it can carry more current with less heat generation. CCA, while lighter and more affordable, has significantly higher resistance. For a Big 3 upgrade, using OFC is highly recommended because it provides the highest efficiency and remains stable in the high-heat environment of an engine bay.
The Importance of Wire Gauge (AWG)
The American Wire Gauge (AWG) system measures the diameter of the wire. In the context of the Big 3, bigger is almost always better. 0-gauge (also known as 1/0 AWG) is the standard for high-end upgrades. A 0-gauge OFC cable can handle significant amperage over short distances with negligible voltage drop. If the vehicle’s power demands are more modest, a 4-gauge cable may suffice, but 0-gauge provides “future-proofing” for subsequent technological additions to the vehicle.
Terminals and Protection
The connections are only as good as the points of contact. Using tinned copper ring terminals ensures a secure, corrosion-resistant connection to the battery and alternator posts. Furthermore, because these cables carry high levels of current, safety is a major consideration. The cable running from the alternator to the battery must be fused. A high-quality ANL fuse holder placed close to the battery protects the vehicle from potential shorts, which could otherwise lead to catastrophic electrical failure or fire.
The Technical Implementation Process
Executing a Big 3 upgrade requires precision and a focus on mechanical integrity. Unlike simple plug-and-play gadgets, this is a hardware modification that integrates deeply with the vehicle’s core systems.
Preparation and Safety Protocols
Before beginning any work on the electrical system, the negative battery terminal must be disconnected to prevent accidental short circuits. Technicians should use a digital multimeter to measure the resting voltage of the battery and the resistance of the factory ground points. This establishes a baseline to measure the effectiveness of the upgrade once completed.
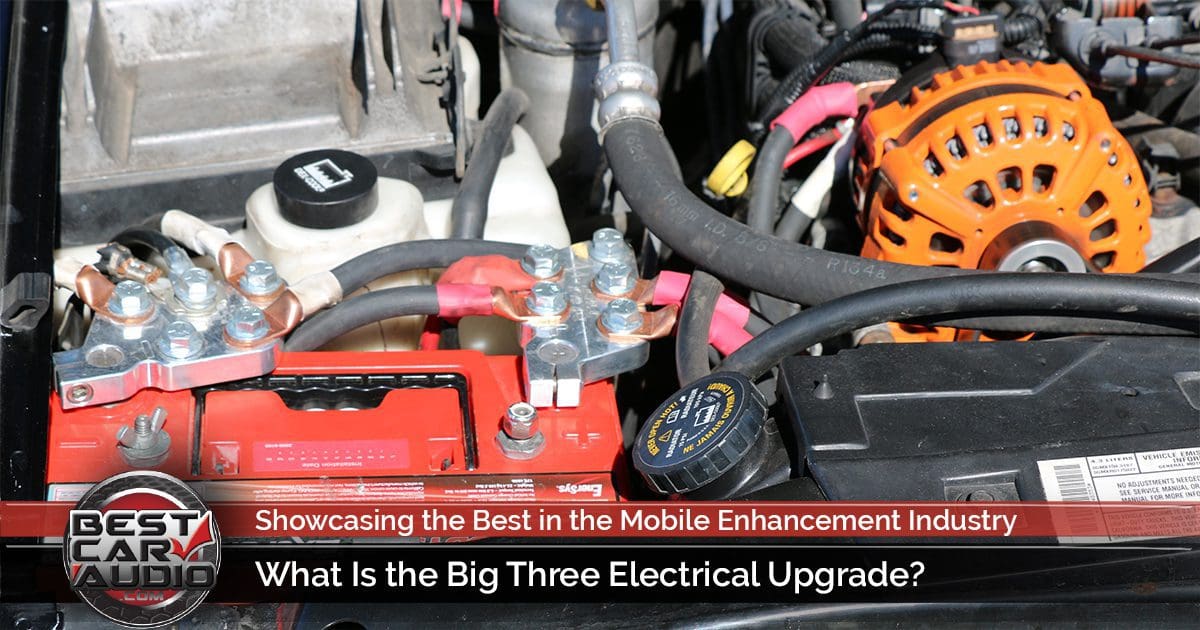
Routing and Securing the Cables
The engine bay is a hostile environment characterized by high temperatures and constant vibration. Proper routing is essential to prevent the new cables from coming into contact with moving parts (like fans or belts) or extreme heat sources (like exhaust manifolds).
Technicians use split-loom tubing or tech-flex sleeving to provide an extra layer of thermal and abrasion protection. Cables are secured with heavy-duty zip ties or P-clamps. When making the ground connections to the chassis, it is vital to sand away any paint or primer at the contact point. Metal-to-metal contact is required for a low-resistance ground; even a thin layer of factory paint can significantly impede current flow.
Performance Benchmarking and Long-term Benefits
The primary technical benefit of the Big 3 upgrade is voltage stabilization. In a standard vehicle, voltage might fluctuate between 12.6V and 14.4V depending on the engine RPM and electrical load. With the Big 3 upgrade, the system can maintain a much tighter tolerance.
For digital audio equipment, this stability is crucial. Modern amplifiers use switching power supplies that are most efficient at specific voltage levels. When voltage drops, these power supplies must draw more current to maintain the same wattage output, which creates a cycle of heat and inefficiency. By stabilizing the voltage, the Big 3 upgrade allows the audio system to perform at its peak technical specifications, delivering cleaner signals and more dynamic headroom.
Beyond the audio system, the entire vehicle benefits. The ECU (Engine Control Unit) receives a cleaner power signal, which can improve sensor accuracy and even idle stability. The starter motor experiences less resistance during the cranking cycle, leading to faster engine turnovers. The battery itself charges more efficiently, extending its service life by reducing the depth of discharge during high-demand periods.
In conclusion, “The Big 3” is not just a modification for enthusiasts; it is a foundational upgrade that optimizes the vehicle’s electrical infrastructure for the digital age. By understanding the principles of DC resistance and implementing high-quality hardware solutions, users can transform their vehicle’s power system into a robust platform capable of supporting the most demanding technological integrations. Whether the goal is high-fidelity sound, advanced mobile computing, or simply ensuring the longevity of the vehicle’s electrical health, the Big 3 upgrade represents a masterful blend of electrical engineering and automotive performance.
aViewFromTheCave is a participant in the Amazon Services LLC Associates Program, an affiliate advertising program designed to provide a means for sites to earn advertising fees by advertising and linking to Amazon.com. Amazon, the Amazon logo, AmazonSupply, and the AmazonSupply logo are trademarks of Amazon.com, Inc. or its affiliates. As an Amazon Associate we earn affiliate commissions from qualifying purchases.