For millions worldwide, Steam isn’t just a gaming platform; it’s the gateway to an expansive universe of digital entertainment. From indie gems to AAA blockbusters, Steam manages your game library, keeps it updated, and provides a social hub for the gaming community. However, beneath the polished user interface lies a crucial decision many users overlook: where exactly should Steam, and by extension, your ever-growing collection of games, be installed? The default installation path might seem convenient, but a thoughtful approach to your Steam folder location can significantly impact your system’s performance, storage management, and overall gaming experience. This guide will dive deep into the optimal strategies for installing Steam, ensuring your digital adventures are as smooth and efficient as possible, aligning with principles of smart tech management and digital productivity.
The Default Path and Why It Might Not Be Optimal
When you first download and run the Steam installer, it will typically suggest a default location for its core files and your game library. Understanding this standard path and its potential limitations is the first step toward a more optimized setup.
Understanding Steam’s Standard Installation
By default, Steam opts for a conventional path on Windows systems: C:Program Files (x86)Steam. This location is a common practice for most applications, situating them within the system’s primary program directory. On macOS, it’s typically /Applications/Steam.app, and on Linux, often within your home directory or a system-wide applications folder. This default choice is designed for ease of use, ensuring that Steam is placed in a recognized and accessible location, particularly for less tech-savvy users who prefer a straightforward installation process without needing to make complex decisions.
The Program Files (x86) folder on Windows specifically houses 32-bit applications, a legacy standard that Steam (which still has 32-bit components or support for older games) adheres to. Within this main Steam folder, you’ll find the Steam client’s executables, essential runtime files, configuration data, and critically, the steamapps folder, which is where your actual game data resides by default. This folder structure means that every game you download, from a small indie title to a massive open-world RPG, will initially be stored in this same location, unless you specify otherwise during installation or later through Steam’s library management features.
Limitations of the Default Location
While convenient, installing Steam in the default C:Program Files (x86)Steam folder comes with several potential drawbacks that can hinder your system’s performance and management:
-
C Drive Clutter and Storage Constraints: The C drive is typically where your operating system (OS) resides. Overloading it with dozens, if not hundreds, of gigabytes of game data can quickly eat into your system drive’s free space. A full C drive can lead to a sluggish OS, slower boot times, and general system instability, directly impacting your overall digital productivity. Running out of space also means you’ll constantly be managing storage, potentially uninstalling games you want to play just to make room for new ones or system updates. This constant struggle for space is a common pain point for PC users and highlights the need for strategic storage allocation.
-
Performance Impact on SSDs: If your C drive is a Solid State Drive (SSD), which is common for modern systems due to their speed, continuously writing large game files to it can contribute to its wear and tear over time. While modern SSDs are far more durable than early models, it’s still good practice to distribute write operations to extend their lifespan. More critically, even though SSDs are fast, dedicating precious SSD space solely to games that don’t critically benefit from ultra-fast loading (e.g., visual novels versus competitive shooters) might be an inefficient use of a premium storage solution. Furthermore, using a single drive for both the OS and all games can create bottlenecks during heavy disk activity, as the OS competes with game loading for disk resources.
-
Permission Issues and System Restore Complications: The
Program Files (x86)folder often has stricter permissions, requiring administrator privileges for certain operations. While Steam typically handles this well, it can occasionally lead to issues with game updates, file modifications, or third-party tools that interact with game files. Additionally, if you ever need to perform a system restore or reinstallation of your OS, the default location means your entire Steam library might be wiped out, requiring a lengthy re-download process. Keeping games on a separate drive or partition offers a layer of protection against accidental data loss during OS maintenance, showcasing a proactive approach to digital security and data management. -
Lack of Flexibility and Organization: A single, monolithic Steam installation on your primary drive can make it difficult to organize your game library logically. As your collection grows, you might want to move less-played games to a larger, slower drive while keeping frequently accessed titles on your fastest storage. The default setup doesn’t inherently facilitate this kind of nuanced management, leading to a less organized and potentially less enjoyable gaming experience.
These limitations underscore the importance of proactively choosing a different installation path, especially for users with multiple storage drives or those who prioritize system performance and longevity.
Strategic Drive Selection: SSD vs. HDD for Your Steam Library
The choice between Solid State Drives (SSDs) and Hard Disk Drives (HDDs) is perhaps the most critical decision when determining where to install your Steam games. Each storage technology offers distinct advantages and disadvantages that significantly impact performance, cost, and capacity, influencing how you manage your digital game collection. Understanding these differences allows for a strategic approach that maximizes your gaming experience while optimizing your system’s overall health, a core principle of effective tech management.
The Performance Advantage of SSDs
Solid State Drives have revolutionized computing with their unparalleled speed. Unlike HDDs, which rely on spinning platters and read/write heads, SSDs use flash memory to store data, resulting in dramatically faster data access times. For gamers, this translates into several tangible benefits:
- Blazing-Fast Load Times: This is arguably the biggest advantage. Games installed on an SSD load significantly faster, reducing the time you spend staring at loading screens and getting you into the action quicker. This is particularly noticeable in open-world games with large assets, competitive online games where every second counts, and games with frequent scene transitions. The difference between an SSD and an HDD for loading times can range from a few seconds to over a minute, profoundly enhancing the fluidity of your gaming sessions.
- Smoother Gameplay Experience: While SSDs don’t directly affect frame rates (that’s primarily a CPU/GPU concern), they can contribute to a smoother overall experience by allowing game assets (textures, models, audio) to stream faster. This minimizes instances of “stuttering” or “hitching” that can occur on HDDs when the game engine struggles to load data quickly enough, ensuring consistent performance and responsiveness.
- Faster System Responsiveness: Beyond games, having Steam itself and your most frequently used applications on an SSD contributes to a snappier, more responsive operating system. Launching Steam, browsing your library, and downloading updates all feel quicker, improving your overall digital productivity.
- Durability and Silence: With no moving parts, SSDs are more resistant to physical shock and operate silently, contributing to a quieter and more reliable computing environment.
For these reasons, modern tech reviews consistently recommend SSDs as the primary drive for your operating system and frequently played games.
The Storage Capacity of HDDs
Despite the rise of SSDs, Hard Disk Drives still hold a vital place in the storage landscape, primarily due to their superior capacity-to-cost ratio. HDDs remain the go-to solution for mass storage, making them ideal for certain aspects of your Steam library:
- Vast Storage at Lower Cost: HDDs offer capacities ranging from 1TB up to 20TB or more, typically at a much lower price per gigabyte compared to SSDs. This makes them an extremely cost-effective solution for storing a massive game library. If you have hundreds of games, many of which you don’t play regularly but want to keep installed, an HDD provides the necessary space without breaking the bank. This aligns with financial prudence, allowing you to maximize your storage investment.
- Ideal for Less Demanding Games and Archiving: Not all games benefit equally from SSD speeds. Older titles, visually simpler games, or genres like turn-based strategy games or visual novels often have minimal loading requirements. Installing these on an HDD is perfectly acceptable, freeing up valuable SSD space for your performance-critical titles. HDDs are also excellent for archiving games you might return to sporadically or for keeping your entire back catalog installed without worrying about running out of space.
- Backup and Media Storage: Beyond games, HDDs are excellent for general data storage, including system backups, media files (movies, music, photos), and documents. Using a dedicated HDD for these purposes keeps your primary SSD clean and focused on performance-critical applications and games, contributing to better system organization and resilience.
While slower, the sheer volume of data an HDD can hold for a relatively low price makes it an indispensable component of a balanced storage strategy.
The Hybrid Approach: Balancing Speed and Space
For most modern PC users, the optimal solution for managing a Steam library isn’t an either/or choice but rather a strategic combination of both SSDs and HDDs. This “hybrid approach” leverages the strengths of each technology to create a balanced, high-performance, and capacious storage setup:
- OS and Core Applications on Primary SSD: Your primary SSD (e.g., an NVMe M.2 drive or a SATA SSD) should host your operating system, essential applications, and the Steam client itself. This ensures fast boot times, snappy application launches, and overall system responsiveness.
- Primary Game Library on a Secondary SSD: Dedicate a separate SSD (or a partition on a larger SSD) specifically for your most frequently played, competitive, or graphically intensive games. These are the titles where reduced load times and smoother asset streaming provide the most significant advantage. This allows you to quickly access and enjoy your go-to games without compromise.
- Less Played/Larger Games on a High-Capacity HDD: Utilize a large HDD for games you play less frequently, older titles, or those with massive installation sizes (e.g., Call of Duty, Microsoft Flight Simulator) that don’t critically rely on ultra-fast loading. This frees up precious SSD space while still allowing you to keep a vast collection of games installed and ready to play without re-downloading. This strategy reflects smart resource management, akin to smart financial planning where different investments serve different purposes.
- Leveraging Steam’s Multiple Library Folders: Steam fully supports creating multiple “Steam Library Folders” on different drives. This feature is the cornerstone of the hybrid approach, allowing you to easily specify where each game is installed after it’s downloaded. You can set your SSD library as the default for new installations and manually move specific games to your HDD as needed, or vice-versa. This flexibility is crucial for dynamic management of your game collection as your interests and storage needs evolve.
By adopting a hybrid strategy, you achieve the best of both worlds: lightning-fast performance for your most cherished titles and abundant, cost-effective storage for your entire digital collection. This thoughtful allocation of resources is a hallmark of intelligent tech ownership and helps future-proof your gaming setup.
How to Choose and Change Your Steam Installation Folder
Once you understand the benefits of strategic drive selection, the next step is to implement it. Whether you’re installing Steam for the first time or looking to reorganize an existing library, Steam provides user-friendly options to manage your installation folders effectively. This section provides a practical tutorial on setting up and modifying your Steam library locations.
Initial Installation: Guiding Steam to Your Preferred Directory
When you first download the Steam client installer, it will present you with an installation wizard. This is your primary opportunity to deviate from the default C:Program Files (x86)Steam path and establish your preferred primary library folder.
- Run the Installer: Double-click the downloaded SteamSetup.exe file to begin.
- Follow Prompts: Click “Next” through the initial welcome screen and agree to the license agreement.
- Choose Components (if applicable): Typically, you’ll install the full client.
- Select Installation Folder: This is the crucial step. The installer will display the default path. Click the “Browse…” button.
- Navigate to Your Desired Drive/Folder:
- For a Secondary SSD: Navigate to your dedicated SSD (e.g.,
D:,E:) and create a new folder specifically for Steam, such asD:SteamorD:GamesSteam. This keeps your Steam installation separate from other applications and the OS. - For an HDD: Similarly, navigate to your HDD and create a folder like
E:SteamLibraryorF:SteamGames. - Why a dedicated folder? Installing directly to the root of a drive (e.g.,
D:) is generally discouraged as it can lead to clutter. A dedicated folder helps keep things organized.
- For a Secondary SSD: Navigate to your dedicated SSD (e.g.,
- Confirm and Install: Once you’ve selected your custom path, click “OK” and then “Install” to complete the process. Steam will then install its client files and create its initial
steamappsfolder in this new location.
By performing this step correctly, you establish your main Steam library on the most appropriate drive from the outset, laying a solid foundation for your digital game collection.
Managing Multiple Steam Library Folders
Even if you initially installed Steam to the default location, or if you acquire new drives later, Steam makes it incredibly easy to create and manage multiple library folders. This is essential for the “hybrid approach,” allowing you to strategically place games across different SSDs and HDDs.
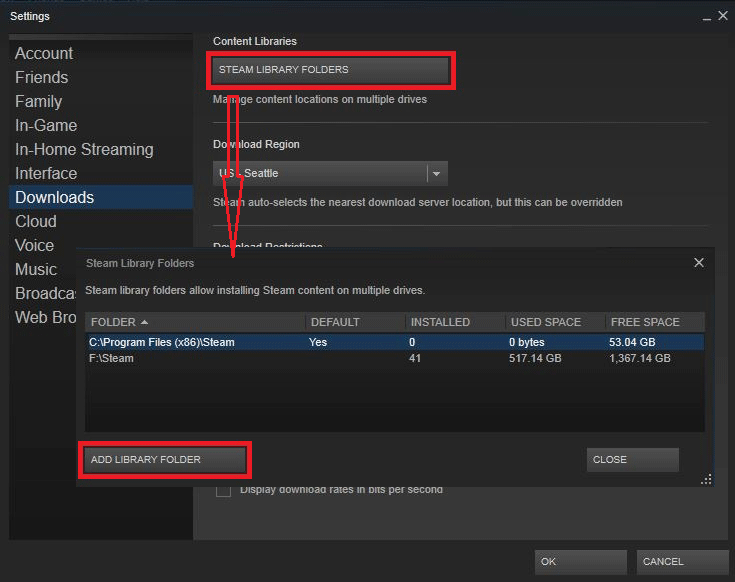
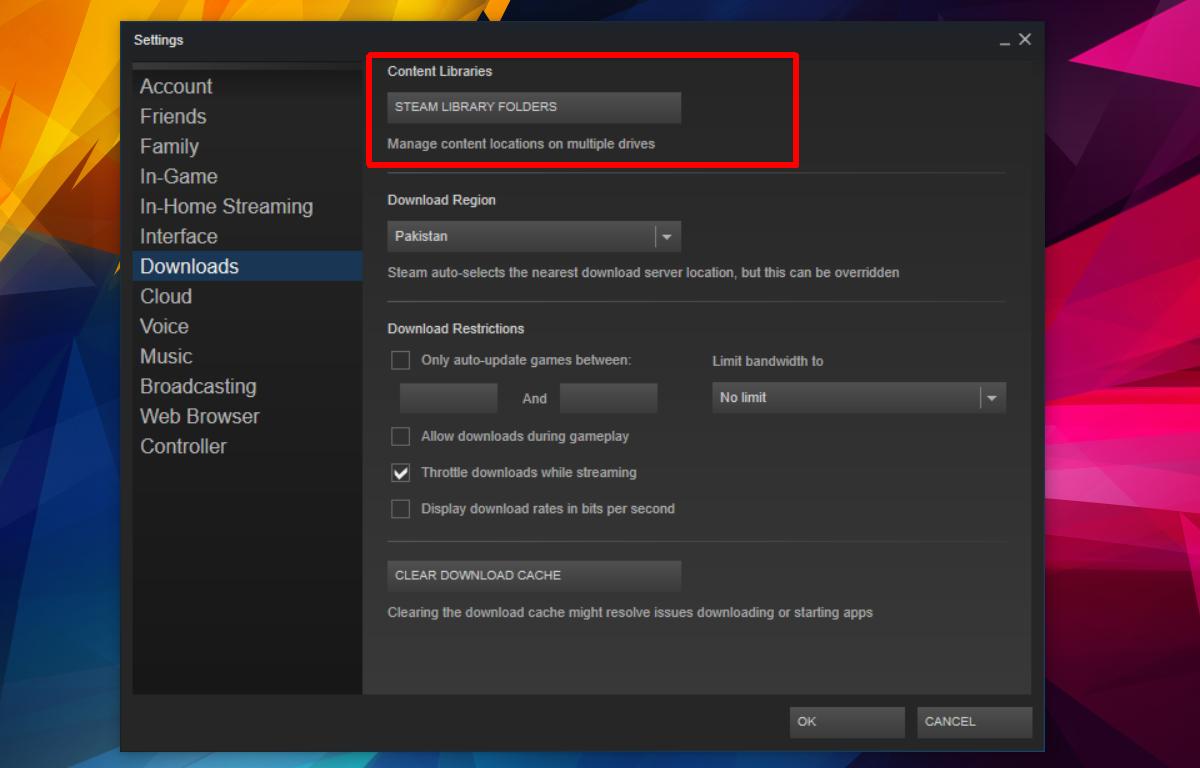
- Open Steam Settings: Launch the Steam client. In the top-left corner, click “Steam” > “Settings” (or “Preferences” on macOS).
- Navigate to Downloads: In the Settings window, select “Downloads” from the left-hand menu.
- Access Steam Library Folders: At the top of the Downloads section, you’ll see a button labeled “Steam Library Folders” (or “Steam Library” on some versions). Click it.
- Add a New Library Folder: In the Storage Manager window that appears, you’ll see all your existing Steam library folders. Click the “+” icon (or “Add Library Folder” button) to add a new one.
- Select Your New Drive/Folder: Navigate to the drive and folder you wish to designate as a new Steam library. Again, it’s recommended to create a dedicated subfolder (e.g.,
E:Steam GamesorF:Steam Library HDD). Click “Select” or “New Folder” and then “Select Folder.” - Set as Default (Optional): You can right-click on any library folder in this list and choose “Make Default” if you want new game installations to automatically go to that location. This is useful if you’ve added a fast secondary SSD and want all future games to benefit from it.
- Close Settings: Click “Close” to exit the Storage Manager and “OK” to exit the Settings window.
Now, when you go to install a new game, Steam will present a dropdown menu asking which library folder you’d like to install it to, giving you granular control over your storage allocation. This capability is a cornerstone of effective digital asset management within the gaming ecosystem.
Moving an Existing Steam Game (or Entire Installation)
What if you’ve already installed games and want to move them between your newly created library folders? Steam provides a built-in feature for this, making reorganization straightforward.
Moving Individual Games:
- Open Steam Library: Go to your Steam Library.
- Right-click on the Game: Find the game you wish to move, right-click on its title, and select “Properties.”
- Navigate to Local Files: In the Properties window, select the “Local Files” tab.
- Click “Move Install Folder”: You’ll see a button labeled “Move Install Folder…” Click it.
- Select New Location: A dropdown menu will appear, showing your other available Steam Library Folders. Choose the destination drive/folder and click “Move.”
- Wait for Transfer: Steam will then move the game’s files to the new location. The time this takes depends on the game’s size and the speed of your drives.
Moving an Entire Steam Installation (Advanced, Use with Caution):
While Steam’s library folder management is robust, sometimes users want to move the entire Steam client and its default library. This is possible but requires more care.
- Backup Your
steamappsFolder: The most critical step. Copy thesteamappsfolder (which contains all your game data) from your old Steam directory to a safe temporary location. - Uninstall Steam: Go to Windows “Add or remove programs” and uninstall Steam. This only removes the client, not usually the game files if they are in a different library folder.
- Delete Remaining Files: Manually check the old Steam installation directory (e.g.,
C:Program Files (x86)Steam) and delete any remaining files or folders except for your backed-upsteamappsfolder if it was there. - Reinstall Steam to New Location: Follow the steps in “Initial Installation” above to install Steam to your desired new primary location (e.g.,
D:Steam). - Restore
steamapps: Once the new Steam client is installed and running, exit Steam completely. Copy your backed-upsteamappsfolder into the new Steam installation directory (e.g.,D:Steamsteamapps), overwriting the emptysteamappsfolder created by the new installation. - Launch Steam: Start Steam. It should detect your previously installed games. If any are not detected, you might need to “Install” them again, but Steam will usually perform a “Discovering existing files” process rather than a full re-download.
This process is more involved and carries a higher risk if not done correctly. For most users, managing multiple library folders and moving individual games is the safer and more convenient approach. These tutorials are examples of how precise, step-by-step guidance enhances digital productivity for users, allowing them to optimize their setup.
Best Practices for a Future-Proof and Optimized Steam Setup
Beyond simply choosing the right folder, an optimized Steam setup involves a broader strategy of organization, maintenance, and awareness of potential issues. Implementing these best practices ensures not only peak performance for your current gaming but also prepares your system for future upgrades and preserves the longevity of your digital investments. This approach aligns with principles of digital security, long-term tech planning, and system productivity.
Organization and Backup Considerations
A well-organized Steam library extends beyond just where games are stored; it encompasses how you manage your data and protect against loss.
- Dedicated Drives/Folders: As discussed, dedicate specific drives or partitions for your Steam libraries. Avoid installing games directly into the root directory of a drive (e.g.,
D:) or mixing them indiscriminately with other types of data. Create clear, descriptive folders likeD:SteamGames_SSDandE:SteamLibrary_HDD. This makes it easier to locate, manage, and back up your game data. - Avoid OS Drive for Primary Games: While acceptable for a few small titles, making your C: drive your primary game storage is generally a poor practice. This keeps your OS drive lean, ensuring optimal system performance and faster system restores if needed.
- Backup Save Files: Steam Cloud often handles game save backups automatically, but not all games support it, and sometimes local save files are more current. Periodically back up critical save files for your most cherished games, especially those with significant progress (e.g., RPGs, single-player campaigns). These are often located in
Documents,AppDatafolders, or within the game’s installation directory. Losing hours of progress due to a drive failure or corruption is a common, frustrating experience that can be mitigated with a robust backup strategy. - Regular Maintenance: Just like any other part of your system, your game drives benefit from occasional maintenance.
- Disk Cleanup: Use Windows’ built-in Disk Cleanup tool to remove temporary files.
- Defragmentation (for HDDs): While SSDs should never be defragmented (it wears them out needlessly), HDDs can benefit from defragmentation to improve file access times. Schedule this periodically.
- TRIM (for SSDs): Ensure TRIM is enabled for your SSDs (usually by default in modern OS). TRIM helps SSDs manage stored data more efficiently and prolongs their lifespan.
These organizational and backup practices aren’t just for gaming; they’re fundamental to good digital hygiene and protect your investment in software and hardware.
Permissions and Troubleshooting Common Issues
Even with the perfect folder structure, you might encounter issues. Understanding common problems and their solutions can save significant frustration.
- Administrator Rights: Sometimes, Steam or certain games require administrator privileges to install updates, modify files, or launch correctly, especially if installed in
Program Files (x86). If you encounter permission errors, try running Steam “As administrator” (right-click on the Steam shortcut). For persistent issues, ensure your user account has full control over the Steam installation folder. - Antivirus Interference: Overzealous antivirus software can sometimes quarantine or block Steam files or game executables, particularly after updates. If games fail to launch or update, temporarily disable your antivirus or add your Steam installation folder (and specific game folders) to its exclusion list.
- Corrupted Files/Validation: If a game is misbehaving, has graphical glitches, or crashes frequently, file corruption might be the culprit. Steam has a built-in feature to verify game files:
- Right-click the game in your Steam Library.
- Select “Properties.”
- Go to the “Local Files” tab.
- Click “Verify integrity of game files…” Steam will then check all game files against its servers and re-download any that are missing or corrupted.
- Insufficient Disk Space: This seems obvious, but it’s a common oversight. Before downloading large games, always check the available space on your target drive. Steam will warn you, but it’s better to plan ahead.
Proactive troubleshooting and understanding basic system permissions are critical skills for any tech user, contributing to a seamless and secure computing experience.

The Impact on Your Gaming Experience and System Performance
Ultimately, all these considerations boil down to enhancing your gaming experience. A thoughtful Steam installation strategy contributes significantly to both perceived and actual performance.
- Loading Times vs. Framerates: It’s important to differentiate. Your folder choice (SSD vs. HDD) primarily impacts loading times. Moving a game from an HDD to an SSD will drastically cut down on how long you wait for levels to load, games to start, or new areas to stream. It will not, however, directly increase your in-game framerate, which is governed by your CPU, GPU, and RAM. However, indirectly, faster asset streaming from an SSD can reduce stuttering in open-world games where new textures and models are constantly loaded, leading to a smoother perceived framerate.
- Overall System Responsiveness: When your primary OS drive (C:) is not overburdened with hundreds of gigabytes of game data, your entire system benefits. Windows runs faster, applications launch quicker, and background processes have more breathing room. This holistic improvement in system responsiveness translates to a better overall PC experience, making it more pleasant to switch between gaming, browsing, and work. This speaks directly to digital productivity – a well-organized system runs efficiently, saving time and frustration.
- Future-Proofing Your Setup: Planning your Steam library folders strategically helps future-proof your system. If you upgrade your SSDs or add new, larger HDDs, it’s easier to integrate them into your existing library management without having to reinstall everything. It allows you to dynamically adapt to new game sizes and hardware innovations, protecting your financial investment in your PC components and game library.
By understanding the nuances of folder selection, drive types, and ongoing maintenance, you’re not just installing games; you’re building an optimized, resilient, and enjoyable gaming ecosystem. This strategic approach to tech management ensures your Steam library serves you efficiently for years to come, a testament to smart digital living.
In conclusion, the question “what folder to install Steam” is far more profound than it appears at first glance. It’s about optimizing performance, managing resources effectively, ensuring data security, and ultimately, enhancing your overall digital experience. By moving beyond the default path and strategically leveraging multiple storage drives, you can transform your gaming setup into a streamlined, high-performance machine. Embrace the hybrid storage approach, utilize Steam’s robust library management features, and adhere to best practices for organization and maintenance. Doing so will not only save you time and frustration but also ensure that your vast digital game collection remains a source of joy and entertainment for years to come, reflecting a keen eye for tech optimization and digital productivity.
aViewFromTheCave is a participant in the Amazon Services LLC Associates Program, an affiliate advertising program designed to provide a means for sites to earn advertising fees by advertising and linking to Amazon.com. Amazon, the Amazon logo, AmazonSupply, and the AmazonSupply logo are trademarks of Amazon.com, Inc. or its affiliates. As an Amazon Associate we earn affiliate commissions from qualifying purchases.