
In the contemporary landscape of personal finance, the boundary between social interaction and monetary exchange has become increasingly blurred. Peer-to-peer (P2P) payment platforms, led by the ubiquity of Venmo, have revolutionized how we split dinner bills, pay rent, or settle casual debts. However, for many users, a significant gap remains between receiving a payment within the app and utilizing those funds within the broader traditional banking system.
Transferring money from Venmo to a bank account is not merely a technical necessity; it is a critical component of personal liquidity management. While Venmo functions as a convenient digital wallet, it is often not the ideal place for long-term capital storage due to differences in interest accumulation and regulatory protections compared to traditional savings accounts. Understanding the nuances of this transfer process is essential for anyone looking to optimize their cash flow and maintain robust financial health.
The Role of Venmo in Modern Personal Finance
To understand the mechanics of moving money, one must first understand the role Venmo plays in a modern financial portfolio. Venmo operates as a “closed-loop” system where funds circulate between users. When someone pays you, the money settles in your “Venmo Balance.” From a financial strategy perspective, this balance represents stagnant capital—money that is not working for you in the form of interest or investments.
Understanding the Digital Wallet Ecosystem
The digital wallet ecosystem serves as a middle layer between the consumer and the traditional banking institution. Unlike a checking account at a major bank, a Venmo balance does not inherently earn an Annual Percentage Yield (APY). For the financially savvy user, leaving large sums of money in a Venmo balance is a missed opportunity for compounding growth. Furthermore, while Venmo offers some protections, funds held in a P2P app may not always carry the same FDIC insurance guarantees as those held in a regulated bank, depending on how the user interacts with the app’s various features (such as the Venmo Debit Card).
Why Transferring to a Bank is Essential for Financial Health
Consolidating your funds into a primary bank account allows for better oversight and budgeting. When money is scattered across various fintech apps, it becomes difficult to track net worth or monitor spending patterns. By transferring your Venmo balance to a bank, you integrate those funds into your broader financial ecosystem, making them available for automated bill payments, high-yield savings contributions, or brokerage transfers. This move from a social payment platform to a formal financial institution represents the transition of “spending money” into “managed capital.”
Step-by-Step Mechanics of the Transfer Process
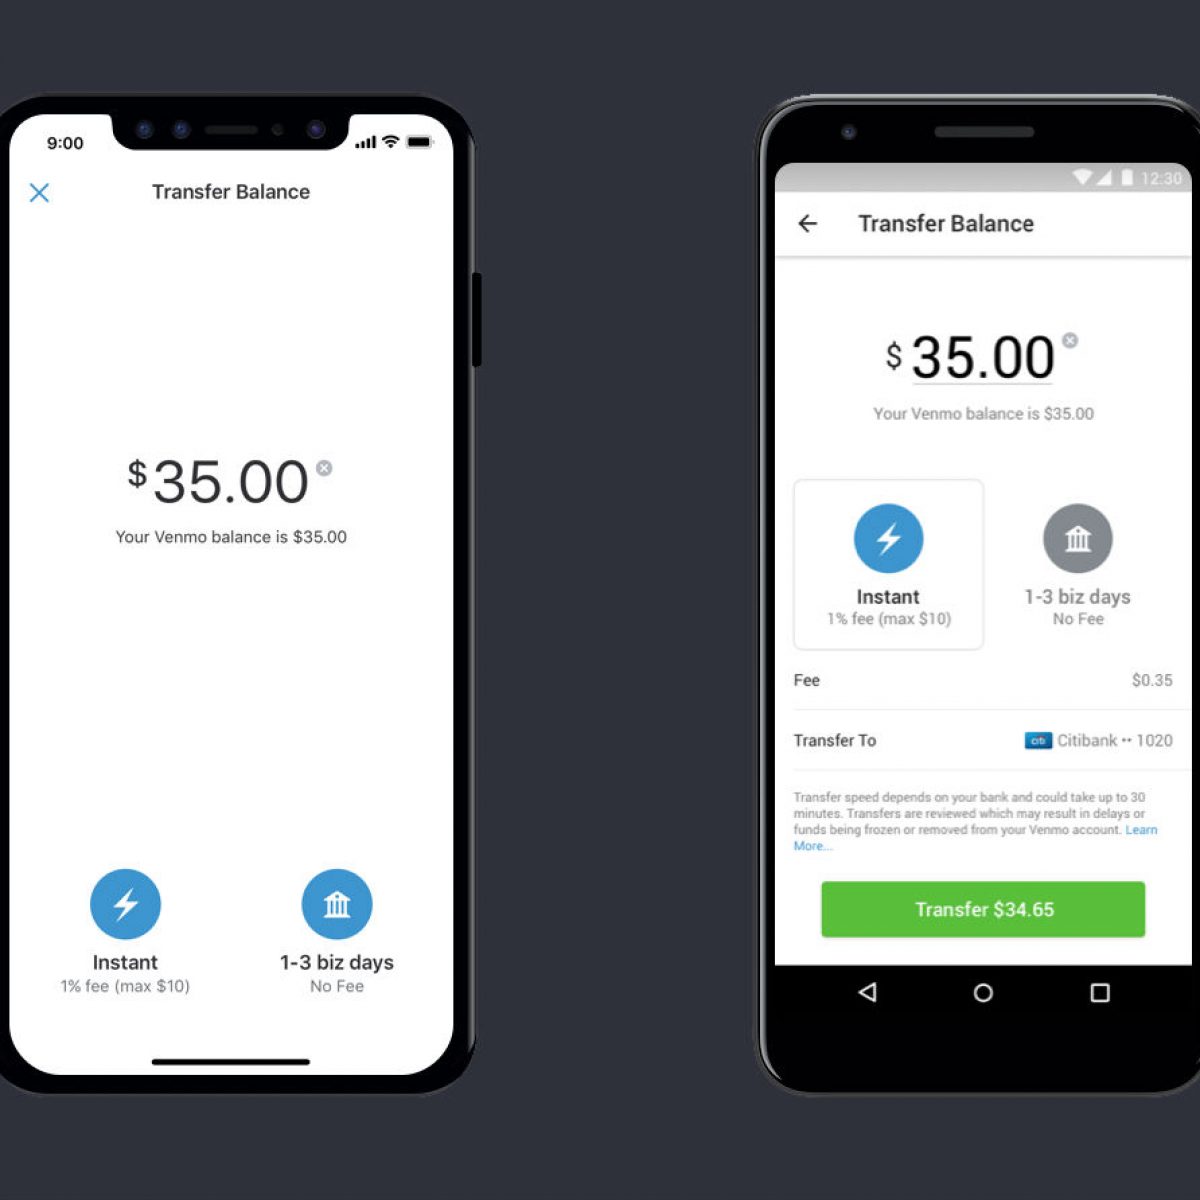
Moving money from the digital cloud of Venmo into your physical bank account is a straightforward process, yet it offers choices that impact both cost and speed. Users must decide between the “Standard” transfer and the “Instant” transfer, each serving different financial needs.
Standard Transfers vs. Instant Transfers: A Cost-Benefit Analysis
The most common method is the Standard Transfer. This utilizes the Automated Clearing House (ACH) network to move funds.
- Speed: Typically takes 1 to 3 business days.
- Cost: Completely free.
- Strategic Use: This is the preferred method for non-urgent funds. If you are moving money to cover a credit card bill due next week, the free ACH transfer is the most fiscally responsible choice.
Conversely, the Instant Transfer caters to the need for immediate liquidity.
- Speed: Funds usually arrive within 30 minutes.
- Cost: Venmo charges a percentage-based fee (currently 1.75%, with a minimum fee of $0.25 and a maximum of $25).
- Strategic Use: This should be reserved for genuine financial emergencies. Paying a 1.75% fee to move your own money is an unnecessary erosion of your capital under normal circumstances.
Linking and Verifying Your Bank Account or Debit Card
Before a transfer can occur, the bridge between the app and the institution must be built. Venmo allows you to link a bank account via an H300-compliant interface (like Plaid) or through manual entry of routing and account numbers. For Instant Transfers, you must link a compatible Visa or Mastercard debit card.
Verification is a crucial security step. Venmo often uses micro-transfers—depositing and then withdrawing a few cents—to ensure the account belongs to you. Completing this process accurately is vital to avoid “frozen” funds or transfers being sent to the wrong destination.
Executing the Transfer: Mobile App vs. Desktop Interface
While most users interact with Venmo via their smartphones, the platform does support web-based transfers. To initiate the move:
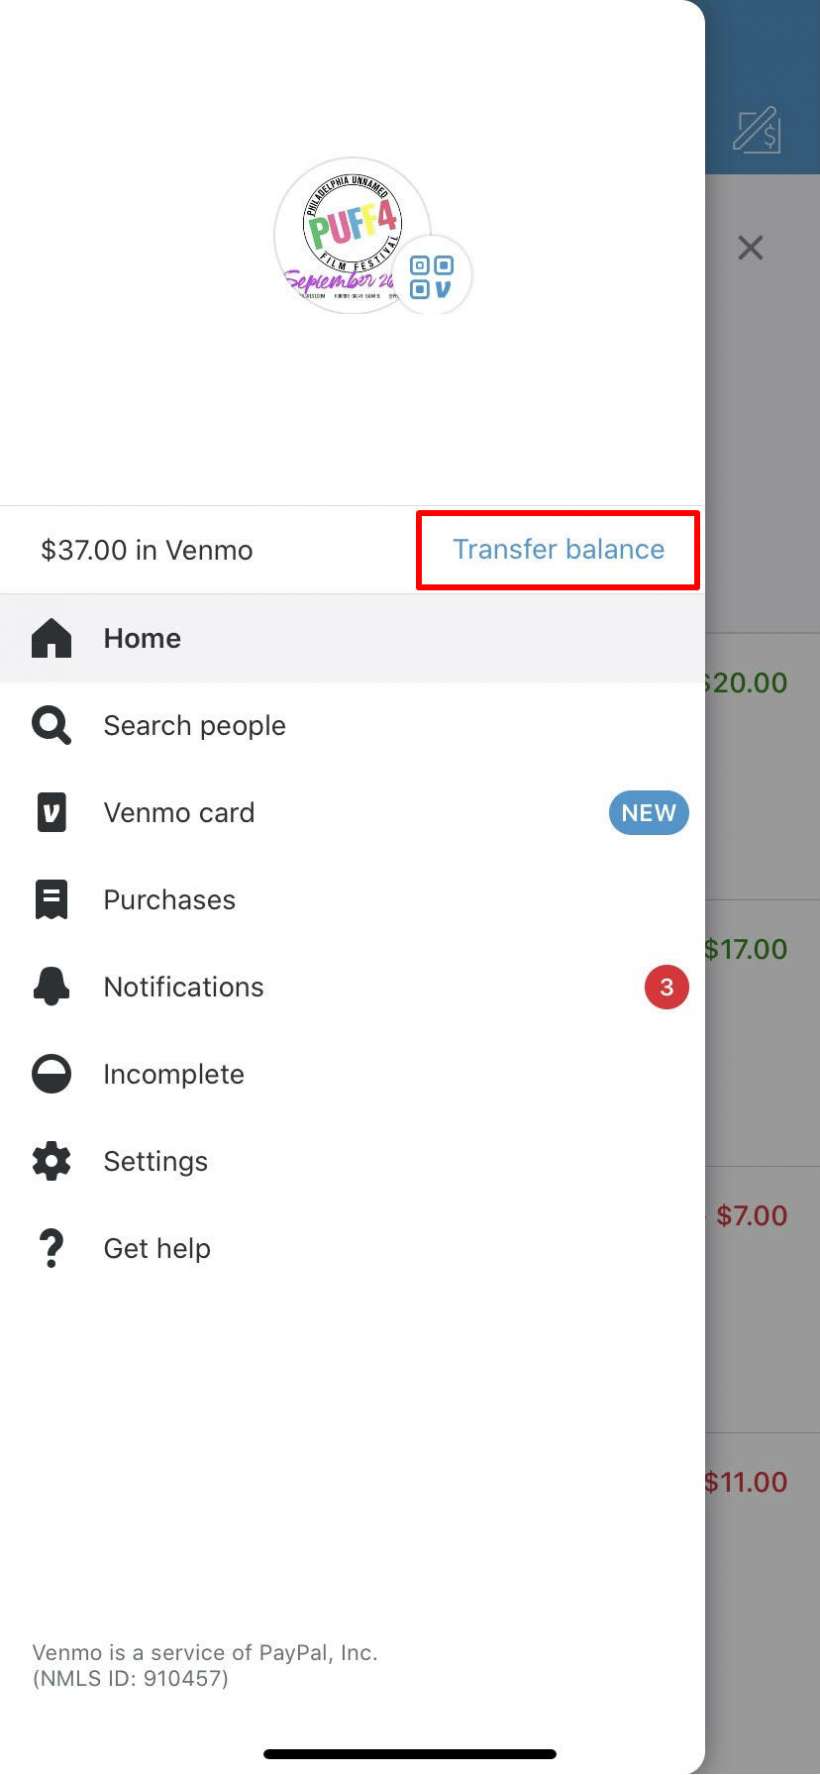
- Navigate to the “Me” tab or your profile.
- Select “Add or Transfer.”
- Enter the desired amount.
- Choose between “Instant” (Debit Card) or “1-3 Days” (Bank Account).
- Review the transaction details—specifically checking for any fees—and confirm.
Navigating Fees, Limits, and Financial Security

In the realm of personal finance, the “small print” is where wealth is often lost or protected. Understanding the regulatory and fee-based environment of Venmo is paramount for professional money management.
Breaking Down the Fee Structure for Instant Transfers
The 1.75% fee might seem negligible on a $20 transfer ($0.35), but on a $1,000 transfer, that is $17.50 lost to convenience. Over a year, frequent use of instant transfers can cost a user hundreds of dollars. To maximize your money, it is advisable to anticipate your cash needs and use the free standard transfer whenever possible. Think of the 1-3 day waiting period as a “patience premium” that keeps more money in your pocket.
Understanding Transfer Limits and Compliance
Venmo, like all financial services, is subject to federal regulations including the Bank Secrecy Act and Anti-Money Laundering (AML) laws. Consequently, there are limits on how much you can transfer. For unverified accounts, these limits are quite low. Once you complete the identity verification process (providing your SSN and other details), your weekly rolling limit for transfers to your bank typically increases significantly (often up to $19,999.99 per week, though this is subject to change based on Venmo’s internal risk profiles).
Safeguarding Your Assets During Peer-to-Peer Transactions
Security is a major pillar of financial management. When transferring money, ensure you are on a secure, private Wi-Fi connection. Enable multi-factor authentication (MFA) on your Venmo account to prevent unauthorized transfers. Furthermore, be aware that once a transfer to a bank is initiated, it is difficult to “undo.” Always double-check the destination account to ensure your capital is headed to the right place.
Optimizing Your Cash Flow Strategy
Moving money from Venmo to a bank should not be a random act; it should be a strategic one. Highly effective money managers treat their digital wallets with the same scrutiny they apply to their investment portfolios.
Managing Float: When to Leave Money in Venmo
Is there ever a reason to keep a balance in Venmo? Generally, the answer is “only as much as you plan to spend via the app in the immediate future.” This is known as managing your “float.” If you know you have several small payments to make to friends in the coming week, keeping that money in Venmo avoids the “in-and-out” friction of pulling funds from your bank. However, any amount exceeding your weekly social expenditure should be moved to a bank account where it can be properly allocated toward goals.
Integrating Venmo with Your Broader Budgeting System
To truly master your finances, you must account for “Venmo income” in your budget. Many people treat Venmo balances as “invisible money”—spending it more freely because it doesn’t feel like it’s part of their “real” bank account. By transferring these funds to your bank, you force that money into your budgeting software (like YNAB or Mint), where it can be assigned to categories like “Rent,” “Emergency Fund,” or “Retirement.”
Troubleshooting and Future-Proofing Your Digital Banking
Even with the best systems, friction can occur. Knowing how to navigate the pitfalls of digital transfers ensures that you are never left without access to your capital.
Resolving Common Transfer Delays
If a standard transfer takes longer than three business days, it is usually due to one of three things: a bank holiday, a weekend, or a security flag. Banks do not process ACH transfers on Saturdays, Sundays, or federal holidays. If your transfer is flagged for review, Venmo may require additional identity verification. In these instances, the “Money” niche advice is simple: maintain an emergency fund in a traditional bank so that you are never reliant on a pending Venmo transfer for vital expenses.
The Evolution of Real-Time Payments
The landscape of moving money is shifting. With the introduction of the FedNow service and the expansion of the RTP (Real-Time Payments) network, the “1-3 day” wait for standard transfers may eventually become a relic of the past. As traditional banks catch up to fintech speeds, the necessity of paying for “Instant Transfers” will likely diminish. Staying informed about these shifts allows you to adapt your transfer strategy, ensuring you always use the fastest, most cost-effective methods available.
In conclusion, transferring money from Venmo to your bank is more than a simple click of a button; it is an exercise in financial discipline. By choosing the right transfer method, understanding the fee structures, and integrating your digital wallet into a cohesive budgeting strategy, you ensure that your money is always working for you, rather than sitting idle in a social app. In the digital age, liquidity is power—and knowing how to move your liquidity efficiently is the hallmark of a savvy financial mind.
aViewFromTheCave is a participant in the Amazon Services LLC Associates Program, an affiliate advertising program designed to provide a means for sites to earn advertising fees by advertising and linking to Amazon.com. Amazon, the Amazon logo, AmazonSupply, and the AmazonSupply logo are trademarks of Amazon.com, Inc. or its affiliates. As an Amazon Associate we earn affiliate commissions from qualifying purchases.