
For any Minecraft player looking to significantly enhance their visual experience, OptiFine is an indispensable mod. It offers a plethora of graphical improvements, performance optimizations, and shader support, transforming the blocky world into something far more vibrant and detailed. However, integrating OptiFine into your Minecraft setup, especially when using a modpack manager like CurseForge, can sometimes seem like a daunting task for newcomers. Fortunately, the process is quite straightforward once you understand the steps involved. This guide will walk you through installing OptiFine with CurseForge, ensuring you can quickly get back to enjoying a visually superior Minecraft.

CurseForge has become the de facto standard for managing Minecraft mods and modpacks. Its user-friendly interface simplifies the process of discovering, installing, and updating mods, making it an ideal platform for both casual players and seasoned modders. When it comes to OptiFine, which is a standalone performance and graphics enhancement mod, its integration with CurseForge requires a slightly different approach compared to mods that are directly distributed through the platform. This article will clarify these distinctions and provide a step-by-step tutorial for a seamless installation.
Understanding OptiFine and CurseForge: A Harmonious Partnership
Before diving into the installation process, it’s beneficial to understand what OptiFine and CurseForge are and why you might want to use them together.
What is OptiFine?
OptiFine is a highly popular Minecraft optimization mod that enhances performance and adds advanced graphical settings. Its key features include:
- Performance Boost: OptiFine can significantly increase your frame rates (FPS), making the game run smoother, especially on lower-end systems or when using resource packs and shaders.
- Graphical Enhancements: It introduces advanced graphics options such as dynamic lighting, better antialiasing, anisotropic filtering, and support for higher-resolution textures.
- Shader Support: OptiFine is the primary way to enable shader packs in Minecraft, which drastically alter the game’s lighting, shadows, water, and other visual elements, creating breathtaking landscapes.
- Fine-grained Control: It allows for granular control over various graphical aspects, letting you fine-tune the game to your liking and hardware capabilities.
- Zoom Functionality: OptiFine includes a built-in zoom feature, allowing you to get a closer look at distant objects without needing a separate mod.
Essentially, OptiFine acts as a powerful upgrade for the vanilla Minecraft graphics engine, offering a level of visual fidelity and performance that the base game simply cannot achieve.
What is CurseForge?
CurseForge is a leading platform for discovering and managing mods for various games, with Minecraft being its most prominent offering. It provides:
- Vast Mod Library: Access to thousands of mods, ranging from small quality-of-life improvements to massive total conversion packs.
- Modpack Management: CurseForge’s desktop application allows users to easily download, install, and manage entire modpacks, which are curated collections of mods designed to work together.
- Profile Management: Create and switch between different Minecraft profiles, each with its own set of mods and configurations, allowing you to play various modded experiences without conflicts.
- Updates and Compatibility: CurseForge helps keep your mods and modpacks up-to-date and checks for compatibility issues, simplifying maintenance.
- Community Hub: It fosters a community where players can share their creations, discuss mods, and find support.
CurseForge’s strength lies in its ability to simplify the often complex world of Minecraft modding, making it accessible to a broader audience.
Why Install OptiFine with CurseForge?
While CurseForge is excellent for managing mods distributed through its platform, OptiFine is typically downloaded and installed as a standalone .jar file from its official website. This means it’s not directly available as a downloadable mod within the CurseForge app for easy installation into a modpack. Therefore, integrating OptiFine requires a manual step.
The primary reason to install OptiFine with a CurseForge modpack is to benefit from its performance improvements and shader support within a modded environment. Many modpacks significantly increase the graphical load on your system, and OptiFine can help alleviate this, making your heavily modded game run more smoothly. Furthermore, if you want to use shaders with your CurseForge modpack, OptiFine is almost always the prerequisite.
The Installation Process: A Step-by-Step Guide
Installing OptiFine into a CurseForge modpack involves creating a separate Minecraft installation profile that uses OptiFine. This is because OptiFine is fundamentally a client-side mod that modifies the Minecraft launcher’s behavior and not a Forge/Fabric mod that gets injected into a modloader’s mod folder.
Here’s how to do it:
Step 1: Download OptiFine
First, you need to download the correct version of OptiFine. It’s crucial to download the version that matches your Minecraft version and, importantly, your modloader (Forge or Fabric).
- Visit the Official OptiFine Website: Open your web browser and go to
optifine.net. - Navigate to Downloads: On the website, find the “Downloads” section.
- Select Your Minecraft Version: You’ll see a list of Minecraft versions. Choose the exact version that your CurseForge modpack uses. For example, if your modpack is for Minecraft 1.18.2, download the OptiFine version for 1.18.2.
- Choose the Correct Modloader Version (If Applicable): OptiFine often provides versions for both Forge and Fabric. If your CurseForge modpack is Forge-based, ensure you download the OptiFine version designated for Forge. If it’s Fabric-based, download the Fabric version. Sometimes, a general OptiFine installer works with Forge, but it’s best to confirm. Look for a note on the download page or the OptiFine website regarding compatibility.
- Download the .jar File: Click the download link for the chosen version. You might be presented with an advertisement page; wait for the “Skip” button to appear in the top-right corner and click it to initiate the actual download of the
.jarfile. Save this file to a location you can easily access, like your Desktop or Downloads folder.
Step 2: Install OptiFine as a Standalone Profile
CurseForge manages its modpacks through its own profiles. To use OptiFine, you’ll create a new, separate Minecraft profile that utilizes OptiFine, and then point your CurseForge modpack to use this profile.
-
Open the Minecraft Launcher: Launch the official Minecraft Launcher (the one you use to play vanilla Minecraft).
-
Go to “Installations”: At the top of the launcher window, click on the “Installations” tab.
-
Create a New Installation: Click the “+ New installation” button.
-
Configure the New Installation:
- Name: Give your installation a descriptive name, such as “OptiFine 1.18.2” or “OptiFine Forge”.
- Version: This is the crucial part. Click the dropdown menu for “Version.” You will need to find the OptiFine installer you downloaded in Step 1.
- If OptiFine Installer Appears: If you ran the OptiFine installer previously (by double-clicking the .jar file), it might have created a new entry in your Minecraft launcher versions list. Look for a version name that corresponds to your OptiFine download (e.g.,
OptiFine_1.18.2_HD_U_H1). Select this if it’s available. - If OptiFine Installer is a .jar: If the OptiFine installer is still just a
.jarfile and hasn’t created a launcher entry, you’ll need to install it into the launcher first.- Run the OptiFine .jar: Double-click the OptiFine
.jarfile you downloaded. This should open the OptiFine installer. - Click “Install”: In the installer window, click the “Install” button.
- Confirmation: You’ll receive a confirmation message when OptiFine has been successfully installed. Close the installer.
- Refresh Launcher: Go back to your Minecraft Launcher’s “Installations” tab. The new OptiFine version should now appear in the “Version” dropdown. Select it.
- Run the OptiFine .jar: Double-click the OptiFine
- If OptiFine Installer Appears: If you ran the OptiFine installer previously (by double-clicking the .jar file), it might have created a new entry in your Minecraft launcher versions list. Look for a version name that corresponds to your OptiFine download (e.g.,
- Game Directory: This field is important for associating your modpack with this OptiFine installation. Click the folder icon to the right of the “Game directory” field. Navigate to the
minecraftfolder inside your CurseForge modpack’s folder. You can find your CurseForge modpack folders by opening the CurseForge app, going to your Minecraft profile, clicking the gear icon, and selecting “Open Folder.” Then, navigate into theinstancesfolder, find your modpack, and go into itsminecraftsubfolder. Copy the path to thisminecraftfolder. - Paste the Path: Paste the copied path into the “Game directory” field in the Minecraft launcher.
- JVM Arguments (Optional but Recommended): To ensure smooth performance, especially with shaders and mods, you might want to allocate more RAM. Find the
jvmArgumentsfield and modify the-Xmxvalue. For example,-Xmx4Gallocates 4GB of RAM. Adjust this based on your system’s RAM and the needs of your modpack.
-
Click “Create”: Once all settings are configured, click the “Create” button at the bottom.
You have now created a new Minecraft installation profile that uses OptiFine and is specifically pointed to your CurseForge modpack’s game directory.
Step 3: Launch Your Modpack Through the CurseForge App
Now that you’ve set up the OptiFine profile in the Minecraft Launcher, you need to launch your modpack through CurseForge to ensure it uses the correct profile.
- Open the CurseForge App: Launch the CurseForge desktop application.
- Select Your Minecraft Profile: Navigate to your Minecraft profile within CurseForge.
- Click “Play”: Click the “Play” button for your desired modpack.
- Select the OptiFine Launcher: A small window or prompt might appear asking which Minecraft launcher you want to use. Ensure you select the OptiFine installation you just created (e.g., “OptiFine 1.18.2”). If it doesn’t prompt you, you might need to go into the modpack’s settings within CurseForge and manually specify which Minecraft launcher profile to use. Look for an option like “Minecraft Launcher” or “Game Launch Settings” within the modpack’s profile page.
- Launch the Game: Click “Launch” or “Play” again.
The game should now launch, and OptiFine should be active within your CurseForge modpack.
Verifying the Installation and Fine-Tuning Settings
Once your game has launched, it’s essential to verify that OptiFine is indeed working and then explore its settings to optimize your experience.
Checking if OptiFine is Active
There are a couple of easy ways to confirm OptiFine is installed and running:
-
In-Game Settings Menu:
- Once Minecraft is running with your modpack, press the
Esckey to open the game menu. - Go to “Options.”
- Look for new “Video Settings” categories that are not present in vanilla Minecraft, such as “Shaders,” “Quality,” “Details,” and “Animations.” The presence of these menus is a strong indicator that OptiFine is active.
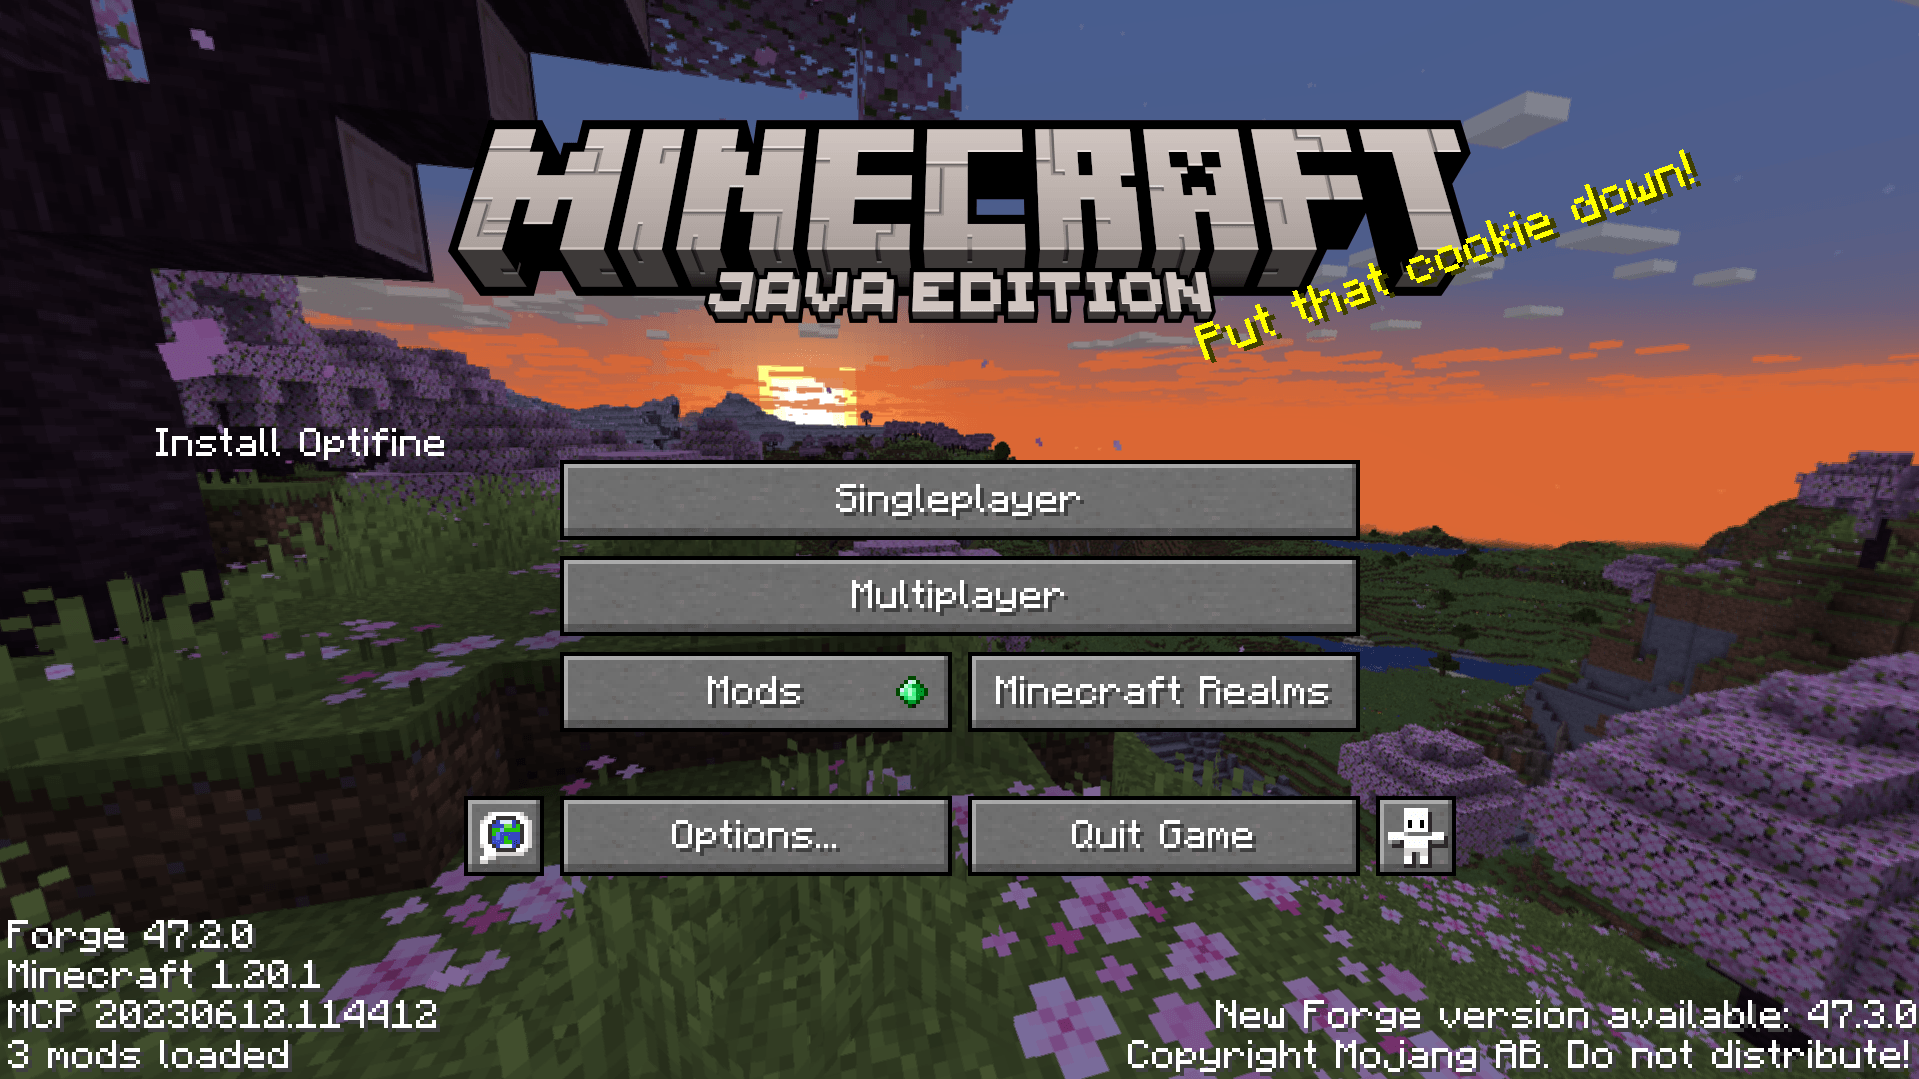
- You might also see “OptiFine HD” displayed in the Minecraft title screen or the loading screen.
- Once Minecraft is running with your modpack, press the
-
Performance Check:
- While in-game, press
F3to open the debug screen. - Observe your FPS counter in the top-left corner. If it’s significantly higher than what you were getting before, or if the game feels much smoother, OptiFine is likely working its magic.
- While in-game, press
Configuring OptiFine’s Video Settings
OptiFine offers a vast array of options to customize your visual experience and performance. Experimenting with these settings is key to finding the perfect balance for your system.
-
Video Settings (Main Tab): This is where you’ll find core graphical options.
- Graphics: Choose between “Fast” and “Fancy.” “Fancy” offers better visuals but can impact performance.
- Render Distance: Controls how many chunks are loaded and rendered around you. Lowering this significantly boosts FPS but reduces how far you can see.
- Smooth Lighting: Controls the gradual transition of light. Set to “Maximum” for the best effect, or “Off” for a performance boost.
- Clouds, Trees, Sky, Fog: These can be set to “Fast,” “Fancy,” or “Off” for performance tuning.
- Particles: Control the detail and number of visual effects. “Minimal” or “Decreased” can help performance.
-
Details Tab: This section allows for fine-tuning of specific visual elements.
- Clouds, Trees, Sky, Fog, Water, Rain & Snow, Portals, Stars, Sun & Moon, Translucent Blocks: Each of these can be toggled on/off or set to “Fast” or “Fancy.” Turning off unnecessary details here can free up resources.
- Alternate Blocks: Enables alternative textures for certain blocks.
- Better Grass: Adds detail to grass textures.
- HiDetail: Generally meant for high-end systems.
-
Quality Tab: More advanced visual settings.
- Mipmap Levels: Smooths textures at a distance. Higher levels look better but can reduce performance.
- Anisotropic Filtering: Improves texture clarity at oblique angles.
- Antialiasing: Smooths jagged edges.
- Emissive Textures: Allows custom emissive textures (useful for mods that use them).
-
Animations Tab: Control various in-game animations. You can toggle specific animations on or off to improve performance if certain effects are causing lag.
-
Shaders Tab: If you intend to use shaders, this is where you’ll manage them.
- Shader Pack: Select your downloaded shader pack from this dropdown.
- Shader Options: Each shader pack comes with its own set of customizable options, which can drastically affect performance.
Important Considerations for Modpacks:
- Modpack Compatibility: While OptiFine is generally compatible with most Forge modpacks, there’s a small chance it might conflict with specific mods. If you encounter crashes or unusual behavior after installation, try disabling OptiFine temporarily by launching your modpack using its default profile to see if the issue resolves.
- Performance Trade-offs: Remember that OptiFine’s primary goal is often performance. However, enabling many of its advanced features, especially alongside a heavily modded pack and shaders, can still demand significant system resources. Always monitor your FPS and adjust settings accordingly.
- Fabric vs. Forge: Ensure you’re using the OptiFine version compatible with your modloader. If your modpack uses Fabric, you’ll need a Fabric-compatible OptiFine version (often referred to as “OptiFine for Fabric” or similar).
Troubleshooting Common Issues
Even with a clear guide, some users might encounter hiccups. Here are a few common issues and their solutions:
OptiFine Installer Not Running or Creating a Profile
- Java Installation: Ensure you have the latest version of Java installed. Minecraft and OptiFine installers are Java applications and require a functioning Java Runtime Environment (JRE). You can download the latest JRE from the official Oracle Java website.
- Administrator Privileges: Try running the OptiFine
.jarfile as an administrator. Right-click the.jarfile and select “Run as administrator.” - File Association: Your operating system might not be associating
.jarfiles with Java. You can manually fix this by right-clicking a.jarfile, selecting “Open with,” and choosing Java.
OptiFine Not Appearing in Minecraft Launcher Versions
- Refresh Launcher: Sometimes, the Minecraft Launcher needs a refresh. Close and reopen the launcher. If it still doesn’t appear, try reinstalling the OptiFine installer.
- Correct Installation Location: Ensure the OptiFine installer is actually placing its files in the correct Minecraft game directory, which the launcher then reads.
Game Crashing After Launch with OptiFine and Modpack
- Version Mismatch: The most common cause is a version mismatch between OptiFine, Minecraft, and your modpack. Double-check that you’ve downloaded the OptiFine version for the exact Minecraft version your modpack uses.
- Mod Conflict: As mentioned earlier, OptiFine might conflict with certain mods. Try launching the modpack without OptiFine (using its default profile) to see if it still crashes. If it doesn’t, then OptiFine is likely the culprit. You might need to find an alternative performance mod or skip OptiFine altogether for that specific modpack.
- Insufficient RAM: If you’re running a large modpack with OptiFine and shaders, you might need to allocate more RAM. Revisit the JVM arguments in your Minecraft Launcher profile and increase the allocated RAM.
- Corrupted Installation: Try deleting the OptiFine installation from your Minecraft launcher and reinstalling it. Also, consider re-downloading the OptiFine
.jarfile in case it was corrupted during download.
By following these steps and understanding the nuances of OptiFine’s integration with CurseForge, you can enjoy a significantly enhanced Minecraft experience, whether you’re playing vanilla with graphical upgrades or diving deep into a complex modpack. The visual improvements and performance gains are well worth the effort.
aViewFromTheCave is a participant in the Amazon Services LLC Associates Program, an affiliate advertising program designed to provide a means for sites to earn advertising fees by advertising and linking to Amazon.com. Amazon, the Amazon logo, AmazonSupply, and the AmazonSupply logo are trademarks of Amazon.com, Inc. or its affiliates. As an Amazon Associate we earn affiliate commissions from qualifying purchases.