
In the ever-evolving landscape of technology, users frequently encounter various file formats. Among these, the .cab file format stands out, particularly within the Windows ecosystem. While often associated with driver installations or system updates, understanding how to handle and install these files is a crucial piece of technical literacy. This guide will demystify .cab files, explaining their purpose and providing clear, step-by-step instructions on how to install them, ensuring you can confidently manage these essential components of your computing experience.
Understanding the .CAB File Format
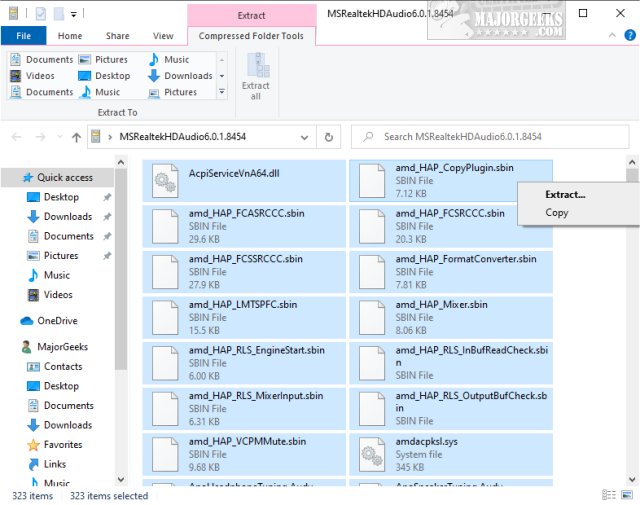
Before diving into the installation process, it’s vital to grasp what a .cab file is and why it’s used. .cab is an abbreviation for Cabinet file, a compressed archive file format developed by Microsoft. Its primary purpose is to bundle multiple files into a single, smaller package, which is then used for distributing software, drivers, and operating system components. Think of it as a digital toolbox, efficiently containing all the necessary parts for a specific function.
The Purpose and Benefits of Cabinet Files
The design of .cab files offers several advantages that make them a popular choice for software distribution:
- Compression: Cabinet files utilize sophisticated compression algorithms, significantly reducing the overall size of the contained files. This translates to faster download times and less storage space required.
- Integrity: They incorporate error detection and correction mechanisms. This ensures that the files within the cabinet remain uncorrupted during transmission or storage, preserving their integrity.
- Efficiency: Bundling multiple files into one reduces the overhead of managing numerous individual files. For developers, this simplifies the packaging and deployment process. For users, it means fewer prompts and a more streamlined installation.
- Digital Signatures:
.cabfiles can be digitally signed. This provides a crucial layer of security, allowing users and the operating system to verify the authenticity and integrity of the files, ensuring they haven’t been tampered with by malicious actors. This is particularly important for drivers and system files, where security and reliability are paramount.
In essence, .cab files are a robust and efficient method for distributing software components and updates, ensuring that they are delivered in a secure, compressed, and uncorrupted state.
Installing .CAB Files: Different Approaches
The method for installing a .cab file can vary depending on the context and your operating system. While Windows has built-in capabilities to handle these files, sometimes third-party tools are also involved, especially for advanced users or specific scenarios.
Method 1: Automatic Installation via INF Files (Most Common)
The most frequent way you’ll encounter a .cab file requiring installation is when it’s packaged alongside an .inf file. The .inf file acts as an instruction manual for Windows, telling it how to install the associated drivers or software components contained within the .cab file.
Steps for Automatic Installation:
- Locate the Files: First, ensure you have downloaded the
.cabfile and any accompanying.inffiles. They are often bundled together in a ZIP archive, so you might need to extract them to a specific folder on your computer. - Identify the .INF File: Look for a file with the
.infextension within the extracted folder. This is the key file for initiating the installation. - Right-Click and Install: Right-click on the
.inffile. You should see an option in the context menu that says “Install.” Click on it. - User Account Control (UAC): If prompted by User Account Control, click “Yes” to allow the installation to proceed.
- Installation Process: Windows will then read the
.inffile, extract the necessary files from the.cabarchive (if it hasn’t already done so implicitly during the process), and install the drivers or software. You might see a progress bar or a notification indicating that the installation is complete. - Restart (If Required): In some cases, especially for driver installations, a system restart might be necessary for the changes to take full effect. The installation wizard will usually inform you if a restart is needed.
This method is the most straightforward and is the intended way for most users to install driver updates or minor software components distributed via .cab files.
Method 2: Manual Installation Using Device Manager (For Drivers)
If you’re dealing specifically with hardware drivers and the .inf installation method doesn’t work, or if you need more granular control, you can manually install drivers from a .cab file using Windows’ Device Manager.
Steps for Manual Installation via Device Manager:
- Extract the .CAB File: If the
.cabfile is not already extracted, you’ll need to extract its contents. You can often do this by treating the.cabfile like a ZIP archive. Right-click on the.cabfile, and if you have archiving software like 7-Zip or WinRAR installed, you should see an option to “Extract Here” or “Extract to [Folder Name]”. Alternatively, you can use the command prompt (as described in Method 3) to extract the contents. - Open Device Manager:
- Press the
Windows key + Xand select “Device Manager” from the power user menu. - Alternatively, type “Device Manager” into the Windows search bar and click on the result.
- Press the
- Locate the Device: In Device Manager, find the hardware device for which you are installing the driver. It might be under a category like “Display adapters,” “Network adapters,” “Sound, video and game controllers,” or under “Other devices” if Windows doesn’t recognize it.
- Update Driver: Right-click on the device you want to update and select “Update driver.”
- Choose Manual Search: In the “Update Drivers” window, select “Browse my computer for drivers.”
- Specify Driver Location: Click “Browse…” and navigate to the folder where you extracted the contents of the
.cabfile. Make sure the checkbox “Include subfolders” is ticked. - Initiate Installation: Click “Next.” Windows will search for compatible drivers in the specified location. If it finds a suitable driver within the extracted
.cabcontents (specifically, a matching.inffile), it will proceed with the installation. - Security Warnings: You might encounter a security warning if the driver is not digitally signed by Microsoft or the hardware manufacturer. If you trust the source of the
.cabfile, you can proceed by clicking “Install this driver software anyway.” - Completion: Once the installation is complete, you may need to restart your computer.
This method gives you direct control over which driver is installed for a specific piece of hardware and is a valuable troubleshooting step.
Method 3: Using the Command Prompt (Advanced)
For users who are comfortable with the command line, or for scripting and automation purposes, the command prompt offers a powerful way to extract and install .cab files. This method provides a high degree of control and is particularly useful for system administrators.
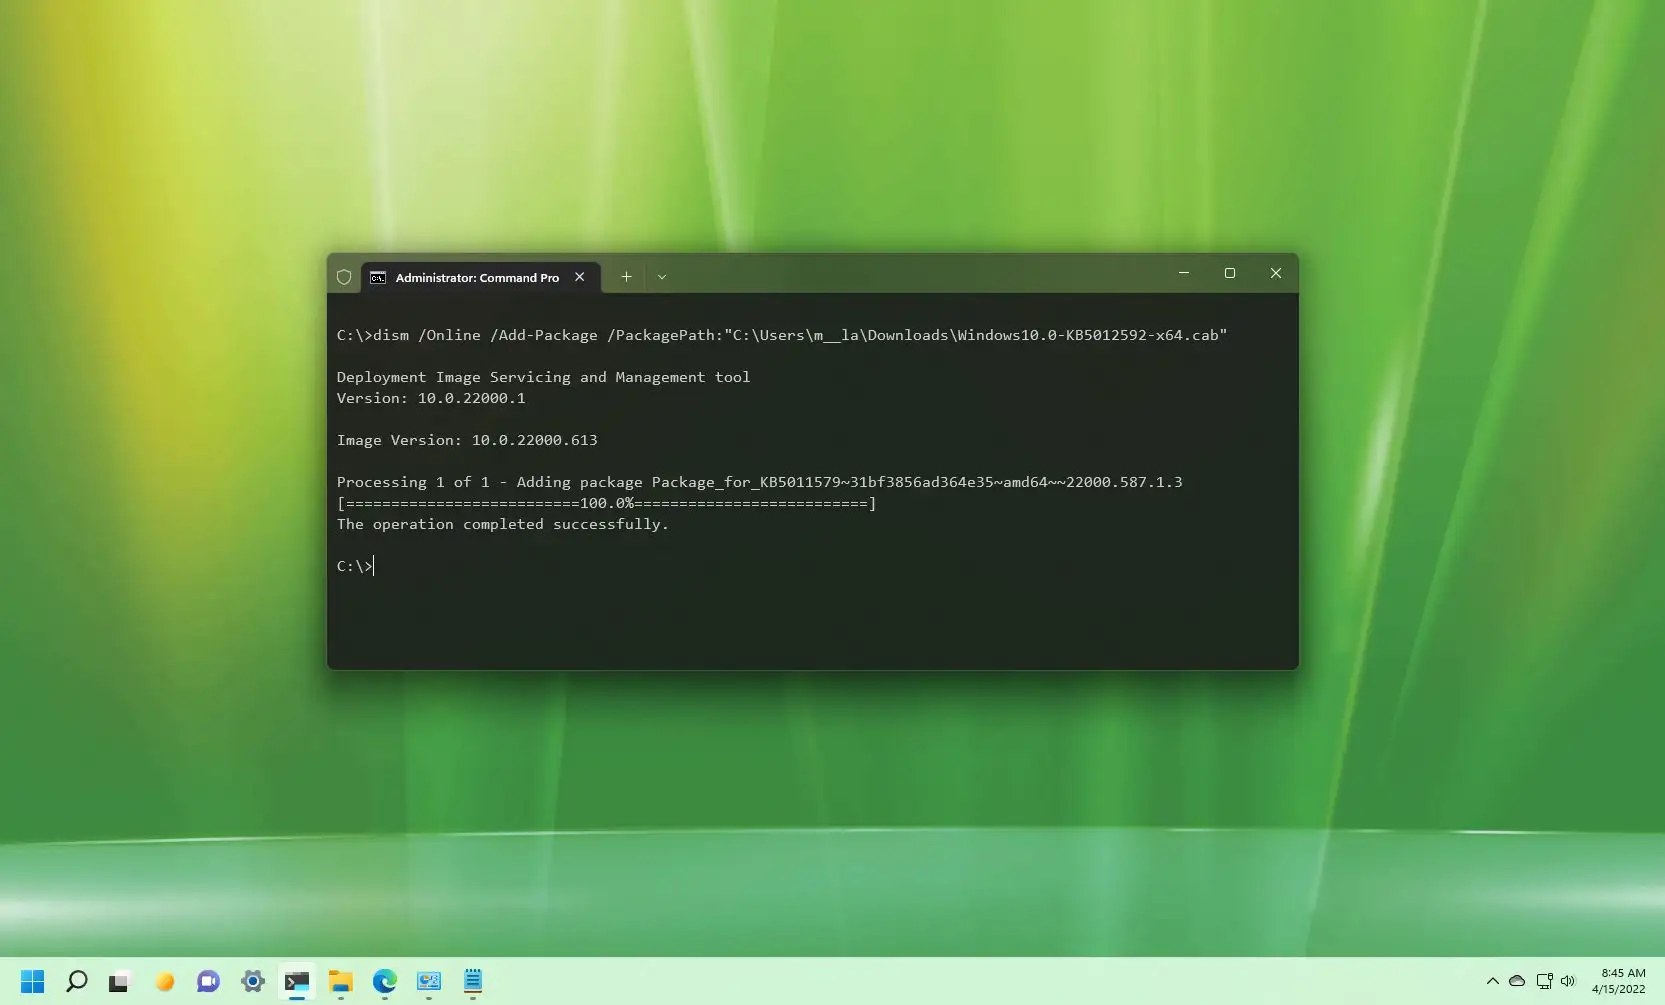
Steps for Command Prompt Installation:
-
Open Command Prompt as Administrator:
- Type “cmd” into the Windows search bar.
- Right-click on “Command Prompt” and select “Run as administrator.” This is crucial as many system-level operations require elevated privileges.
-
Navigate to the Folder: Use the
cdcommand to navigate to the directory where your.cabfile is located. For example, if the file is inD:DriversMyCabFile, you would type:
bash

cd D:DriversMyCabFile
(ReplaceD:DriversMyCabFilewith the actual path to your.cabfile.) -
Extract the .CAB File: Windows has a built-in command-line utility called
expand.exethat can be used to extract.cabfiles. The syntax is typically:expand -F:* <cab_file_name> <destination_folder>expand: The command to invoke the extraction utility.-F:*: This flag tellsexpandto extract all files from the cabinet.<cab_file_name>: The name of your.cabfile (e.g.,mydriver.cab).<destination_folder>: The folder where you want to extract the contents (e.g.,extracted_files). If the folder doesn’t exist,expandwill create it.
Example:
expand -F:* mydriver.cab extracted_filesThis will extract all files from
mydriver.cabinto a new folder namedextracted_fileswithin the current directory. -
Install from Extracted Files (If .INF is present): After extraction, if an
.inffile is present in theextracted_filesfolder, you can then use thepnputilcommand-line tool to install the driver.pnputilis a utility designed for managing driver packages.- First, navigate into the extracted folder:
bash

cd extracted_files
- Then, use
pnputilto add the driver package. You’ll need to specify the.inffile.
bash

pnputil /add-driver <inf_file_name> /install
Example:
bash

pnputil /add-driver mydriver.inf /install
This command adds the driver package defined bymydriver.infand automatically installs it for any matching hardware.
- First, navigate into the extracted folder:
-
Direct Installation (Less Common, but Possible): In some specific scenarios,
expand.exemight be able to directly install components, but the primary use is extraction. For driver installations, thepnputilmethod after extraction is the standard advanced approach.
Using the command prompt is a more technical approach, but it’s highly effective for bulk operations or when graphical interfaces are unavailable or problematic.
Troubleshooting Common .CAB Installation Issues
While installing .cab files is generally straightforward, occasional hiccups can occur. Understanding common problems and their solutions can save you time and frustration.
Issues with Digital Signatures
One of the most frequent roadblocks is encountering issues related to digital signatures. Windows enforces security measures, and if a driver or software component within a .cab file is not digitally signed or has an invalid signature, you might be prevented from installing it.
Solutions:
- Verify the Source: Ensure you downloaded the
.cabfile from a reputable source (e.g., the official hardware manufacturer’s website, Microsoft’s update catalog). - Temporarily Disable Driver Signature Enforcement (Use with Extreme Caution): For advanced users who are absolutely certain about the source and integrity of the
.cabfile, you can temporarily disable driver signature enforcement. This is typically done by restarting your computer in Advanced Startup options (Troubleshoot > Advanced options > Startup Settings > Restart, then choose “Disable driver signature enforcement”). This is NOT recommended for general users as it significantly weakens your system’s security. Re-enable it immediately after installation. - Look for Signed Versions: Sometimes, manufacturers provide both signed and unsigned versions. Try to find a signed version if available.
Corrupted .CAB File
A corrupted .cab file can lead to installation failures, errors during extraction, or corrupted installations.
Solutions:
- Re-download the File: The most common cause of corruption is an incomplete or interrupted download. Delete the current file and download it again.
- Check for Errors During Extraction: If you’re extracting the
.cabfile, pay attention to any error messages provided by your archiving software. - Use a Different Extraction Tool: If one tool fails, try another (e.g., try 7-Zip if your default extractor fails).
Incorrect File Association or Missing Software
Sometimes, your system might not recognize .cab files correctly, or you might lack the necessary software to open them if they aren’t being handled automatically.
Solutions:
- Ensure Windows is Up-to-Date: Windows has native support for
.cabfiles. Ensure your operating system is updated. - Install Archiving Software: While not strictly necessary for installation via
.infor Device Manager, having archiving software like 7-Zip or WinRAR can be helpful for manual extraction and verification. - Run as Administrator: As highlighted in Method 3, always run command-line tools or installation processes that require system-level changes with administrative privileges.
By understanding these common issues and their resolutions, you can navigate the process of installing .cab files with greater confidence, ensuring your hardware functions correctly and your software components are properly updated.

Conclusion
.CAB files, or Cabinet files, are an integral part of the Windows ecosystem, serving as efficient containers for distributing software, drivers, and system updates. While their underlying technology might seem complex, the process of installing them is generally straightforward, especially when accompanied by an .inf file. Whether you opt for the simple right-click-and-install method, delve into the intricacies of Device Manager for driver management, or leverage the power of the command prompt for advanced scenarios, this guide has provided you with the knowledge to successfully install .cab files. By understanding their purpose and following the outlined steps, you can ensure your system remains up-to-date and your hardware functions optimally, navigating the technical aspects of your digital world with greater ease and expertise.