
In an era defined by rapid technological advancements, the landscape of digital security has become more complex and critical than ever before. From safeguarding personal data to protecting global financial systems, the demand for skilled cybersecurity professionals is skyrocketing. For aspiring ethical hackers, penetration testers, or simply those keen to deepen their understanding of network security, Kali Linux stands as an indispensable tool. This powerful, open-source operating system is a complete suite of specialized tools designed for penetration testing, security auditing, and digital forensics.

However, diving into an unfamiliar OS, especially one as potent as Kali, can feel daunting. The solution? Virtualization. By installing Kali Linux within a virtual machine (VM) like Oracle VM VirtualBox, you create a sandboxed environment on your existing computer. This method offers unparalleled flexibility, safety, and a perfect learning ground without risking your main system. This comprehensive guide will walk you through every step of setting up Kali Linux on VirtualBox, transforming your machine into a potent cybersecurity laboratory. Beyond the technical steps, we’ll explore how mastering such tools can enhance your tech prowess, strengthen your personal brand in the digital realm, and even open doors to lucrative career opportunities in the burgeoning cybersecurity market.
The Foundation: Understanding Kali Linux and VirtualBox
Before we delve into the installation process, it’s crucial to understand why this specific combination is so widely recommended and effective. This section lays the groundwork, highlighting the significance of both Kali Linux and VirtualBox in the cybersecurity ecosystem and how they align with modern technological trends and digital security best practices.
Why Kali Linux is Your Go-To Cybersecurity Toolkit
Kali Linux, developed by Offensive Security, isn’t just another Linux distribution; it’s a specialized platform tailored for cybersecurity professionals. It comes pre-loaded with hundreds of tools for various information security tasks, including:
- Penetration Testing: Simulating cyberattacks to find vulnerabilities.
- Security Research: Analyzing systems for weaknesses.
- Computer Forensics: Investigating digital crimes and recovering data.
- Reverse Engineering: Disassembling software to understand its functionality.
- Vulnerability Assessment: Identifying and prioritizing security flaws.
For anyone serious about digital security, Kali Linux offers an unparalleled learning environment. It allows users to experiment with various attack vectors, understand network protocols, and develop crucial problem-solving skills – all vital components for enhancing one’s “Tech” proficiency and building a robust professional skillset. Its open-source nature means a vibrant community constantly contributes to its development and support, ensuring it remains at the forefront of security innovation.
The Power of Virtualization with Oracle VM VirtualBox
Virtualization, at its core, is the creation of a virtual (rather than actual) version of something, such as an operating system, a server, a storage device, or network resources. Oracle VM VirtualBox is a free, powerful, and open-source cross-platform virtualization software that allows you to run multiple operating systems (guests) on a single physical computer (host) simultaneously.
For cybersecurity enthusiasts and professionals, VirtualBox offers several key advantages:
- Safety and Isolation: Any experiments or potential misconfigurations within the Kali Linux VM will not affect your host operating system. This isolation is paramount when dealing with potentially malicious tools or scripts.
- Flexibility and Portability: You can easily create snapshots of your VM, allowing you to revert to a previous state if something goes wrong. VMs can also be copied and moved between different host machines, making them highly portable.
- Cost-Effectiveness: Being entirely free, VirtualBox removes any financial barrier to entry, aligning perfectly with the “Money” topic by providing a zero-cost solution for skill development. This allows individuals and small businesses to invest in learning without upfront software expenses.
- Learning Environment: It provides a perfect sandbox to practice ethical hacking techniques, test new security tools, and understand how systems react to various threats without impacting live production environments. This hands-on experience is invaluable for sharpening your “Tech” skills and building a strong “Personal Brand” in the cybersecurity domain.
By combining Kali Linux with VirtualBox, you gain a versatile, safe, and powerful platform to hone your cybersecurity skills, conduct research, and explore the intricate world of digital defense and offense. This setup is not just about installing software; it’s about establishing a personal cybersecurity lab that serves as a cornerstone for continuous learning and professional development.
Setting Up Your Cybersecurity Lab: Prerequisites and VirtualBox Configuration
Embarking on the Kali Linux installation journey requires a few essential preparations. This section details the necessary downloads and guides you through the initial setup of VirtualBox, ensuring a smooth and efficient environment for your virtual cybersecurity workstation. Proper preparation here is crucial for minimizing potential issues down the line and maximizing your “Productivity” during the installation process.
Essential Downloads and System Requirements
Before you begin, ensure your host computer meets the minimum system requirements for running VirtualBox and a Kali Linux VM, and download the necessary software:
-
Sufficient System Resources:
- RAM: At least 4GB of RAM is recommended for your host system, with 2GB allocated to the Kali Linux VM. More is always better for performance.
- CPU: A modern 64-bit processor with virtualization support enabled in your BIOS/UEFI settings (often labeled Intel VT-x or AMD-V). This is critical for virtual machine performance.
- Disk Space: At least 20-30GB of free disk space for the Kali Linux VM.
- Internet Connection: Required for downloading files and future updates.
-
Oracle VM VirtualBox:
- Navigate to the official VirtualBox website (
www.virtualbox.org). - Download the latest stable version of VirtualBox for your host operating system (Windows, macOS, Linux).
- Also, download the VirtualBox Extension Pack, which adds support for USB 2.0/3.0, RDP, disk encryption, and NVMe. This pack enhances the usability and functionality of your VM, contributing to a better “Tech” experience.
- Navigate to the official VirtualBox website (
-
Kali Linux ISO Image:
- Visit the official Kali Linux website (
www.kali.org). - Go to the “Downloads” section and select the “Kali Linux 64-bit (Installer)” ISO image. Ensure you download the installer image, not the live boot image, for a permanent installation. The file size can be several gigabytes, so a stable internet connection is beneficial.
- Visit the official Kali Linux website (
Installing VirtualBox and Configuring Your First VM
With the necessary files downloaded, it’s time to install VirtualBox and create the virtual machine that will house Kali Linux.
Step 1: Install VirtualBox and the Extension Pack
- Install VirtualBox: Run the downloaded VirtualBox installer and follow the on-screen prompts. Accept the default settings unless you have specific reasons to change them.
- Install Extension Pack: Once VirtualBox is installed, open it. Go to
File > Preferences > Extensions. Click the “Add” icon (a small square with a plus sign) and select the downloaded VirtualBox Extension Pack file (.vbox-extpack). Click “Install” and agree to the license terms.
Step 2: Create a New Virtual Machine for Kali Linux
- Launch VirtualBox: Open the VirtualBox Manager.
- Click “New”: In the VirtualBox Manager window, click the “New” button (or go to
Machine > New). - Name and Operating System:
- Name: Type “Kali Linux” (or a name of your choice).
- Machine Folder: Choose a location on your hard drive where the VM files will be stored. Ensure it has enough free space.
- Type: Select “Linux”.
- Version: Select “Debian (64-bit)”. Kali Linux is based on Debian.
- Click “Next”.
- Memory Size (RAM):
- Allocate at least 2048 MB (2GB) of RAM to your Kali Linux VM. If your host system has more RAM (e.g., 8GB or more), you can safely allocate 4096 MB (4GB) for better performance. Do not allocate more than half of your host system’s RAM to avoid slowing down your main machine.
- Click “Next”.
- Hard Disk:
- Select “Create a virtual hard disk now”.
- Click “Create”.
- Hard Disk File Type:
- Choose “VDI (VirtualBox Disk Image)”. This is VirtualBox’s native format.
- Click “Next”.
- Storage on Physical Hard Disk:
- Select “Dynamically allocated”. This means the virtual disk file will only grow as the space is used, up to its maximum size. This is efficient for disk space management.
- Click “Next”.
- File Location and Size:
- Leave the default file location (it will be in your chosen Machine Folder).
- Size: Allocate at least 25-30 GB for the virtual hard disk. This provides ample space for Kali, tools, and future updates. You can go higher if you plan extensive use.
- Click “Create”.
You have now successfully created a virtual machine container. The next step is to configure its settings to prepare for the Kali Linux installation.
Step 3: Configure Virtual Machine Settings
With the VM created, you need to fine-tune its settings to ensure optimal performance and functionality for Kali Linux.
- Select VM: In the VirtualBox Manager, select your “Kali Linux” VM.
- Click “Settings”: Click the “Settings” button in the toolbar (or right-click the VM and choose “Settings”).
- System:
- Motherboard Tab: Ensure “Enable I/O APIC” is checked. For the “Chipset”, leave as default.
- Processor Tab: Allocate at least 2 CPUs to the VM if your host processor has multiple cores. More cores will improve performance. Ensure “Enable PAE/NX” is checked.
- Acceleration Tab: Ensure “Enable VT-x/AMD-V” and “Enable Nested Paging” are checked.
- Display:
- Screen Tab: Set “Video Memory” to at least 64MB, or higher (e.g., 128MB) for a smoother graphical experience. Enable “3D Acceleration”.
- Storage:
- Under the “Controller: IDE” section, click on the “Empty” CD icon.
- On the right side, click the small CD icon next to “Optical Drive” and choose “Choose a disk file…”.
- Navigate to where you downloaded the Kali Linux ISO image and select it. This mounts the ISO as a virtual CD/DVD, allowing the VM to boot from it.
- Network:
- Adapter 1 Tab: “Attached to” should be set to “NAT (Network Address Translation)”. This allows Kali Linux to access the internet through your host machine’s network adapter. For more advanced networking scenarios (e.g., capturing network traffic or running services), you might explore “Bridged Adapter” later.
- USB:
- USB Tab: Enable “USB 3.0 (xHCI) Controller” if you installed the Extension Pack, to utilize faster USB devices within your VM.
After making these adjustments, click “OK” to save your settings. Your VirtualBox environment is now primed and ready for the Kali Linux installation. This detailed configuration ensures not only a functional setup but also an optimized one that contributes to your “Productivity” in learning and applying “Digital Security” principles.

Installing Kali Linux: Bringing Your Cybersecurity OS to Life
With VirtualBox properly configured, the next phase involves installing Kali Linux itself. This is where your virtual machine transforms into a fully functional cybersecurity workstation. Follow these steps meticulously to ensure a successful installation of the OS that will become your primary tool for ethical hacking and security analysis.
The Installation Process: Step-by-Step
-
Start the Virtual Machine:
- In the VirtualBox Manager, select your “Kali Linux” VM.
- Click the “Start” button (the green arrow icon). The VM will boot up, and you should see the Kali Linux boot menu.
-
Boot from ISO and Select Installation Mode:
- From the boot menu, use the arrow keys to select “Graphical install” and press Enter. This will launch a user-friendly graphical installer.
-
Language, Location, and Keyboard Layout:
- Language: Select your preferred language (e.g., English). Click “Continue”.
- Location: Select your geographical location (e.g., United States). Click “Continue”.
- Keyboard Layout: Choose your keyboard layout (e.g., American English). Click “Continue”.
- The installer will now detect hardware, load additional components, and configure the network.
-
Network Configuration:
- Hostname: Enter a hostname for your system (e.g., “kali-vm” or “kali-lab”). Click “Continue”.
- Domain Name: You can leave this blank unless you’re part of a specific domain network. Click “Continue”.
-
User and Password Setup:
- Full name for the new user: Enter your full name. Click “Continue”.
- Username for your account: Enter a username (e.g., “kaliuser”). Click “Continue”.
- Choose a password for the new user: Set a strong password. This is crucial for “Digital Security” and protects your system. Re-enter it to confirm. Click “Continue”.
-
Disk Partitioning: This is a critical step.
- Partitioning Method: Select “Guided – Use the entire disk”. This is the simplest option for a VM and suitable for most users. Kali will automatically partition the virtual hard disk. Click “Continue”.
- Select disk to partition: Choose the virtual disk you created (it will likely be
/dev/sdawith the size you allocated, e.g., “26.8 GB VBOX HARDDISK”). Click “Continue”. - Partitioning scheme: Select “All files in one partition (recommended for new users)”. This simplifies management. Click “Continue”.
- Finish partitioning and write changes to disk: Review the proposed partition layout. Select “Yes” to write the changes to the disk. Click “Continue”.
- The installer will now format the partitions and install the base system. This process may take some time.
-
Software Selection:
- By default, essential tools and the desktop environment are selected. You can add or remove categories of tools here, but for a standard setup, the defaults are usually sufficient.
- Kali desktop environment: Leave XFCE selected (it’s lightweight and efficient).
- Selected tools: Leave “Top 10 most popular tools” and “Default recommended tools” selected.
- Click “Continue”.
- The system will now download and install the selected software, which can take a significant amount of time depending on your internet speed.
-
Install the GRUB Boot Loader:
- When prompted to “Install the GRUB boot loader to the primary drive”, select “Yes”. Click “Continue”.
- Device for boot loader installation: Select the virtual hard disk (e.g.,
/dev/sda). Click “Continue”.
-
Finish the Installation:
- The installer will finalize the installation.
- Once complete, select “Continue” to reboot the system.
- Crucial Step: When the VM restarts, quickly go to
Devices > Optical Drives > Remove disk from virtual drivein the VirtualBox menu. This unmounts the ISO, preventing the VM from booting back into the installer.
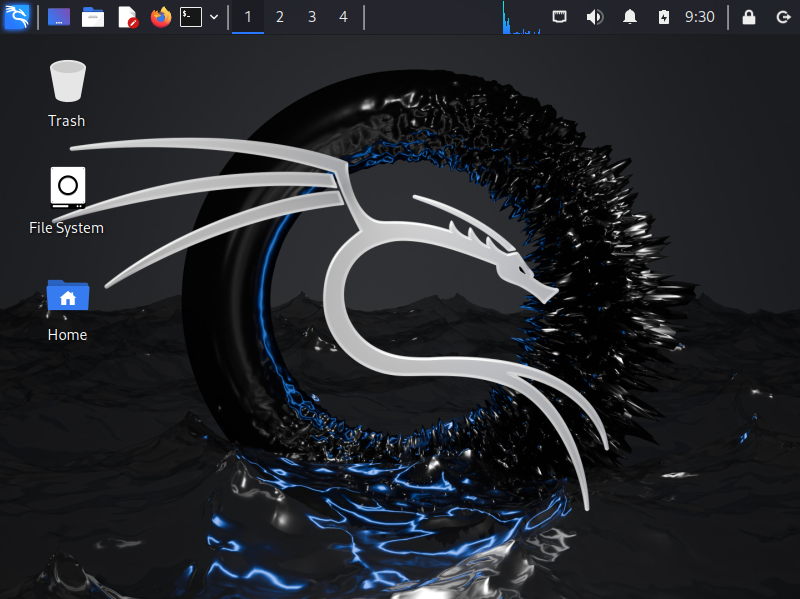
Your Kali Linux VM will now boot up, presenting you with the login screen. Use the username and password you created during the installation. Congratulations, you have successfully installed Kali Linux on VirtualBox!
Post-Installation Essentials and Embracing Your Cybersecurity Journey
With Kali Linux successfully installed, your cybersecurity lab is almost complete. This final section focuses on crucial post-installation steps, including enhancing usability and preparing you for effective engagement with the powerful tools at your disposal. More importantly, we’ll connect this technical achievement to broader themes of “Personal Branding,” “Online Income,” and “Corporate Identity,” showing how this skill can be a significant asset in your professional and financial future.
Enhancing Usability with VirtualBox Guest Additions
One of the first things you’ll notice after a fresh Kali Linux installation in VirtualBox is the lack of seamless integration. Features like dynamic screen resizing, shared clipboards, and drag-and-drop functionality are often missing. This is where VirtualBox Guest Additions come in. Installing them dramatically improves the user experience and productivity.
-
Update Kali Linux:
- Open a terminal in Kali Linux (usually found on the desktop or in the applications menu).
- Update your package lists and upgrade existing packages to ensure everything is up-to-date:
bash

sudo apt update

sudo apt full-upgrade -y
- This step is crucial for “Digital Security” as it patches known vulnerabilities and ensures you’re running the latest stable software. Reboot if prompted.
-
Install Essential Build Tools:
- Guest Additions require some compiler and kernel headers to build correctly. Install them with:
bash

sudo apt install -y build-essential dkms linux-headers-$(uname -r)
- Guest Additions require some compiler and kernel headers to build correctly. Install them with:
-
Insert Guest Additions CD Image:
- From the VirtualBox menu bar (the one on your host machine, not inside the Kali VM window), go to
Devices > Insert Guest Additions CD image.... - This will virtually insert a CD-ROM into your Kali Linux VM.
- From the VirtualBox menu bar (the one on your host machine, not inside the Kali VM window), go to
-
Run the Installer Script:
- Open the file manager in Kali Linux. You should see a new CD-ROM drive appear, possibly named “VBoxGAs6.1.X” (where X is the VirtualBox version).
- Navigate into this CD-ROM.
- Open a terminal within that directory (right-click and select “Open Terminal Here”).
- Run the installer script with superuser privileges:
bash

sudo ./VBoxLinuxAdditions.run
- Let the script complete. You might see some warnings, but as long as there are no critical errors, it should be fine.
-
Reboot Kali Linux:
- After the installation is complete, reboot your Kali Linux VM:
bash

sudo reboot
- After the installation is complete, reboot your Kali Linux VM:
Upon reboot, you should notice that your Kali VM window can be resized dynamically, the clipboard can be shared between host and guest, and you can drag and drop files (if enabled in VM settings via Settings > General > Advanced > Shared Clipboard and Drag'n'Drop). These enhancements significantly boost your “Productivity” when working with Kali Linux.
Your Journey Ahead: Mastering Cybersecurity Skills
Installing Kali Linux on VirtualBox is just the beginning. It’s the first step towards a deeper understanding of “Digital Security” and the vast world of ethical hacking. Here’s how you can leverage this setup:
- Explore Kali’s Tools: Familiarize yourself with the various categories of tools provided: information gathering, vulnerability analysis, web application analysis, password attacks, wireless attacks, reverse engineering, exploitation tools, sniffing & spoofing, post-exploitation, forensics, and more. Each tool represents a specific “Tech” skill.
- Practice with Labs: Create other virtual machines (e.g., a vulnerable Windows XP or Metasploitable2 VM) within VirtualBox to build your own controlled penetration testing labs. This hands-on practice is invaluable for learning.
- Stay Updated: Regularly update your Kali Linux system (
sudo apt update && sudo apt full-upgrade -y) to ensure you have the latest tools and security patches. - Join Communities: Engage with the Kali Linux community, online forums, and cybersecurity groups. Learning from others and sharing knowledge is vital for growth.
Beyond the Terminal: Brand, Money, and Your Cybersecurity Future
Your proficiency with tools like Kali Linux extends far beyond mere technical competence. It directly impacts your professional trajectory and financial prospects:
- Personal Branding: Mastering Kali Linux and understanding its applications is a significant booster for your “Personal Branding” in the tech industry. It signals to employers, clients, and peers that you possess practical, in-demand cybersecurity skills. Listing “Ethical Hacking,” “Penetration Testing,” or “Digital Forensics” on your resume, backed by hands-on experience, makes you stand out.
- Career Opportunities & Online Income: The cybersecurity sector is experiencing a massive talent shortage, making it a highly lucrative field. Skills gained through practicing with Kali Linux can lead to roles as:
- Penetration Testers: Companies pay well for individuals who can find vulnerabilities before malicious actors do.
- Security Analysts: Protecting corporate networks and data.
- Bug Bounty Hunters: Earning “Online Income” by discovering and reporting vulnerabilities in software for organizations worldwide.
- Freelance Cybersecurity Consultants: Offering your expertise as a “Side Hustle” or a full-time business, protecting “Business Finance” for various clients.
The investment of your time in learning these tools can translate into substantial financial returns.
- Corporate Identity and Reputation: For businesses, understanding the attacker’s mindset (which Kali Linux facilitates) is crucial for protecting “Corporate Identity” and “Reputation.” Cyberattacks can cripple operations, erode customer trust, and lead to massive financial losses. Professionals skilled in ethical hacking are vital assets in building robust defense strategies, ensuring the integrity of a company’s “Brand Strategy” and safeguarding its financial health.
In conclusion, installing Kali Linux on VirtualBox is more than just a technical exercise; it’s an investment in your future. It’s about empowering yourself with critical “Tech” skills, enhancing your “Brand” in a competitive market, and unlocking pathways to significant “Money” earning potential. Embrace this powerful platform, continue to learn, and become an integral part of securing our increasingly digital world. Your cybersecurity journey has just begun, and the possibilities are limitless.
aViewFromTheCave is a participant in the Amazon Services LLC Associates Program, an affiliate advertising program designed to provide a means for sites to earn advertising fees by advertising and linking to Amazon.com. Amazon, the Amazon logo, AmazonSupply, and the AmazonSupply logo are trademarks of Amazon.com, Inc. or its affiliates. As an Amazon Associate we earn affiliate commissions from qualifying purchases.