
In an increasingly data-driven world, the constant demand for digital storage can feel like an endless battle. From high-resolution photos and 4K videos to a burgeoning collection of apps and essential work documents, our devices are continually pushed to their limits. While cloud storage offers a partial solution, nothing beats the convenience, speed, and reliability of having ample local storage directly on your device. This is where the humble yet powerful microSD card steps in, offering a remarkably simple and cost-effective way to dramatically expand your digital real estate.
Whether you’re struggling with a smartphone constantly flagging “storage full” notifications, a camera running out of space mid-shoot, or a portable gaming console crying for more game installations, understanding how to properly install and utilize a microSD card is an invaluable skill. This guide will walk you through everything you need to know, from selecting the perfect card to seamless installation and beyond, ensuring your gadgets not only keep up with your digital life but also enhance your productivity and protect your valuable data. By extending the life and utility of your existing devices, you’re making a smart investment, aligning perfectly with both the “Tech” and “Money” principles of savvy digital living.
Why Expand Your Device’s Storage? Unlocking Performance and Productivity
Before diving into the mechanics of installation, it’s crucial to understand the profound benefits that additional storage, courtesy of a microSD card, brings to your digital ecosystem. It’s more than just space; it’s about enhanced performance, extended device longevity, and greater personal and professional flexibility.
The Ever-Growing Need for Digital Space
Consider the sheer volume of data we generate and consume daily. A single minute of 4K video can consume hundreds of megabytes, while high-resolution photos from modern smartphone cameras often exceed 10-15MB each. Gaming applications, productivity suites, and a myriad of social media apps further compound this demand. Without sufficient storage, your device quickly becomes a bottleneck, leading to frustrating “storage full” warnings that halt photo opportunities, prevent app updates, and impede overall functionality.
A microSD card provides a dedicated reservoir for this ever-expanding digital footprint. It allows you to offload media files, documents, and even some applications from your device’s internal memory, freeing up critical space for system operations and essential apps. This not only keeps your device running smoothly but also future-proofs it to some extent against the relentless march of technological progress and increasing file sizes. For creative professionals, vloggers, or even avid hobbyists, this expanded capacity means fewer interruptions and more continuous workflow, directly impacting productivity.
Boosting Device Performance and Longevity
Counterintuitively, running a device with its internal storage near capacity can significantly degrade its performance. When internal storage is almost full, the operating system struggles to find space for temporary files, app caches, and system updates, leading to noticeable slowdowns, app crashes, and overall sluggishness. By moving non-essential data to a microSD card, you alleviate this pressure on the internal memory, allowing your device to operate more efficiently.
This efficiency translates directly into better performance: faster app loading times, smoother multitasking, and a more responsive user experience. Furthermore, by extending the usable life of your current smartphone, tablet, camera, or laptop, you’re making a financially sound decision. Instead of prematurely upgrading to a new device simply for more storage, a relatively inexpensive microSD card can breathe new life into your existing hardware, saving you money while maintaining your preferred device. It’s a classic example of smart resource management and maximizing your tech investment.
Data Portability, Security, and Peace of Mind
Beyond capacity and performance, microSD cards offer unparalleled data portability. Imagine being able to instantly transfer an entire library of photos or a collection of important documents between your smartphone, tablet, and computer without relying on internet connectivity or cumbersome cables. For content creators, this means transferring raw footage from a drone or camera directly to a laptop for editing, or sharing a large presentation file with a client on the go. This physical portability adds a layer of convenience that cloud-based solutions sometimes lack, especially in areas with limited internet access.
From a security standpoint, a physical card can offer a tangible backup for critical data. In the unfortunate event of a device malfunction or loss, having your most precious photos and documents stored on a removable card provides an extra layer of protection. You can simply remove the card and insert it into another compatible device, recovering your data with minimal fuss. While not a replacement for comprehensive backup strategies, it acts as a quick, accessible, and often overlooked safeguard for your digital assets, ensuring peace of mind that your memories and work are securely portable and recoverable.
Choosing the Right MicroSD Card: A Smart Investment in Digital Storage
Selecting the correct microSD card is as crucial as the installation process itself. With a bewildering array of options regarding capacity, speed, and class ratings, making an informed decision can seem daunting. However, understanding these specifications ensures you get the best value for your money and the optimal performance for your specific needs, preventing compatibility issues and potential data corruption. This step underscores the importance of both “Tech” knowledge and “Money” mindfulness.
Understanding Capacity, Speed, and Class Ratings
-
Capacity (GB/TB): This is perhaps the most straightforward metric. MicroSD cards range from a few gigabytes to over a terabyte.
- microSD (Standard Capacity): Up to 2GB. Largely obsolete for modern devices.
- microSDHC (High Capacity): 4GB to 32GB. Suitable for older devices or basic storage needs.
- microSDXC (Extended Capacity): 64GB to 2TB. The most common type today, ideal for high-resolution media, large app installations, and future-proofing.
- microSDUC (Ultra Capacity): Up to 128TB. Still emerging, for extremely high-capacity needs.
The larger the capacity, the more data it can hold. Always check your device’s maximum supported capacity before purchasing.
-
Speed Class (C2, C4, C6, C10): This indicates the minimum sequential write speed of the card in MB/s.
- Class 2 (C2): 2 MB/s – Basic video recording.
- Class 4 (C4): 4 MB/s – Standard definition video.
- Class 6 (C6): 6 MB/s – High definition video.
- Class 10 (C10): 10 MB/s – Full HD video recording, continuous shooting for cameras, and general smartphone use. This is the minimum recommended for most modern applications.
-
UHS Speed Class (U1, U3): UHS (Ultra High Speed) is designed for faster data transfer, especially for devices supporting the UHS bus interface.
- UHS-I Speed Class 1 (U1): Minimum 10 MB/s write speed. Often combined with C10.
- UHS-I Speed Class 3 (U3): Minimum 30 MB/s write speed. Essential for 4K video recording, drone footage, and high-speed photography.
- UHS-II and UHS-III: Feature a second row of pins for even faster speeds (up to 312 MB/s and 624 MB/s respectively). These are high-end cards for professional equipment and are backward compatible with UHS-I slots but will operate at UHS-I speeds.
-
Video Speed Class (V6, V10, V30, V60, V90): Specifically designed for high-resolution video recording (4K, 8K) and multi-stream recording.
- V6: 6 MB/s
- V10: 10 MB/s
- V30: 30 MB/s (Recommended for 4K video)
- V60: 60 MB/s (For higher bit-rate 4K and 8K video)
- V90: 90 MB/s (For professional-grade 8K video and super slow-motion)
-
Application Performance Class (A1, A2): Crucial for smartphones and tablets where apps can be installed on the microSD card. These classes specify minimum random read/write speeds and sequential write speeds, optimizing performance for running applications directly from the card.
- A1: Minimum 1500 IOPS random read, 500 IOPS random write, 10 MB/s sequential write.
- A2: Minimum 4000 IOPS random read, 2000 IOPS random write, 10 MB/s sequential write. Offers even better app performance.
For most modern smartphones, cameras, and drones, a microSDXC card with at least a C10/U3 and ideally an A2 rating is recommended for a balanced combination of capacity, speed, and app performance.
Compatibility Check with Your Device
This is non-negotiable. Before purchasing, consult your device’s manual or the manufacturer’s website to confirm:
- Supported Card Type: Does it accept microSD, microSDHC, or microSDXC? Most newer devices support microSDXC.
- Maximum Capacity: Each device has a limit (e.g., up to 256GB, 512GB, or 1TB). Installing a card larger than supported will likely result in it not being recognized.
- Speed Class Recommendations: Some devices, especially high-end cameras or 4K drones, may specify a minimum speed class (e.g., U3 or V30) for optimal performance.
Failing to check compatibility can lead to a non-functional card, wasted money, and frustration.
Reputable Brands and Avoiding Counterfeits
The market is flooded with microSD cards, but quality and authenticity vary widely. Investing in a card from a reputable brand is paramount for data integrity, longevity, and overall reliability. Well-known brands like SanDisk, Samsung, Kingston, Lexar, and PNY have established reputations for quality control and customer support.
Be wary of suspiciously low prices, especially from unfamiliar sellers or unverified online marketplaces. Counterfeit cards are rampant; these often report a false capacity (e.g., claiming 1TB but only having 32GB) or deliver abysmal speeds, leading to corrupted data and lost files. Purchase from trusted retailers, check reviews, and if the deal seems too good to be true, it probably is. Choosing a reputable brand aligns with “Brand” awareness and protects your “Money” by ensuring you receive a genuine, high-quality product that performs as advertised.
Step-by-Step Installation Guide: Seamlessly Expanding Your Digital Horizon
Once you’ve selected the perfect microSD card for your device, the installation process is typically straightforward. While the exact steps may vary slightly depending on the device type and model, the underlying principles remain consistent. This section will guide you through the process, ensuring a smooth and successful setup.
Preparing Your Device and Card
Before you begin, a few preparatory steps can prevent issues:
- Power Down Your Device: For most devices (smartphones, tablets, cameras), it’s highly recommended, and often mandatory, to power off the device completely before inserting or removing a microSD card. This prevents data corruption and potential damage to the card or device. For some laptops, it might be possible to hot-swap, but powering down is always the safest bet.
- Locate the MicroSD Card: Ensure your card is easily accessible and correctly oriented.
Locating the MicroSD Card Slot
The placement of the microSD card slot varies significantly across different device categories:
- Smartphones and Tablets:
- Side Tray: The most common location. Look for a small tray on the side of your device, often near the SIM card tray. You’ll typically need a SIM ejector tool (a thin metal pin) or a paperclip to push into a small hole next to the tray to pop it open.
- Under the Battery/Back Cover (Older Models): On some older devices, you might need to remove the back cover and/or the battery to access the slot.
- Integrated Slot: Some devices have a slot that doesn’t require a tray, simply a small opening where the card slides directly in.
- Digital Cameras (DSLRs, Mirrorless, Point-and-Shoot):
- Side Slot: Often behind a small flap or door on the side of the camera body.
- Battery Compartment: Sometimes located next to or within the battery compartment, usually on the bottom of the camera.
- Laptops:
- Side Slot: Many laptops, especially ultra-portables, have a dedicated microSD or full-size SD card slot on the side.
- Internal Slot (Rare): Very few laptops have an internal slot requiring partial disassembly.
- Drones and Action Cameras:
- Dedicated Slot: Usually under a protective flap on the side or back of the drone/camera body.
- Gaming Consoles (e.g., Nintendo Switch):
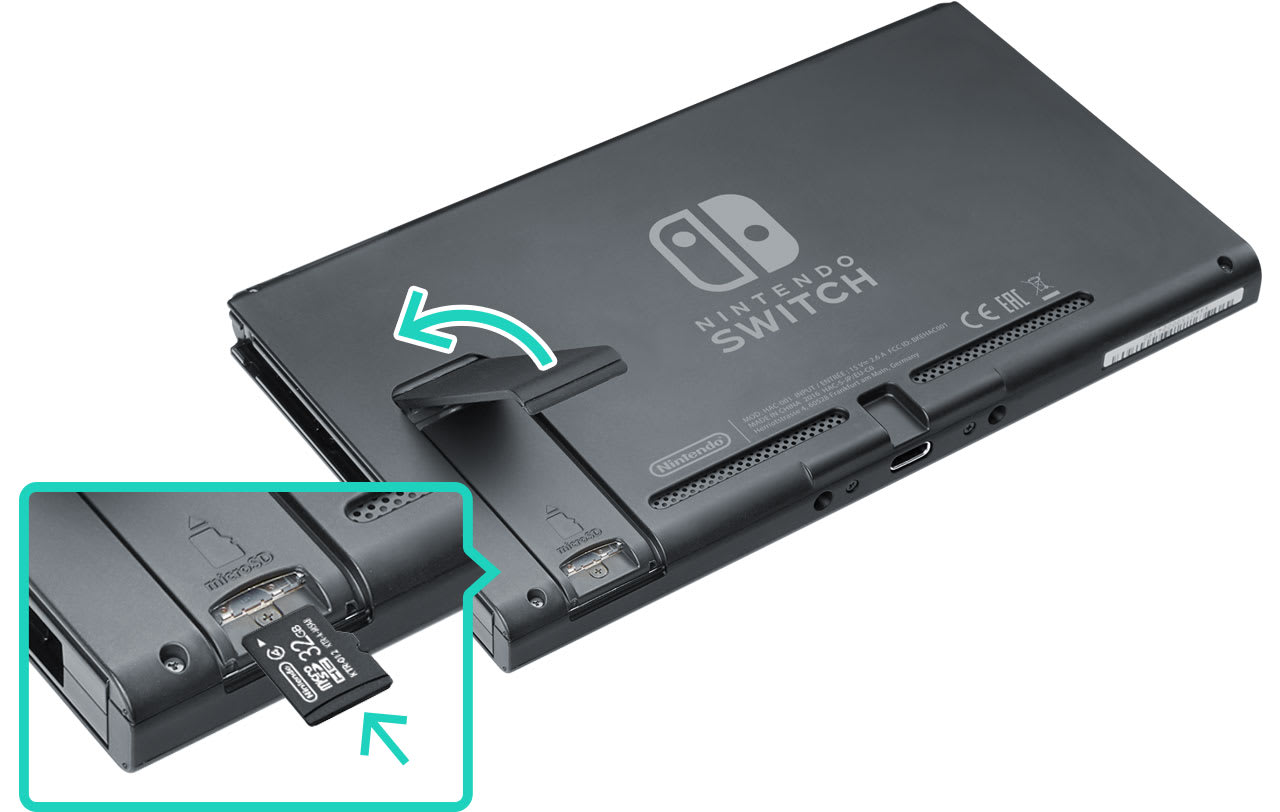
- Under the Kickstand: The Switch’s microSD slot is conveniently located under the kickstand on the back of the console.
If you’re unsure, consult your device’s user manual or the manufacturer’s website for precise instructions and slot location.
Inserting the Card Correctly
Once you’ve located the slot:
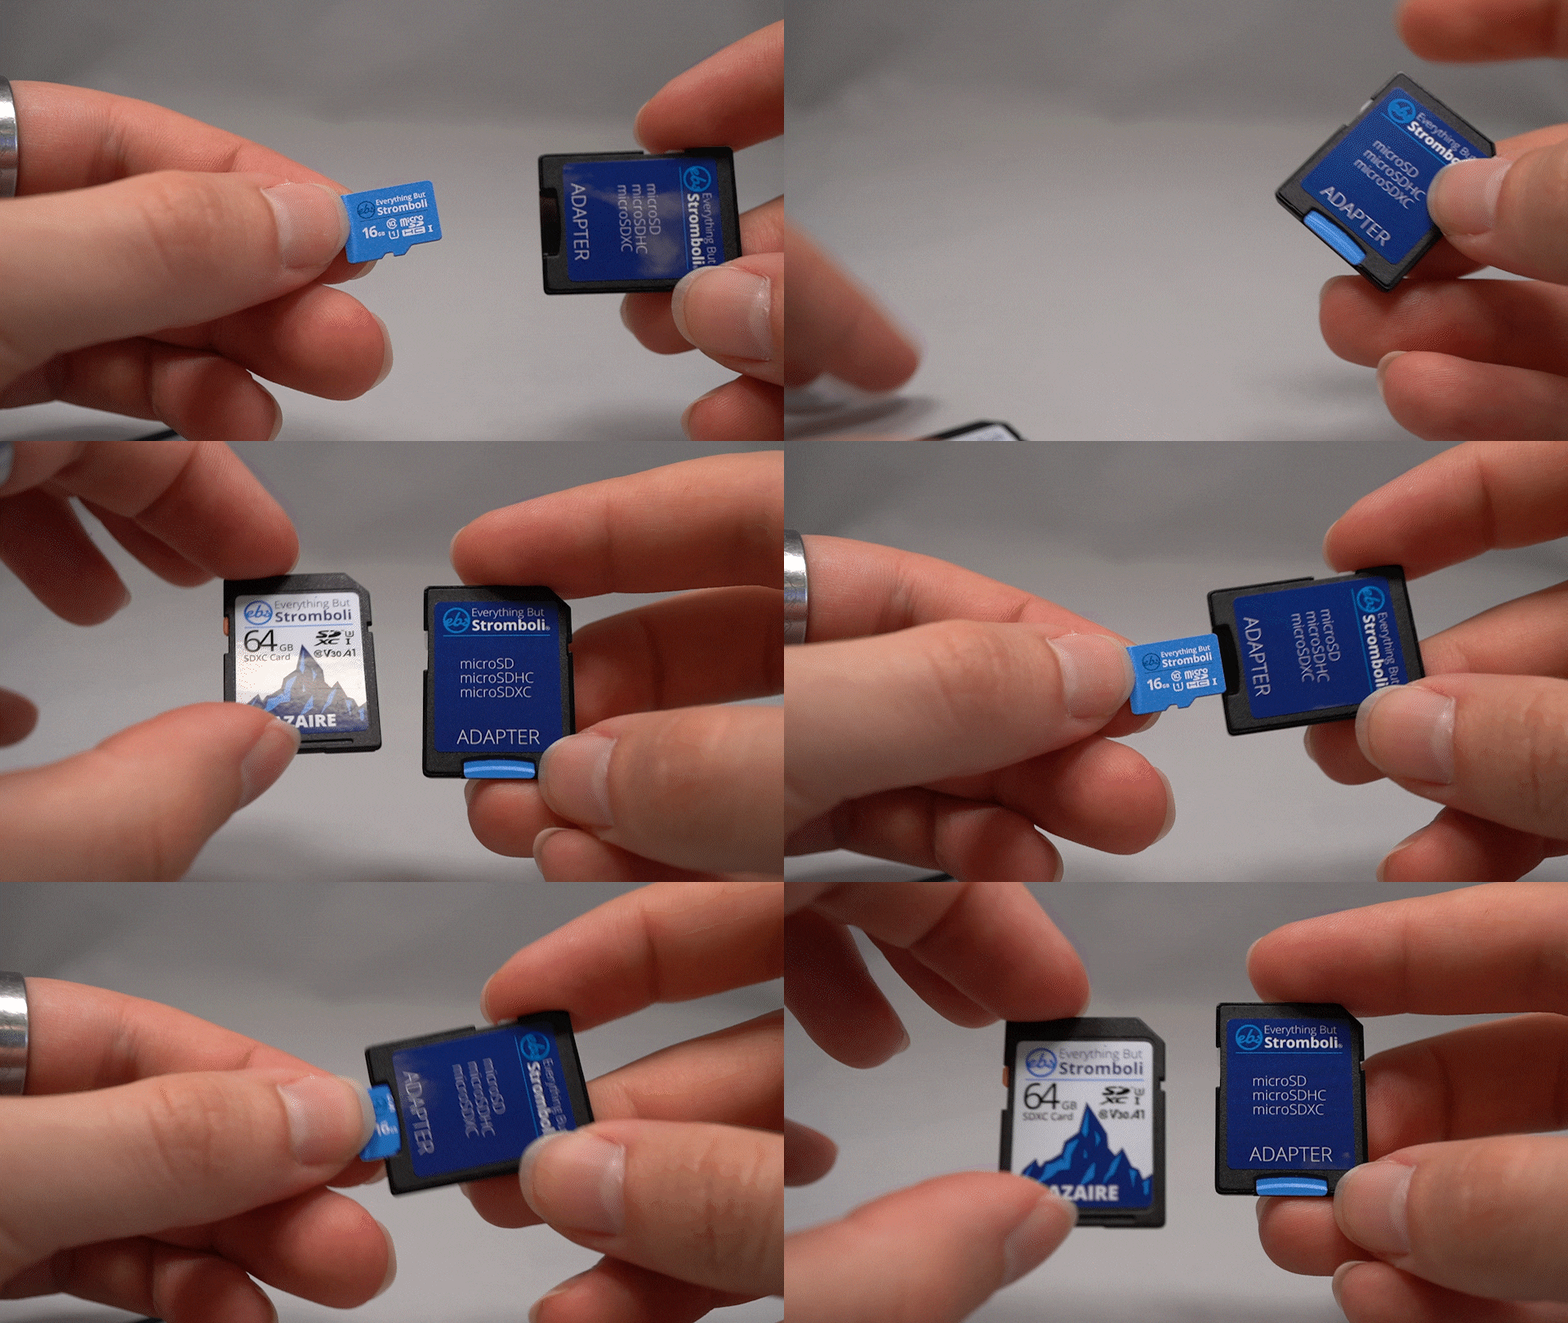
- Orient the Card: MicroSD cards are designed to fit only one way. Look for a small arrow on the card or the slot indicating the correct direction. The gold contacts on the card should typically face downwards or towards the back of the device.
- Insert Gently:
- Tray Type: Place the microSD card into the designated slot on the tray. Ensure it sits flush and doesn’t fall out when you re-insert the tray. Slide the tray back into the device until it clicks into place. Do not force it.
- Direct Slot Type: Gently push the card into the slot until you hear a soft click or feel a slight spring resistance. This indicates it’s locked into place. If it doesn’t click, you might not have pushed it in far enough, or the orientation is incorrect.
- Do Not Force It: If the card doesn’t slide in easily or resists, re-check the orientation and try again. Forcing it can damage both the card and the device’s card reader.
Initializing and Formatting the Card (If Required)
After insertion, power on your device.
- Recognition: Your device should automatically detect the new microSD card. You might see a notification like “SD card detected” or “New storage device.”
- Initialization/Setup: Some devices, especially Android smartphones, may prompt you to “Set up” or “Format” the card.
- Portable Storage: This option treats the card as external storage, ideal for media files, documents, and easy transfer between devices. Files remain accessible even if you remove the card.
- Internal/Adoptable Storage (Android Specific): This option formats the card to act as an extension of your device’s internal storage, allowing you to install apps directly onto it. Warning: Formatting as internal storage encrypts the card to that specific device, making it unreadable by other devices. It also ties the card to that device; removing it can cause app instability. Only choose this if you understand the implications and intend for the card to be a permanent fixture in that device.
- Formatting: If prompted, or if the card isn’t recognized or seems to be causing issues, you may need to format it. Formatting erases all data on the card and prepares it for use with your device.
- Navigate to your device’s settings (e.g., “Storage” or “Device Care” on Android).
- Locate the “SD card” or “External storage” option.
- Select “Format” or “Erase SD card.”
- Confirm the action. Ensure you back up any important data on the card before formatting, as it will be permanently deleted.
Verifying Successful Installation
After installation and potential formatting:
- Check Storage Settings: Go to your device’s storage settings. The microSD card should now be listed, showing its total capacity and available space.
- File Manager: Open your device’s file manager app. You should see a new storage location labeled “SD card,” “External storage,” or similar. You can try creating a new folder or copying a small file to it to confirm read/write access.
- Test Usage: If it’s for a camera, take a test photo. If for a phone, try moving some photos or videos to it.
Optimizing Your MicroSD Card Usage: Maximizing Its Potential
Installing the microSD card is just the beginning. To truly leverage its capabilities and ensure its longevity and your data’s safety, it’s essential to understand how to optimize its usage. This goes beyond simple storage, touching on effective data management, security, and troubleshooting – all critical components of responsible “Tech” ownership and “Productivity.”
Managing Storage and Moving Files
One of the primary reasons for installing a microSD card is to offload data from your device’s internal storage. Here’s how to do it efficiently:
- Identify Movable Data: Common candidates for transfer include photos, videos, music, documents, and downloaded files. On Android, some apps also allow you to move them to the SD card (though performance might be slightly reduced compared to internal storage).
- Use Your Device’s File Manager: Most smartphones, tablets, and computers have a built-in file manager. Navigate to your internal storage, select the files or folders you wish to move, and use the “Move” or “Copy” function to transfer them to the SD card.
- Set Default Storage Locations: Many camera apps, messaging apps, and download managers allow you to set the microSD card as the default storage location for new photos, videos, or downloads. This is highly recommended to proactively save space on your internal storage.
- For cameras: Check the camera’s menu settings for “Storage Location” or “Save To.”
- For Android phones: In your Camera app settings, look for “Storage location.” For other apps, you might find this in their individual settings.
- Periodically Review and Organize: Just like any other storage, your microSD card can become cluttered. Periodically review its contents, delete unnecessary files, and organize them into logical folders to maintain efficiency and ease of access.
Best Practices for Data Safety and Longevity
MicroSD cards are robust, but they are not infallible. Following best practices ensures your data remains safe and extends the life of your card:
- Eject Safely: Always “eject” or “unmount” your microSD card from your device’s settings before physically removing it (if your device supports this feature). This ensures all read/write operations are completed, preventing data corruption. For PCs, use the “Safely Remove Hardware” option. For Android, go to Storage settings and tap “Eject SD card.”
- Regular Backups: While the card provides portable storage, it’s not a sole backup solution. Regularly back up critical data from your microSD card to a computer, an external hard drive, or cloud storage. This protects against card failure, loss, or damage.
- Avoid Excessive Read/Write Cycles: Constantly deleting and rewriting data can degrade the card over time. While modern cards are built for durability, try to minimize unnecessary read/write operations.
- Protect from Physical Damage: MicroSD cards are tiny and delicate. Store them in protective cases when not in use, and keep them away from extreme temperatures, moisture, and strong magnetic fields.
- Use Reputable Card Readers: If you’re using an external card reader for your computer, use a quality one from a trusted brand. Cheap, poorly made readers can sometimes cause data corruption or even damage the card.
- Update Firmware: Keep your device’s firmware and operating system updated. Updates often include improvements to storage management and compatibility with various SD card types.
Troubleshooting Common Issues
Even with careful installation, you might occasionally encounter issues. Here are some common problems and their solutions:
- Card Not Detected:
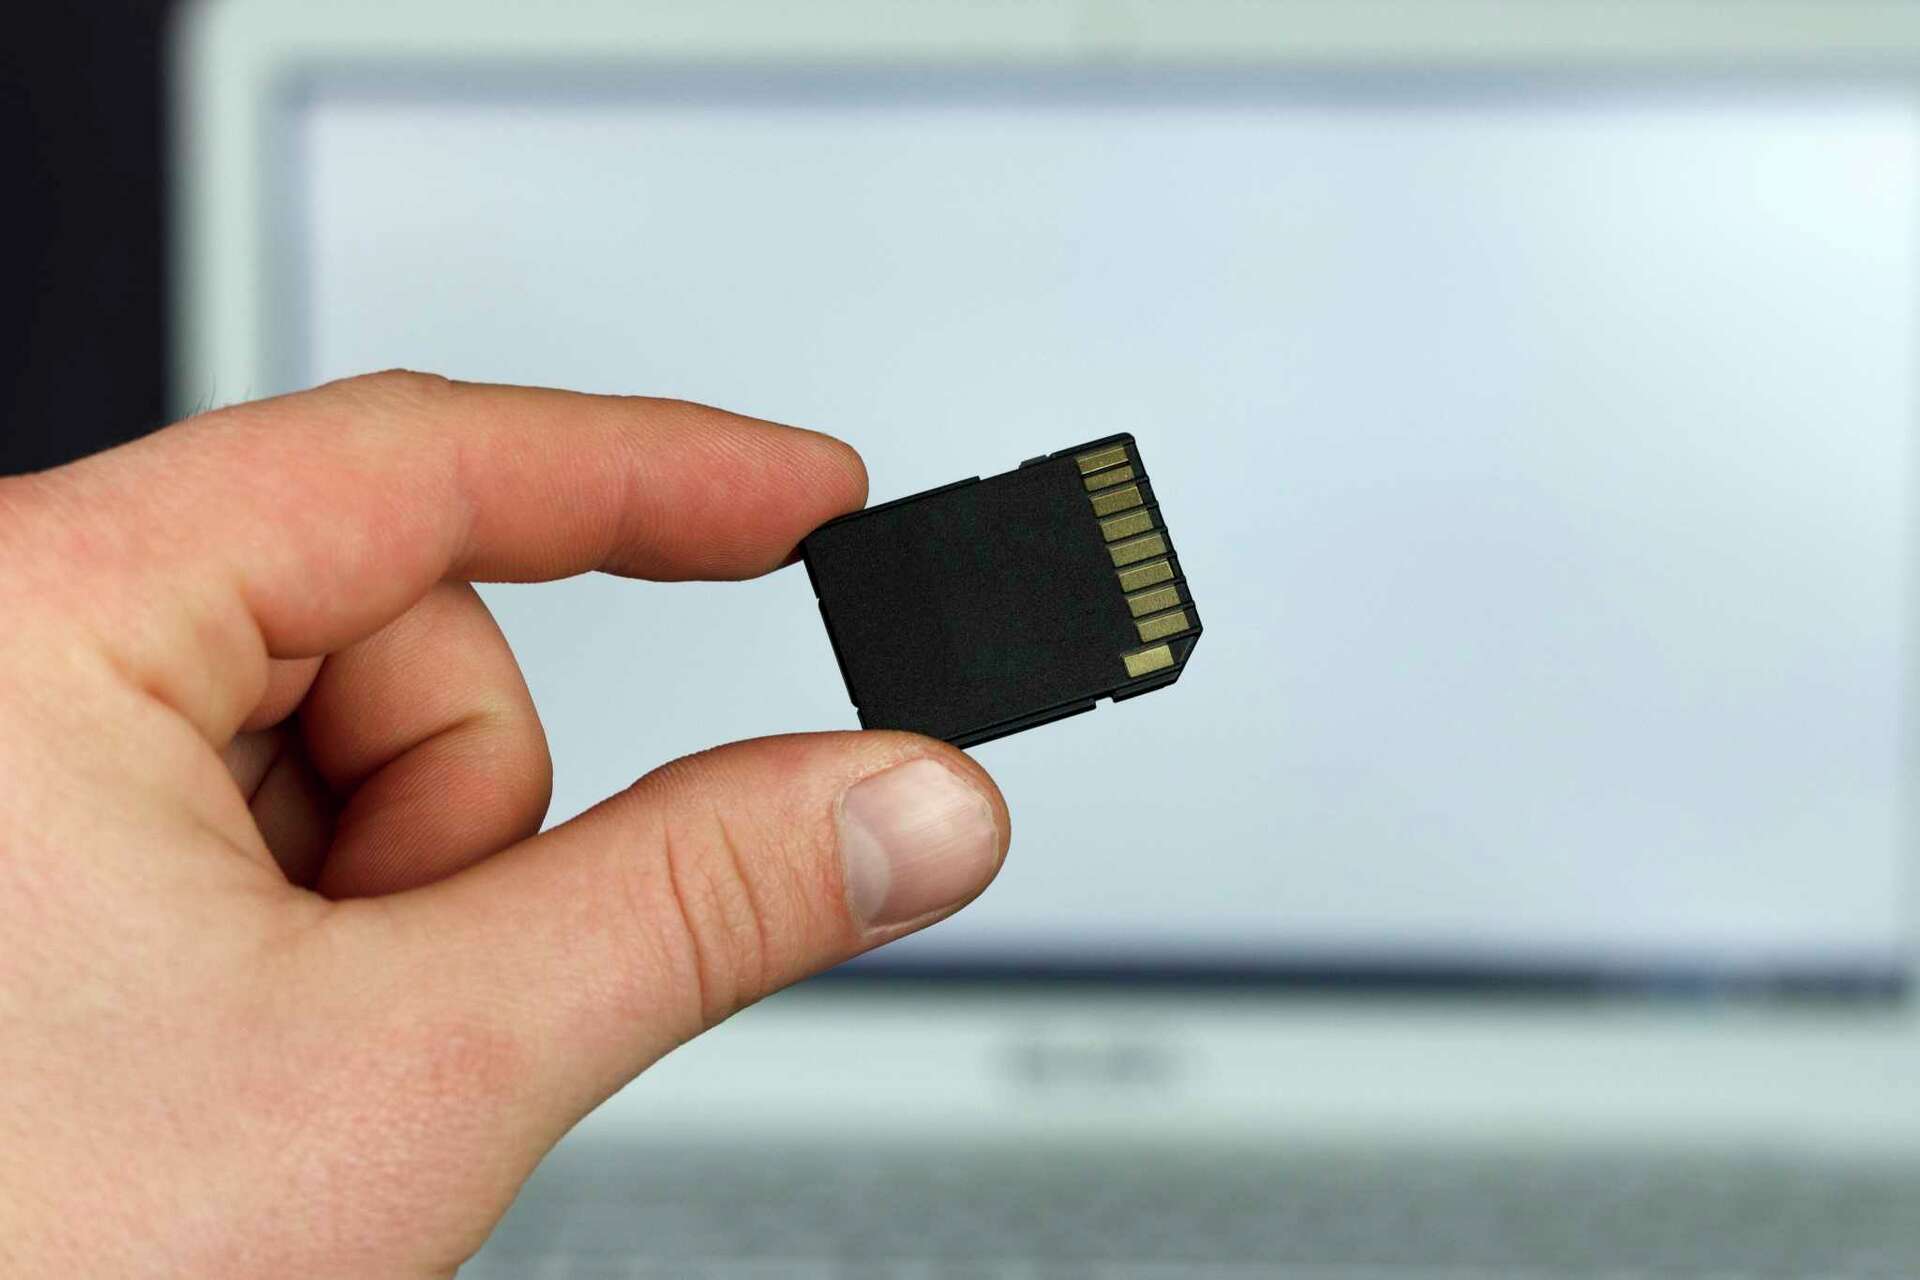
- Reinsert: Power off the device, remove the card, clean the gold contacts gently with a soft, dry cloth, and reinsert it correctly.
- Restart Device: Sometimes a simple reboot can resolve detection issues.
- Test on Another Device: If possible, try the card in another compatible device or a computer with a card reader. If it works there, the issue might be with your original device’s card slot. If it doesn’t, the card itself might be faulty.
- Update Drivers (PC): For PCs, ensure your card reader drivers are up to date.
- “Card is Corrupted” or “Unreadable”:
- Format: If you’ve backed up your data, try formatting the card using your device’s settings or a computer.
- Check Disk Utility (PC/Mac): Use your computer’s disk utility tools (e.g., Disk Management on Windows, Disk Utility on macOS) to check for errors and attempt repairs.
- Third-Party Recovery Tools: If data recovery is critical and formatting isn’t an option, specialized data recovery software might be able to retrieve some files, though success is not guaranteed.
- Slow Performance:
- Check Speed Class: Ensure your card’s speed class meets the requirements of your usage (e.g., a C4 card will be slow for 4K video).
- Fragmented Data: On older cards, fragmentation can slow things down. Back up data, format the card, and then restore.
- Card Full: A nearly full card can perform slower. Free up some space.
- Device Limitations: Your device’s processor or card reader might be a bottleneck, even with a fast card.
By understanding these nuances, you ensure that your microSD card not only serves its purpose but also becomes a reliable and integrated part of your digital toolkit, truly enhancing your tech experience and extending your device’s useful life.
In conclusion, installing a microSD card is a simple yet profoundly impactful upgrade that offers immense value to almost any modern electronic device. It’s an intelligent approach to managing your digital footprint, enhancing device performance, and ensuring the safety and portability of your precious data. By following the steps outlined in this guide – from informed selection to careful installation and optimized usage – you can confidently unlock a new realm of storage possibilities, making your devices more capable, your workflow more fluid, and your digital life more boundless. It’s a small card with a massive impact, empowering you to do more with the technology you already own, a testament to smart tech utilization and thoughtful financial decisions.
aViewFromTheCave is a participant in the Amazon Services LLC Associates Program, an affiliate advertising program designed to provide a means for sites to earn advertising fees by advertising and linking to Amazon.com. Amazon, the Amazon logo, AmazonSupply, and the AmazonSupply logo are trademarks of Amazon.com, Inc. or its affiliates. As an Amazon Associate we earn affiliate commissions from qualifying purchases.