
Upgrading or installing a new graphics card (GPU) is one of the most impactful hardware changes you can make to your PC, transforming its capabilities from gaming and content creation to complex rendering and AI tasks. While the prospect of delving into your computer’s internals might seem daunting, the process is straightforward with the right guidance. This comprehensive tutorial will walk you through every step, ensuring a smooth and successful installation. By the end, you’ll not only have a powerful new component but also a deeper understanding of your system’s architecture.
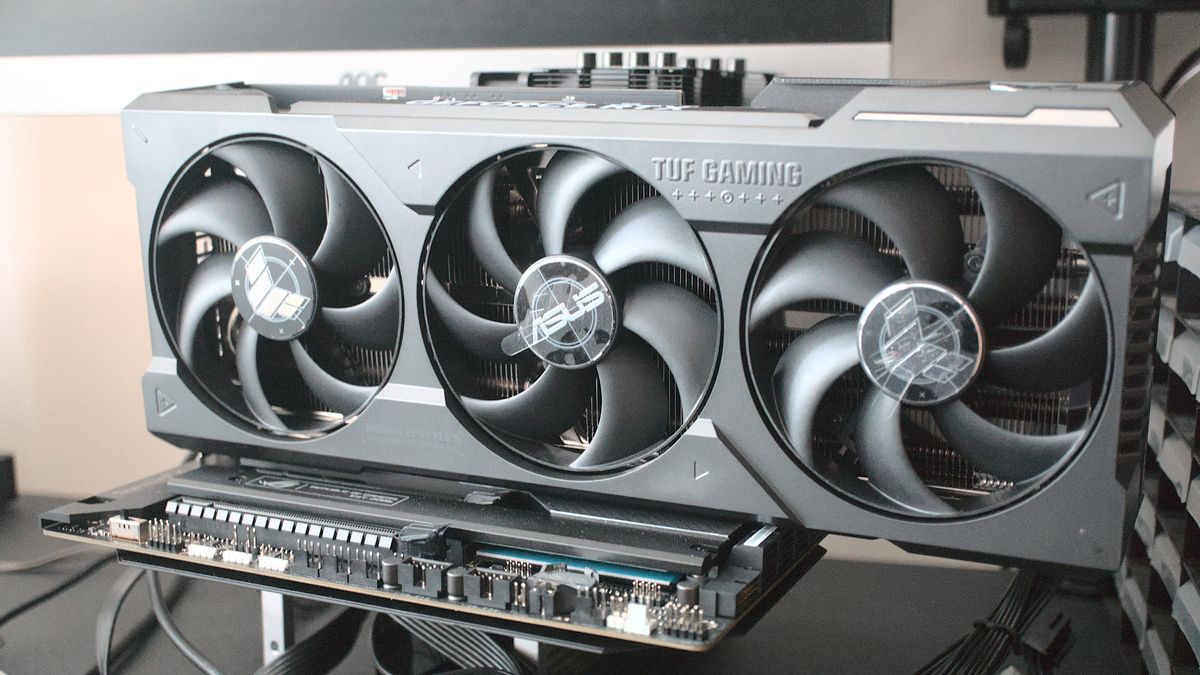
1. Understanding Your Graphics Card and System Compatibility
Before you even think about unscrewing your PC’s side panel, a foundational understanding of your new graphics card and its compatibility with your existing system is paramount. This initial phase can save you significant time, frustration, and potential hardware damage down the line.
What is a Graphics Card and Why Upgrade?
A graphics card, also known as a video card or GPU (Graphics Processing Unit), is a dedicated piece of hardware responsible for rendering images, animations, and video for your display. Unlike integrated graphics, which are built into your CPU, a discrete graphics card has its own processor and memory, allowing it to handle much more complex visual tasks.
Users typically upgrade their graphics cards for several key reasons:
- Enhanced Gaming Performance: Higher frame rates, better graphical fidelity, and support for newer games.
- Professional Workflows: Faster video editing, 3D rendering, graphic design, and CAD applications.
- Content Creation: Improved performance in streaming, animation, and visual effects software.
- AI and Machine Learning: GPUs are highly efficient at parallel processing, making them ideal for training AI models.
- Multi-Monitor Setups: Many modern GPUs offer multiple display outputs, facilitating extensive monitor configurations.
- Support for New Technologies: Access to features like ray tracing, DLSS (NVIDIA), FSR (AMD), and higher refresh rate displays.
The decision to upgrade should align with your specific computing needs and the performance bottlenecks you currently experience.
Checking System Compatibility: Motherboard, PSU, and Case
Compatibility is the cornerstone of any successful hardware upgrade. Neglecting this step can lead to a non-functional system or, worse, damaged components.
Motherboard Compatibility (PCIe Slot)
Modern graphics cards connect to the motherboard via a PCI Express (PCIe) slot. Specifically, you’ll be looking for a PCIe x16 slot, which is the longest slot on your motherboard and typically located closest to the CPU. Most motherboards from the last decade or more feature at least one PCIe x16 slot. While newer GPUs use PCIe 4.0 or even 5.0, they are backward compatible with older PCIe 3.0 slots, albeit with a potential slight performance reduction. Ensure you have an available, unoccupied x16 slot.
Power Supply Unit (PSU) Compatibility
The power supply is often the most overlooked component when upgrading a GPU. Graphics cards are power-hungry, and an underpowered PSU can lead to system instability, crashes, or simply prevent your PC from booting.
- Wattage: Check the recommended minimum PSU wattage specified by your new graphics card manufacturer. This information is usually found on the product box or the manufacturer’s website. Compare this to your existing PSU’s total wattage output. A good rule of thumb is to have at least 100-200W headroom above the GPU’s requirement, considering your CPU and other components.
- PCIe Power Connectors: Modern high-performance GPUs require dedicated PCIe power connectors from the PSU, typically 6-pin, 8-pin, or a combination (e.g., 6+2-pin). Inspect your new graphics card to see how many and what type of connectors it needs, then check your PSU’s cables to ensure you have the necessary connectors available. Adapters exist (e.g., SATA to PCIe power), but they are generally not recommended for sustained use with high-power GPUs due to potential fire hazards and instability.
PC Case Compatibility
The physical size of your new graphics card is a critical factor. Graphics cards vary significantly in length, height, and thickness (single, dual, or triple slot designs).
- Length: Measure the available space from the back of your PC case (where the expansion slot is) to the front drive cages or fans. Compare this to the length of your new GPU.
- Height/Width: Some cards are taller than standard, potentially interfering with the side panel, while thicker cards might obstruct adjacent PCIe slots or airflow.
- Airflow: Consider the overall airflow within your case. A powerful GPU generates a lot of heat, and adequate ventilation is crucial for optimal performance and longevity.
Gathering Your Tools and Materials
Having the right tools at hand will make the installation process smoother and safer.
- Phillips Head Screwdriver: For removing case screws, expansion slot covers, and potentially motherboard screws.
- Anti-Static Wrist Strap (Recommended): To prevent electrostatic discharge (ESD) which can permanently damage sensitive electronic components. Alternatively, frequently touch an unpainted metal surface of your PC case to ground yourself.
- Flashlight or Headlamp: For illuminating dark areas inside the PC case.
- Zip Ties or Velcro Straps: For cable management, improving airflow and aesthetics.
- Small Container: To hold screws and prevent them from getting lost.
- Your New Graphics Card: Unboxed and ready.
- Motherboard Manual (Optional but Helpful): For specific slot information or troubleshooting.
2. Preparing Your PC for Installation
Proper preparation is key to a hassle-free installation. This stage involves safely powering down your system and making it accessible for the upgrade.
Backing Up Your Data (Optional but Recommended)
While installing a graphics card is primarily a hardware operation and doesn’t directly interact with your data, it’s always good practice to back up important files before any major hardware intervention. This safeguards against unforeseen issues, though data loss is highly unlikely during a GPU installation.
Disconnecting and Opening Your PC
- Power Down: Fully shut down your computer from the operating system.
- Disconnect Peripherals: Unplug all cables from the back of your PC: power cord, monitor cables, USB devices, Ethernet, etc.
- Move to a Clean Workspace: Place your PC tower on a clean, flat, and sturdy surface. Avoid carpeted areas, as they can generate static electricity.
- Open the Case: Use your Phillips head screwdriver to remove the screws securing the side panel of your PC case (usually the left panel when looking from the front). Carefully slide or swing the panel off and set it aside.
Removing the Old Graphics Card (If Applicable)
If you’re upgrading an existing graphics card, you’ll need to remove it first. If you’re installing a GPU into a new build or a PC that previously used integrated graphics, skip this section.
- Disconnect Power Cables: Locate any PCIe power cables running from your PSU to the old graphics card and carefully disconnect them. These usually have small clips that need to be pressed.
- Unscrew the Card: The graphics card is secured to the PC case at the back with one or two screws holding its bracket in place. Unscrew and remove these.
- Release the PCIe Retention Clip: At the end of the PCIe x16 slot on the motherboard, there’s a small plastic lever or clip. Gently press or pull this clip to release the graphics card from the slot. Be careful not to force it, as these clips can be delicate.
- Remove the Card: With the power cables disconnected, the bracket screws removed, and the retention clip released, gently but firmly pull the old graphics card straight up and out of its PCIe slot. Place it in an anti-static bag if you plan to keep or sell it.
Grounding Yourself: Preventing Static Discharge
Electrostatic discharge (ESD) is a silent killer of electronic components. Before touching any internal components, you must ground yourself.
- Anti-Static Wrist Strap: Attach the wrist strap to your wrist and clip the other end to an unpainted metal part of your PC case. Keep it on throughout the installation.
- Manual Grounding: If you don’t have a wrist strap, frequently touch an unpainted metal surface of your PC case (like the power supply enclosure) with your bare hand before and during the process. Avoid working on carpet and wear natural fiber clothing.
3. The Installation Process: Step-by-Step
With your PC prepared and your old card removed, it’s time for the main event: installing your new graphics card.

Locating the PCIe Slot
Identify the primary PCIe x16 slot on your motherboard. This is typically the top-most long slot, closest to your CPU. If your motherboard has multiple x16 slots, consult your motherboard manual to identify which one offers the full x16 bandwidth (often the top one) for optimal performance. You may need to remove a metal expansion slot cover from the back of your PC case that corresponds to the chosen slot.
Seating the New Graphics Card
- Align the Card: Carefully align the PCIe connector of your new graphics card with the chosen PCIe x16 slot on the motherboard. Ensure the card’s bracket lines up with the opening at the back of your PC case.
- Apply Gentle Pressure: With both hands, press the graphics card firmly and evenly down into the slot. You should feel it click into place as the PCIe retention clip on the motherboard automatically closes and secures the card. Do not force it; if it doesn’t go in, recheck the alignment.
- Secure the Bracket: Once seated, use your Phillips head screwdriver to fasten the card’s bracket to the PC case using the screw(s) you removed earlier for the expansion slot cover. This prevents the card from sagging and ensures it’s firmly held in place.
Connecting PCIe Power Cables
This is a critical step for modern, high-performance GPUs.
- Identify Power Ports: Locate the PCIe power input port(s) on your new graphics card. These are usually on the top or side edge of the card.
- Connect PSU Cables: Route the appropriate 6-pin, 8-pin, or 6+2-pin PCIe power cables from your PSU to the graphics card. Ensure each connector clicks firmly into place. Never mix up CPU 8-pin (EPS) power cables with PCIe 8-pin cables; they look similar but are wired differently and can damage components. Use separate cables if your GPU requires multiple connections (e.g., two 8-pins) rather than splitting a single cable, especially for high-end cards. This ensures stable power delivery.
Securing the Card and Closing the Case
- Double-Check Connections: Visually inspect all connections: the card seated in the PCIe slot, the bracket screwed in, and all PCIe power cables securely attached.
- Cable Management: If desired, use zip ties or Velcro straps to tidy up any loose power cables or other internal wiring. Good cable management improves airflow and aesthetics.
- Close the Case: Carefully reattach the side panel of your PC case and secure it with its screws.
4. Post-Installation: Powering Up and Driver Setup
The physical installation is complete, but your journey isn’t over yet. The next steps involve bringing your system back online and configuring the software to fully utilize your new hardware.
Initial Boot-Up and BIOS/UEFI Check
- Reconnect Peripherals: Plug your monitor cable (HDMI, DisplayPort, DVI) directly into one of the output ports on your new graphics card. Reconnect your keyboard, mouse, power cord, and any other peripherals.
- Power On: Press the power button on your PC.
- Check for Display: The most immediate indication of success is a display on your monitor. If you see your BIOS/UEFI screen or the operating system loading, congratulations!
- BIOS/UEFI Settings (Rarely Needed): In some rare cases, you might need to enter your motherboard’s BIOS/UEFI settings (usually by pressing DEL or F2 during boot) to ensure that the primary video output is set to “PCIe” or “Discrete Graphics Card” instead of “Integrated Graphics.” Most modern motherboards detect this automatically.
Installing Graphics Drivers
Your operating system might boot up with a basic display driver, but to unlock the full potential and performance of your new GPU, you must install the latest dedicated drivers.
- Uninstall Old Drivers (If Applicable): If you previously had a graphics card from a different manufacturer (e.g., switching from AMD to NVIDIA or vice-versa), it’s highly recommended to use a utility like Display Driver Uninstaller (DDU) in Windows Safe Mode to completely remove all traces of previous drivers. This prevents conflicts.
- Download New Drivers: Visit the official website of your graphics card manufacturer (NVIDIA, AMD, or Intel Arc). Navigate to their driver download section, select your specific GPU model and operating system, and download the latest stable drivers.
- NVIDIA: NVIDIA Drivers
- AMD: AMD Drivers
- Intel Arc: Intel Drivers & Support
- Install Drivers: Run the downloaded driver executable. Follow the on-screen instructions. It’s often best to choose a “clean installation” option if available. Your screen might flicker or go black momentarily during the installation process; this is normal.
- Restart PC: After the driver installation is complete, restart your computer.
Testing Your New Graphics Card
Once drivers are installed and your PC has restarted, it’s time to put your new GPU through its paces.
- Basic Check: Open Windows Device Manager (or equivalent on Linux) and expand “Display adapters.” You should see your new graphics card listed by its correct name.
- Benchmark Software: Run a reputable benchmark utility (e.g., 3DMark, Unigine Heaven/Superposition, FurMark) to assess its performance and stability under load.
- Gaming/Applications: Launch your favorite games or demanding applications. Monitor frame rates, temperatures (using software like MSI Afterburner or HWMonitor), and overall system responsiveness. Ensure there are no visual artifacts, crashes, or unusual behavior.
5. Troubleshooting Common Issues and Best Practices
Even with careful installation, issues can arise. Knowing how to diagnose and address common problems will save you headaches.
Display Not Working
- No Display/Black Screen:
- Monitor Cable: Ensure the monitor cable is firmly plugged into the new graphics card’s output, not the motherboard’s integrated graphics port.
- PCIe Power: Double-check that all PCIe power cables are fully seated in the graphics card.
- Card Seating: Re-open your PC and ensure the graphics card is fully seated in the PCIe slot and the retention clip is engaged.
- PSU Check: Verify your PSU has sufficient wattage and is properly connected to the motherboard and GPU.
- Integrated Graphics: Temporarily plug your monitor into your motherboard’s integrated graphics port (if your CPU has one). If you get a display, it indicates an issue with the discrete GPU or its drivers.
- Other PCIe Slot: If your motherboard has another PCIe x16 slot, try installing the card there (ensure it’s still full bandwidth).
- Test with Old Card: If you still have your old card, reinstall it to confirm the rest of your system is functional.
Power Issues and System Instability
- PC Won’t Boot/Random Shutdowns: This often points to an insufficient or faulty power supply.
- PSU Wattage: Reconfirm your PSU meets or exceeds the manufacturer’s recommendations for your GPU.
- PCIe Power Cables: Ensure correct and secure connections. Avoid adapters if possible.
- CPU Power: While unrelated to the GPU, ensure the CPU power cable (EPS 4+4 or 8-pin) is securely connected to the motherboard.
- Crashing in Games/Benchmarks: Can be caused by overheating, unstable overclocks (if applied), or driver issues.
- Monitoring Temperatures: Use monitoring software to check GPU temperatures under load. If they are excessively high (e.g., consistently above 85-90°C), improve case airflow, clean dust, or consider replacing thermal paste (advanced users).
- Clean Driver Install: Perform a clean driver installation using DDU.
Driver-Related Problems
- Graphical Artifacts/Stuttering/Low Performance: These are classic signs of driver issues.
- Latest Drivers: Always ensure you have the very latest drivers directly from the manufacturer’s website.
- Clean Install: Use DDU to perform a clean uninstallation of all graphics drivers before reinstalling the latest version.
- Windows Updates: Ensure your Windows OS (or other OS) is fully updated, as some updates include critical display components.
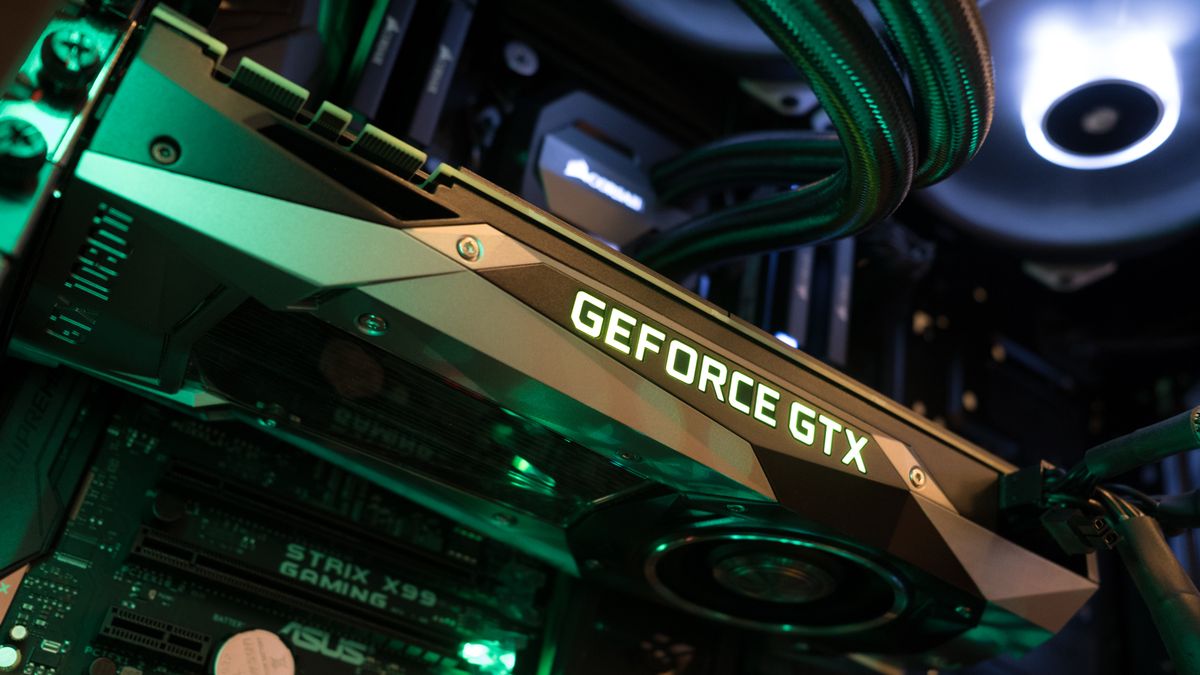
Maximizing Your New Card’s Performance
- Keep Drivers Updated: Regularly check for new driver releases from NVIDIA or AMD. These often include performance optimizations and bug fixes for new games and applications.
- Monitor Temperatures: Good airflow and cooling are crucial for sustained performance. Keep an eye on GPU temperatures, especially during intensive tasks.
- Enable Resizable BAR/Smart Access Memory (SAM): If your motherboard, CPU, and GPU support it, enable Resizable BAR (NVIDIA/Intel) or Smart Access Memory (AMD) in your BIOS/UEFI. This can provide a small but noticeable performance boost by allowing the CPU to access the GPU’s entire VRAM more efficiently.
- Overclocking (Advanced): For experienced users, minor overclocking of the GPU core clock and memory clock can yield additional performance, but always proceed with caution and monitor temperatures. Tools like MSI Afterburner or EVGA Precision X1 are commonly used.
Installing a graphics card is a rewarding experience that empowers your PC with new capabilities. By following these steps carefully, you’ll successfully integrate your new hardware and unlock a world of enhanced performance and visual fidelity. Enjoy your upgraded system!
aViewFromTheCave is a participant in the Amazon Services LLC Associates Program, an affiliate advertising program designed to provide a means for sites to earn advertising fees by advertising and linking to Amazon.com. Amazon, the Amazon logo, AmazonSupply, and the AmazonSupply logo are trademarks of Amazon.com, Inc. or its affiliates. As an Amazon Associate we earn affiliate commissions from qualifying purchases.