The transition to a smart home is one of the most significant upgrades a modern homeowner can undertake, and at the heart of this digital transformation is the smart thermostat. Ecobee has established itself as a leader in this space, offering sophisticated sensors, intuitive interfaces, and deep integration with major IoT (Internet of Things) ecosystems. However, the hardware installation and software configuration can be daunting for those unfamiliar with HVAC (Heating, Ventilation, and Air Conditioning) wiring. This guide provides a comprehensive, tech-focused walkthrough to help you install your Ecobee thermostat, ensuring your home’s climate control is both intelligent and efficient.
Preparing Your Smart Home Infrastructure
Before you begin the physical installation, it is crucial to understand the technological requirements of the Ecobee system. Unlike traditional “dumb” thermostats that operate on simple relays, smart thermostats are essentially mini-computers that require a constant source of power to maintain Wi-Fi connectivity and power their high-resolution displays.
Assessing Compatibility and Voltage Requirements
The first step is verifying that your current HVAC system is compatible with the Ecobee. Most modern systems utilize a 24V AC transformer. Ecobee thermostats are compatible with most residential heating and cooling systems, including gas, oil, electric, and dual-fuel systems. To verify compatibility, remove your existing thermostat cover and inspect the wiring. If you see thick wires joined by wire nuts or labels indicating 110V or 220V, you are likely looking at a high-voltage system, which is incompatible with Ecobee without a specialized transformer.
The most critical component is the “C-wire” or Common wire. This wire provides the continuous return path for the 24V power. If your current setup has a wire connected to the “C” terminal, your installation will be straightforward. If not, Ecobee includes a Power Extender Kit (PEK) in the box, which we will discuss in the next section.
Gathering the Essential Tools for Installation
While Ecobee provides almost everything you need in the box, including a backplate, screws, and drywall anchors, having the right tools on hand will ensure a professional-grade installation. You will need:
- A Phillips head screwdriver.
- A small flat-head screwdriver (for terminal blocks).
- A smartphone with the Ecobee app installed.
- A drill with a 3/16″ bit (if installing anchors).
- A digital camera or smartphone (to document original wiring).
Understanding the Power Extender Kit (PEK)
If your thermostat wiring does not include a C-wire, the Power Extender Kit (PEK) is a brilliant piece of engineering that allows you to power the thermostat using the existing four wires (R, G, Y, and W). The PEK is installed at the HVAC control board (usually located in your furnace or air handler) and multiplexes the signals to provide power and control over fewer conductors. Understanding this component is vital for users in older homes where pulling new wire through walls is not feasible.
The Hardware Installation Process
With your tools ready and power requirements understood, it is time to move to the physical installation. Safety is paramount during this stage, as you will be interacting with low-voltage electrical components.
Decommissioning Your Old System Safely
The very first step is to power down your HVAC system. Locate your home’s circuit breaker panel and switch off the breaker labeled for your furnace or air conditioner. Alternatively, many furnaces have a simple light-switch-style power toggle on the side of the unit. Confirm the power is off by attempting to adjust the temperature on your old thermostat; if the screen remains blank or the system doesn’t kick on, it is safe to proceed.
Remove the faceplate of your old thermostat. Before disconnecting any wires, take a high-resolution photograph of the wiring terminals. This “digital map” is your insurance policy; if you run into issues, you need to know exactly where the original wires were connected (e.g., Red to R, White to W, Green to G). Once documented, disconnect the wires and remove the old backplate from the wall. Ensure the wires do not slip back into the wall cavity by wrapping them around a pencil or using a piece of painter’s tape.
Mounting the Ecobee Backplate and Wiring
Position the Ecobee backplate against the wall, pulling the HVAC wires through the central opening. Use the built-in spirit level on the backplate to ensure it is perfectly horizontal. Mark the holes for the screws, and if you are not drilling into a stud, use the provided drywall anchors.
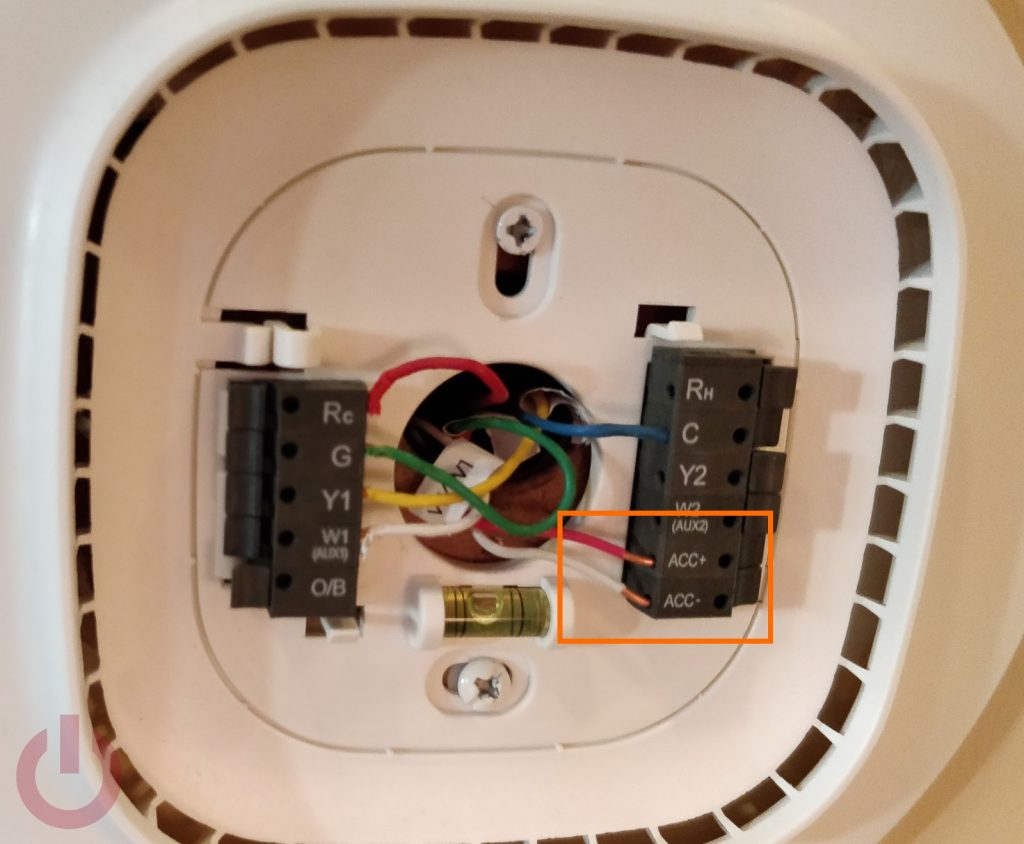
Once the backplate is secure, connect the wires to the corresponding terminals on the Ecobee. The terminal blocks are “push-to-insert,” meaning you simply press a lever, insert the stripped end of the wire, and release.
- R (or Rc/Rh): Power (Ecobee typically uses Rc for power).
- G: Fan.
- W: Heat.
- Y: Air Conditioning.
- C: Common (Power return).
If you are using the PEK, follow the specific wiring diagram provided in the Ecobee manual, as the terminal mappings will shift slightly at the thermostat end.
Attaching the Ecobee Control Unit
Once the wiring is secure and the backplate is mounted, gently push the wires back into the wall to ensure the thermostat can sit flush. Align the Ecobee device with the backplate and press firmly until you hear a click. The pins on the back of the device must interface perfectly with the terminals on the backplate.

Return to your breaker panel or furnace switch and restore power. If the wiring is correct, the Ecobee logo will appear on the screen within a few seconds, signaling the start of the boot sequence.
Digital Integration and Smart Home Ecosystems
Once the hardware is live, the Ecobee enters its software configuration phase. This is where the device transforms from a simple controller into a node within your smart home ecosystem.
Navigating the On-Screen Setup Wizard
The Ecobee will guide you through a series of prompts on its touch-sensitive display. It will first ask you to confirm which wires it has detected in its terminals. This is a critical diagnostic step; if the device does not show a wire that you know you plugged in, you may need to re-strip the wire or reseat it in the terminal.
You will then configure the equipment type (e.g., Forced Air, Heat Pump, or Boiler) and set your preferred temperature units (Celsius or Fahrenheit). The device will also ask about your HVAC’s specific features, such as whether the thermostat or the furnace should control the fan during a heat cycle. For most modern systems, allowing the furnace to control the fan is the standard “Tech-Optimized” choice.
Connecting to Wi-Fi and the Ecobee App
To leverage the “smart” features, the Ecobee must be connected to your local 2.4GHz or 5GHz Wi-Fi network. Follow the on-screen instructions to select your SSID and enter your credentials. Once connected, the device will provide a registration code.
Open the Ecobee app on your smartphone, create an account, and enter the registration code. This links your physical device to your cloud account, enabling remote control from anywhere in the world, as well as the ability to receive software updates and security patches.
Synchronizing with AI Assistants and Room Sensors
Ecobee is renowned for its platform-agnostic approach. Within the app, you can link the thermostat to:
- Apple HomeKit: Allowing for Siri voice control and integration into “Scenes.”
- Amazon Alexa: Many Ecobee models have Alexa built-in, effectively acting as a smart speaker.
- Google Assistant: For seamless control via Google Home devices.
Furthermore, if your kit included “SmartSensors,” now is the time to pair them. These sensors detect both temperature and occupancy. By placing them in bedrooms or offices, the Ecobee can prioritize the climate in the rooms you are actually using, rather than just the hallway where the main unit is located. This “follow me” feature is a pinnacle of modern smart home tech efficiency.
Troubleshooting and Optimizing Performance
After installation, the Ecobee begins a “learning” phase where it analyzes your home’s thermal profile. However, technical hiccups can occasionally occur during the initial setup.
Common Installation Errors and Solutions
If the device does not power on, the most common culprit is a loose C-wire or a blown fuse on the HVAC control board. Many HVAC units have a small 3A or 5A automotive-style fuse that can pop if wires touch during installation.
If the system is blowing cool air when it should be heating, you likely have a Heat Pump system that requires the “O/B” terminal configuration. You can adjust these settings in the Advanced Settings menu on the thermostat without having to rewire the device.
Utilizing Data Analytics via Home IQ
One of the most powerful tech features of the Ecobee is “Home IQ.” Accessible via the web portal, Home IQ provides a detailed breakdown of your system’s runtime and energy savings. It compares your home’s efficiency to others in your region and provides a “Weather Impact” report, showing how outdoor conditions affect your indoor climate.
By analyzing this data, you can fine-tune your “Smart Recovery” settings. This feature uses local weather forecasts and your home’s historical heat-up/cool-down rates to ensure the house reaches the desired temperature exactly when your schedule starts, rather than just starting the equipment at that time. This predictive modeling is a prime example of how AI and data analytics are being used to reduce carbon footprints at a household level.

Conclusion
Installing an Ecobee thermostat is more than a simple DIY project; it is a significant upgrade to your home’s digital infrastructure. By carefully managing the hardware installation, ensuring robust network connectivity, and integrating the device into your broader smart home ecosystem, you gain unprecedented control over your environment. The result is a home that is not only more comfortable but also significantly more energy-efficient, driven by the power of modern IoT technology.
aViewFromTheCave is a participant in the Amazon Services LLC Associates Program, an affiliate advertising program designed to provide a means for sites to earn advertising fees by advertising and linking to Amazon.com. Amazon, the Amazon logo, AmazonSupply, and the AmazonSupply logo are trademarks of Amazon.com, Inc. or its affiliates. As an Amazon Associate we earn affiliate commissions from qualifying purchases.