
For seasoned macOS users, installing applications often feels like second nature. Yet, for those new to Apple’s ecosystem or encountering a less common software package, the .dmg file can sometimes present a point of confusion. Short for “Disk iMaGe,” DMG files are the standard container format for distributing software on macOS, serving a role similar to .exe files on Windows, but with a distinctly Mac-centric workflow. They encapsulate applications, their associated files, and sometimes even custom backgrounds and license agreements, all within a single, mountable volume.
This guide aims to demystify the .dmg installation process, providing a professional, insightful, and engaging walkthrough for users of all experience levels. We’ll delve into what DMGs are, provide a detailed step-by-step installation process, troubleshoot common issues, and offer best practices to ensure a smooth and secure experience when adding new software to your Mac. Embracing the efficiency and elegance of the .dmg file is a fundamental step in mastering your macOS environment.
What is a .DMG File? Demystifying macOS Software Packages
Before diving into the installation mechanics, it’s crucial to understand the nature and purpose of .dmg files. This knowledge forms the foundation for secure and effective software management on your Mac.
The Role of Disk Images in macOS
A .dmg file is essentially a virtual disk drive. When you double-click it, your macOS operating system treats it as if you’ve inserted a physical disk or mounted a USB drive. This virtual disk contains the application and any auxiliary files needed for its installation. The beauty of this approach lies in its self-contained nature and integrity. Developers can package their software, ensuring that all necessary components are delivered together in an uncorrupted state. It’s a snapshot of a file system, compressed and secured, ready to be expanded and utilized.
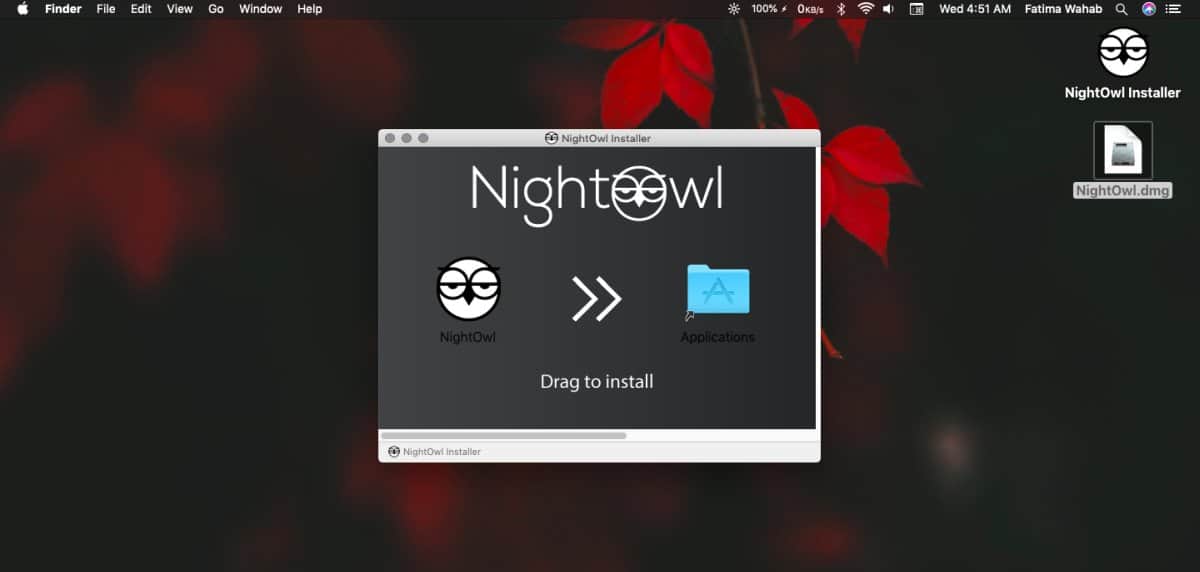
Historically, before widespread high-speed internet, software was distributed on physical CDs or DVDs. .dmg files were designed to mimic these physical media, making the transition to digital distribution seamless for users. They often contain a Read Me file, a license agreement, and most importantly, the application itself, often accompanied by an alias to your Applications folder, making the drag-and-drop installation intuitive.
Why Developers Use DMG Files
Developers favor .dmg files for several compelling reasons, contributing to their ubiquitous presence in the macOS software landscape:
-
Integrity and Compression: DMG files can be compressed, reducing download times and bandwidth usage. Crucially, they also include checksums, which allow macOS to verify the file’s integrity upon download and mounting, ensuring that the software hasn’t been corrupted or tampered with. This is a critical security feature.
-
Ease of Distribution: A single
.dmgfile contains everything required. This simplifies the distribution process for developers and the acquisition process for users, as there’s no need to manage multiple downloads or intricate directory structures. -
User Experience (UX): Many
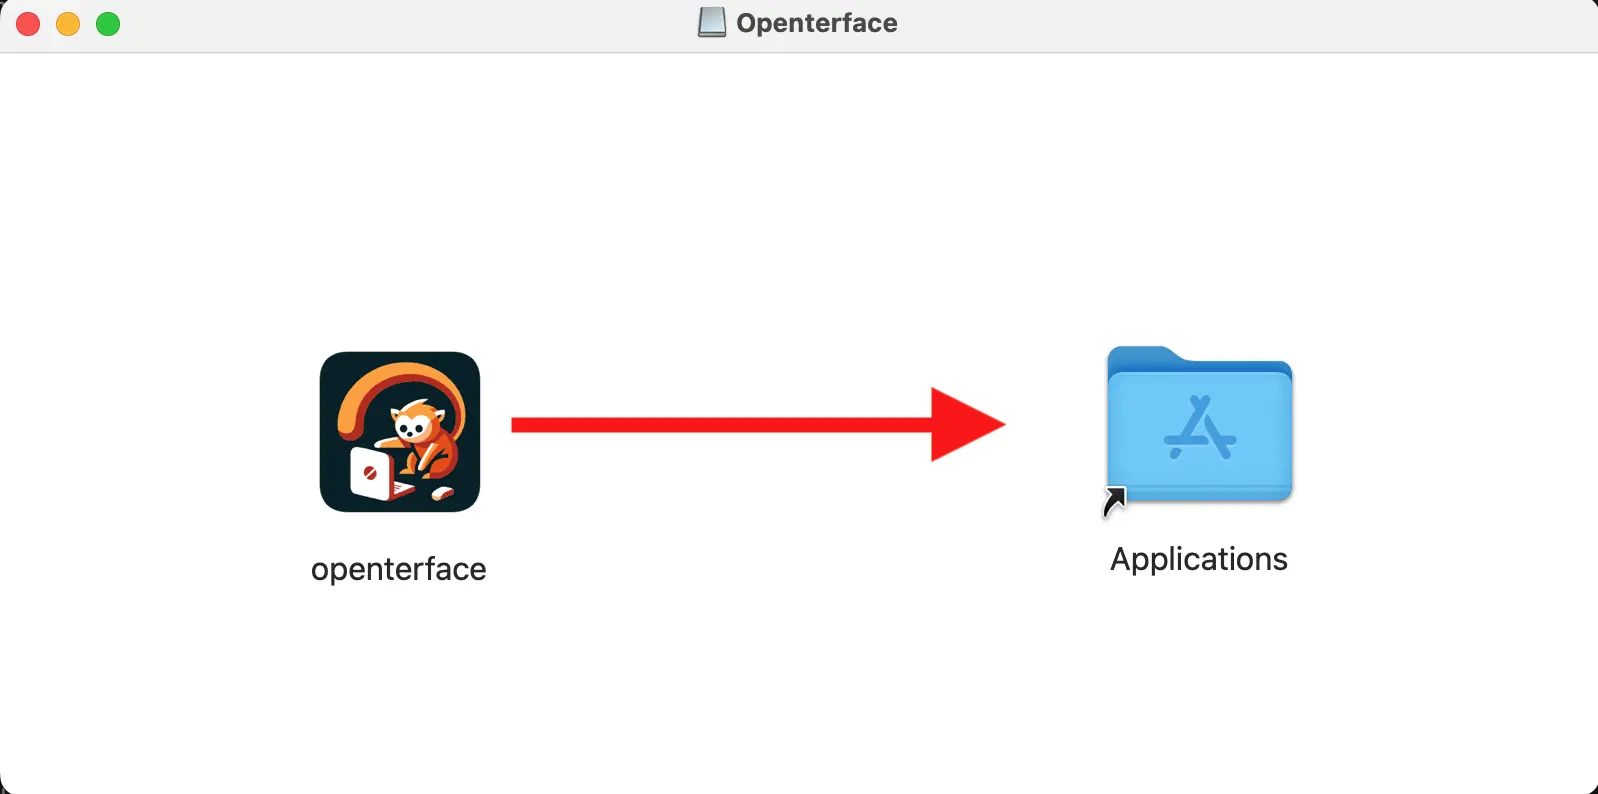
.dmgfiles are crafted with custom backgrounds and intuitive layouts, often featuring an arrow pointing from the application icon to the Applications folder alias. This visual cue makes the installation process incredibly straightforward, even for novices. -
Security Features: Beyond integrity checks, DMGs can be password-protected or encrypted, providing an additional layer of security for proprietary or sensitive software. More commonly, they integrate with macOS Gatekeeper, allowing for developer signing that verifies the origin and integrity of the software.
Understanding these foundational aspects helps demystify the .dmg and reinforces its role as a secure and efficient method for software distribution on macOS.
The Standard Installation Process: A Step-by-Step Walkthrough
Installing a .dmg file is typically a straightforward, intuitive process. By following these steps, you can successfully add new applications to your Mac with confidence.
Downloading and Locating Your DMG File
The first step is always to acquire the .dmg file from a reputable source. This usually means downloading it directly from the software developer’s official website. Avoid downloading software from unofficial or untrusted sites, as these can harbor malicious code.
-
Download: Navigate to the software’s official download page and click the link for the macOS version. Your browser will download the
.dmgfile, usually placing it in yourDownloadsfolder. -
Locate: Once downloaded, you can find the
.dmgfile in yourDownloadsfolder, which is accessible via the Dock, Finder sidebar, or by pressingShift + Command + Din Finder. You can also quickly find recent downloads by clicking the Downloads icon in your browser or the Downloads stack on your Dock.
Mounting the Disk Image
After locating the file, the next step is to “mount” the disk image, which makes its contents accessible to your system.
-
Double-Click: Simply double-click the
.dmgfile. -
Verification and Mounting: macOS will typically verify the disk image for integrity and then mount it. A new Finder window will open, displaying the contents of the virtual disk. You’ll also see the disk image appear on your Desktop (if you have “Hard disks, External disks, CDs, DVDs, and iPods” enabled in Finder preferences to show on the desktop) and in the sidebar of any Finder window, usually under the “Locations” section.
Dragging to Applications: The Core Installation Step
This is the quintessential macOS drag-and-drop installation method.
-
Identify the Application: Inside the mounted
.dmgwindow, you will usually see the application icon. Often, there will also be an alias to yourApplicationsfolder. -
Drag and Drop: Click and drag the application icon directly onto the
Applicationsfolder alias within the.dmgwindow. If there’s no alias, open a new Finder window (Command + N), navigate to yourApplicationsfolder, and drag the app icon from the.dmgwindow into theApplicationsfolder. -
Copying: macOS will then copy the application from the disk image to your
Applicationsfolder. This process might take a few moments, depending on the size of the application. -
Launch: Once copied, the application is installed and ready to be launched from your
Applicationsfolder, Launchpad, or by searching with Spotlight (Command + Space).
Ejecting the Mounted Disk Image
After the application has been successfully copied, it’s good practice to unmount or “eject” the .dmg file.
-
Drag to Trash: Drag the disk image icon from your Desktop to the Trash in the Dock. The Trash icon will temporarily change into an Eject icon.
-
Right-Click/Control-Click: Alternatively, right-click (or Control-click) the disk image icon on your Desktop or in the Finder sidebar and select “Eject [Disk Image Name]”.
-
Finder Sidebar Eject Button: Click the Eject icon next to the disk image in the Finder sidebar.
Ejecting the disk image safely removes it from your system, much like safely removing a USB drive. You can then delete the original .dmg file from your Downloads folder to free up space, as it’s no longer needed once the application is installed.
Navigating Security and Common Challenges
While .dmg installation is generally smooth, macOS’s robust security features, particularly Gatekeeper, sometimes present hurdles. Understanding these mechanisms and how to address common issues is key to a frustration-free experience.
Understanding macOS Gatekeeper and Security Settings
Gatekeeper is a core macOS security feature designed to prevent malicious software from running on your Mac. By default, it allows apps downloaded from the App Store and from “identified developers” (developers who have registered with Apple and signed their apps).
-
Default Settings: You can find these settings by going to
System Settings(orSystem Preferenceson older macOS versions) >Privacy & Security. Under the “Security” section, look for “Allow applications downloaded from:”. The default is typically “App Store and identified developers.” -
How Gatekeeper Intervenes: If you try to open an app from an “unidentified developer,” Gatekeeper will present a warning dialog stating, “‘[App Name]’ can’t be opened because it is from an unidentified developer.” This is not necessarily an indication of malware, but a cautionary flag that Apple hasn’t verified the developer.
Installing Applications from Unidentified Developers
Proceed with caution when installing software from unidentified developers, ensuring you trust the source. If you’re confident in the software’s legitimacy:
-
Bypass First Launch: The first time you try to open such an app from your
Applicationsfolder, you might get the Gatekeeper warning and no option to “Open.” Close this dialog. -
Control-Click to Open: Navigate to your
Applicationsfolder, Control-click (or right-click) the application icon, and select “Open” from the contextual menu. -
Confirmation Dialog: A new dialog will appear, this time offering an “Open” button. Click “Open” to launch the application. macOS will remember your decision for this app, and subsequent launches will not trigger the Gatekeeper warning.
-
Temporarily Allow All (Not Recommended for General Use): In
System Settings>Privacy & Security, there might be an option “Anywhere” or a “Allow Anyway” button if you’ve recently tried to open a blocked app. While this option was present in older macOS versions, modern macOS prioritizes the Control-click method for individual apps for better security. Only change system-wide settings if you understand the security implications.
Troubleshooting Common DMG Installation Issues
Occasionally, you might encounter problems during the DMG installation. Here are some common issues and their solutions:
-
“Disk image is damaged and can’t be opened.”: This error usually means the download was incomplete or corrupted.
- Solution: Delete the
.dmgfile and re-download it. Try a different browser or network connection if the issue persists.
- Solution: Delete the
-
“No mountable file systems.”: Similar to a damaged file, this indicates macOS can’t interpret the
.dmg.- Solution: Re-download the file. Ensure your macOS version meets the software’s requirements.
-
App won’t copy to Applications folder:
- Solution: Check if the
Applicationsfolder is write-protected (highly unlikely for the main folder, but possible for subfolders). Ensure you have enough free disk space. Try dragging the app to a different location (like your Desktop) first, then toApplications.
- Solution: Check if the
-
“Application can’t be opened” or “moved to Trash.”: This might happen if the app itself is corrupted, or if there are leftover files from a previous incomplete installation.
- Solution: Delete the app and re-install. Consider using a dedicated uninstaller if available, or manually checking for app support files in
~/Library/Application Support/and~/Library/Preferences/.
- Solution: Delete the app and re-install. Consider using a dedicated uninstaller if available, or manually checking for app support files in
When Installation Fails: Corrupted Files and Insufficient Space
Beyond the Gatekeeper, two primary culprits for installation failure are file corruption and lack of storage.
-
Corrupted DMG Files: As mentioned, re-downloading is the primary fix. Ensure your internet connection is stable. If you’re using a download manager, try disabling it or downloading directly from the browser.
-
Insufficient Disk Space: Applications, especially complex ones, can require significant storage. If your Mac is running low on space, the copying process will fail.
- Solution: Check your available storage via
About This Mac>Storage(orSystem Information>Storageon older versions). Free up space by deleting unnecessary files, emptying the Trash, or moving large files to external storage. Consider using macOS’s built-in storage management tools (System Settings>General>Storage) to identify and remove large files or unnecessary app data.
- Solution: Check your available storage via
By understanding these security protocols and troubleshooting steps, you can effectively manage almost any .dmg-related challenge.
Post-Installation and Best Practices
Installing an application is just the first step. Proper post-installation management and adherence to best practices ensure a clean, secure, and efficient macOS environment.
Verifying Application Installation
After dragging the application to your Applications folder, it’s always a good idea to verify the installation:
-
Locate in Applications: Open your
Applicationsfolder in Finder and confirm that the newly installed app’s icon is present. -
Launch and Test: Double-click the app icon to launch it. Perform a basic function or two to ensure it’s running correctly and doesn’t immediately crash. This confirms the core installation was successful.
-
Check for Updates: Many applications have an “Check for Updates” option within their menus (e.g., under
[App Name]>Check for Updates). It’s wise to run this after installation, as the downloaded.dmgmight contain an older version.
Removing Installed Applications (and their components)
While DMG installation is simple, uninstallation can be slightly more involved than just dragging the app to the Trash, especially if you want to remove all associated files.
-
Drag to Trash: For most simple apps, dragging the application from the
Applicationsfolder to the Trash (and then emptying the Trash) is sufficient. -
Beyond the App Icon: Many applications create support files, preferences, caches, and logs in various folders within your
~/Library(your user’s Library folder, which is hidden by default).-
To access
~/Library: In Finder, hold down theOptionkey, click theGomenu, and selectLibrary. -
Common Locations for App Support Files:
-
~/Library/Application Support/[App Name] -
~/Library/Caches/[App Name] -
~/Library/Preferences/[App Name].plist(or files containing the app’s bundle identifier) -
~/Library/Logs/[App Name]
-
-
Caution: Manually deleting files from
~/Libraryshould be done carefully to avoid accidentally removing essential system or other application files. Only delete files clearly associated with the uninstalled application.
-
-
Using App Cleaners (Optional): For thorough uninstallation, consider using a reputable third-party app cleaner (e.g., AppCleaner, CleanMyMac X). These tools can scan your system for all files related to an application and offer to remove them, simplifying the process and ensuring a cleaner uninstall.
Keeping Your System Secure: Safe Downloading Habits
The simplicity of DMG installation means that vigilance is your best defense against malware.
-
Official Sources Only: Always download software directly from the developer’s official website. Avoid third-party download sites, torrents, or suspicious links.
-
Read Reviews: Before downloading unfamiliar software, check independent reviews and user feedback.
-
Antivirus/Anti-malware: While macOS has robust built-in security, consider running a reputable antivirus or anti-malware scan occasionally, especially if you frequently download software from less-established sources.
-
Keep macOS Updated: Apple regularly releases security updates. Ensure your macOS is always running the latest version to benefit from the newest protections.

Alternatives to DMG: App Store and Package Installers (.pkg)
While DMGs are prevalent, macOS offers other software distribution methods:
-
Mac App Store: The most secure and straightforward method. Apps from the App Store are vetted by Apple, automatically updated, and sandboxed for security. Installation and uninstallation are handled entirely by the system.
-
Package Installers (.pkg): These are traditional installers that guide you through a wizard-like process. They are often used for larger applications, system utilities, or software that needs to install components in various system locations (e.g., drivers, fonts, command-line tools). Installation involves clicking through steps, agreeing to licenses, and selecting installation locations.
Mastering the .dmg installation process is an essential skill for any Mac user. By understanding what these files are, following best practices, and being mindful of security, you can confidently expand your software library and enhance your macOS experience.