
In an increasingly interconnected digital world, the lines between mobile and desktop computing are blurring. Android Package Kits (APKs), the fundamental format for distributing and installing applications on Android devices, are no longer confined to smartphones and tablets. Many users find themselves needing or wanting to run their favorite Android apps directly on their personal computers, whether for productivity, gaming, development, or simply a larger screen experience. This guide will walk you through the various methods to install APKs on your PC, transforming your desktop into a versatile platform for both Windows and Android applications.
Understanding APKs and the Compelling Need for PC Installation
Before diving into the “how-to,” it’s essential to grasp what an APK is and why its installation on a PC has become such a sought-after capability. This foundational understanding will illuminate the benefits and considerations involved in bridging the gap between mobile and desktop ecosystems.
What is an APK? Unpacking the Android Package Kit
An APK, short for Android Package Kit, is the package file format used by the Android operating system for distribution and installation of mobile apps and middleware. Just like .exe files on Windows or .dmg files on macOS, an APK file contains all the elements that an Android app needs to install correctly on a device. This includes the app’s code, resources, assets, certificates, and manifest file.
When you download an app from the Google Play Store, the process is largely automated; the Play Store handles the download of the APK and its subsequent installation. However, sideloading an APK involves manually downloading the file from a source other than an official app store and installing it directly. This flexibility is what allows for the installation of apps not available in specific regions, beta versions, or applications from independent developers.
Why Install Android Apps on Your PC? Unlocking New Possibilities
The desire to run Android apps on a PC stems from a multitude of practical and strategic advantages. It’s not merely a technical novelty but a solution that addresses various user needs and enhances workflow efficiency.
- Enhanced Productivity and Multitasking: Many Android productivity apps offer streamlined interfaces and unique features that might not be available or optimized on their desktop counterparts. Running these alongside your traditional PC software allows for seamless multitasking. Imagine using a mobile-first note-taking app or a specific communication tool directly from your desktop without constantly switching between devices.
- Superior Gaming Experience: Mobile gaming has evolved dramatically, with many titles boasting console-quality graphics and complex gameplay. Playing these games on a larger monitor with a keyboard and mouse (or even a dedicated controller) offers a significantly more immersive and precise experience than on a small touchscreen. Emulators often provide features like key mapping, allowing for custom control schemes.
- App Development and Testing: For Android app developers, running APKs on a PC is an invaluable tool. It allows them to test their applications in a controlled environment, debug issues, and ensure compatibility across various Android versions and device configurations without needing a physical phone for every iteration. This accelerates the development cycle and improves app quality.
- Access to Region-Locked or Unavailable Apps: Sometimes, certain Android applications are geo-restricted or simply not available on official desktop platforms. Installing the APK on a PC bypasses these limitations, granting access to a wider range of software.
- Resource Management and Device Preservation: Running resource-intensive Android apps on a PC can offload the strain from your mobile device, preserving its battery life, processing power, and storage. It’s also useful if your phone’s screen is broken or if you prefer to keep your personal device clean of certain apps.
- Convenience and Unified Workspace: For many, the ultimate goal is a unified digital workspace. Being able to access all your essential applications, regardless of their native platform, from a single powerful machine enhances convenience and reduces friction in your daily digital interactions.
These compelling reasons highlight why mastering the art of installing APKs on your PC is a valuable skill in today’s tech landscape.
Method 1: Harnessing the Power of Android Emulators
The most established and widely used method for running Android apps on a PC involves using Android emulators. These software applications create a virtual Android environment within your Windows or macOS operating system, allowing Android apps to run as if they were on a native device.
Popular Android Emulators: Your Gateway to Mobile Apps
The market for Android emulators is robust, with several excellent options catering to different needs, from hardcore gamers to developers and casual users. Each offers a unique blend of features, performance, and user interface.
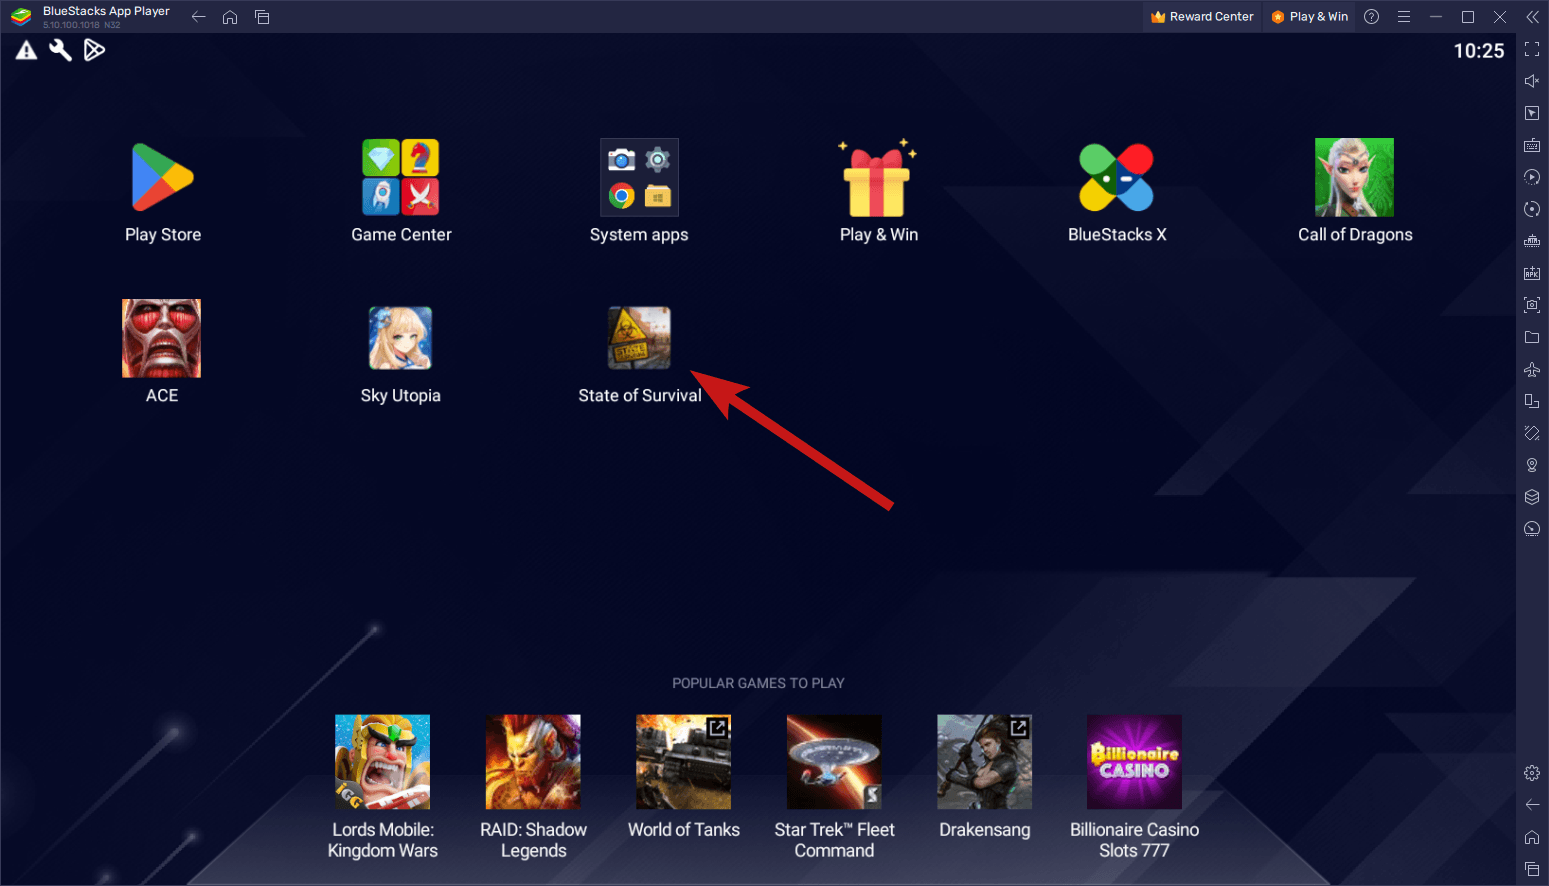
- BlueStacks: Often considered the most popular Android emulator, BlueStacks is renowned for its user-friendly interface and excellent performance, particularly for gaming. It comes pre-installed with the Google Play Store and offers features like key mapping, multi-instance capabilities, and high frame rates.
- NoxPlayer: Another strong contender, NoxPlayer is optimized for gaming performance and offers a clean, intuitive interface. It supports various Android versions, allows for custom key controls, and includes features like macro recording and script automation.
- LDPlayer: Specifically designed with mobile gaming in mind, LDPlayer boasts superior performance and a lightweight design. It’s known for its low resource consumption and high frame rates, making it a favorite among competitive mobile gamers.
- Memu Play: Offering a good balance of features and performance, Memu Play supports multiple Android kernels and allows for running multiple instances simultaneously. It’s versatile enough for both gaming and general app usage.
- Android Studio Emulator: While primarily a development tool, Android Studio (Google’s official IDE for Android development) includes a powerful and highly customizable emulator. It’s ideal for developers who need to test apps across various Android versions and device configurations. However, it requires a deeper technical understanding to set up.
When choosing an emulator, consider your primary use case (gaming, productivity, development), your PC’s specifications, and the specific features you prioritize.
Step-by-Step Guide for Emulator Installation and APK Sideloading
The general process for installing an Android emulator and subsequently running APKs is quite straightforward across most platforms. Here’s a generic guide that applies to the majority of popular emulators:
-
Download Your Chosen Emulator:
- Visit the official website of the emulator you’ve selected (e.g., BlueStacks.com, NoxPlayer.com).
- Locate the download button for the Windows version of the software.
- Download the installer file to your PC.
-
Install the Emulator:
- Double-click the downloaded installer file.
- Follow the on-screen instructions. This typically involves accepting the license agreement, choosing an installation directory, and allowing the installer to make changes to your system.
- The installation process might download additional files and could take a few minutes, depending on your internet speed and PC performance.
- Once installed, the emulator will launch automatically or prompt you to launch it.
-
Initial Setup and Google Account Integration:
- Upon first launch, most emulators will guide you through an initial setup similar to setting up a new Android phone.
- You’ll typically be prompted to sign in with your Google account. This step is crucial as it grants you access to the Google Play Store within the emulator. If you don’t have a Google account, you can create one during this process.
- Complete any other setup steps, such as language selection or tutorial walkthroughs.
-
Installing Apps via Google Play Store (Recommended for most cases):
- Once signed in with your Google account, open the “Play Store” app from the emulator’s home screen.
- Search for the app you wish to install, just as you would on an Android phone.
- Click “Install” and wait for the app to download and install within the emulator.
- Once installed, the app icon will appear on the emulator’s home screen, and you can launch it like any other application.
-
Sideloading APKs (For apps not on Play Store or specific versions):
- Download the APK: Obtain the APK file from a trusted source. Be extremely cautious when downloading APKs from third-party websites, as they can sometimes contain malware or modified code. Prioritize reputable sites like APKMirror or official developer websites.
- Drag and Drop: The simplest method for sideloading is often to drag the downloaded
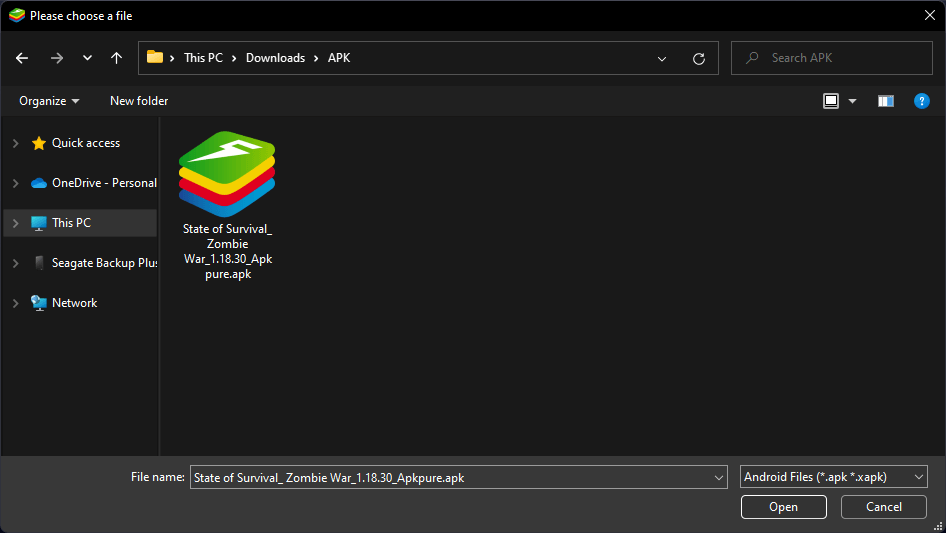
.apkfile directly from your PC’s file explorer and drop it onto the open emulator window. Most emulators will automatically detect the APK and initiate the installation process. - Manual Installation from within the Emulator: Some emulators offer an “Install APK” button or an option in their menu. Click this, navigate to where you saved the APK on your PC, select it, and the emulator will install it.
- Using the Emulator’s Browser: You can also open the web browser within the emulator, navigate to the website hosting the APK, and download it directly into the virtual Android environment. Then, use a file manager within the emulator to locate and install the APK.
After successful installation, the app will be accessible from the emulator’s home screen or app drawer. You can then configure its settings, grant permissions, and start using it as if it were running on an actual Android device.
Method 2: Windows Subsystem for Android (WSA) – A Native Approach
For users running Windows 11, the Windows Subsystem for Android (WSA) offers a more integrated and native way to run Android applications directly on your PC, without the need for a full-fledged third-party emulator. WSA essentially creates a compatibility layer that allows Android apps to run seamlessly alongside your Windows applications.
What is WSA? The Native Integration of Android on Windows 11
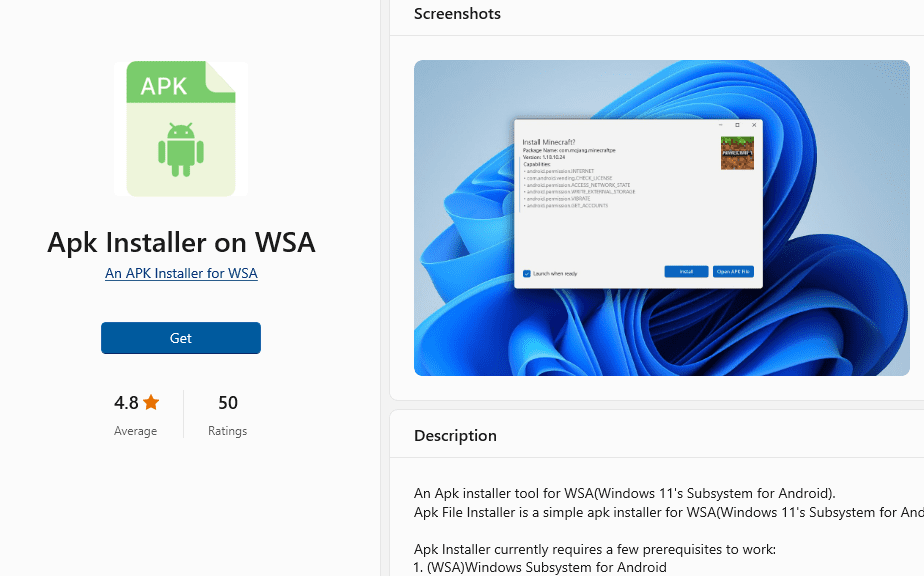
Windows Subsystem for Android (WSA) is a Microsoft-developed feature for Windows 11 that enables Android applications to run natively on the operating system. Unlike emulators that simulate an entire Android device, WSA operates more like a virtual machine or a compatibility layer that bridges Android Open Source Project (AOSP) and the Windows kernel. It runs silently in the background, consuming resources only when Android apps are active.
WSA is designed to work in conjunction with the Amazon Appstore, providing a curated selection of Android apps. However, its true power lies in the ability to sideload APKs, allowing users to install almost any Android application outside of the Amazon Appstore.
Requirements for WSA:
- Windows 11: WSA is exclusively available on Windows 11.
- Minimum 8GB RAM (16GB recommended): For smooth performance.
- SSD Storage: For faster loading times.
- Virtualization Enabled: You must have virtualization (Intel VT-x or AMD-V) enabled in your PC’s BIOS/UEFI settings.
- Microsoft Store Version: Ensure your Microsoft Store app is up to date.
Setting Up WSA on Windows 11: A Seamless Integration
Setting up WSA involves a few more steps than installing a simple emulator, but the payoff is a more native and integrated experience.
-
Enable Virtual Machine Platform:
- Search for “Turn Windows features on or off” in the Windows search bar and open it.
- Scroll down and ensure “Virtual Machine Platform” and “Windows Hypervisor Platform” are checked.
- Click “OK” and restart your computer if prompted.
-
Install the Amazon Appstore:
- Open the Microsoft Store on your Windows 11 PC.
- Search for “Amazon Appstore” and click “Install.”
- This will automatically download and install the Windows Subsystem for Android in the background. The download can be quite large (over 1GB) and might take some time.
- Once installed, you’ll see the Amazon Appstore icon in your Start Menu. Launching it for the first time will complete the WSA setup.
-
Enable Developer Mode in WSA:
- Open the Windows Start Menu, search for “Windows Subsystem for Android™️,” and launch its settings.
- In the WSA settings window, scroll down to the “Developer mode” section and toggle it “On.”
- Note the IP address displayed under “IP address” (or click “Refresh” if it’s not present). You’ll need this for sideloading.
Sideloading APKs with WSA: Expanding Your App Library
With WSA set up and developer mode enabled, you can now sideload APKs. This process typically involves using the Android Debug Bridge (ADB) tool.
-
Download ADB Platform Tools:
- Go to the official Android Developers website to download the “SDK Platform Tools” for Windows.
- Extract the downloaded ZIP file to an easily accessible location on your PC (e.g.,
C:adb).
-
Download Your Desired APK:
- As with emulators, download the APK file from a trusted source (e.g., APKMirror, official developer websites) and save it in a location you can easily access, preferably within the ADB folder for convenience (e.g.,
C:adbyourapp.apk).
- As with emulators, download the APK file from a trusted source (e.g., APKMirror, official developer websites) and save it in a location you can easily access, preferably within the ADB folder for convenience (e.g.,
-
Connect to WSA via ADB:
- Open Command Prompt (CMD) or Windows Terminal (PowerShell or Command Prompt) as an administrator.
- Navigate to the directory where you extracted ADB. For example, type:
cd C:adb - Connect ADB to your running WSA instance. Use the IP address you noted from WSA settings:
adb connect <WSA_IP_Address>(e.g.,adb connect 127.0.0.1:58526). - You should see a message indicating “connected to
“.
-
Install the APK:
- Once connected, install the APK using the following command, replacing
yourapp.apkwith the actual name of your APK file:
adb install yourapp.apk - You should see a “Success” message if the installation is successful.
- Once connected, install the APK using the following command, replacing
-
Launch the App:
- After installation, the Android app will appear directly in your Windows Start Menu alongside your other Windows applications. You can pin it to your Start Menu or Taskbar, or launch it directly from the search bar.
While ADB provides a powerful command-line method, there are also third-party GUI tools designed to simplify sideloading for WSA, such as WSATools available in the Microsoft Store. These tools abstract away the command-line interface, making the process more user-friendly for those less comfortable with CMD.
Troubleshooting Common Issues When Installing APKs on PC
Despite the advancements in emulators and WSA, you might encounter issues during installation or while running Android apps on your PC. Here are some common problems and their solutions:
Performance Lags and Stuttering
- Allocate More Resources: Emulators often allow you to allocate more RAM and CPU cores within their settings. Increase these values if your PC has sufficient resources to spare.
- Enable Virtualization: Ensure virtualization (Intel VT-x or AMD-V) is enabled in your BIOS/UEFI settings. This is crucial for optimal performance for both emulators and WSA.
- Update Graphics Drivers: Outdated graphics drivers can severely impact performance. Make sure your GPU drivers are up to date from NVIDIA, AMD, or Intel’s official websites.
- Close Background Applications: Resource-intensive applications running in the background can compete with your emulator or WSA. Close unnecessary programs to free up system resources.
- Choose a Lighter Emulator: If you’re struggling with performance, consider switching to a more lightweight emulator like LDPlayer or NoxPlayer, which are often optimized for speed.
Installation Errors
- “App Not Installed” Error:
- Corrupted APK: The APK file might be corrupted. Try downloading it again from a different, trusted source.
- Incompatible Android Version: The app might require a newer or older Android version than what your emulator is running. Check the app’s requirements and adjust your emulator’s Android version if possible.
- Insufficient Storage: Ensure there’s enough storage space within the emulator’s virtual disk or on your PC’s drive for WSA.
- Conflicting App: Sometimes, a previous version or a different build of the same app might conflict. Uninstall any existing versions before attempting a new installation.
- Emulator/WSA Installation Failure:
- Administrator Rights: Ensure you are running the emulator installer or Command Prompt (for ADB) with administrator privileges.
- Antivirus Interference: Your antivirus software might be blocking the installation. Temporarily disable it (use caution!) and try again. Remember to re-enable it afterward.
- System Requirements: Double-check that your PC meets the minimum system requirements for the chosen emulator or WSA.
Network Connectivity Problems
- Check PC’s Internet Connection: Ensure your host PC has a stable internet connection.
- Emulator Network Settings: Most emulators bridge your PC’s network connection automatically. If you’re having issues, check the emulator’s network settings to ensure it’s configured correctly.
- Firewall Settings: Your Windows Firewall or a third-party firewall might be blocking the emulator or WSA from accessing the internet. Create an exception for the emulator/WSA in your firewall settings.
- WSA Specifics: For WSA, ensure there are no VPNs or proxy settings interfering with its network access, especially if you’re trying to access the Amazon Appstore or use ADB.
By systematically addressing these common issues, you can often resolve most problems and enjoy a smooth experience running Android apps on your PC.
Conclusion: Bridging the Divide Between Mobile and Desktop
The ability to install and run APKs on a PC represents a significant step towards a more unified and flexible computing experience. Whether you’re a gamer seeking a larger display and better controls, a developer needing robust testing environments, or a user simply wishing to leverage your favorite mobile apps on a desktop, the options available today are both powerful and accessible.
Android emulators like BlueStacks and NoxPlayer offer a mature and versatile platform, providing a full virtual Android environment with extensive customization and performance optimizations for a wide range of users. For those on Windows 11, the Windows Subsystem for Android (WSA) presents a more native and deeply integrated solution, allowing Android applications to blend almost seamlessly into the Windows ecosystem.
While the setup for each method has its nuances, the underlying principle is about expanding your digital horizons. Always prioritize security by downloading APKs from trusted sources and keeping your emulator or WSA environment updated. With this comprehensive guide, you now have the knowledge and tools to confidently transform your PC into a hybrid powerhouse, effortlessly running the best of both Windows and Android worlds. Embrace the flexibility and unlock new dimensions of productivity and entertainment from your desktop.
aViewFromTheCave is a participant in the Amazon Services LLC Associates Program, an affiliate advertising program designed to provide a means for sites to earn advertising fees by advertising and linking to Amazon.com. Amazon, the Amazon logo, AmazonSupply, and the AmazonSupply logo are trademarks of Amazon.com, Inc. or its affiliates. As an Amazon Associate we earn affiliate commissions from qualifying purchases.