
The landscape of digital finance has evolved dramatically, moving beyond traditional banking to embrace the decentralized world of cryptocurrencies and blockchain technology. At the heart of this revolution lies the concept of self-custody – the ability for individuals to directly control their digital assets without relying on a third party. While cryptocurrency exchanges like Coinbase offer convenience, a dedicated self-custody solution like Coinbase Wallet provides a different, often more powerful, level of engagement with the Web3 ecosystem.
Coinbase Wallet is more than just a place to store digital currency; it’s a non-custodial software application that serves as your gateway to the decentralized internet. It empowers users to securely store cryptocurrencies and NFTs, explore decentralized applications (DApps), participate in decentralized finance (DeFi) protocols, and truly own their digital identity. This guide will walk you through the technical process of setting up your Coinbase Wallet, demystifying the essential features and security considerations that are paramount in the digital realm. Understanding how to navigate this tool is a fundamental step for anyone looking to embrace the full potential of Web3.

Understanding Coinbase Wallet: Beyond the Exchange
To truly appreciate the utility and design of Coinbase Wallet, it’s crucial to understand its core identity and how it distinguishes itself from other familiar platforms. It represents a significant shift in how users interact with their digital assets, placing emphasis on personal responsibility and direct control.
Differentiating Coinbase Exchange from Coinbase Wallet
Many users initially confuse Coinbase Wallet with the Coinbase Exchange, primarily due to their shared branding. However, their underlying technological architectures and operational philosophies are fundamentally different. Coinbase Exchange is a custodial platform. When you hold assets on the exchange, Coinbase acts as a custodian, meaning they hold the private keys to your cryptocurrencies. This offers convenience, as Coinbase handles security, key management, and recovery processes. In essence, you trust the exchange with your funds.
Coinbase Wallet, by contrast, is a non-custodial wallet. This distinction is paramount in the blockchain space. With Coinbase Wallet, you – and only you – hold the private keys to your digital assets. This empowers you with ultimate control and ownership, often summarized by the adage “not your keys, not your crypto.” The wallet application itself simply provides a user interface to interact with the blockchain using your privately held keys. The responsibility for securing these keys, typically represented by a “seed phrase” or “recovery phrase,” falls entirely on you. This technical difference has profound implications for digital security and autonomy.
Key Features and Technological Advantages
Coinbase Wallet is engineered to be a versatile and secure portal to the decentralized web. Its technological advantages extend beyond simple storage:
-
Multi-Chain Support: Unlike many wallets limited to a single blockchain, Coinbase Wallet supports a vast array of networks, including Ethereum, Polygon, BNB Chain, Avalanche, Solana, and many more. This technological flexibility allows users to manage assets across diverse ecosystems from a single interface, significantly enhancing interoperability.
-
Integrated DApp Browser: A built-in Web3 browser allows users to directly connect to and interact with thousands of decentralized applications (DApps) without ever leaving the wallet interface. This seamless integration streamlines access to DeFi protocols, NFT marketplaces, blockchain games, and other Web3 services, acting as a gateway to the decentralized internet.
-
NFT Management: Beyond fungible tokens, Coinbase Wallet provides robust support for non-fungible tokens (NFTs). Users can view, send, and receive ERC-721 and ERC-1155 tokens, giving them a dedicated space to manage their digital collectibles and art.
-
Biometric Security: The wallet leverages device-level biometric authentication (Face ID, Touch ID) and PIN protection, adding a critical layer of security for everyday access to the application. While the seed phrase remains the ultimate recovery mechanism, biometrics secure the app from unauthorized access on your device.
-
ENS Integration: Support for the Ethereum Name Service (ENS) allows users to replace complex hexadecimal wallet addresses with human-readable names (e.g.,
yourname.eth). This is a significant user experience enhancement, reducing the risk of errors during transactions and making blockchain interactions more intuitive. -
WalletConnect Compatibility: Coinbase Wallet seamlessly integrates with WalletConnect, an open protocol that enables secure connections between mobile wallets and desktop DApps. This technical standard allows users to authorize transactions on a desktop browser using the security of their mobile wallet, bridging the gap between different computing environments.
These features highlight Coinbase Wallet’s design as a sophisticated technological tool for navigating the complex and rapidly evolving Web3 landscape, offering both robust security features and broad interoperability.
Step-by-Step Guide to Setting Up Your Coinbase Wallet
Creating your Coinbase Wallet is a straightforward process, but it requires careful attention to detail, particularly regarding the security of your recovery phrase. This section outlines the technical steps from installation to initial setup.
Downloading and Initializing the Application
The first step is to acquire the official Coinbase Wallet application for your device. It is available on major mobile app stores:
-
Download from Official Sources: Navigate to the Apple App Store (for iOS) or Google Play Store (for Android) and search for “Coinbase Wallet.” Ensure you download the application published by “Coinbase, Inc.” to avoid malicious imposters.
-
Install the App: Tap “Install” or “Get” to download and install the application on your smartphone.
-
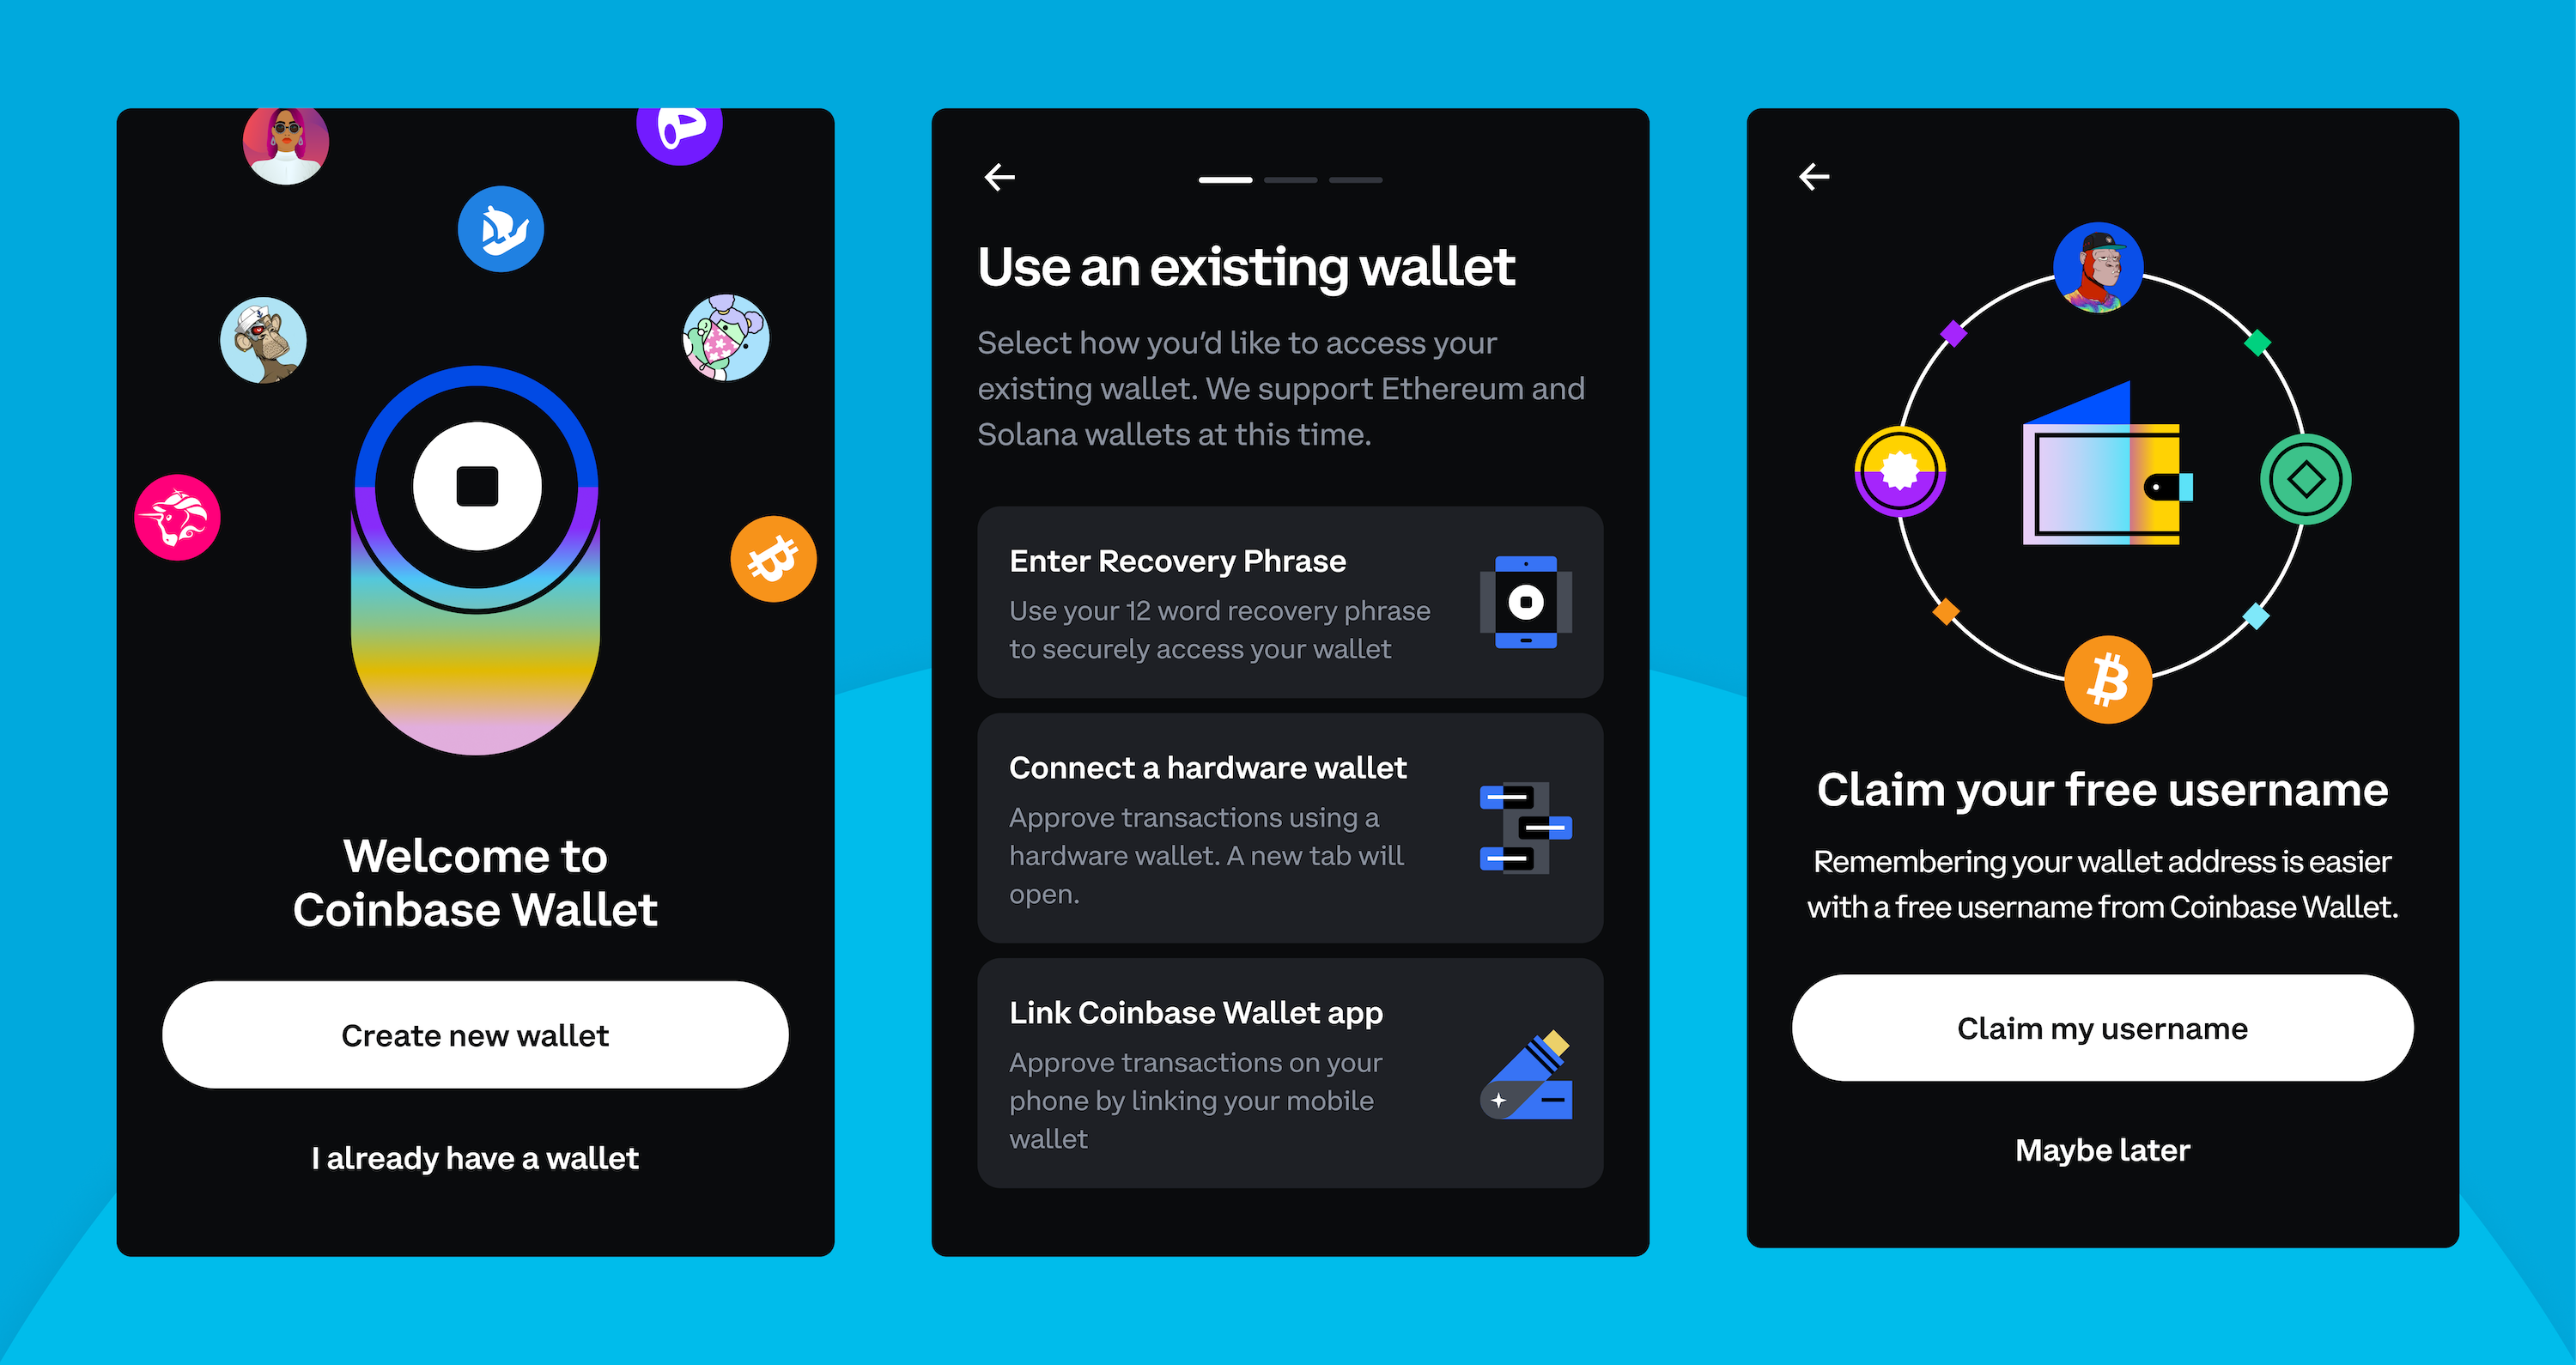
Launch the App: Once installed, open the Coinbase Wallet app. You will be greeted with a welcome screen.
-
Choose Your Option: You will typically be presented with two options: “Create a new wallet” or “Restore an existing wallet.” For new users, select “Create a new wallet.”
Generating Your New Wallet and Seed Phrase
This is the most critical part of the setup process, directly involving the cryptographic foundation of your wallet’s security.
-
Agree to Terms: Review and accept the Terms of Service and Privacy Policy.
-
Choose a Username: You’ll be prompted to create a username. This is an optional public handle that makes it easier for others to find you (similar to ENS, but within the Coinbase Wallet ecosystem). You can choose to skip this or make it private later.
-
Secure Your Wallet (Seed Phrase Generation): This is where the wallet generates your unique 12-word recovery phrase (also known as a seed phrase or mnemonic phrase). This sequence of words is the master key to your wallet.
-
Understand Its Significance: The seed phrase is a human-readable representation of your private key. Anyone with access to your seed phrase can gain full control over your funds, even if they don’t have your device. Conversely, if you lose your device but have your seed phrase, you can restore your wallet on a new device.
-
Write It Down – Physically: The app will display your 12-word phrase. Do not take a screenshot. Do not store it digitally (e.g., in a cloud service, email, or photo). The safest method is to meticulously write down each word, in the correct order, on a piece of paper. Consider writing it down multiple times and storing these copies in separate, secure, physical locations (e.g., a home safe, a safety deposit box).
-
Verify Your Phrase: The app will then ask you to confirm your seed phrase by having you re-enter certain words or the entire sequence. This step ensures you have accurately recorded it.
-
Setting Up Biometric Security and PIN
After securing your seed phrase, you’ll set up your immediate access controls.
-
Create a PIN: You will be prompted to create a 6-digit PIN. This PIN is required every time you open the wallet app, providing a quick security layer for your device.
-
Enable Biometrics (Optional but Recommended): If your device supports it, you’ll have the option to enable Face ID or Touch ID. This allows for convenient and secure access to your wallet using your biometrics, bypassing the PIN for quicker entry. It’s a robust technical feature that adds security without compromising user experience.
Understanding Your Wallet Address and QR Code
Once your wallet is set up, you’ll have a unique public address.
-
Locate Your Address: On the main screen, you’ll find your wallet’s public address (a long string of alphanumeric characters, e.g.,
0x...). This address is what you share with others when you want to receive cryptocurrency. It’s safe to share your public address. -
QR Code Functionality: The wallet also provides a QR code representation of your public address, making it easy for others to scan and send funds to you. This technological convenience minimizes typing errors.
Mastering Your Coinbase Wallet’s Security and Functionality

Creating your wallet is just the first step. True mastery lies in understanding its ongoing functionality and, most importantly, maintaining robust digital security practices. This section delves into crucial operational aspects and advanced security considerations.
The Imperative of Seed Phrase Management
Reiterating the importance of your seed phrase is not an exaggeration; it is the single most critical security component of your non-custodial wallet.
-
Irreversible Asset Loss: Unlike traditional bank accounts where you can reset a password, losing your seed phrase for a non-custodial wallet means permanent and irreversible loss of your assets. There is no “forgot password” option. The cryptographic nature of the seed phrase means it cannot be recovered by Coinbase or any other entity.
-
Best Practices for Storage:
-
Offline Storage: Never store your seed phrase digitally. This includes photos, cloud storage, emails, or text documents. Digital storage exposes it to hacking risks.
-
Multiple Physical Backups: Write it down precisely and store multiple copies in physically secure locations that are known only to you.
-
Fire/Water/Theft Protection: Consider laminating your written copies or engraving them on metal plates to protect against environmental damage and theft.
-
No Sharing: Never, under any circumstances, share your seed phrase with anyone. Anyone asking for it is likely attempting to scam you. Coinbase support will never ask for your seed phrase.
-
Connecting to Decentralized Applications (DApps)
Coinbase Wallet is designed as a portal to Web3, enabling seamless interaction with DApps.
-
In-App Browser: The integrated DApp browser allows you to navigate to Web3 websites directly. When you visit a DApp, it will often prompt you to “Connect Wallet.” This establishes a secure, temporary connection between your wallet and the DApp.
-
WalletConnect: For DApps accessed on a desktop browser, WalletConnect is a key technology. The DApp will display a QR code, which you can scan with your Coinbase Wallet’s built-in scanner. This securely links your mobile wallet to the desktop DApp, allowing you to authorize transactions on your phone while viewing the interface on your computer.
-
Understanding Permissions: When connecting to a DApp, it will request certain permissions (e.g., to view your wallet balance, to propose transactions). Always review these permissions carefully before approving them. Be wary of DApps requesting excessive or unusual permissions. Interacting with smart contracts requires a clear understanding of what you are authorizing.
Sending and Receiving Digital Assets
The core function of any wallet is to manage transactions.
-
Receiving Assets: To receive cryptocurrency or NFTs, simply provide your public wallet address (or QR code) to the sender. Ensure the sender uses the correct network (e.g., if you’re receiving ETH, ensure it’s sent on the Ethereum network). Sending assets to the wrong network can result in permanent loss.
-
Sending Assets:
-
Select Asset: Choose the cryptocurrency or NFT you wish to send.
-
Enter Recipient Address: Carefully input or paste the recipient’s public wallet address. Double-check every character; a single mistake can send your funds to an unrecoverable address.
-
Specify Amount: Enter the amount you wish to send.
-
Review Network Fees (Gas): On networks like Ethereum, transactions incur “gas fees” paid to network validators. These fees fluctuate based on network congestion. Coinbase Wallet will display an estimated fee. Understand that these are separate from the amount you’re sending and must be covered by your wallet balance in the network’s native currency (e.g., ETH for Ethereum transactions).
-
Confirm Transaction: After reviewing all details (recipient, amount, fee), confirm the transaction using your PIN or biometrics. Once broadcasted to the blockchain, transactions are generally irreversible.
-
Managing NFTs and Other Digital Collectibles
Coinbase Wallet offers a dedicated section for viewing and managing your non-fungible tokens.
-
Dedicated Tab: Navigate to the “NFTs” or “Collectibles” tab within your wallet. Here, you’ll see all the NFTs associated with your wallet address across supported chains.
-
Integration with Marketplaces: While you can view NFTs in your wallet, actual buying and selling typically occur on dedicated NFT marketplaces (e.g., OpenSea, Rarible) accessed via the DApp browser. Your Coinbase Wallet connects to these marketplaces, allowing you to sign transactions for purchases, sales, or transfers.
-
Understanding Standards: Most NFTs adhere to specific technical standards like ERC-721 or ERC-1155 on Ethereum, which dictate how they are created and managed on the blockchain. Coinbase Wallet is built to interpret and display these standards correctly.
Advanced Tips for Optimal Wallet Experience and Security
To maximize the utility and security of your Coinbase Wallet, consider incorporating these advanced practices into your digital asset management strategy. These tips delve deeper into the technological nuances of self-custody.
Integrating with Hardware Wallets (Optional but Recommended)
For users holding significant amounts of digital assets, integrating with a hardware wallet represents the pinnacle of digital security.
-
Enhanced Cold Storage: Hardware wallets (e.g., Ledger, Trezor) are physical devices designed to store your private keys offline. This “cold storage” method dramatically reduces the risk of online theft, as your keys are never exposed to an internet-connected device.
-
Interoperability: Coinbase Wallet, while a software wallet, often supports connecting to hardware wallets. In this setup, Coinbase Wallet acts as the user interface for viewing balances and initiating transactions, but the critical act of signing transactions (using your private key) occurs securely on the hardware device. This combination offers the best of both worlds: the convenience of a software wallet with the superior security of a hardware wallet. It creates a robust multi-layered security architecture.
Regular Software Updates and Threat Awareness
Staying vigilant against evolving digital threats is crucial in the crypto space.
-
Importance of Updates: Always keep your Coinbase Wallet application updated to the latest version. Software updates often include critical security patches, bug fixes, and new features that enhance both performance and protection against newly discovered vulnerabilities. Developers continuously work to harden their software, and users must follow suit by updating.
-
Threat Awareness:
-
Phishing: Be wary of emails, messages, or websites impersonating Coinbase or other crypto services. Always verify URLs and sender identities. Never click suspicious links.
-
Malicious DApps: Exercise caution when interacting with unknown DApps. Research them thoroughly before connecting your wallet, as malicious DApps can attempt to trick you into signing transactions that drain your funds.
-
Social Engineering: Scammers often use psychological manipulation to trick users into revealing their seed phrase or private keys. Remember: no legitimate service will ever ask for this information.
-
Utilizing Multiple Wallets for Different Purposes
A common security strategy in cybersecurity is compartmentalization, and this applies effectively to crypto wallets.
-
Security Through Isolation: Consider having multiple Coinbase Wallets (or other non-custodial wallets) for different purposes. For instance, you might use one wallet for daily DApp interactions and small transactions (a “hot wallet”) and another, more secure wallet for long-term holdings or larger sums (potentially linked to a hardware wallet, a “cold wallet”).
-
Minimizing Exposure: If one wallet is ever compromised (e.g., through a malicious DApp interaction), the exposure of your total assets is limited. This architectural approach to asset management reduces systemic risk.
Conclusion
Creating a Coinbase Wallet is a fundamental step into the world of decentralized finance and the broader Web3 ecosystem. It provides a powerful, non-custodial tool that puts you in direct control of your digital assets. While the setup process is relatively straightforward, the true power and security of this technology lie in understanding its underlying principles and diligently adhering to best practices for seed phrase management, DApp interaction, and ongoing security awareness.
Embracing a self-custody wallet like Coinbase Wallet means accepting a greater degree of personal responsibility. However, this responsibility comes with unparalleled freedom and autonomy over your digital wealth, bypassing traditional intermediaries. As you continue to explore the innovative applications and possibilities within Web3, remember that continuous learning and a proactive approach to digital security are your most valuable assets. Your Coinbase Wallet is not just an app; it’s your personal portal to the future of the internet.
aViewFromTheCave is a participant in the Amazon Services LLC Associates Program, an affiliate advertising program designed to provide a means for sites to earn advertising fees by advertising and linking to Amazon.com. Amazon, the Amazon logo, AmazonSupply, and the AmazonSupply logo are trademarks of Amazon.com, Inc. or its affiliates. As an Amazon Associate we earn affiliate commissions from qualifying purchases.