PHP, a widely-used open-source general-purpose scripting language, has been the backbone of countless dynamic websites and web applications for decades. From powering the world’s most popular CMS, WordPress, to driving large-scale e-commerce platforms and bespoke web solutions, PHP’s versatility and robust ecosystem make it an indispensable tool for web developers. If you’re looking to dive into web development, manage a WordPress site, or simply understand how server-side applications function, installing PHP is often your first crucial step. This comprehensive guide will walk you through the various methods of installing PHP across different operating systems, catering to both beginners seeking a quick setup and experienced developers needing more granular control.
Understanding PHP and Its Prerequisites
Before we embark on the installation journey, it’s essential to grasp what PHP is, why it’s fundamental to web development, and the components that typically comprise a functional PHP environment. This foundational understanding will help you choose the most appropriate installation method for your specific needs, whether it’s for local development, staging, or a production server.
What is PHP and Why Do You Need It?
PHP, an acronym for “PHP: Hypertext Preprocessor,” is primarily designed for web development. It’s an interpreted language, meaning the code is executed directly by the PHP interpreter without requiring prior compilation. This characteristic simplifies the development workflow, allowing for rapid iteration and testing.
At its core, PHP excels at server-side scripting. When a user requests a web page that contains PHP code, the web server (like Apache or Nginx) passes the request to the PHP interpreter. The interpreter processes the PHP code, generates dynamic HTML content (or other data), and then sends this generated content back to the web server, which finally delivers it to the user’s browser. This process allows for interactive websites, user authentication, database integration, and a myriad of other features that static HTML pages cannot offer.
You need PHP if you plan to:
- Develop Dynamic Websites: Create interactive forms, user accounts, personalized content, and more.
- Run Content Management Systems (CMS): Power popular platforms like WordPress, Drupal, Joomla, and Magento.
- Build Web Applications: Construct robust applications ranging from social networks to business dashboards.
- Integrate with Databases: Interact seamlessly with databases such as MySQL, PostgreSQL, SQLite, and more to store and retrieve data.
- Handle Server-Side Logic: Manage sessions, cookies, file uploads, and other back-end operations.
Its relatively low learning curve, extensive documentation, and vast community support make PHP an excellent choice for both newcomers and seasoned professionals in the “Tech” landscape.
Key Components of a PHP Environment
A fully functional PHP environment typically involves several interconnected components working in harmony. Understanding these will demystify the installation process and help you troubleshoot potential issues.
- PHP Interpreter: This is the heart of the PHP environment. It’s the executable program responsible for reading, parsing, and executing PHP code. Different versions of PHP (e.g., PHP 7.4, 8.0, 8.2) have varying features and performance characteristics, and specific projects might require particular versions.
- Web Server: A web server’s role is to accept requests from web browsers and deliver web pages. For PHP applications, the web server acts as an intermediary, forwarding PHP files to the PHP interpreter for processing. The most common web servers used with PHP are:
- Apache HTTP Server: Known for its flexibility, rich module ecosystem, and widespread adoption. It often integrates with PHP via
mod_phporphp-fpm. - Nginx: A high-performance web server often used as a reverse proxy. It typically works with PHP through FastCGI Process Manager (PHP-FPM).
- Microsoft IIS (Internet Information Services): For Windows environments, IIS is the native web server that can be configured to run PHP.
- Apache HTTP Server: Known for its flexibility, rich module ecosystem, and widespread adoption. It often integrates with PHP via
- Database Management System (DBMS): Most dynamic web applications require a database to store persistent data (user information, blog posts, product catalogs, etc.). The most popular choices include:
- MySQL / MariaDB: Open-source relational databases widely used with PHP applications.
- PostgreSQL: Another powerful open-source relational database known for its advanced features and data integrity.
- SQLite: A file-based database, often used for smaller applications or local development due to its zero-configuration nature.
- PHP Extensions: These are compiled libraries that extend PHP’s core functionality, enabling it to perform specific tasks. Common extensions include
php-mysql(for database connectivity),php-gd(for image manipulation),php-curl(for making HTTP requests), andphp-mbstring(for multi-byte string handling). - Composer (Dependency Manager): While not strictly required for PHP to run, Composer is an essential tool for modern PHP development. It allows you to declare the libraries your project depends on and it will install and manage them for you. This dramatically boosts “productivity” and code organization.
Choosing Your Operating System and Method
Your choice of operating system (Windows, macOS, or Linux) will significantly influence the installation process. Furthermore, you’ll need to decide between an all-in-one package for simplicity, a manual installation for fine-grained control, or a containerized approach for portability and isolation.
- Windows: Offers user-friendly graphical installers.
- macOS: Leverages package managers like Homebrew or integrated packages.
- Linux (Ubuntu/Debian, CentOS/RHEL): Typically uses system package managers (
apt,yum,dnf) for robust server setups.
The method you choose should align with your specific goals. For instance, local development often benefits from the quick setup of integrated packages, while production servers usually demand the stability and control offered by manual installations or containerization.
Simplified Installation: All-in-One Packages (XAMPP/WAMP/MAMP)
For developers looking to set up a local PHP development environment quickly and with minimal hassle, all-in-one packages are an excellent solution. These bundles include a web server (Apache), PHP, and a database (MySQL/MariaDB) in a single, easy-to-install package. They are perfect for learning PHP, testing applications, or working on client projects without affecting your system’s core configuration.
Why Use an All-in-One Package?
The primary advantage of all-in-one packages is their unparalleled ease of use. Instead of installing and configuring each component (Apache, PHP, MySQL) individually, these packages provide a straightforward installer that sets everything up for you. This significantly reduces the learning curve and time investment, allowing you to focus on coding rather than server administration.
Key benefits include:
- Rapid Setup: Get a fully functional local server running in minutes.
- Bundled Components: Apache, PHP, and MySQL (or MariaDB) are pre-configured to work together.
- Cross-Platform Availability: Versions are available for Windows, macOS, and Linux.
- User-Friendly Interface: Often comes with a control panel for starting/stopping services and managing settings.
- Ideal for Development: Perfect for testing code, building websites, and learning PHP in an isolated environment.
While convenient, it’s generally not recommended to use these packages for production servers due to potential security configurations and less optimized performance compared to manually tuned environments.
Installing XAMPP on Windows, macOS, and Linux
XAMPP (X for cross-platform, Apache, MySQL, PHP, Perl) is one of the most popular all-in-one packages. It’s available for all major operating systems.
General Steps for XAMPP Installation:
- Download XAMPP: Visit the official Apache Friends website (https://www.apachefriends.org/) and download the appropriate installer for your operating system. Choose a PHP version that aligns with your project requirements or the latest stable version.
- Run the Installer:
- Windows: Double-click the
.exefile. You might encounter a UAC (User Account Control) warning; click “Yes” to proceed. Follow the on-screen prompts, typically clicking “Next” through the component selection (keeping defaults is usually fine), choosing an installation directory (e.g.,C:xampp), and completing the installation. You might be prompted about a firewall exception; allow it. - macOS: Double-click the
.dmgfile. Drag the XAMPP icon to your Applications folder. Open the XAMPP application from there. - Linux: Make the downloaded
.runfile executable (chmod +x xampp-linux-x64-*-installer.run) and then run it (sudo ./xampp-linux-x64-*-installer.run). Follow the graphical installer steps.
- Windows: Double-click the
- Start Services:
- Once installed, open the XAMPP Control Panel (on Windows) or Manager-OSX/Linux application.
- Click the “Start” buttons next to “Apache” and “MySQL.” Their status should change to green, indicating they are running.
- Test PHP Installation (
phpinfo()):- Open your web browser and navigate to
http://localhost/. You should see the XAMPP dashboard. - To verify PHP is working, create a new file named
info.phpin your XAMPP’s web directory (C:xampphtdocson Windows,/Applications/XAMPP/htdocs/on macOS,/opt/lampp/htdocs/on Linux). - Add the following content to
info.php:
php

<?php

phpinfo();

?>
- Save the file and then access
http://localhost/info.phpin your browser. You should see a detailed page displaying your PHP configuration, confirming a successful installation. Remember to delete thisinfo.phpfile from a production server for “digital security” reasons.
- Open your web browser and navigate to
WAMP Server for Windows and MAMP for macOS
While XAMPP is cross-platform, there are also OS-specific alternatives that offer similar functionalities:
- WAMP Server (Windows Apache MySQL PHP): Specifically designed for Windows, WAMP Server is another popular choice. It provides a simple tray icon interface for managing your Apache, MySQL, and PHP services. You can download it from https://www.wampserver.com/.
- MAMP (macOS Apache MySQL PHP): As its name suggests, MAMP is tailored for macOS. It comes in a free and a pro version, offering a user-friendly interface for setting up your development environment. Download MAMP from https://www.mamp.info/.
These tools streamline the initial setup, allowing developers to focus on application logic and design without getting bogged down in server configuration, significantly boosting “productivity.”
Manual Installation: Granular Control for Production Environments
For those requiring more control, specific configurations, or deploying to a production server, manual installation is the preferred route. This method involves installing each component (web server, PHP, database) separately and configuring them to work together. While more complex, it offers greater flexibility, optimization opportunities, and often enhanced “digital security” when properly configured.
Installing PHP on Linux (Debian/Ubuntu)
Linux distributions are the most common choice for PHP production servers. Using their native package managers simplifies the process.
- Update Package Lists:
bash

sudo apt update

sudo apt upgrade -y
- Install PHP and Common Extensions: To install PHP with Apache and the MySQL extension:
bash

sudo apt install php libapache2-mod-php php-mysql -y
This command installs the PHP interpreter, the Apache module for PHP, and the MySQL database driver. For Nginx, you would installphp-fpminstead oflibapache2-mod-php:
bash

sudo apt install php php-fpm php-mysql -y
- Install Additional Extensions (Optional but Recommended):
Depending on your application’s needs, you might require more extensions:
bash

sudo apt install php-cli php-gd php-curl php-mbstring php-xml php-zip -y
- Configure Web Server:
- Apache: If you installed
libapache2-mod-php, PHP should be automatically enabled. Restart Apache:
bash

sudo systemctl restart apache2
- Nginx (with PHP-FPM): You’ll need to configure Nginx to pass PHP requests to PHP-FPM. Edit your Nginx server block configuration (e.g.,
/etc/nginx/sites-available/default) to include alocationblock for PHP files:
nginx

location ~ .php$ {

    include snippets/fastcgi-php.conf;

    fastcgi_pass unix:/var/run/php/php8.2-fpm.sock; # Adjust PHP version

}
Then, restart Nginx and PHP-FPM:
bash

sudo systemctl restart nginx

sudo systemctl restart php8.2-fpm # Adjust PHP version
- Apache: If you installed
- Test PHP: Create a
phpinfo.phpfile in your web server’s document root (e.g.,/var/www/html/) with<?php phpinfo(); ?>and access it via your browser (http://your_server_ip/phpinfo.php).
Installing PHP on Linux (CentOS/RHEL)
CentOS and RHEL-based distributions use yum or dnf as their package managers and require enabling additional repositories for newer PHP versions.
- Enable EPEL and Remi Repositories: Remi’s RPM repository is essential for getting the latest PHP versions.
bash

sudo dnf install epel-release -y # For CentOS 8+/RHEL 8+

sudo dnf install https://rpms.remirepo.net/enterprise/remi-release-8.rpm -y # For RHEL/CentOS 8+

sudo yum install epel-release -y # For CentOS 7/RHEL 7

sudo yum install https://rpms.remirepo.net/enterprise/remi-release-7.rpm -y # For RHEL/CentOS 7
- Enable PHP Version (e.g., PHP 8.2):
bash

sudo dnf module reset php -y # For CentOS 8+/RHEL 8+ to reset module list

sudo dnf module enable php:remi-8.2 -y # Enable PHP 8.2 from Remi

sudo yum-config-manager --enable remi-php82 # For CentOS 7/RHEL 7
- Install PHP and Extensions:
bash

sudo dnf install php php-cli php-fpm php-mysqlnd php-gd php-curl php-mbstring php-xml php-zip -y
(Replacednfwithyumfor older systems). - Configure Web Server:
- Apache (httpd): Start/enable
php-fpmand configure Apache to use it.
bash

sudo systemctl start php-fpm

sudo systemctl enable php-fpm
Edit your Apache configuration (e.g.,/etc/httpd/conf/httpd.confor a virtual host file) to include FastCGI Proxy directives. - Nginx: Similar to Debian/Ubuntu, configure Nginx to pass requests to the PHP-FPM socket (usually
/run/php-fpm/www.sock).
bash

sudo systemctl start nginx

sudo systemctl enable nginx

sudo systemctl restart php-fpm
- Apache (httpd): Start/enable
- Test PHP: Place your
phpinfo.phpfile in the web root (e.g.,/var/www/html/) and access it via your server’s IP or domain.
Installing PHP on macOS (Homebrew)
Homebrew is the de facto package manager for macOS, making command-line installations straightforward.
- Install Homebrew (if not already installed):
Open Terminal and run:
bash

/bin/bash -c "$(curl -fsSL https://raw.githubusercontent.com/Homebrew/install/HEAD/install.sh)"
Follow the prompts to complete the installation. - Install PHP:
bash

brew install php
Homebrew will install the latest stable version of PHP. If you need a specific version (e.g., PHP 7.4), you might need to tap an older formulae or usebrew search phpto find available versions and installphp@7.4. - Link PHP (if necessary): Homebrew usually links the installed PHP version automatically. You can check
php -vto confirm. If you have multiple PHP versions, you might need to link/unlink:
bash

brew unlink php@7.4 # If you have an older version

brew link php # Link the latest version
- Running PHP:
- Built-in PHP Development Server: For simple testing, PHP comes with a built-in server:
bash

php -S localhost:8000
Then, navigate tohttp://localhost:8000in your browser. - With Apache/Nginx: macOS has Apache pre-installed, but it’s often outdated. For modern development, installing Nginx via Homebrew (
brew install nginx) and configuring it with PHP-FPM (brew install php-fpm) is a more common and robust approach. This configuration is similar to the Linux Nginx setup.
- Built-in PHP Development Server: For simple testing, PHP comes with a built-in server:
- Test PHP: Use the
phpinfo.phpfile in your web server’s document root to verify the installation.
Installing PHP on Windows (IIS/Apache)
Manual installation on Windows is less common for local development (where XAMPP/WAMP are preferred) but is relevant for production environments using IIS or a separately installed Apache.
- Download PHP Binaries:
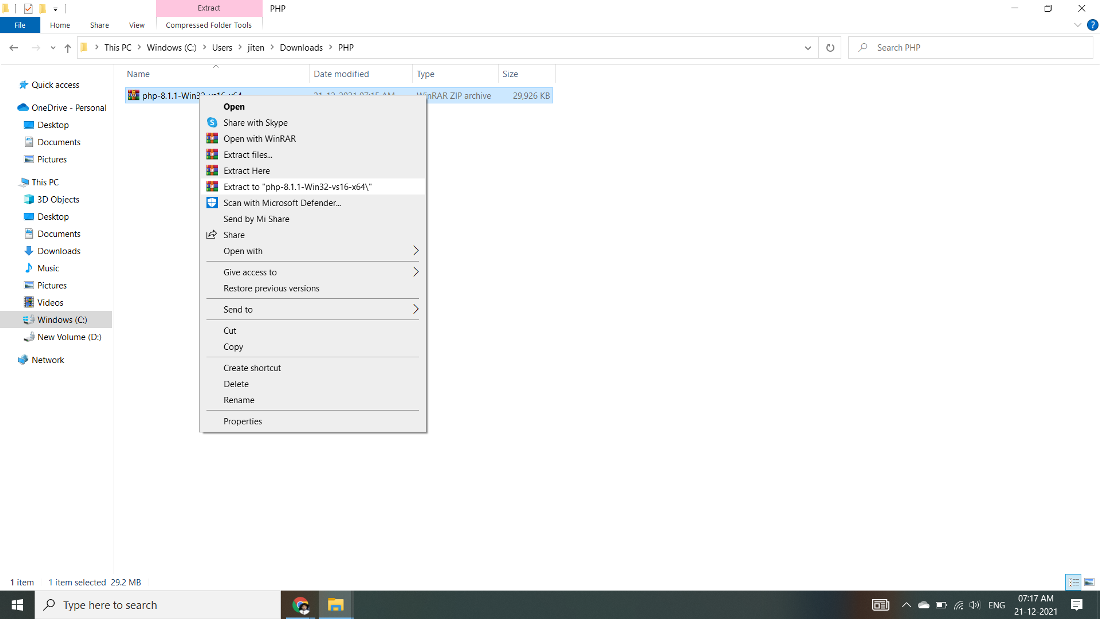
Go to the official PHP for Windows download page (https://windows.php.net/download/). Choose the appropriate “Non-Thread Safe” (NTS) version for IIS or “Thread Safe” (TS) for Apache. Download the Zip package. - Extract PHP:
Extract the contents of the zip file to a directory, e.g.,C:php. - Configure PHP (
php.ini):
Renamephp.ini-development(for development) orphp.ini-production(for production) tophp.iniwithin theC:phpdirectory. Openphp.iniand make necessary configurations (e.g., uncommentextension_dir = "ext", enable required extensions likeextension=php_mysqli.dll). - Configure Web Server:
- IIS:
- Enable IIS in Windows Features.
- Install the “IIS CGI” feature.
- In IIS Manager, add a “Handler Mapping” for
.phpfiles, pointing toC:phpphp-cgi.exeas the executable. - Add
index.phpto your default documents.
- Apache HTTP Server:
- If you have Apache installed separately, edit its
httpd.conffile. - Add directives to load the PHP module (e.g.,
LoadModule php_module "C:/php/php8apache2_4.dll"for TS versions) and configure the handler for.phpfiles. - Ensure the
php_modulepath matches your PHP version and Apache version.
- If you have Apache installed separately, edit its
- IIS:
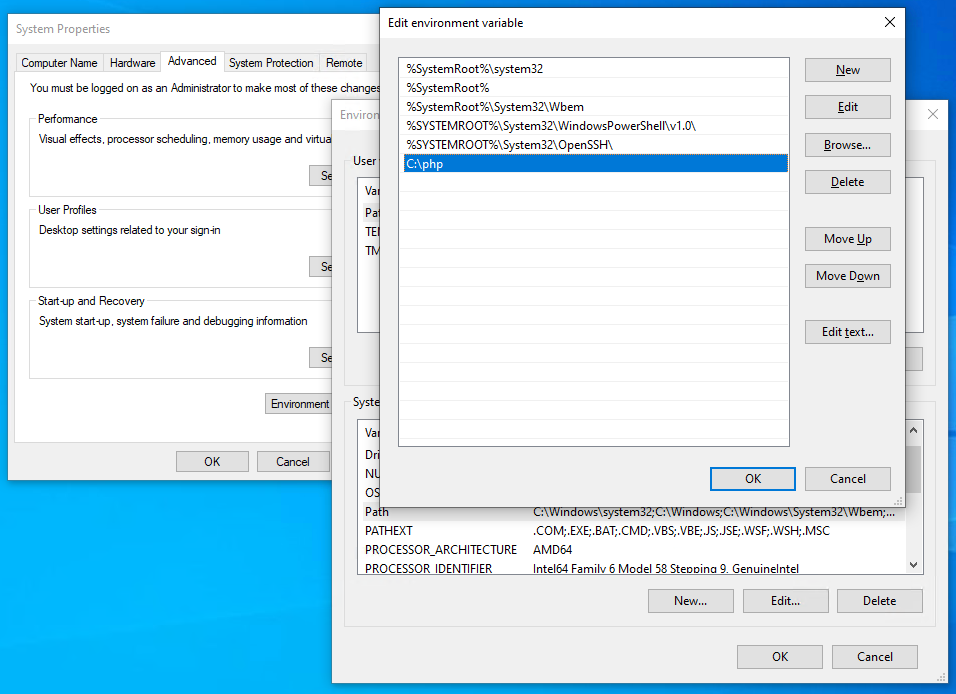
- Add PHP to System PATH (Optional but Recommended):
AddC:phpto your system’sPathenvironment variable to run PHP commands from any directory in the Command Prompt. - Test PHP: Create a
phpinfo.phpfile in your web root and access it via your browser.
Advanced Installation and Configuration Considerations
Beyond the basic installations, modern PHP development often involves more sophisticated tools and configurations that enhance developer experience, application performance, and “digital security.”
Using Docker for Containerized PHP Development
Docker has revolutionized how applications are developed, deployed, and scaled. For PHP, Docker offers isolated, portable, and consistent environments.
Benefits of Docker:
- Isolation: Each application or service runs in its own container, preventing conflicts between dependencies.
- Portability: A Docker container runs identically across any system with Docker installed, from local development machines to production servers.
- Consistency: Eliminates “it works on my machine” issues, ensuring everyone on a team uses the same environment.
- Scalability: Easily scale services up or down as needed.
Basic Docker Setup for PHP:
You would typically use docker-compose to orchestrate multiple services (PHP-FPM, Nginx/Apache, MySQL). A simple docker-compose.yml might look like this:
version: '3.8'
services:
  nginx:
    image: nginx:latest
    ports:
      - "80:80"
    volumes:
      - ./src:/var/www/html
      - ./nginx/default.conf:/etc/nginx/conf.d/default.conf
    depends_on:
      - php
  php:
    image: php:8.2-fpm # Or php:8.2-apache for Apache integration
    volumes:
      - ./src:/var/www/html
  mysql:
    image: mysql:8.0
    environment:
      MYSQL_ROOT_PASSWORD: root_password
      MYSQL_DATABASE: my_database
      MYSQL_USER: my_user
      MYSQL_PASSWORD: user_password
    volumes:
      - db_data:/var/lib/mysql
volumes:
  db_data:
With this setup, you can run your entire PHP application stack with a single command: docker-compose up -d. This approach significantly enhances “productivity” and simplifies team collaboration.
Managing PHP Versions with PHP Version Managers
In a world where different projects might require different PHP versions, manually switching between them can be tedious. PHP version managers streamline this process.
phpenv: Similar torbenvfor Ruby,phpenvallows you to install and manage multiple PHP versions and easily switch between them globally or on a per-project basis.phpbrew: Offers even more features, including installing PHP from source with various compilation options and managing extensions.
These tools are invaluable for developers working on multiple projects with diverse PHP requirements, ensuring maximum “productivity” without version conflicts.
Post-Installation: Configuration and Optimization
Once PHP is installed, several configuration adjustments can optimize performance, security, and developer experience. The primary configuration file is php.ini.
- Memory Limit:
memory_limit = 256M(Increase if your scripts run out of memory). - Upload File Size:
upload_max_filesize = 64M,post_max_size = 64M(Adjust for large file uploads). - Error Reporting: For development,
display_errors = Onanderror_reporting = E_ALLare useful. For production,display_errors = Offandlog_errors = Onwitherror_logspecified are crucial for “digital security” and stability. - Timezone:
date.timezone = "America/New_York"(Set your local timezone). - Extensions: Ensure all necessary extensions are enabled (
extension=pdo_mysql,extension=gd, etc.) by uncommenting their lines inphp.ini. - OPcache: Enable OPcache (
opcache.enable = 1) for significant performance improvements by caching precompiled PHP bytecode.
Regularly reviewing and tuning your php.ini is an essential part of managing a robust PHP environment, ensuring optimal application performance and security.
Conclusion
Installing PHP is the foundational step for anyone embarking on web development, managing a CMS, or building custom web applications. As this guide illustrates, the method you choose largely depends on your specific needs and environment. For quick local development and learning, all-in-one packages like XAMPP, WAMP, or MAMP offer an unparalleled ease of entry. For production environments requiring fine-tuned control, stability, and “digital security,” manual installations on Linux, macOS with Homebrew, or Windows with IIS/Apache provide the necessary granularity.
Furthermore, advanced approaches like Docker containerization deliver unparalleled portability and consistency, making them ideal for complex projects and collaborative teams. Regardless of your chosen path, remember to configure your php.ini file appropriately, manage extensions, and consider tools like Composer for dependency management to maximize your “productivity” and ensure your PHP applications run efficiently and securely. With PHP correctly installed, you are now equipped to unlock the vast potential of server-side web development and build dynamic, interactive experiences for users worldwide.