
Understanding the Digital Wallet Divide: Why Direct Transfers Aren’t an Option
In the evolving landscape of digital finance, convenience is king. Platforms like Venmo and PayPal have revolutionized how individuals send, receive, and manage money, offering swift, often peer-to-peer, transactions. However, despite their shared ownership under PayPal Holdings, Inc., Venmo and PayPal operate as distinct financial ecosystems. This fundamental separation is the primary reason why a direct, built-in function to transfer funds immediately from a Venmo balance to a PayPal balance simply does not exist.
Both Venmo and PayPal are designed with their own user experiences, fee structures, and regulatory compliances, catering to slightly different market segments while often overlapping. Venmo is renowned for its social payment features, ease of splitting bills, and quick transfers among friends. PayPal, on the other hand, boasts a more global reach, robust e-commerce integration, and a broader suite of services for businesses and international transactions. Because they maintain separate account structures and internal processing systems, transferring money directly between them is akin to trying to move funds directly from one bank’s account to another without using an intermediary like the Automated Clearing House (ACH) network or a wire transfer.

Consequently, users seeking to bridge these two platforms must employ an indirect strategy. This involves leveraging a common financial conduit – typically your linked bank account – as an intermediate step to move funds out of Venmo and then into PayPal. Understanding this core limitation and the practical workaround is crucial for anyone looking to manage their digital finances effectively across these popular applications.
The Bank Account Loop: Your Go-To Strategy for Bridging the Gap
Since a direct transfer mechanism is absent, the most reliable and universally applicable method to move money from Venmo to PayPal involves using your personal bank account as a temporary holding ground. This two-step process ensures your funds transition securely between the two distinct platforms.
Transferring Funds from Venmo to Your Bank Account
The first leg of your journey involves withdrawing the desired amount from your Venmo balance and depositing it into your linked bank account. This process is straightforward and can be initiated directly from the Venmo app.
- Open the Venmo App: Launch the Venmo application on your mobile device and log into your account.
- Access the “Me” Tab: Navigate to the “Me” tab, which typically displays your Venmo balance.
- Initiate a Transfer: Tap the “Transfer Balance” or “Manage Balance” option, usually located near your current balance.
- Enter the Amount: Specify the exact amount of money you wish to transfer from your Venmo balance to your bank account. Ensure you have sufficient funds available.
- Choose Your Bank Account: Select the verified bank account you wish to transfer the money to. If you haven’t linked one yet, you’ll need to do so, which usually involves providing your bank’s routing and account numbers. Venmo may require micro-deposits for verification, a process that can take a couple of business days.
- Select Transfer Speed: Venmo offers two primary transfer options:
- Standard Transfer: This option is typically free and processes within 1 to 3 business days. While cost-effective, it requires patience. The funds will usually appear in your bank account by the next business day if initiated before a certain cut-off time, but can take up to three days depending on your bank’s processing times.
- Instant Transfer: For a fee, usually 1.75% of the transfer amount (with a minimum of $0.25 and a maximum of $25), your funds can be transferred to your linked debit card or bank account within minutes, often less than 30 minutes. This is ideal if you need immediate access to your money.
- Confirm the Transfer: Review all details – amount, destination bank account, and transfer speed – before confirming the transaction.
Once the transfer is complete, and the funds are confirmed to be in your bank account, you can proceed to the next step.
Depositing Money from Your Bank Account into PayPal
With your funds now securely in your bank account, the second step involves moving them from your bank to your PayPal balance. This process is initiated from within your PayPal account.
- Log into PayPal: Access your PayPal account, either through the mobile app or via a web browser.
- Navigate to “Wallet” or “Money”: Locate the “Wallet” section or “Money” tab within your PayPal dashboard. This is where you manage your linked payment methods and balances.
- Add Money to Your Balance: Look for an option like “Add Money,” “Transfer Money,” or “Add Money to Your Balance.”
- Select Your Bank Account: Choose the verified bank account from which you intend to draw funds. It’s imperative that this is the same bank account where you transferred money from Venmo. If you haven’t linked your bank account to PayPal, you’ll need to do so first, a process similar to Venmo’s that may involve micro-deposits for verification.
- Enter the Amount: Input the exact amount you wish to add to your PayPal balance.
- Confirm the Transfer: Review the details and confirm the transfer. This process is generally free from PayPal’s side but typically takes 3 to 5 business days for the funds to reflect in your PayPal balance. PayPal usually does not offer an “instant” option for adding funds from a bank account directly to your balance.
By completing these two steps, your money will have successfully migrated from your Venmo balance to your PayPal balance, albeit indirectly through your bank account.
Navigating the Transfer Process: Fees, Timelines, and Security
While the bank account loop is effective, understanding its nuances regarding costs, processing times, and security protocols is vital for an optimal experience. These factors directly impact your financial efficiency and peace of mind.

Analyzing Transfer Costs
The most significant cost consideration in this multi-step transfer lies with Venmo’s instant transfer option.
- Venmo Standard Transfer: This option is free. It’s the most economical choice if time is not a critical factor.
- Venmo Instant Transfer: A fee of 1.75% of the transfer amount is applied, with a minimum charge of $0.25 and a maximum of $25. For example, transferring $100 would incur a $1.75 fee, while transferring $1,000 would cost $17.50.
- PayPal “Add Money from Bank”: Generally, adding money to your PayPal balance from a linked bank account is free.
Therefore, the total cost of moving funds from Venmo to PayPal is primarily dictated by whether you opt for Venmo’s instant transfer. If you prioritize speed, be prepared to pay the associated Venmo fee. If you’re willing to wait, the entire process can be completed without incurring direct transfer fees from either platform.
Anticipating Processing Times
The combined timeline for this indirect transfer can vary significantly based on your chosen Venmo withdrawal method:
- Scenario 1: Venmo Standard Transfer + PayPal Bank Transfer
- Venmo to Bank: 1-3 business days.
- Bank to PayPal: 3-5 business days.
- Total Time: Approximately 4-8 business days. This is the slowest but most cost-effective route.
- Scenario 2: Venmo Instant Transfer + PayPal Bank Transfer
- Venmo to Bank (Instant): Within minutes (typically under 30 minutes).
- Bank to PayPal: 3-5 business days.
- Total Time: Approximately 3-5 business days. This option is faster but comes with the Venmo instant transfer fee.
It’s crucial to factor these timelines into your financial planning, especially if the funds are needed by a specific deadline. Business days exclude weekends and holidays, which can further extend the overall duration.
Ensuring Digital Security
Given that you are linking and transferring funds between multiple financial accounts, maintaining robust digital security is paramount:
- Strong, Unique Passwords: Use complex passwords for both Venmo and PayPal accounts that are different from each other and other online services.
- Two-Factor Authentication (2FA): Always enable 2FA on both platforms. This adds an extra layer of security, requiring a code from your phone in addition to your password for login.
- Verify Linked Accounts: Double-check that the correct bank account is linked and verified on both Venmo and PayPal before initiating any transfers. Mistakes in account numbers can lead to significant delays and complications.
- Monitor Transactions: Regularly review your transaction history on both platforms and your bank statements to spot any unauthorized activity immediately.
- Beware of Phishing: Be vigilant against phishing emails or messages that claim to be from Venmo or PayPal. Always go directly to the official apps or websites to log in and manage your accounts.
- Secure Network: Only perform financial transactions over secure, private Wi-Fi networks. Avoid public Wi-Fi when handling sensitive financial information.
Adhering to these security best practices will significantly reduce your risk of fraud or account compromise during the transfer process and in your broader digital financial interactions.
Strategic Financial Management: When and Why to Make the Move
Understanding how to move money between Venmo and PayPal is one thing; discerning when and why to do so is an integral part of strategic personal finance management. This indirect transfer process is not always the most efficient, but it serves specific, important purposes.
Specific Use Cases
There are several scenarios where undertaking this multi-step transfer becomes a necessary or advantageous maneuver:
- Recipient Preference: The most common reason is when the intended recipient of funds exclusively uses PayPal, and your money is currently in your Venmo balance. This is often the case for international payments or payments to certain online merchants who primarily accept PayPal.
- Consolidating Funds: You might need to consolidate funds from various sources into a single PayPal balance for a larger purchase, an investment, or to settle a business payment. For example, if you receive multiple small payments on Venmo, you might transfer them to PayPal to fund a more significant transaction or withdraw them together to your bank.
- Accessing PayPal-Specific Features: PayPal offers certain features that Venmo does not, such as robust seller protection for goods and services, specific dispute resolution processes, or integration with certain e-commerce platforms. Moving funds to PayPal allows you to leverage these services with money originally held in Venmo.
- Bridging Business and Personal Finances: If you use Venmo more for personal peer-to-peer transactions and PayPal for business-related income or expenses, you might need to transfer funds between the two to balance your financial flows, though direct business accounts for each platform are often preferred.
Considering Alternatives
Before initiating the indirect transfer, it’s always wise to consider if there are simpler alternatives:
- Direct Payment: If both you and the recipient have accounts on the same platform (either both Venmo or both PayPal), direct peer-to-peer payment is always the simplest and often free option.
- Ask the Recipient: If the goal is to pay someone, inquire if they would be willing to accept payment via Venmo instead of PayPal, or vice versa. This can save you time and potential fees.
- Physical Cash/Bank Transfer: For larger sums or less urgent needs, a direct bank transfer or even withdrawing cash and then depositing it might be an option, though less convenient for digital wallet users.
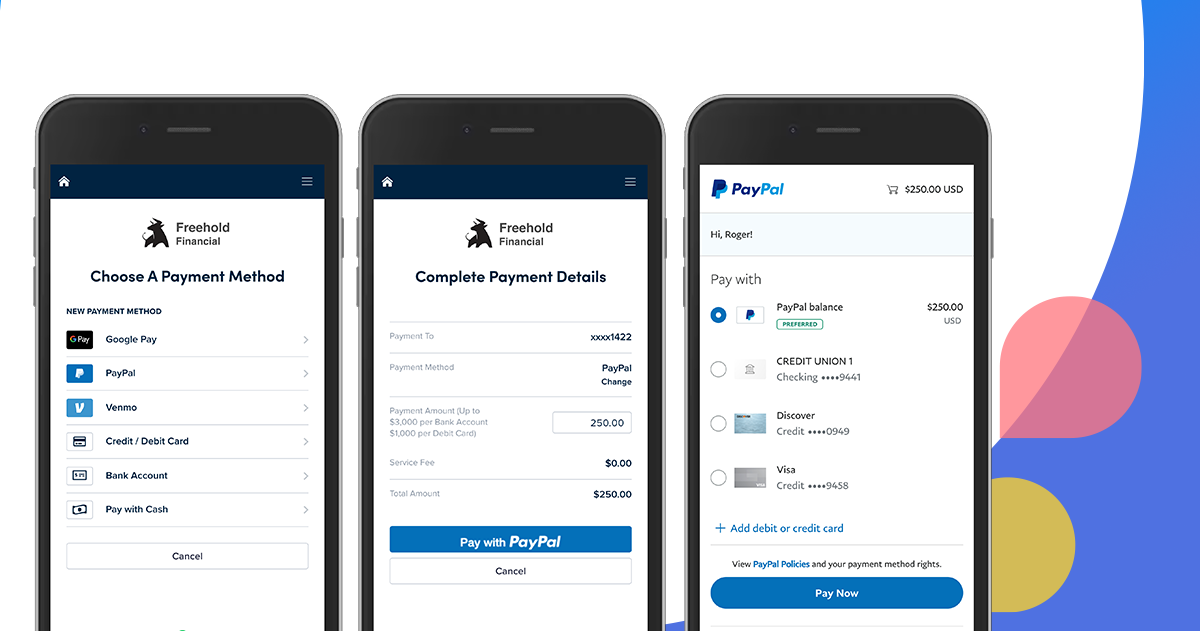
Optimizing Your Digital Wallet Ecosystem
Ultimately, the ability to transfer funds between Venmo and PayPal, even indirectly, empowers users to maintain greater control over their digital finances. It highlights the importance of:
- Understanding Platform Strengths: Knowing when to use Venmo (casual, social payments) versus PayPal (e-commerce, international, business) helps you make informed decisions.
- Minimizing Fees: Being aware of instant transfer fees versus standard transfer times allows you to choose the most cost-effective method based on urgency.
- Strategic Fund Placement: Intentionally placing funds in the platform best suited for their intended use can streamline your financial operations and avoid unnecessary steps or costs.
By treating these platforms as interconnected, yet distinct, components of your overall financial toolkit, you can navigate the digital money landscape with greater insight, efficiency, and confidence.
aViewFromTheCave is a participant in the Amazon Services LLC Associates Program, an affiliate advertising program designed to provide a means for sites to earn advertising fees by advertising and linking to Amazon.com. Amazon, the Amazon logo, AmazonSupply, and the AmazonSupply logo are trademarks of Amazon.com, Inc. or its affiliates. As an Amazon Associate we earn affiliate commissions from qualifying purchases.