
Unleashing the full power of your Nvidia GPU on an Ubuntu system is a transformative experience, crucial for everything from high-fidelity gaming to demanding professional applications like AI/ML development and 3D rendering. While Ubuntu comes with open-source drivers (Nouveau) that offer basic display functionality, they rarely tap into the true potential of Nvidia hardware. To unlock peak performance, access advanced features like CUDA, and ensure maximum system stability, installing the proprietary Nvidia drivers is essential. This comprehensive guide will walk you through the process, detailing multiple installation methods, crucial pre-installation steps, and post-installation verification, ensuring you get the most out of your hardware investment. By following these steps, you’ll not only enhance your system’s capabilities but also contribute to a smoother, more productive digital workflow.

Understanding the Importance of Proprietary Nvidia Drivers
When you choose a powerful Nvidia graphics card, you’re not just buying silicon; you’re investing in a sophisticated piece of technology designed for specific high-performance tasks. To fully leverage this investment, the right software — the proprietary Nvidia drivers — is indispensable.
The “Why”: Beyond Basic Display
The default open-source Nouveau drivers, while commendable for their broad compatibility and community development, are often reverse-engineered and lack the optimized performance and feature set of Nvidia’s official offerings. Proprietary drivers provide:
- Performance Uplift: For gamers, this means higher frame rates, smoother gameplay, and access to advanced visual technologies like DLSS. For professionals, it translates to faster rendering times in applications like Blender, quicker video encoding, and seamless operation of demanding design software.
- CUDA Core Activation: Nvidia’s CUDA platform is a cornerstone for parallel computing, powering everything from scientific simulations to machine learning and artificial intelligence tasks. Proprietary drivers are a prerequisite for utilizing CUDA, making them non-negotiable for developers and researchers in these fields.
- Advanced Display Features: Technologies like G-Sync for tear-free gaming, specific color profiles, and comprehensive multi-monitor management are typically only accessible through the official drivers and the accompanying
nvidia-settingsutility. - Stability and Compatibility: Drivers released by Nvidia undergo rigorous testing to ensure optimal compatibility with their hardware and popular operating systems. This often results in a more stable system, fewer graphical glitches, and better overall reliability compared to open-source alternatives for complex workloads. This stability isn’t just a comfort; it’s a critical factor in maintaining productivity, preventing costly downtime due to crashes, and upholding the integrity of your digital workspace.
Ensuring System Stability and Security
Official Nvidia drivers are developed and maintained directly by the hardware manufacturer. This means they are designed to interface perfectly with your GPU, reducing the likelihood of bugs, conflicts, and performance bottlenecks that can arise with generic or reverse-engineered drivers. From a digital security standpoint, obtaining drivers directly from trusted sources (like Ubuntu’s repositories or Nvidia’s official website) mitigates the risk of installing malicious software disguised as drivers, protecting your system from potential vulnerabilities. A well-secured and stable system is a foundation for any productive endeavor, whether personal or professional.
Essential Pre-Installation Steps: Preparing Your Ubuntu System
Before diving into the installation process, a few critical preparatory steps are necessary. These steps ensure that your system is ready for the new drivers, preventing potential conflicts and safeguarding your data. Skipping these can lead to complications, from minor display issues to a completely unbootable system.
Identify Your Nvidia GPU and Recommended Driver Version
Knowing your exact Nvidia GPU model is the first step. This information helps you select the correct driver version. An outdated or incorrect driver can lead to instability or non-functionality.
You can identify your GPU using the terminal:
lspci -k | grep -EA3 'VGA|3D|Display'
This command will output details about your graphics card, including its model name. Once you have the model, you can consult the official Nvidia website’s driver finder to see which driver versions are recommended for your specific card and operating system version. Ubuntu also often suggests a stable version via its “Additional Drivers” tool, which we’ll explore. This careful matching of hardware and software is a fundamental principle in technology, ensuring optimal performance and compatibility.
Backup Your System: A Critical Safeguard
This step cannot be overemphasized. Installing graphics drivers, especially proprietary ones, involves changes to core system components. In rare cases, this can lead to boot issues or system instability. Having a recent backup is your safety net, allowing you to restore your system to a working state if anything goes wrong, thereby preventing data loss and significant downtime.
- Home Directory Backup: At a minimum, ensure your personal files in your home directory (
/home/yourusername) are backed up to an external drive or cloud storage. - System Snapshot: Tools like
Timeshift(available in Ubuntu’s repositories) allow you to create full system snapshots. This is an excellent way to revert your entire operating system to a previous state, including installed applications and configurations, should the driver installation fail.
bash

sudo apt install timeshift
Launch Timeshift, configure a backup location (preferably an external drive), and create a snapshot before proceeding.
Taking the time for a backup is a small investment that can save immense frustration, effort, and potentially even financial costs associated with data recovery or system rebuilds. It’s a key aspect of digital security and productivity.
Update Your System and Kernel
An up-to-date system is more likely to handle new driver installations smoothly. Ensure your Ubuntu installation and its kernel are fully updated before proceeding.
Open your terminal and run:
sudo apt update
sudo apt upgrade -y
sudo apt dist-upgrade -y
sudo reboot
These commands fetch the latest package information, upgrade all installed packages to their newest versions, and perform a distribution upgrade for any pending changes. A reboot ensures that any kernel updates are applied. Running on the latest stable kernel often provides better compatibility and bug fixes, which can be crucial for driver installation. Keeping your system current is also a fundamental practice in digital security, patching known vulnerabilities and enhancing overall system resilience.
Disable Nouveau Drivers
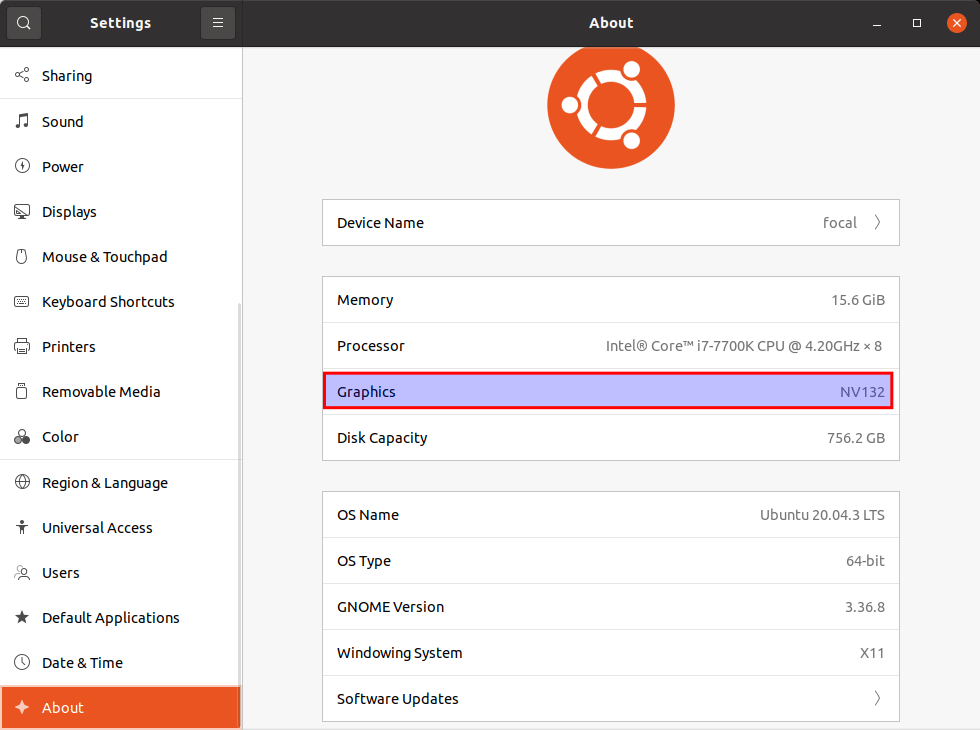
The Nouveau drivers can conflict with the proprietary Nvidia drivers, potentially causing boot loops or black screens. It’s best to disable them before installing the official drivers.
To blacklist Nouveau, create a new configuration file:
sudo nano /etc/modprobe.d/blacklist-nouveau.conf
Add the following lines to the file:
blacklist nouveau
options nouveau modeset=0
Save and exit the editor (Ctrl+O, then Enter, then Ctrl+X for Nano). Then, update your initial RAM filesystem:
sudo update-initramfs -u
This step ensures that Nouveau modules are not loaded during boot.
Installing Nvidia Drivers: Three Reliable Methods
Ubuntu offers several ways to install Nvidia drivers, ranging from the most user-friendly graphical interface to more advanced command-line methods. We’ll explore the three most common and reliable approaches.
Method 1: The Recommended and Easiest Approach (Additional Drivers GUI)
This is the preferred method for most users, as it’s integrated directly into Ubuntu and provides the most stable, tested driver versions for your specific hardware. Ubuntu’s “Additional Drivers” tool simplifies the process significantly, making it both beginner-friendly and reliable.
- Open “Software & Updates”:
- Press the
Superkey (Windows key) and search for “Software & Updates.” - Click on the “Additional Drivers” tab.
- Press the
- Scan for Drivers:
- The system will automatically scan for available proprietary drivers for your hardware. This typically takes a few moments.
- Select and Install:
- You will see a list of detected drivers, usually including the open-source Nouveau driver and several proprietary Nvidia driver versions. Nvidia often recommends a “tested” or “recommended” driver; this is usually the best choice for stability.
- Select the recommended Nvidia driver (e.g.,
nvidia-driver-535). - Click “Apply Changes.”
- Authenticate and Wait:
- You will be prompted to enter your password to authenticate the installation.
- The system will download and install the selected drivers. This can take some time depending on your internet speed.
- Reboot:
- Once the installation is complete, you will be prompted to reboot your system. Do not skip this step. A reboot is essential for the new drivers to take effect.
This method is highly recommended because it manages dependencies automatically, retrieves drivers from Ubuntu’s trusted repositories, and ensures compatibility with your specific Ubuntu version. It represents an excellent blend of technology, security, and productivity, offering a streamlined path to optimal performance.
Method 2: For Newer Drivers and Specific Needs (Proprietary GPU Drivers PPA)
The Proprietary GPU Drivers PPA (Personal Package Archive) is maintained by the Ubuntu developers and often contains newer driver versions than those immediately available in the standard Ubuntu repositories. This method is ideal for users who need the latest features, bug fixes, or performance enhancements, or for those with very new Nvidia hardware that requires a more recent driver.
- Add the PPA:
Open your terminal and add the PPA to your system:
bash

sudo add-apt-repository ppa:graphics-drivers/ppa

sudo apt update
Theapt updatecommand refreshes your package lists to include the drivers from the newly added PPA. - Identify and Install the Recommended Driver:
Now you can useubuntu-driversto find the recommended driver and install it. This tool intelligently suggests the best driver for your hardware from all available sources, including the PPA.
bash

ubuntu-drivers devices

sudo ubuntu-drivers install
Theubuntu-drivers devicescommand will list all recommended drivers for your GPU. Thesudo ubuntu-drivers installcommand will install the most recent recommended proprietary Nvidia driver found in any enabled repository (including the PPA).
Alternatively, if you know the specific driver version you want (e.g.,nvidia-driver-535), you can install it directly:
bash

sudo apt install nvidia-driver-535
- Reboot Your System:
Just like with Method 1, a reboot is crucial for the new drivers to fully initialize.
bash

sudo reboot
This method provides a balance between ease of use and access to cutting-edge driver versions. It’s a great choice for those who want to stay current with Nvidia’s releases without resorting to manual compilation, offering enhanced brand experience by leveraging the latest innovations from Nvidia.
Method 3: The Manual Installation (From Nvidia’s Website)
This method involves downloading the driver directly from Nvidia’s official website and installing it manually. It’s generally not recommended for beginners due to its complexity and potential for system instability if not done correctly. However, it can be necessary in specific scenarios:
- You need a very specific driver version not available through Ubuntu’s repositories or the PPA (e.g., a beta driver, an older driver for compatibility with specific software).
- You are installing drivers on a system without internet access.
- You are an advanced user who prefers direct control over the installation process.
- Download the Driver:
Visit the Nvidia driver download page and select your GPU model, operating system (Linux 64-bit), and desired driver type. Download the.runfile to your Downloads folder.
Always verify the source and integrity of any downloaded files for digital security. - Stop the Display Manager:
You need to exit the graphical environment to install the drivers.- Switch to a TTY (text-only terminal) by pressing
Ctrl+Alt+F3(or F2-F6). - Log in with your username and password.
- Stop your display manager (GDM3 for Gnome, LightDM for Xfce/MATE, SDDM for KDE):
bash

sudo systemctl stop gdm3  # For Gnome

# OR

sudo systemctl stop lightdm # For Xfce/MATE

# OR

sudo systemctl stop sddm # For KDE
- Switch to a TTY (text-only terminal) by pressing
- Run the Installer:
Navigate to your Downloads directory and run the installer script:
bash

cd ~/Downloads

sudo sh NVIDIA-Linux-x86_64-XXX.run --dkms
(ReplaceNVIDIA-Linux-x86_64-XXX.runwith the actual file name you downloaded).
The--dkmsflag is highly recommended as it enables Dynamic Kernel Module Support, ensuring that your Nvidia drivers are automatically recompiled if your kernel updates, preventing breakage. - Follow On-Screen Prompts:
The installer will guide you through the process. Typically, you’ll accept the license, allow it to install, and choose whether to install 32-bit compatibility libraries. Decline the option to install Nvidia X configuration if prompted, as Ubuntu handles this better. - Restart Display Manager and Reboot:
After the installation completes, start your display manager:
bash

sudo systemctl start gdm3 # Or lightdm/sddm
Then, switch back to your graphical environment (Ctrl+Alt+F7or F1) and reboot your system:
bash

sudo reboot
This method demands a higher level of technical proficiency and attention to detail. While it offers maximum control, it also carries the highest risk if not executed carefully.
Post-Installation Verification and Configuration
Once the drivers are installed, it’s crucial to verify that they are functioning correctly and to optimize your experience. This ensures that your system is stable and performing as expected, allowing you to maximize your hardware investment and productivity.
Confirming Driver Installation
After rebooting, the first step is to confirm that the Nvidia drivers are active.
- Using
nvidia-smi:
Open a terminal and type:
bash

nvidia-smi
This command-line utility provides real-time information about your Nvidia GPU, including driver version, CUDA version, GPU temperature, and memory usage. If you see output listing your GPU and driver details, the installation was successful. If the command is not found or returns an error, the drivers may not have been installed correctly. - Using
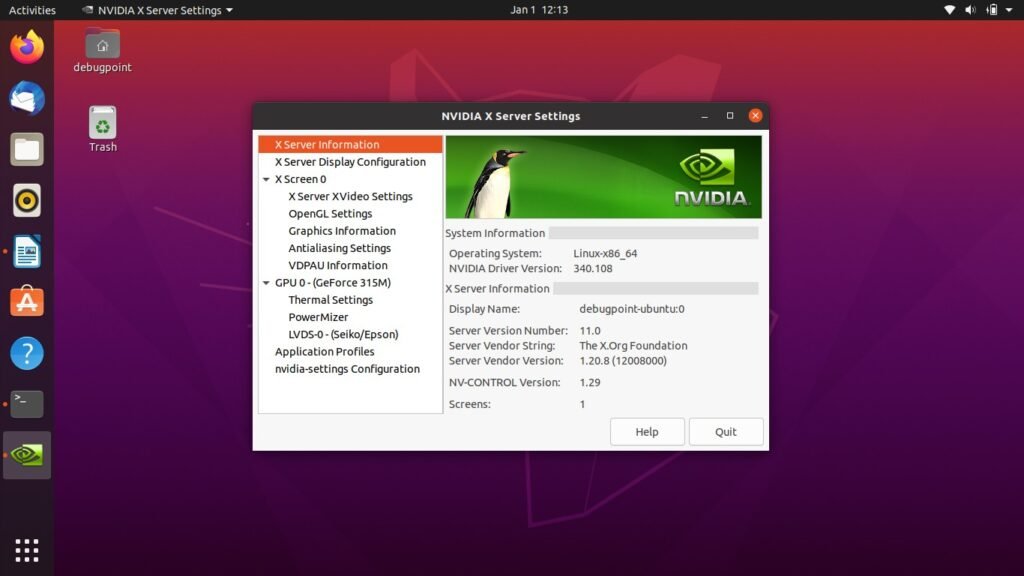
nvidia-settings:
This is Nvidia’s graphical control panel. Open it from the terminal:
bash

nvidia-settings
Or search for “NVIDIA X Server Settings” in your applications menu. This GUI tool offers detailed information about your GPU, display settings, performance profiles, and more. It’s a clear indicator that the proprietary drivers are correctly installed and loaded.
These verification steps are quick checks that save you potential headaches down the line, ensuring that the software foundation for your powerful hardware is solid.
Optimizing Your Experience with Nvidia Settings
The nvidia-settings utility isn’t just for verification; it’s a powerful tool for fine-tuning your GPU’s performance and display settings.
- Power Management Modes: Depending on your use case, you can adjust power settings. For maximum performance (e.g., gaming, rendering), select “Prefer Maximum Performance.” For energy saving (e.g., laptop on battery), choose “Adaptive” or “Auto.”
- Display Configuration: Manage multiple monitors, set resolutions, refresh rates, and adjust color profiles directly from this tool. This is particularly useful for professionals requiring precise display calibration or for users setting up complex multi-monitor workspaces, directly impacting productivity.
- GPU Fan Control: Some versions allow for manual fan control, which can be useful for maintaining optimal temperatures during intensive tasks, preserving the lifespan of your hardware.
Leveraging nvidia-settings allows you to customize your GPU’s behavior to match your specific needs, whether it’s for peak gaming performance or stable, efficient operation for professional applications. This level of control enhances your overall computing experience and helps you extract maximum value from your Nvidia hardware.
Troubleshooting Common Issues
Even with careful preparation, issues can sometimes arise during or after driver installation. Here are some common problems and their solutions:
- Black Screen After Reboot: This often indicates a problem with the display manager or a conflict with Nouveau.
- Solution: Switch to a TTY (
Ctrl+Alt+F3), log in, and try to purge the Nvidia drivers:sudo apt purge nvidia* && sudo apt autoremove. Then, try Method 1 or 2 again. If that fails, consider reinstalling Ubuntu.
- Solution: Switch to a TTY (
- Looping Login Screen: Similar to a black screen, this usually means the display manager cannot start properly.
- Solution: From a TTY, ensure Nouveau is properly blacklisted (
sudo update-initramfs -u). You might also try purging old drivers and reinstalling the recommended one.
- Solution: From a TTY, ensure Nouveau is properly blacklisted (
- Performance Not as Expected: If
nvidia-smishows the drivers are active but performance is poor.- Solution: Check
nvidia-settingsfor power management modes (ensure “Prefer Maximum Performance” is selected for demanding tasks). Ensure your applications are configured to use the Nvidia GPU if you have an integrated graphics card (hybrid graphics systems).
- Solution: Check
- “No NVIDIA GPU detected” error: This could be due to an incorrect driver version or a fundamental hardware issue.
- Solution: Verify your GPU model and reinstall the correct driver version. Ensure your system’s BIOS/UEFI is configured to use the discrete GPU.
When troubleshooting, prioritize trusted sources like official documentation or reputable forums. Be cautious of arbitrary commands found online, as they could potentially compromise your digital security or system stability.
Conclusion
Installing Nvidia drivers in Ubuntu is a crucial step for anyone looking to unlock the full potential of their graphics hardware. Whether you’re a gamer seeking higher frame rates, a developer utilizing CUDA for AI/ML, or a professional demanding robust performance for creative applications, proprietary drivers are indispensable. By following the comprehensive steps outlined in this guide – from careful preparation and method selection to post-installation verification and optimization – you ensure a stable, high-performing system. This commitment to proper driver management not only enhances your system’s capabilities but also maximizes your hardware investment, contributing to a more efficient, productive, and enjoyable computing experience. Embrace the power of your Nvidia GPU, and transform your Ubuntu workstation into a high-performance hub.
aViewFromTheCave is a participant in the Amazon Services LLC Associates Program, an affiliate advertising program designed to provide a means for sites to earn advertising fees by advertising and linking to Amazon.com. Amazon, the Amazon logo, AmazonSupply, and the AmazonSupply logo are trademarks of Amazon.com, Inc. or its affiliates. As an Amazon Associate we earn affiliate commissions from qualifying purchases.