Kodi, once known as XBMC (Xbox Media Center), has evolved into a powerhouse for managing and enjoying your digital media. Whether you’re looking to organize your movie collection, stream your favorite TV shows, listen to music, or even play games, Kodi offers a versatile and customizable platform. If you’ve been hearing about Kodi and are wondering “how do I install Kodi?”, you’ve come to the right place. This comprehensive guide will walk you through the process, covering installation on various devices and providing insights into setting it up for optimal performance.
Kodi itself is an open-source media player application, meaning it’s free to download and use. What makes it so popular is its ability to act as a central hub for all your entertainment. It doesn’t host or provide any content; instead, it connects to your existing media libraries, local storage, and the internet to present everything in a user-friendly, visually appealing interface. This flexibility is its greatest strength, but it also means the installation and setup process can vary depending on the device you intend to use it on.
Before diving into the installation steps, it’s crucial to understand that Kodi is designed to run on a multitude of platforms. From smart TVs and streaming devices like Amazon Fire Stick and Nvidia Shield to desktop computers (Windows, macOS, Linux), smartphones (Android, iOS), and even single-board computers like the Raspberry Pi, Kodi can be integrated into almost any setup. This wide compatibility is a testament to its robust development and the vibrant community behind it.
Getting Started: Understanding Kodi and Its Ecosystem
To truly understand “how do I install Kodi?”, it’s beneficial to grasp what Kodi is at its core and the ecosystem that surrounds it. Kodi is a software application, not a physical device or a streaming service. It’s like a sophisticated player that needs to be installed on a device that can run applications and has a display.
What is Kodi?
At its heart, Kodi is a media center application. Think of it as a digital library and player rolled into one. It allows you to:
- Organize Your Media: Import your local movie, TV show, music, and photo collections. Kodi can automatically fetch metadata, artwork, and descriptions for your files, making your library look professional and easy to navigate.
- Stream Content: While Kodi doesn’t provide content itself, it’s designed to work with various add-ons. These add-ons can connect to legitimate streaming services, local network shares (like Network Attached Storage – NAS devices), or even your own digital broadcasts.
- Customize Your Experience: Kodi is highly customizable. You can change its skin (interface theme), add functionality with add-ons, and tailor its settings to your preferences.
- Cross-Platform Compatibility: As mentioned, Kodi is available for virtually any platform you can think of, making it a universal solution for your media needs.
The Role of Add-ons
A significant aspect of the Kodi experience is its add-on system. Add-ons are small programs that extend Kodi’s functionality. They can be official, developed and maintained by the Kodi team, or third-party, created by the broader community.
- Official Add-ons: These are typically for accessing legitimate streaming services (like YouTube, SoundCloud, or Plex) or for system utilities. They are generally safe and well-supported.
- Third-Party Add-ons: This category is where the more diverse (and sometimes controversial) add-ons reside. While some third-party add-ons are perfectly legal and useful (e.g., for accessing specific news feeds or personal media servers), others can be used to access pirated content. It’s crucial to exercise caution and understand the legality and safety of any third-party add-on you choose to install. The Kodi team strongly advises against the use of add-ons that facilitate copyright infringement.
Understanding add-ons is key to unlocking Kodi’s full potential, but also to using it responsibly and legally.
Installing Kodi on Your Favorite Devices
The process of “how do I install Kodi?” varies depending on the device you are using. Here, we’ll cover the most common platforms.
Installing Kodi on Streaming Devices (Amazon Fire Stick, Android TV Boxes, Nvidia Shield)
Streaming devices are arguably the most popular platforms for running Kodi due to their affordability, ease of use, and dedicated media-centric nature.
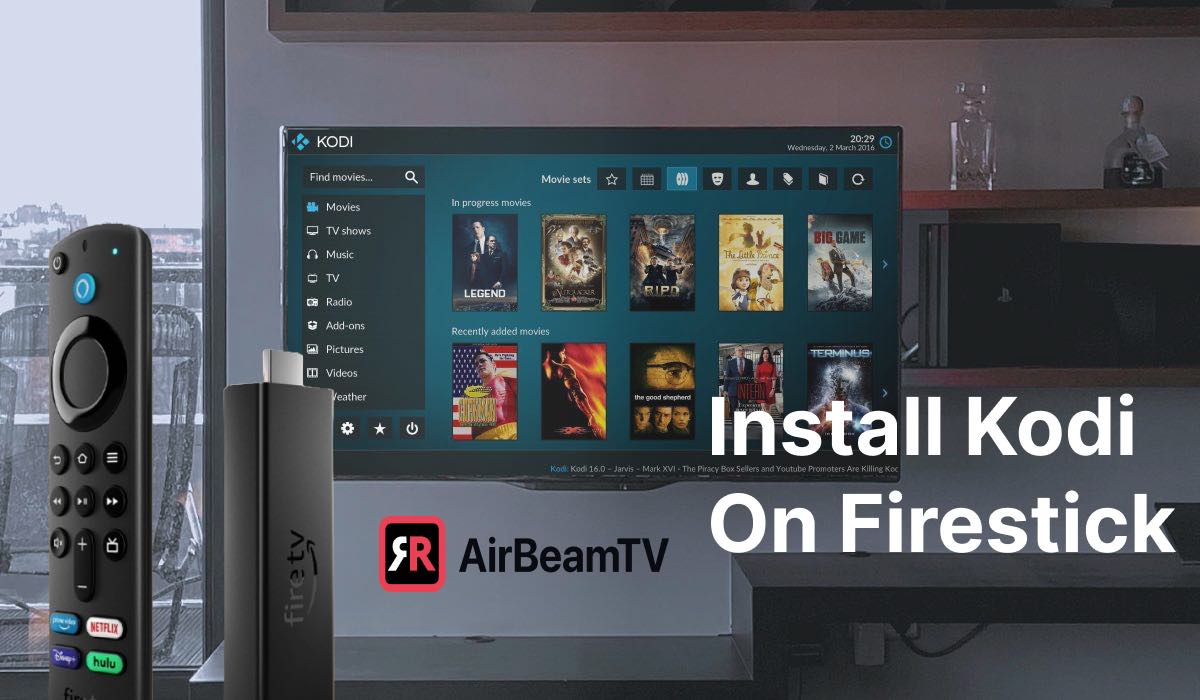
Amazon Fire Stick (and Fire TV devices)
The Amazon Fire Stick is a favorite for many, and installing Kodi is relatively straightforward, though it requires a slightly different approach than simply downloading from an app store.
- Enable “Apps from Unknown Sources”:
- Navigate to your Fire Stick’s Settings.
- Select My Fire TV (or Device & Software).
- Choose Developer Options.
- Turn on Apps from Unknown Sources. (If you don’t see Developer Options, go to “About” and click your Fire TV device name seven times to unlock it).
- Install a File Manager/Downloader App: You’ll need an app to download the Kodi APK file. The most common is the Downloader app, available directly from the Amazon Appstore. Install it.
- Download the Kodi APK:
- Open the Downloader app.
- In the URL field, enter the official Kodi download URL. You can find the latest Android APK URL on the official Kodi website (kodi.tv/download). It will look something like
https://kodi.tv/download/android. - Click Go. The APK file will download.
- Install Kodi: Once the download is complete, Downloader will prompt you to install the application. Follow the on-screen instructions.
- Launch Kodi: After installation, you can find Kodi in your Fire Stick’s “Apps & Channels” section. You might need to navigate to “See All” to find it.
Android TV Boxes and Nvidia Shield
For most Android TV boxes and the Nvidia Shield, installing Kodi is as simple as it gets.
- Open the Google Play Store: Navigate to the Google Play Store on your Android TV device.
- Search for Kodi: Use the search function to find “Kodi.”
- Install Kodi: Select the official Kodi app and click the “Install” button.
The device will download and install Kodi automatically. You can then launch it from your app list.
Installing Kodi on Computers (Windows, macOS, Linux)
Installing Kodi on your desktop or laptop is very similar to installing any other software.
Windows
- Visit the Official Kodi Website: Go to kodi.tv/download.
- Select the Windows Icon: Click on the Windows icon to be taken to the Windows download page.
- Download the Installer: Click on the installer link to download the
.exefile. - Run the Installer: Once the download is complete, double-click the
.exefile to start the installation wizard. - Follow On-Screen Instructions: Proceed through the standard Windows installation steps, accepting the license agreement and choosing an installation location (the default is usually fine).
- Launch Kodi: After installation, you can launch Kodi from your Start Menu or by navigating to the installation directory.
macOS
- Visit the Official Kodi Website: Go to kodi.tv/download.
- Select the macOS Icon: Click on the macOS icon to be taken to the macOS download page.
- Download the Disk Image: Click on the download link for the macOS disk image (
.dmgfile). - Open the DMG File: Once downloaded, double-click the
.dmgfile to mount it. - Drag and Drop: A window will appear showing the Kodi application icon and a shortcut to your Applications folder. Drag the Kodi icon into the Applications folder.
- Launch Kodi: You can now launch Kodi from your Applications folder or using Spotlight search.

Linux
The installation process for Linux can vary slightly depending on your distribution. The most common methods involve using your distribution’s package manager or compiling from source.
Using Package Managers (Recommended for most users):
- Debian/Ubuntu:
bash

sudo apt update

sudo apt install kodi
- Fedora:
bash

sudo dnf install kodi
- Arch Linux:
bash

sudo pacman -S kodi
Compiling from Source: This is a more advanced method and is generally not recommended unless you have specific reasons or are comfortable with compiling software. Instructions can be found on the official Kodi wiki.
Installing Kodi on Smartphones and Tablets (Android, iOS)
While not as common as on dedicated media devices, you can install Kodi on your mobile devices for convenience.
Android
- Open the Google Play Store: On your Android phone or tablet, open the Google Play Store.
- Search for Kodi: Search for “Kodi.”
- Install Kodi: Tap “Install” and follow the prompts.
iOS (iPhone/iPad)
Installing Kodi on iOS without jailbreaking is more complex and involves sideloading the application. This typically requires a computer, an Apple Developer account (even a free one), and tools like Cydia Impactor or AltStore.
- Download the Kodi IPA: Obtain the official Kodi
.ipafile from the Kodi website or a trusted source. - Use Sideloading Software:
- Cydia Impactor: Connect your iOS device to your computer, run Cydia Impactor, drag the IPA file into it, and sign it with your Apple ID.
- AltStore: This is a more modern alternative that allows you to refresh apps periodically without needing to reconnect your device every time.
- Install the App: Follow the instructions for your chosen sideloading tool. You may need to trust the developer profile in your iPhone’s settings after installation.
Due to the complexities, many users opt for a dedicated media device for Kodi.
Setting Up and Configuring Kodi for the First Time
Once you’ve successfully installed Kodi, the next crucial step in understanding “how do I install Kodi?” is learning how to configure it. This is where you’ll bring your media to life.
The Initial Setup Wizard
Upon launching Kodi for the first time, you might be greeted with a setup wizard, especially on some platforms. This wizard typically guides you through basic settings like language, region, and time zone.
Adding Your Media Sources
This is the core of setting up Kodi. You need to tell Kodi where your media files are located.
- Navigate to the Media Section: On the main Kodi menu, select Videos, Music, or Pictures.
- Select “Files”: Within the chosen media section, select Files.
- Click “Add Videos…” (or Music/Pictures): This will open a window to add a new media source.
- Browse for Your Media: Click the Browse button. You’ll see options like:
- Root filesystem: For files stored directly on the device.
- Network File System (NFS) / Samba (SMB): For accessing media stored on network-attached storage (NAS) devices or shared folders on other computers. You’ll need to enter the network path and credentials.
- External Storage: For USB drives or SD cards.
- Select Your Media Folder: Navigate to and select the folder containing your movies, TV shows, or music. Click OK.
- Name Your Source: Give this media source a descriptive name (e.g., “My Movies,” “TV Shows Library”). Click OK.
- Choose an Information Provider (Scraper): This is a crucial step. The scraper is responsible for fetching metadata (titles, descriptions, posters, cast information, etc.) for your media. For movies, The Movie Database Python is a popular and effective choice. For TV shows, The TVDB (TheTVDB) is commonly used. Select your preferred scraper and click OK.
- Scan Your Library: Kodi will ask if you want to scan the files in this directory for new content. Select Yes.
Kodi will now scan your chosen folder, identify your media, and start fetching all the relevant information. This process can take some time, especially for large libraries, and requires an active internet connection.
Customizing the Look and Feel (Skins and Add-ons)
- Changing Skins: Kodi’s appearance can be dramatically altered by changing its skin.
- Go to Settings (the gear icon).
- Select Interface.
- Under Skin, choose Skin.
- You can then select a different installed skin or click Get More… to download new skins from the official repository. Popular skins include Arctic Zephyr, Estuary (default), and Aeon Nox.
- Installing Add-ons: As discussed, add-ons extend Kodi’s functionality.
- Go to Settings.
- Select Add-ons.
- Click Install from repository (for official add-ons) or Install from zip file (for manually downloaded add-ons).
- Browse the repositories for what you need, whether it’s a streaming service, a subtitle downloader, or a utility.
Troubleshooting Common Installation and Setup Issues
Even with a clear guide on “how do I install Kodi?”, you might encounter hiccups. Here are some common issues and their solutions:
- Kodi Not Installing:
- Fire Stick: Ensure “Apps from Unknown Sources” is enabled. Check that your Fire Stick has sufficient storage space.
- Computer: Make sure you’re downloading the correct installer for your operating system and architecture (32-bit vs. 64-bit). Temporarily disable your antivirus if it’s interfering.
- Mobile: For iOS, ensure your Apple ID is valid and that you’ve trusted the developer profile in settings.
- Media Not Showing Up:
- Incorrect Source Path: Double-check the path to your media files.
- Wrong Scraper: Try a different scraper for your media type.
- No Internet Connection: Scrapers need the internet to fetch metadata.
- File Naming Convention: Kodi works best with standard naming conventions (e.g., “Movie Title (Year).mkv,” “TV Show Name – S01E01 – Episode Title.mkv”). Ensure your files are named clearly.
- Corrupted Files: Try playing the media file directly with another player to rule out file corruption.
- Add-ons Not Working:
- Outdated Add-on: Add-ons can break when the service they connect to changes or when Kodi itself is updated. Check if there’s an updated version.
- Repository Issues: If you installed from a repository, the repository itself might be offline or broken.
- Kodi Version Compatibility: Ensure the add-on is compatible with your version of Kodi.
- Performance Issues (Lagging, Slowdowns):
- Device Limitations: If you’re using a low-power device, it might struggle with high-definition content or complex skins.
- Overloaded Skin: Some skins are more resource-intensive than others. Try switching to the default Estuary skin to see if performance improves.
- Too Many Add-ons: Disable or uninstall add-ons you don’t use, as they can consume resources in the background.
- Network Speed: For streaming, a slow or unstable internet connection will cause buffering and lag.
Remember that the Kodi community forums and official Kodi wiki are excellent resources for further troubleshooting and detailed information.
Conclusion: Unleash Your Digital Entertainment with Kodi
Installing Kodi is the first step towards a more organized, personalized, and powerful media experience. By following the steps outlined in this guide, you can successfully install Kodi on your preferred device and begin setting it up to manage your movies, music, TV shows, and more. While the initial setup might seem a bit daunting, especially for those new to the platform, the ability to centralize and enjoy your entire digital library in a beautiful, user-friendly interface is well worth the effort.
Remember to always source your media legally and to be mindful of the add-ons you install, opting for official repositories whenever possible. With Kodi, your digital entertainment is in your hands, ready to be customized and enjoyed to the fullest. Happy streaming!
aViewFromTheCave is a participant in the Amazon Services LLC Associates Program, an affiliate advertising program designed to provide a means for sites to earn advertising fees by advertising and linking to Amazon.com. Amazon, the Amazon logo, AmazonSupply, and the AmazonSupply logo are trademarks of Amazon.com, Inc. or its affiliates. As an Amazon Associate we earn affiliate commissions from qualifying purchases.