The thrill of unboxing a new graphics card and sliding it into your PC is unmatched for any tech enthusiast. Whether you’re upgrading for cutting-edge gaming, intensive content creation, or simply to future-proof your rig, a new GPU represents a significant investment in your digital experience. However, the journey doesn’t end with the satisfying click of the card locking into its PCIe slot. To truly unlock its full potential, ensure system stability, and protect your investment, a series of crucial post-installation steps are necessary.
This comprehensive guide will walk you through everything you need to do after physically installing your new GPU. From verifying hardware connections and scrubbing old software to optimizing performance and understanding advanced configurations, we’ll cover the essential actions that bridge the gap between a fresh installation and a seamlessly integrated, high-performing system. By meticulously following these steps, you’ll not only maximize your GPU’s capabilities but also gain peace of mind, knowing your setup is primed for peak efficiency and longevity.

Initial Setup and Verification: Laying the Foundation
Before you even think about firing up your favorite game or demanding application, it’s critical to ensure all physical connections are secure and your system’s BIOS/UEFI is configured correctly. This foundational stage prevents a host of common issues and sets the stage for a smooth software installation process. Overlooking these initial checks can lead to frustrating troubleshooting later on, making a few minutes spent here incredibly valuable.
Physical Connections and Power Check
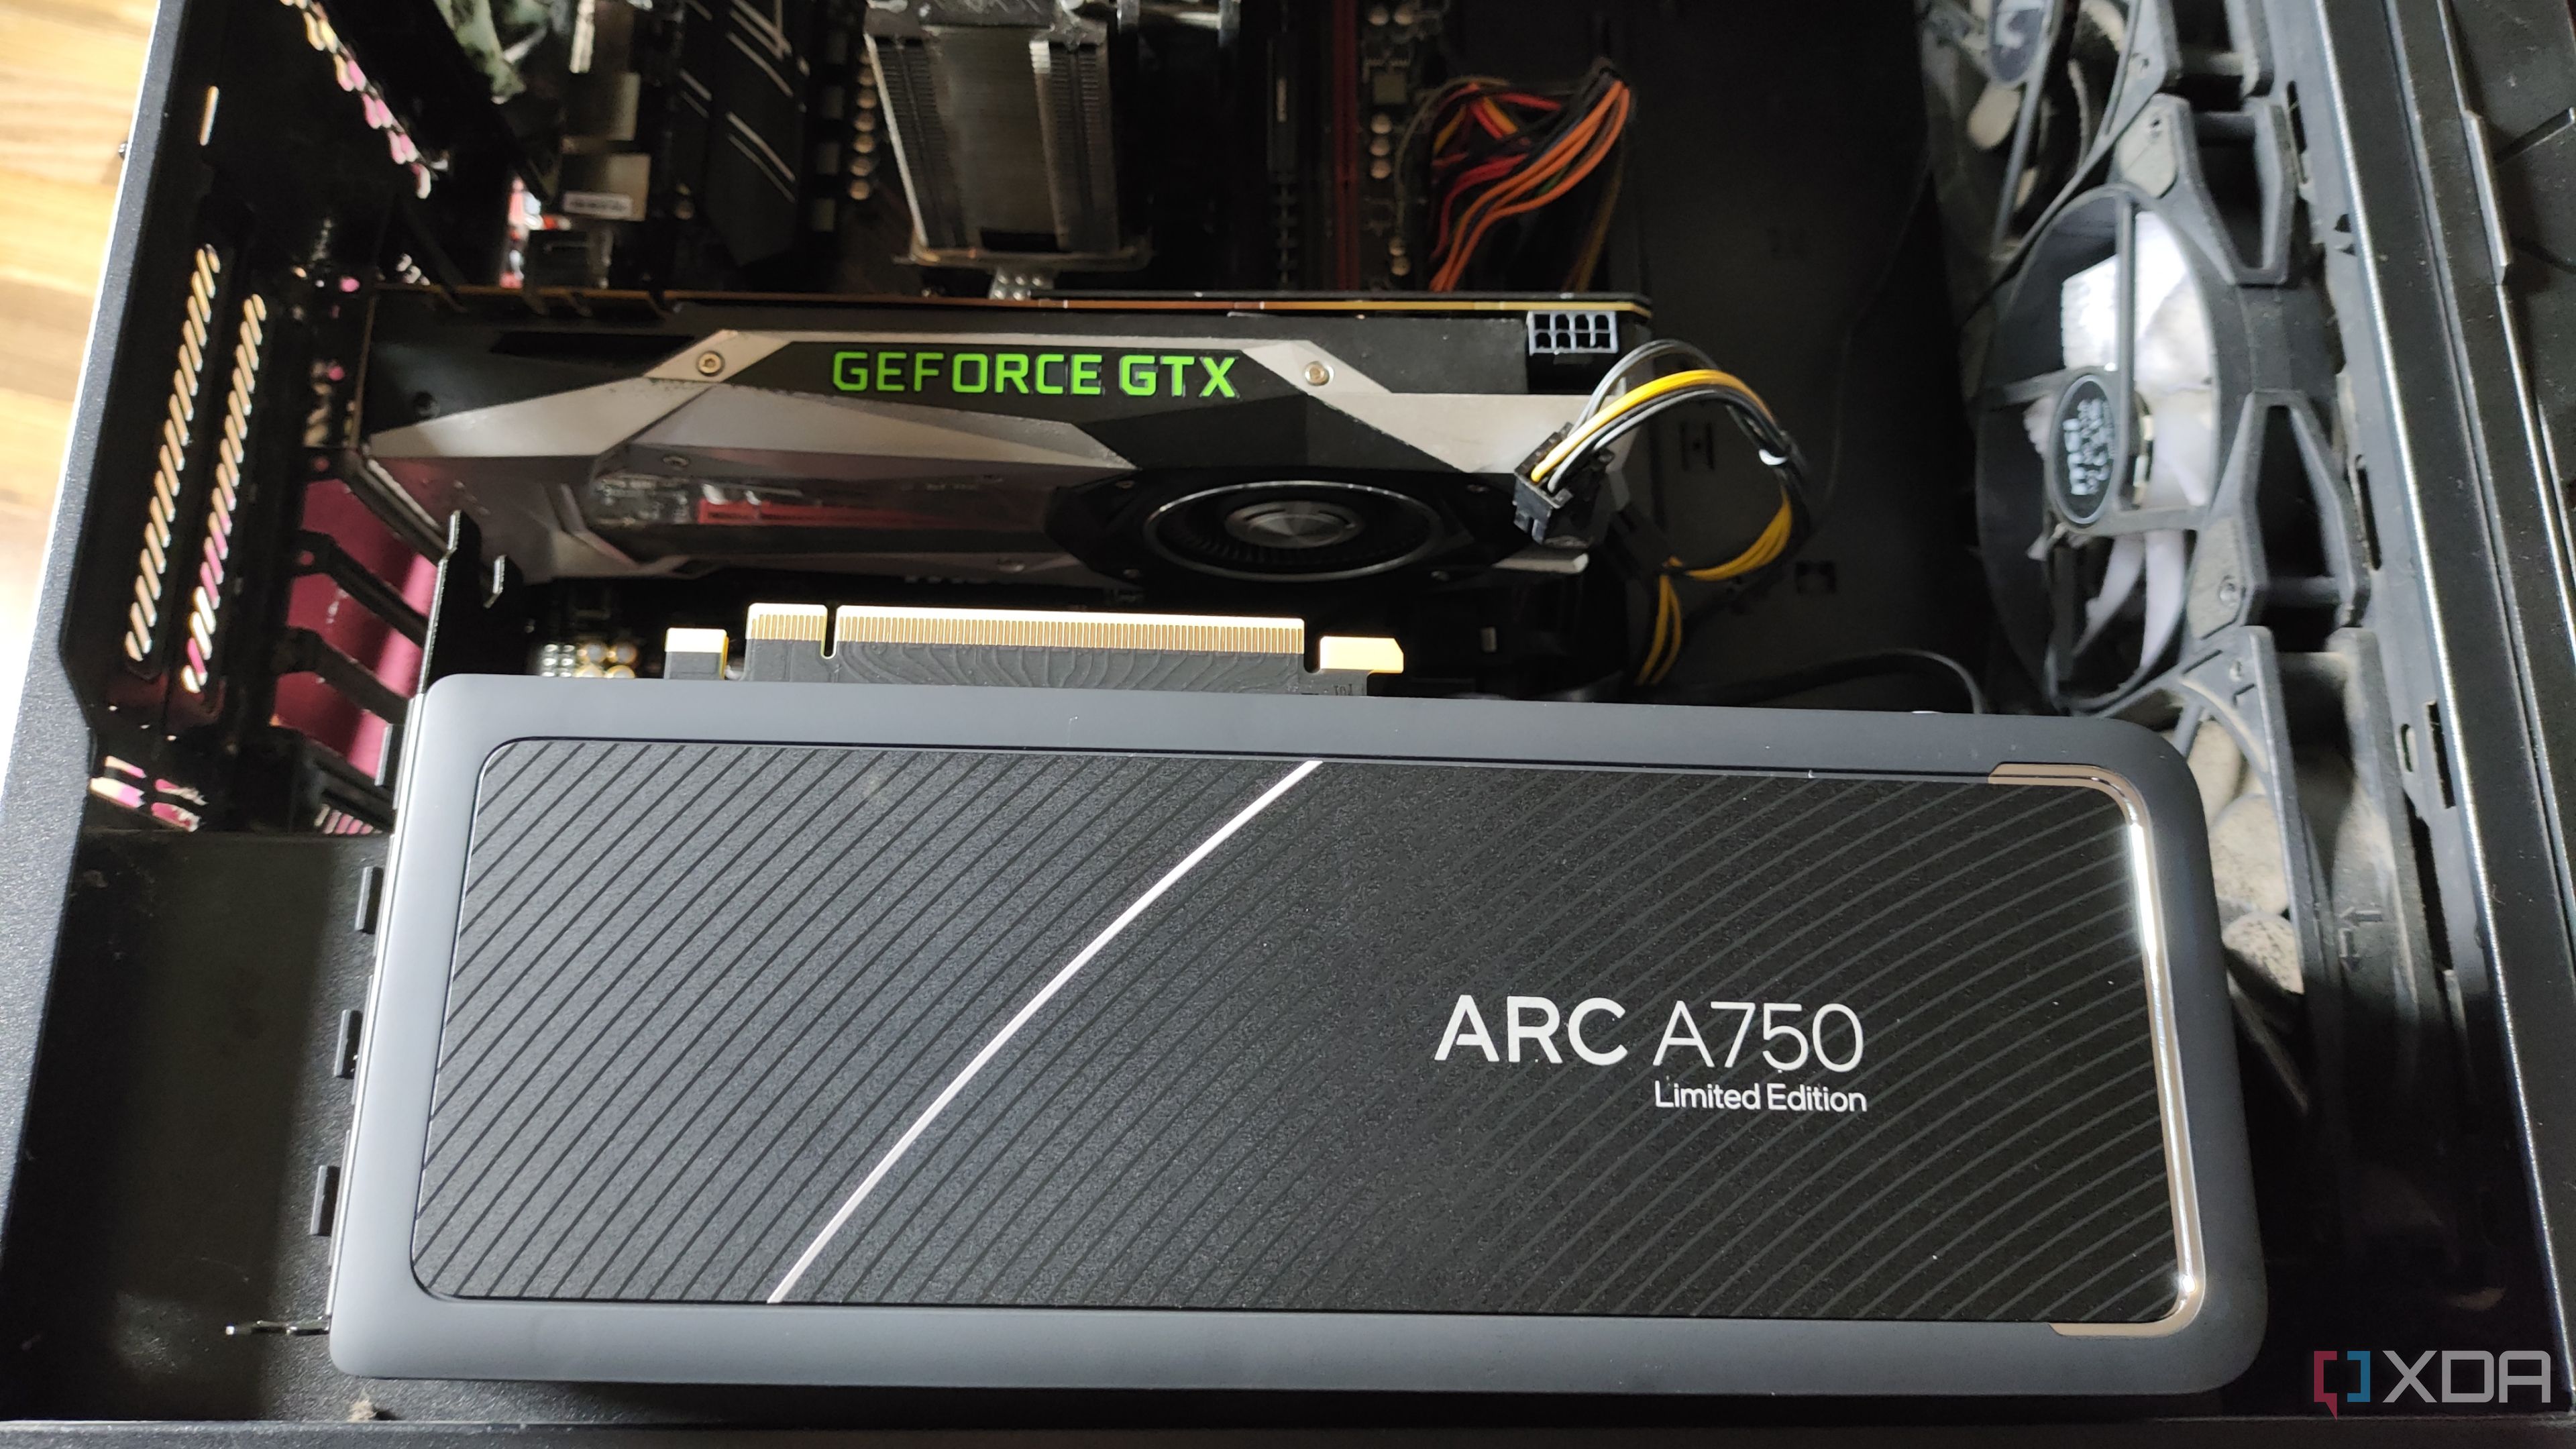
Even for experienced builders, it’s easy to miss a crucial connection amidst the excitement. Start by double-checking that your new GPU is fully seated in the primary PCIe x16 slot on your motherboard. A visible and audible click usually confirms it’s locked in. Next, examine all power connections. Modern high-performance GPUs often require one or more dedicated PCIe power cables (6-pin, 8-pin, or 12VHPWR) directly from your power supply unit (PSU). Ensure each connector is firmly plugged into both the GPU and the PSU, especially if it’s a modular unit. A loose power cable is a frequent culprit for “no signal” errors or system instability under load. Finally, confirm your display cable (HDMI or DisplayPort) is connected to the new GPU’s output ports, not the motherboard’s integrated graphics ports.
BIOS/UEFI Configuration and PCIe Slot Verification
Accessing your system’s BIOS/UEFI settings is a vital step to ensure your motherboard is ready for the new hardware. Typically, you can enter BIOS by pressing ‘Delete’, ‘F2’, ‘F10’, or ‘F12’ during startup. Once inside, navigate to the PCIe or Graphics section. Verify that your primary graphics adapter is set to “PCIe” or “Discrete Graphics” rather than “Integrated Graphics.” This ensures your system prioritizes the new GPU. For modern systems and GPUs (NVIDIA RTX 30/40 series, AMD RX 6000/7000 series), look for options like “Resizable BAR” (NVIDIA) or “Smart Access Memory (SAM)” (AMD) and enable them. These technologies allow the CPU to access the GPU’s entire frame buffer, potentially boosting performance in supported games. Also, confirm your primary PCIe slot is operating at its maximum speed (e.g., PCIe Gen 4.0 x16 or Gen 5.0 x16).
Removing Old Drivers (DDU)
One of the most critical, yet often overlooked, steps is to completely remove any old GPU drivers. Residual files from previous NVIDIA, AMD, or even integrated graphics drivers can conflict with your new card’s drivers, leading to instability, performance issues, or even preventing the system from booting correctly. The recommended tool for this task is Display Driver Uninstaller (DDU). Download DDU from a reputable source (e.g., Guru3D), boot your PC into Windows Safe Mode, and run DDU. Select the appropriate GPU vendor (NVIDIA or AMD) and choose the “Clean and restart” option. This utility meticulously scrubs all driver remnants, providing a clean slate for your new GPU’s drivers. This meticulous cleansing process is a cornerstone of preventing future software conflicts, ensuring your new hardware and its dedicated software can operate in harmony without inherited digital “baggage.”
Software Installation and Optimization: Unleashing Performance
With the hardware physically secure and old drivers purged, it’s time to equip your new GPU with the necessary software. The right drivers are the heart of your graphics card, allowing it to communicate effectively with your operating system and applications. Beyond basic installation, fine-tuning these software settings can yield significant performance gains and a more tailored user experience. This stage directly impacts how well your new card performs, making attention to detail here paramount for maximizing your investment.
Installing the Latest GPU Drivers
Immediately after a DDU cleanup and reboot, your operating system might install a generic display driver, but you need the official, up-to-date drivers from your GPU manufacturer. Visit the official website for NVIDIA (GeForce Drivers) or AMD (Adrenalin Drivers) to download the latest stable drivers for your specific card model and operating system. Avoid third-party driver download sites to ensure digital security and prevent malware. During installation, opt for a “Custom” or “Advanced” install rather than “Express.” This allows you to deselect optional software you don’t need (like certain audio drivers or unnecessary components) and perform a “Clean Installation” (even after DDU, this is a good habit). Once installed, reboot your system again to ensure all changes take effect.
Optimizing Driver Settings
Both NVIDIA’s Control Panel and AMD’s Adrenalin Software offer extensive settings that can significantly impact performance, visual quality, and power consumption. Dive into these control panels to tailor your experience. Key settings to consider:
- Power Management Mode (NVIDIA): Set to “Prefer Maximum Performance” to prevent your GPU from downclocking during demanding tasks.
- Image Sharpening/Radeon Image Sharpening (RIS) (NVIDIA/AMD): Experiment with these to enhance visual clarity without a significant performance hit.
- Anti-aliasing (AA) and Anisotropic Filtering (AF): While often controlled by games, you can sometimes override application settings here for specific titles if desired, but generally, in-game settings are preferred.
- V-Sync: Enable “Fast Sync” (NVIDIA) or “Enhanced Sync” (AMD) for tear-free gaming at high frame rates without the input lag of traditional V-Sync.
- Frame Rate Target Control (AMD): Limit FPS to manage power consumption and heat if your GPU consistently exceeds your monitor’s refresh rate.
Careful optimization here transforms your generic installation into a personalized powerhouse.
Essential Software Updates (OS, Chipset)
While the GPU drivers are paramount, don’t overlook other critical system updates. Ensure your Windows operating system (or Linux distribution) is fully updated. Microsoft often releases performance enhancements and security patches that can directly benefit hardware. Navigate to Windows Update and install any pending updates. Furthermore, visit your motherboard manufacturer’s website and download the latest chipset drivers for your specific motherboard model. Chipset drivers facilitate communication between various components on your motherboard, including the PCIe lanes your GPU uses. Outdated chipset drivers can sometimes cause subtle performance bottlenecks or instability. Finally, consider updating your motherboard’s BIOS/UEFI firmware if a newer, stable version is available, especially if it includes specific optimizations for newer GPUs or PCIe generations. Always exercise caution when updating BIOS and follow the manufacturer’s instructions precisely to avoid bricking your motherboard.
Performance Testing and Benchmarking: Confirming Your Investment
After the software foundation is laid, it’s time for the true test: how well does your new GPU actually perform? Benchmarking and real-world testing are crucial steps to validate your investment, identify any bottlenecks, and ensure your system is operating as expected. This process not only confirms that everything is working but also provides valuable metrics for comparison and future reference. It allows you to objectively quantify the performance upgrade and troubleshoot any unexpected results.
Running Synthetic Benchmarks
Synthetic benchmarks are specialized applications designed to push your GPU to its limits and generate standardized scores. These scores are invaluable for comparing your system’s performance against others with similar hardware configurations and for identifying if your card is performing within expected parameters. Popular synthetic benchmarks include:
- 3DMark (Time Spy, Port Royal): A suite of benchmarks covering DirectX 12, ray tracing, and more. It offers a comprehensive overview of your system’s graphics and CPU performance.
- UNIGINE Superposition: Known for its visually stunning, graphically intensive scenes, it’s an excellent tool for stress testing and gathering reliable FPS data.
- Heaven Benchmark: An older but still relevant benchmark that can provide a baseline for DirectX 11 performance.
Run several passes on these benchmarks and compare your scores to online databases. Significantly lower scores than expected might indicate a problem with drivers, power, or thermal throttling.
Real-World Gaming and Application Testing
While synthetic benchmarks provide raw numbers, real-world testing in your favorite games and applications is where the rubber meets the road. Load up a few graphically demanding titles that you frequently play or the professional applications you use daily. Monitor your frame rates (FPS) using in-game overlays or third-party tools like MSI Afterburner (which can also display GPU usage, temperatures, and clock speeds). Pay attention to consistency; look for smooth frame delivery rather than just peak FPS. Test different settings, from high to ultra, to understand your GPU’s capabilities at various quality levels. For content creators, run rendering tasks or video editing workflows to gauge performance improvements in productivity applications. This practical testing ensures your actual user experience matches your expectations from the upgrade.
Monitoring Temperatures and System Stability
During benchmarking and real-world testing, closely monitor your GPU’s temperatures. Overheating can lead to performance throttling, instability, and potentially shorten the lifespan of your hardware. Tools like MSI Afterburner, HWMonitor, or the monitoring section within AMD Adrenalin/NVIDIA GeForce Experience are essential.
- Idle Temperatures: Typically below 40-50°C.
- Load Temperatures: Under heavy load, temperatures usually range from 60-80°C, though some high-end cards might push into the low 80s under extreme conditions. Consistently hitting 85°C+ could indicate insufficient cooling or poor airflow in your case.
Observe for any crashes, freezes, or visual artifacts during extended periods of load. If your system remains stable with acceptable temperatures across various demanding tasks, it’s a good sign your installation and setup are successful. If not, further troubleshooting into cooling, power, or driver issues may be necessary.
Advanced Configuration and Fine-Tuning: Maximizing Your Experience
Once your new GPU is up and running stably, there are further steps you can take to squeeze out every last drop of performance, optimize for noise, or ensure longevity. These advanced configurations are not strictly necessary for basic operation but can significantly enhance your overall experience. Approaching these with caution and understanding is key, as some involve pushing your hardware beyond factory defaults.
Understanding Overclocking (and its Risks)
Overclocking involves increasing your GPU’s core clock speed and/or memory clock speed beyond its manufacturer-set limits to gain additional performance. While it can yield a few extra frames per second, especially in CPU-bound scenarios, it comes with inherent risks. Increased clock speeds demand more power, generate more heat, and can lead to instability, crashes, and potentially reduce the lifespan of your GPU if not done carefully. If you choose to overclock, use reputable tools like MSI Afterburner or EVGA Precision X1. Start with small, incremental adjustments, thoroughly testing stability and monitoring temperatures after each change. Never push voltages excessively unless you fully understand the implications. For most users, the factory settings provide an optimal balance of performance, stability, and longevity, making aggressive overclocking often unnecessary.
Custom Fan Curves and Undervolting
Beyond pure performance, you can optimize your GPU for acoustics and thermal efficiency.
- Custom Fan Curves: Your GPU’s fans usually follow a pre-programmed curve that balances noise and temperature. Using tools like MSI Afterburner, you can create a custom fan curve. For example, you might set the fans to spin slower at lower temperatures for a quieter idle experience, then ramp up more aggressively at higher temperatures to maintain optimal cooling under load. This offers a personalized balance between acoustics and thermals.
- Undervolting: This involves reducing the voltage supplied to your GPU while maintaining its clock speed. Lower voltage means less power consumption and, consequently, less heat generation. This often results in a cooler, quieter, and potentially more stable card without sacrificing performance. Similar to overclocking, undervolting requires careful testing and incremental adjustments. It’s generally safer than overclocking as it reduces stress on the hardware, but unstable undervolts can still lead to crashes. Many users find a ‘sweet spot’ where their GPU runs significantly cooler and quieter with a minor undervolt, making it a valuable optimization for system health and user comfort.
Maintaining Your GPU for Longevity
Your GPU is a significant investment, and proper care can extend its lifespan and maintain its performance.
- Keep Drivers Updated: Regularly check for new GPU drivers from NVIDIA or AMD. These often include performance optimizations, bug fixes, and support for new games/applications.
- Ensure Good Airflow: Maintain good airflow within your PC case. Clean out dust buildup from case fans, CPU cooler, and GPU heatsink fins periodically using compressed air. Dust acts as an insulator, trapping heat and reducing cooling efficiency.
- Monitor System Health: Continue to monitor temperatures and GPU usage regularly. Early detection of rising temperatures or unusual behavior can prevent potential issues.
- Consider PSU Load: Ensure your Power Supply Unit (PSU) has sufficient wattage for your new GPU, especially if you’re overclocking. An underpowered PSU can lead to instability and component stress. Regularly checking these aspects helps ensure your graphics card performs optimally for years to come, preserving the value of your initial outlay.
Troubleshooting Common Issues: Navigating Potential Hurdles
Even with careful installation, issues can arise. Knowing how to diagnose and address common problems is an invaluable skill for any PC owner. This section prepares you to tackle typical post-GPU installation hurdles, saving you time and frustration and potentially avoiding costly professional repairs. A methodical approach to troubleshooting is always the most effective.
Display Issues (No Signal, Black Screen)
These are arguably the most common and alarming issues after a new GPU install.
- No Signal: First, double-check that your monitor cable is plugged into the new GPU’s port, not the motherboard’s integrated graphics port. Ensure the monitor is on the correct input source. Verify all power cables to the GPU are securely connected. If you have multiple monitors, try connecting just one to isolate the problem.
- Black Screen: This could stem from a driver conflict. If you can boot into Safe Mode (usually by pressing F8 or Shift+Restart before Windows loads), perform another DDU cleanup and reinstall drivers. A corrupt BIOS setting can also cause this; try resetting your motherboard’s CMOS (refer to your motherboard manual for instructions, often involves removing a battery or shorting pins).
- Intermittent Signal/Flickering: Check the integrity of your display cable (try a different one), and ensure it’s firmly seated. This could also be an early sign of an unstable driver or an issue with the GPU itself.
Performance Problems (Stuttering, Low FPS)
If your new GPU isn’t delivering the expected frame rates, several factors could be at play.
- Driver Issues: Always the first suspect. Ensure you have the latest drivers installed cleanly (use DDU if necessary). Also, confirm you’ve installed the correct drivers for your specific card model.
- CPU Bottleneck: While your GPU is new, your CPU might be struggling to keep up, especially in CPU-intensive games or at lower resolutions. Monitor CPU utilization alongside GPU utilization; if your CPU is consistently at 100% while your GPU is underutilized, your CPU is likely the bottleneck.
- Thermal Throttling: As discussed, high temperatures force your GPU to reduce clock speeds to prevent damage, leading to lower performance. Monitor temperatures and improve case airflow if needed.
- Power Supply Issues: An underpowered or failing PSU can cause performance drops under load. Ensure your PSU provides enough wattage for your entire system, especially the power-hungry new GPU.
- Background Applications: Close unnecessary programs and processes running in the background that consume CPU, RAM, or disk I/O.
Driver-Related Glitches
Beyond outright crashes, drivers can cause subtle glitches like graphical artifacts, texture flickering, or game-specific issues.
- Rolling Back Drivers: If a new driver version causes problems, try rolling back to a previous, stable version. Both NVIDIA and AMD keep archives of older drivers on their websites.
- Clean Driver Reinstallation: Again, DDU is your best friend here. A complete wipe and fresh install often resolves persistent driver-related oddities.
- Game-Specific Driver Issues: Sometimes, a particular game might have issues with the very latest driver. Check online forums or the game developer’s support pages for known compatibility problems and potential workarounds.
- OS Corruptions: In rare cases, severe driver conflicts can corrupt Windows system files. Running
sfc /scannowin an elevated Command Prompt can check and repair corrupted system files. A system restore point made before the new GPU installation can also be a lifesaver.
By systematically addressing these common issues, you can usually diagnose and resolve problems quickly, allowing you to get back to enjoying your powerful new graphics card.
The installation of a new GPU is an exciting upgrade, but the post-installation process is equally as important as the physical swap itself. By diligently performing the initial setup checks, installing and optimizing your software, validating performance through benchmarks, and fine-tuning your system, you ensure that your significant tech investment delivers its full potential. Remember that ongoing maintenance, driver updates, and vigilant monitoring of your system’s health are key to a long-lasting and satisfying experience. Embrace these steps, and prepare to immerse yourself in a new era of enhanced visual fidelity and buttery-smooth performance.
aViewFromTheCave is a participant in the Amazon Services LLC Associates Program, an affiliate advertising program designed to provide a means for sites to earn advertising fees by advertising and linking to Amazon.com. Amazon, the Amazon logo, AmazonSupply, and the AmazonSupply logo are trademarks of Amazon.com, Inc. or its affiliates. As an Amazon Associate we earn affiliate commissions from qualifying purchases.