
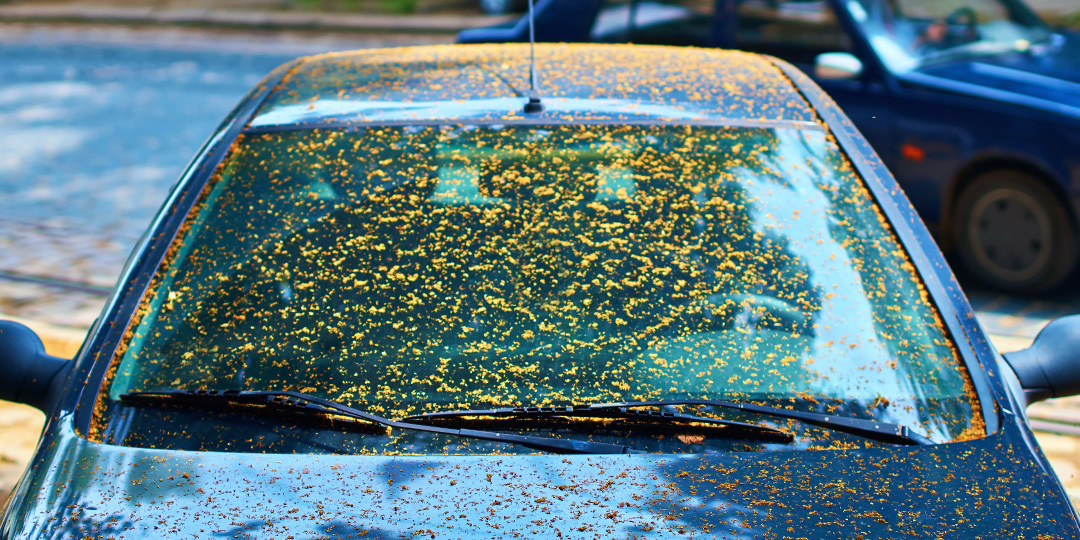
Tree sap, while a natural occurrence, presents a formidable adversary for car owners, often leaving behind a sticky, stubborn residue that is not only unsightly but also poses a significant financial threat to a vehicle’s long-term value and aesthetic integrity. Beyond the immediate inconvenience, neglecting sap removal can lead to costly repairs and depreciation, making it a critical component of savvy personal finance and asset management for any car owner. Understanding the financial implications of sap damage and the cost-effectiveness of various removal strategies is paramount to protecting your automotive investment.
The Hidden Costs of Tree Sap Damage
Many car owners underestimate the profound financial impact that seemingly innocuous tree sap can have on their vehicle. It’s not merely a cosmetic blemish; it’s a corrosive agent that, if left unattended, eats away at your car’s value.
Depreciation and Resale Value
A car’s resale value is heavily influenced by its cosmetic condition. A vehicle with a pristine paint job and well-maintained exterior will invariably command a higher price on the used car market than one marred by stains, pitting, or dull spots. Tree sap, particularly if allowed to bake under the sun, can permanently etch into the clear coat, leaving behind irreversible marks. These blemishes reduce the car’s attractiveness and signal to potential buyers a lack of diligent maintenance, translating directly into a lower valuation. Every dollar lost in resale value due to neglected sap is a tangible financial blow to the owner.
Potential for Permanent Paint Damage
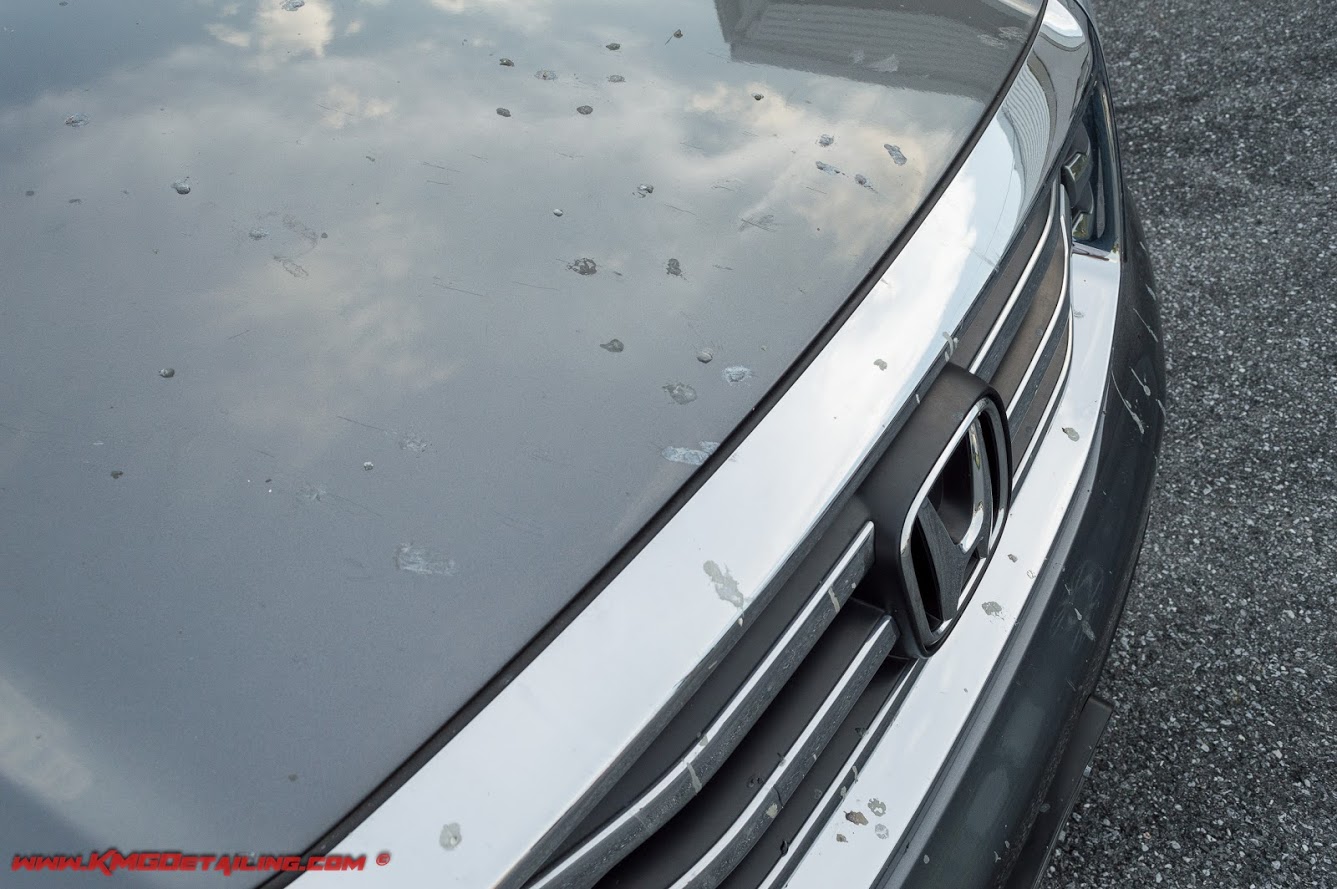
The composition of tree sap includes organic compounds and sugars that are acidic and corrosive. When exposed to heat, this acidity intensifies, causing the sap to bond more aggressively with the car’s clear coat. Over time, it can penetrate the clear coat and even the underlying paint layer, leading to permanent discoloration, pitting, and even cracking. Repairing this kind of damage often necessitates professional paint correction, which can range from hundreds to thousands of dollars depending on the severity and extent of the damage. This cost far outweighs the expense and effort of timely sap removal.
Beyond Aesthetics: Functional Implications
While primarily an aesthetic concern, severe sap accumulation can have minor functional impacts. Thick layers of sap on windows or mirrors can impede visibility, posing a safety risk. On certain plastic trim or rubber seals, prolonged exposure can lead to degradation, necessitating replacement of these components. Though less common, these scenarios add to the cumulative financial burden of neglecting sap.
DIY vs. Professional: A Cost-Benefit Analysis
When faced with sap removal, car owners typically have two routes: do-it-yourself (DIY) or professional detailing. Each path presents its own financial equation of costs, risks, and potential returns.
The DIY Approach: Savings and Risks
Opting for DIY sap removal can offer significant cost savings upfront. A bottle of specialized sap remover, a microfiber towel, and perhaps some rubbing alcohol or mineral spirits might cost anywhere from $10 to $30. This is a fraction of what a professional detailer charges. However, the DIY route is not without its risks. Using incorrect products (e.g., harsh household cleaners, abrasive scrubbers) or improper techniques can inadvertently cause more damage to the clear coat or paint, leading to swirl marks, scratches, or dullness. Such damage often requires professional correction, effectively negating any initial savings and potentially adding to the overall expense. The time investment for DIY also has an opportunity cost; the hours spent cleaning could be spent on income-generating activities or leisure.
Professional Detailing: When to Invest
Professional detailing services, while more expensive (ranging from $50 to $200+ for sap removal alone, or as part of a larger detailing package), offer expertise, specialized tools, and premium products. A professional detailer understands paint types, clear coat resilience, and the most effective yet gentle methods for sap removal. They also often provide a guarantee against further damage. This investment becomes particularly justifiable for:
- Extensive or Old Sap: When sap has been on the car for an extended period, is heavily crusted, or covers a large area.
- High-Value Vehicles: For luxury cars or collector vehicles where paint integrity is paramount to maintaining investment value.
- Lack of Time or Expertise: For individuals who lack the time, proper materials, or confidence to tackle the job themselves.
- Preventing Further Damage: If initial DIY attempts have been unsuccessful or have caused minor damage, professional intervention can prevent the situation from worsening.
Considering the potential cost of paint correction or depreciation, the fee for professional sap removal can often be seen as a prudent investment to preserve the car’s condition and value.
Product Cost Comparison: Solvents, Waxes, and Clay Bars
When evaluating DIY options, understanding the cost and efficacy of different products is crucial for making financially sound decisions.
- Rubbing Alcohol/Mineral Spirits: These are often the most cost-effective first-line defenses, costing under $10 for a bottle. They are effective on fresh to moderately aged sap but require careful application to avoid stripping wax or damaging certain plastics.
- Specialized Sap Removers: Formulated specifically for automotive paint, these products typically range from $10 to $25. They are often safer and more effective, reducing the risk of accidental damage.
- Clay Bars: While not a primary sap remover, a clay bar kit (around $20-$40) is an essential tool for removing residual contaminants after initial sap removal, ensuring a smooth finish without microscopic particles that could cause long-term damage.
- Waxes/Sealants: After sap removal, reapplying wax or a sealant (costing $15-$50+) is critical. This protective layer is a proactive investment, creating a barrier against future sap adhesion and making subsequent cleaning easier, thus saving time and money in the long run.

Proactive Measures: An Investment in Your Vehicle’s Future
The most financially intelligent approach to tree sap is prevention. Proactive measures can significantly reduce the likelihood of sap damage, translating into long-term savings on detailing, repairs, and depreciation.
The Value of Preventative Care (Waxes, Sealants, Ceramic Coatings)
Applying a protective layer to your car’s paint is akin to an insurance policy against environmental hazards like tree sap.
- Waxes: Traditional car waxes (carnauba or synthetic) provide a sacrificial layer that sap adheres to instead of the clear coat. This makes sap removal much easier and less damaging. Regular waxing (every 1-3 months, costing $15-$30 per bottle DIY) is a low-cost, high-return maintenance activity.
- Paint Sealants: Offering superior durability and protection compared to waxes, sealants (lasting 6-12 months, costing $20-$50 per bottle DIY) create a tougher barrier. The slightly higher initial investment pays off through extended protection and less frequent reapplication.
- Ceramic Coatings: The most robust and long-lasting form of paint protection, ceramic coatings (lasting 2-5+ years, DIY kits $50-$200; professional application $500-$2000+) create a semi-permanent, hydrophobic layer. This not only makes sap removal incredibly easy but also offers unparalleled protection against etching and other contaminants, representing a significant upfront investment that delivers substantial long-term savings in maintenance and preserves resale value. For those committed to long-term vehicle ownership, a ceramic coating is a compelling financial decision.
Strategic Parking: The Simplest Saving
The most straightforward and zero-cost preventative measure is strategic parking. Avoiding parking directly under trees known for heavy sap production (e.g., pines, maples, oaks, fruit trees) is the first line of defense. If garage parking is available, utilizing it protects your vehicle from all environmental contaminants, including sap. This simple habit requires no financial outlay but yields significant financial protection.
Budgeting for Car Care
Incorporating car care, including potential sap removal products or detailing services, into your personal finance budget is a smart move. Allocating a small monthly sum (e.g., $20-$50) for maintenance allows you to address issues promptly, preventing minor problems from escalating into expensive repairs. This proactive budgeting approach treats your car as a valuable asset that requires consistent financial allocation for its upkeep.
Choosing the Most Economical Removal Method
When sap inevitably lands on your car, selecting the most economical and effective removal method depends on the sap’s age and severity.
Assessing the Severity: Fresh vs. Cured Sap
- Fresh Sap: Newly deposited sap is soft and sticky. It’s the easiest and cheapest to remove. Prompt action with mild solutions minimizes financial impact.
- Cured Sap: Sap that has dried and hardened, especially after sun exposure, has chemically bonded with the paint. This requires more aggressive (and potentially more expensive) methods and carries a higher risk of paint damage if not handled correctly.
Effective and Budget-Friendly Solutions (Alcohol, Mineral Spirits, Specific Cleaners)
For fresh to moderately cured sap, the following budget-friendly methods are often effective:
- Rubbing Alcohol (Isopropyl Alcohol): Dampen a soft microfiber cloth with rubbing alcohol (70% or higher). Gently place the cloth over the sap spot for 30-60 seconds to allow it to soften. Wipe away the sap. Rinse the area thoroughly with water and reapply wax to the treated spot. Cost: < $5.
- Mineral Spirits (Paint Thinner): Similar to rubbing alcohol, apply mineral spirits to a microfiber cloth, let it dwell on the sap, then gently wipe. Mineral spirits are slightly more aggressive and should be used cautiously, always rinsing and re-waxing afterwards. Cost: < $10.
- Specialized Automotive Sap Removers: These products are designed to be safe for automotive paint and are often very effective. Follow the product instructions carefully. While slightly more expensive than alcohol or mineral spirits, their formulation reduces the risk of paint damage, providing peace of mind. Cost: $10-$25.
- Quick Detailer with Clay Bar (for residue): After initial sap removal, if a slight texture remains, a clay bar with quick detailer can safely lift embedded contaminants without abrading the paint. This ensures a perfectly smooth finish. Cost: $20-$40 for a kit.
Always work in small sections, out of direct sunlight, and test the chosen method on an inconspicuous area first to ensure it doesn’t harm your paint.
Step-by-Step for Cost-Effective DIY Removal
- Wash the Car: Begin by thoroughly washing the affected area (or the entire car) to remove loose dirt and grime, which could scratch the paint during sap removal.
- Apply Solvent: Dampen a clean, soft microfiber towel with your chosen solvent (alcohol, mineral spirits, or specialized remover).
- Dwell Time: Gently place the dampened cloth over the sap spot and allow it to sit for 30 seconds to a minute, letting the solvent penetrate and soften the sap. Do not scrub harshly immediately.
- Gentle Wipe: With minimal pressure, gently wipe away the softened sap. If the sap doesn’t come off easily, re-apply the solvent and let it dwell for a bit longer. Repeat as necessary, always using fresh sections of the microfiber towel.
- Rinse Thoroughly: Immediately after the sap is removed, rinse the treated area with clean water to neutralize any remaining solvent.
- Reapply Protection: Crucially, reapply a coat of car wax or sealant to the treated area. The solvents used for sap removal will likely strip any existing protection, leaving the paint vulnerable. This step is a non-negotiable part of the financially savvy approach, ensuring your investment remains protected.
When to Call a Professional: Protecting Your Investment
While DIY methods are often effective and cost-efficient for fresh sap, there are clear financial thresholds where professional intervention becomes the more prudent choice. If sap has been on your car for weeks or months, has hardened into a crystalline state, or covers a substantial portion of your vehicle, attempting a DIY removal carries a high risk of causing permanent paint damage. The cost of rectifying amateur paint damage (swirl marks, etching, or clear coat burns) can far exceed the price of professional detailing.
A professional detailer has the expertise, specialized products, and tools (e.g., paint thickness gauges, specific polishing compounds, heat guns for softening) to safely remove even the most stubborn sap without harming your paint. They can also assess any underlying damage and perform paint correction to restore clarity and shine, thereby protecting your car’s aesthetic appeal and, most importantly, its monetary value. Viewing professional detailing in these challenging scenarios not as an expense, but as a critical investment in preserving your asset, is key to sound financial management for your vehicle.
aViewFromTheCave is a participant in the Amazon Services LLC Associates Program, an affiliate advertising program designed to provide a means for sites to earn advertising fees by advertising and linking to Amazon.com. Amazon, the Amazon logo, AmazonSupply, and the AmazonSupply logo are trademarks of Amazon.com, Inc. or its affiliates. As an Amazon Associate we earn affiliate commissions from qualifying purchases.