
The chilling realization that your iPhone notes have vanished can send a jolt of panic through even the most tech-savvy individual. Whether it’s a crucial grocery list, a brilliant idea that struck at 3 AM, or vital work-related information, losing your notes can feel like a digital emergency. But before you start tearing your hair out, take a deep breath. In the vast, interconnected world of technology, there are usually logical explanations and, more importantly, solutions to this common problem. This article will delve into the most likely reasons why your iPhone notes might have disappeared and guide you through the steps to recover them, all while touching upon the broader themes of digital security, productivity, and the underlying technological mechanisms that govern our digital lives.
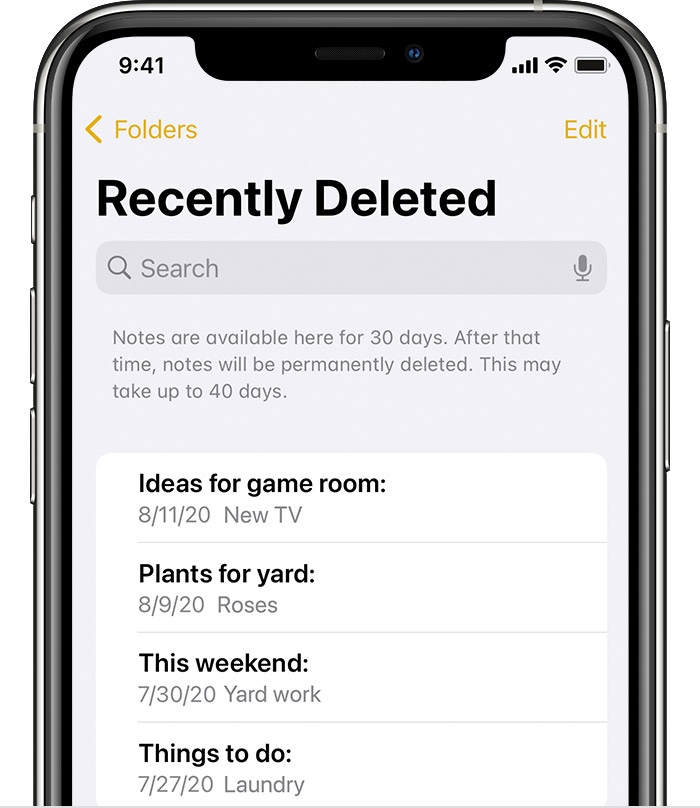
The Invisible Threads: How Your iPhone Notes Are Stored and Synced
Understanding how your notes are supposed to work is the first step to understanding why they might not be. Apple’s Notes app, while seemingly simple, is a sophisticated piece of software deeply integrated into the iOS ecosystem. Its primary function is to store and organize your textual thoughts, reminders, and creative bursts. However, the magic happens when these notes extend beyond your device through syncing.
iCloud: The Digital Backbone of Your Notes
For most iPhone users, the primary mechanism for note storage and synchronization is iCloud. When you enable Notes in your iCloud settings, every note you create or edit on your iPhone is uploaded to Apple’s cloud servers. This offers several significant advantages:
- Synchronization Across Devices: This is the hallmark of iCloud. Your notes are accessible not just on your iPhone, but also on your iPad, Mac, and even through the iCloud website on any web browser. If you edit a note on your Mac, it will instantly appear on your iPhone, and vice versa.
- Backup and Recovery: iCloud acts as an automatic backup for your notes. If you accidentally delete a note or your iPhone is lost or damaged, your notes are preserved in the cloud.
- Peace of Mind: Knowing your notes are safely stored elsewhere provides a crucial layer of security against data loss.
When your notes disappear, it’s often because of an issue with this iCloud synchronization. This could be due to a temporary server glitch, a change in your iCloud settings, or a problem with your Apple ID.
Other Cloud Services: Diversifying Your Digital Storage
While iCloud is the default, you’re not limited to it. The Notes app also allows you to sync with other popular cloud services like Gmail, Outlook, or Yahoo. If you’ve configured your iPhone to sync notes with one of these accounts, your notes would be stored and managed by that service.
- Third-Party Integration: This offers flexibility, especially if you’re heavily invested in a particular email or cloud ecosystem.
- Potential for Confusion: The drawback is that if you switch between accounts or if there’s an issue with the third-party server, it can lead to confusion about where your notes are actually residing.
Understanding which account your notes are synced with is crucial. If you primarily use iCloud, the troubleshooting steps will differ from someone who has their notes synced with Gmail.
Troubleshooting the Disappearing Act: Common Causes and Solutions
When your iPhone notes go missing, the first course of action is to systematically investigate the most common culprits. These range from simple settings misconfigurations to more complex software glitches.
H2: Checking Your iCloud Settings and Account Status
The most frequent reason for missing notes is an issue with iCloud. A simple toggle off or on can often resolve the problem.
H3: Verifying iCloud Sync for Notes
- Navigate to Settings: Open the “Settings” app on your iPhone.
- Tap Your Apple ID: At the very top of the Settings screen, tap on your name and Apple ID.
- Select iCloud: Scroll down and tap on “iCloud.”
- Locate Notes: Find “Notes” in the list of apps that are using iCloud.
- Toggle the Switch: Ensure the toggle switch next to “Notes” is turned ON (green). If it’s already on, try turning it OFF, waiting a few seconds, and then turning it back ON. This simple reset can often re-establish the connection and prompt your notes to reappear.
H3: Ensuring You’re Signed into the Correct Apple ID
It sounds basic, but it’s surprisingly common to be signed into multiple Apple IDs on a device, or to have accidentally signed out of the one you use for iCloud.
- Double-Check the Apple ID: In the same “iCloud” settings menu (where you checked the Notes toggle), the Apple ID displayed at the top should be the one you actively use for iCloud services. If it’s not, you’ll need to sign out of the incorrect one and sign in with your primary Apple ID. Be cautious when signing out and back in, as this can sometimes prompt a choice about merging data.
H2: Recovering Deleted Notes: The Recently Deleted Folder
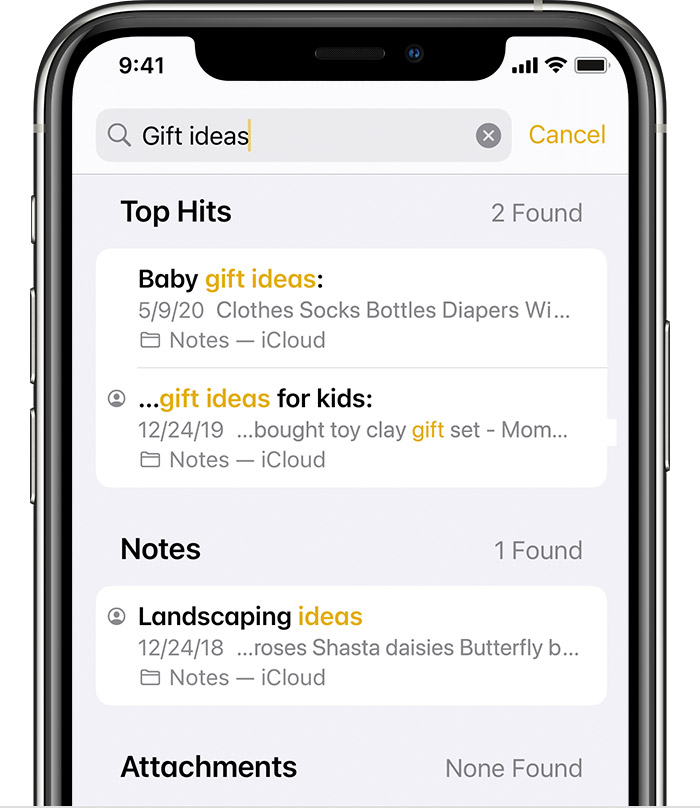
Even if you’re sure you didn’t intentionally delete your notes, it’s possible they ended up in the “Recently Deleted” folder. This is a safety net designed to prevent accidental permanent data loss.
H3: Accessing and Restoring from Recently Deleted
- Open the Notes App: Launch the “Notes” application on your iPhone.
- Go to Folders View: If you are inside a specific note, tap the back arrow in the top-left corner until you see a list of folders.
- Find “Recently Deleted”: Scroll down the list of folders. You should see a folder named “Recently Deleted.” Tap on it.
- Select Notes to Recover: Inside the “Recently Deleted” folder, you’ll see all the notes you’ve deleted within the last 30 days. Tap “Edit” in the top-right corner.
- Choose and Recover: Select the notes you wish to restore by tapping the circle next to each one. Then, tap “Recover” at the bottom of the screen. You can choose to recover them to their original location or to another folder.
This folder is your first line of defense against accidental deletion. Regularly checking it can save you from significant stress.
H2: Exploring Syncing with Other Accounts
If you’re not primarily using iCloud for your notes, or if you’ve previously used other services, it’s time to investigate those.
H3: Checking Other Mail Accounts for Notes
- Go to Settings > Mail: Open the “Settings” app, then tap “Mail.”
- Tap Accounts: Select “Accounts.”
- Review Your Accounts: You’ll see a list of all the email accounts you have added to your iPhone. Tap on each account (e.g., Gmail, Outlook).
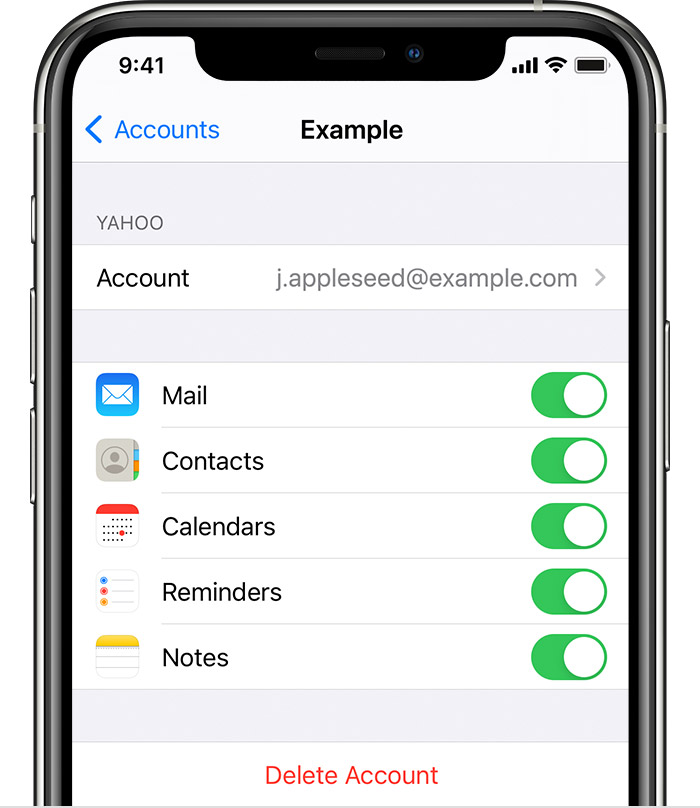
- Check for Notes Sync: Within each account’s settings, look for a toggle switch specifically for “Notes.” If it’s enabled for an account you might have used previously, your notes could be residing there.
- Access Notes via Webmail: If you find that your notes are synced with a particular email account, you can often access them by logging into that email provider’s website through a web browser.
This can sometimes lead to confusion if you have multiple accounts with Notes sync enabled, as the Notes app interface might show notes from different sources in a single view.
H2: Advanced Troubleshooting and Prevention
When the common solutions don’t yield results, it’s time to consider more advanced steps and strategies for preventing future data loss.
H3: Restarting and Updating Your iPhone
A simple device restart can resolve many temporary software glitches that might be interfering with app functionality, including note synchronization.
- Restart: Press and hold the side button (or top button) and either volume button until the “slide to power off” slider appears. Drag the slider, then wait for your iPhone to turn off. To turn it back on, press and hold the side button (or top button) until you see the Apple logo.
- Update iOS: Outdated software can cause compatibility issues. Go to “Settings” > “General” > “Software Update” to check for and install any available iOS updates.
H3: Checking for Software Glitches and Bugs
Sometimes, the Notes app itself might be experiencing a temporary bug. This is more common immediately after a new iOS update or if there’s a known issue with a specific app version.
- Force Close the Notes App: Swipe up from the bottom of your screen to go to the Home Screen. Then, swipe up on the Notes app preview to close it. Reopen the app to see if your notes reappear.
- Check Apple Support Forums: If you suspect a widespread bug, Apple’s support forums are a good place to see if other users are reporting similar issues.
H3: The Importance of Regular Backups
In the digital realm, proactive measures are always better than reactive ones. Beyond iCloud, consider other backup strategies to ensure the ultimate safety of your valuable notes.
- iCloud Backups: Ensure your iPhone’s overall iCloud backup is enabled. This backs up your entire device, including app data, settings, and photos, which can be crucial for full recovery if your device is lost or corrupted. Go to “Settings” > “[Your Name]” > “iCloud” > “iCloud Backup” and make sure it’s turned on.
- Computer Backups (Finder/iTunes): Periodically back up your iPhone to your Mac (using Finder) or Windows PC (using iTunes). This creates a local copy of your device’s data that can be invaluable.
- Third-Party Backup Solutions: Explore reputable third-party backup services that offer comprehensive iPhone data management and backup features.
By understanding the intricacies of your iPhone’s note-taking system, diligently checking settings, and leveraging the recovery features available, you can significantly increase your chances of finding those elusive notes. The digital world, while prone to occasional hiccups, is also built with layers of protection and recovery options. A systematic approach, combined with a good understanding of how your data is managed, will help you navigate these common digital disappearances and keep your important information readily accessible.
aViewFromTheCave is a participant in the Amazon Services LLC Associates Program, an affiliate advertising program designed to provide a means for sites to earn advertising fees by advertising and linking to Amazon.com. Amazon, the Amazon logo, AmazonSupply, and the AmazonSupply logo are trademarks of Amazon.com, Inc. or its affiliates. As an Amazon Associate we earn affiliate commissions from qualifying purchases.