In the rapidly evolving landscape of digital art technology, Procreate has established itself as the premier application for illustrators, designers, and concept artists. Its success is not merely due to its intuitive interface, but also its suite of sophisticated tools designed to streamline the creative workflow. Among these tools, Alpha Lock stands out as a fundamental feature that every digital artist must master.
At its core, Alpha Lock is a transparency locking mechanism. It allows users to modify existing pixels on a specific layer without affecting the transparent areas of that same layer. While the concept may sound simple, its technical implications for efficiency, precision, and hardware resource management are profound. Understanding how to leverage Alpha Lock is the difference between a cluttered, difficult-to-manage project and a professional-grade digital masterpiece.
The Mechanics of Alpha Lock: How It Redefines Layer Interaction
To appreciate the utility of Alpha Lock, one must first understand the technical foundation of “Alpha” in digital imaging. In computer graphics, the “Alpha Channel” represents the degree of transparency or opacity in a pixel. When you create a new layer in Procreate, it is essentially a transparent void—an empty alpha channel. As you paint, you are assigning color data and opacity to specific pixels.
Understanding Transparency and the Alpha Channel
Alpha Lock works by “freezing” the current transparency state of a layer. Once activated, the software ignores any input directed at pixels that are currently 100% transparent. The application essentially treats the existing opaque pixels as a permanent boundary. This is a purely raster-based operation that allows the hardware to calculate brush strokes only within a defined perimeter, reducing the need for manual erasing and precision-masking.
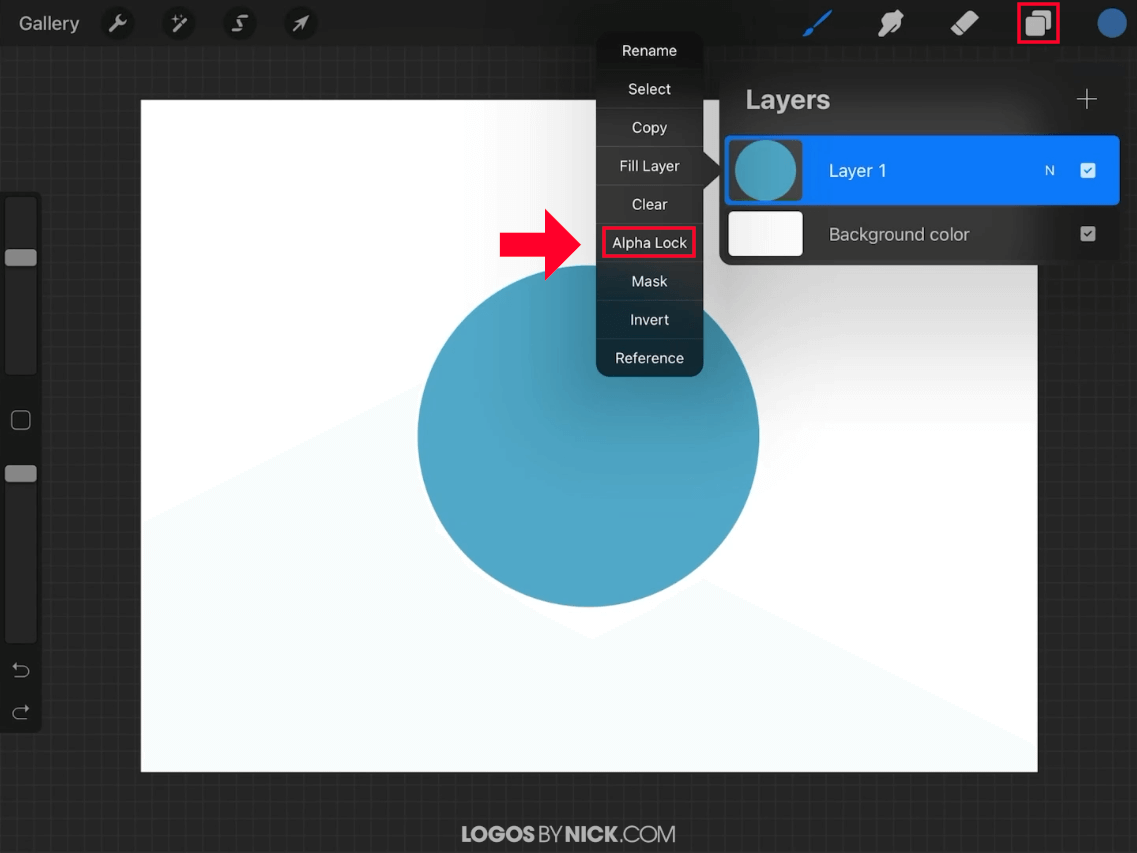
How to Activate Alpha Lock in the Procreate Interface
The Procreate development team at Savage Interactive has designed the UI for speed. There are two primary ways to engage Alpha Lock:
- The Layer Menu: Tap on a layer thumbnail to open the side menu and select “Alpha Lock.” You will notice a checkered background appear behind the image in the layer thumbnail, signifying that transparency is now locked.
- The Two-Finger Swipe: For a faster workflow, artists can use a gesture-based shortcut. Swiping right with two fingers on any layer thumbnail will instantly toggle Alpha Lock on or off. This technical shortcut is a favorite among professional concept artists who need to maintain momentum during high-speed painting sessions.
Practical Applications: Enhancing Workflow Efficiency
Alpha Lock is not just a technical curiosity; it is a workhorse feature that solves several common problems in digital painting. By restricting where the brush can deposit color, it provides a safety net that allows for more aggressive, expressive mark-making.
Perfecting Textures and Shading
One of the most common uses for Alpha Lock is adding depth to a flat shape. Imagine you have painted a character’s armor on a single layer. Without Alpha Lock, adding highlights or shadows would require you to be incredibly careful near the edges, or to go back and erase the “over-spill.” By activating Alpha Lock, you can use large, textured brushes or airbrushes to sweep across the armor. The color will only apply to the armor itself, leaving the background perfectly clean. This allows for a much more natural blending process, as you can focus on the interplay of light and shadow rather than the containment of the stroke.
Coloring Line Art Without the Mess
For illustrators working with clean line art, Alpha Lock is an essential step in the “color block” phase. Once an artist has filled a shape with a base color—using tools like ColorDrop—they can lock the alpha channel of that base layer. This enables them to add variations in hue, such as skin tones, blush, or fabric patterns, without ever worrying about the color bleeding outside the lines of the initial silhouette.
Non-Destructive vs. Destructive Editing Realities
It is important to note from a technical standpoint that Alpha Lock is a “destructive” editing tool. This means that the changes you make are applied directly to the pixels of that layer. Once you paint over a section with Alpha Lock on, the original color underneath is replaced. While this is highly efficient for file size and layer management, it requires the artist to be certain of their choices. In a professional tech-driven workflow, choosing between Alpha Lock and its “non-destructive” counterparts depends entirely on the project’s complexity and the hardware’s limitations.
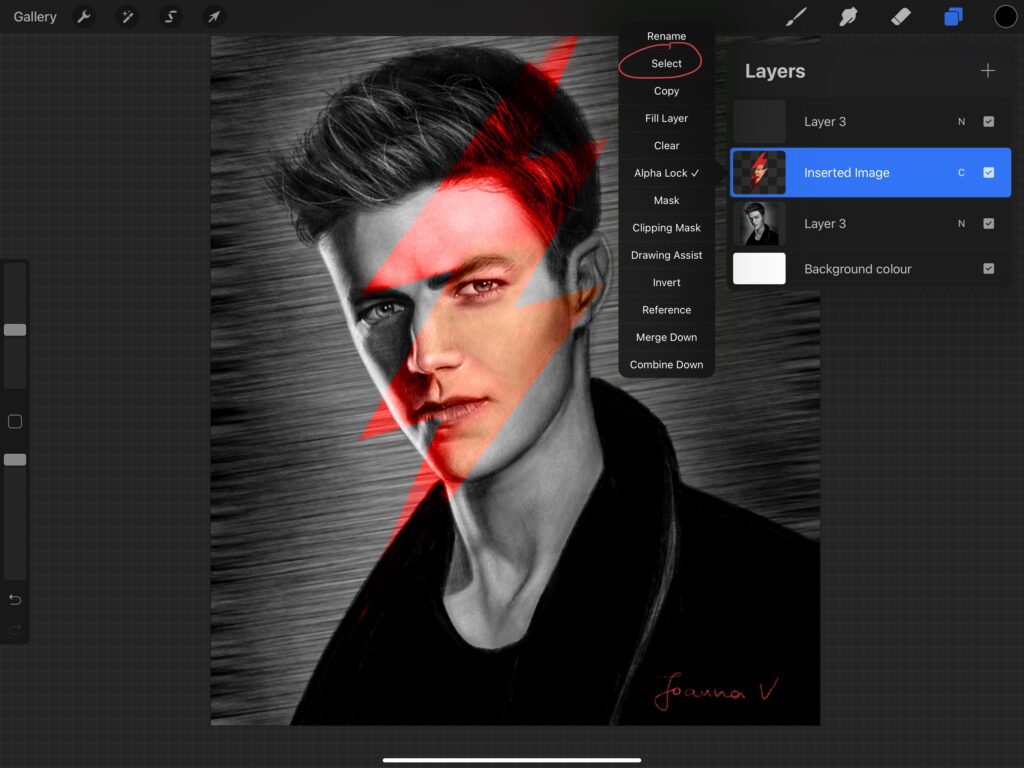
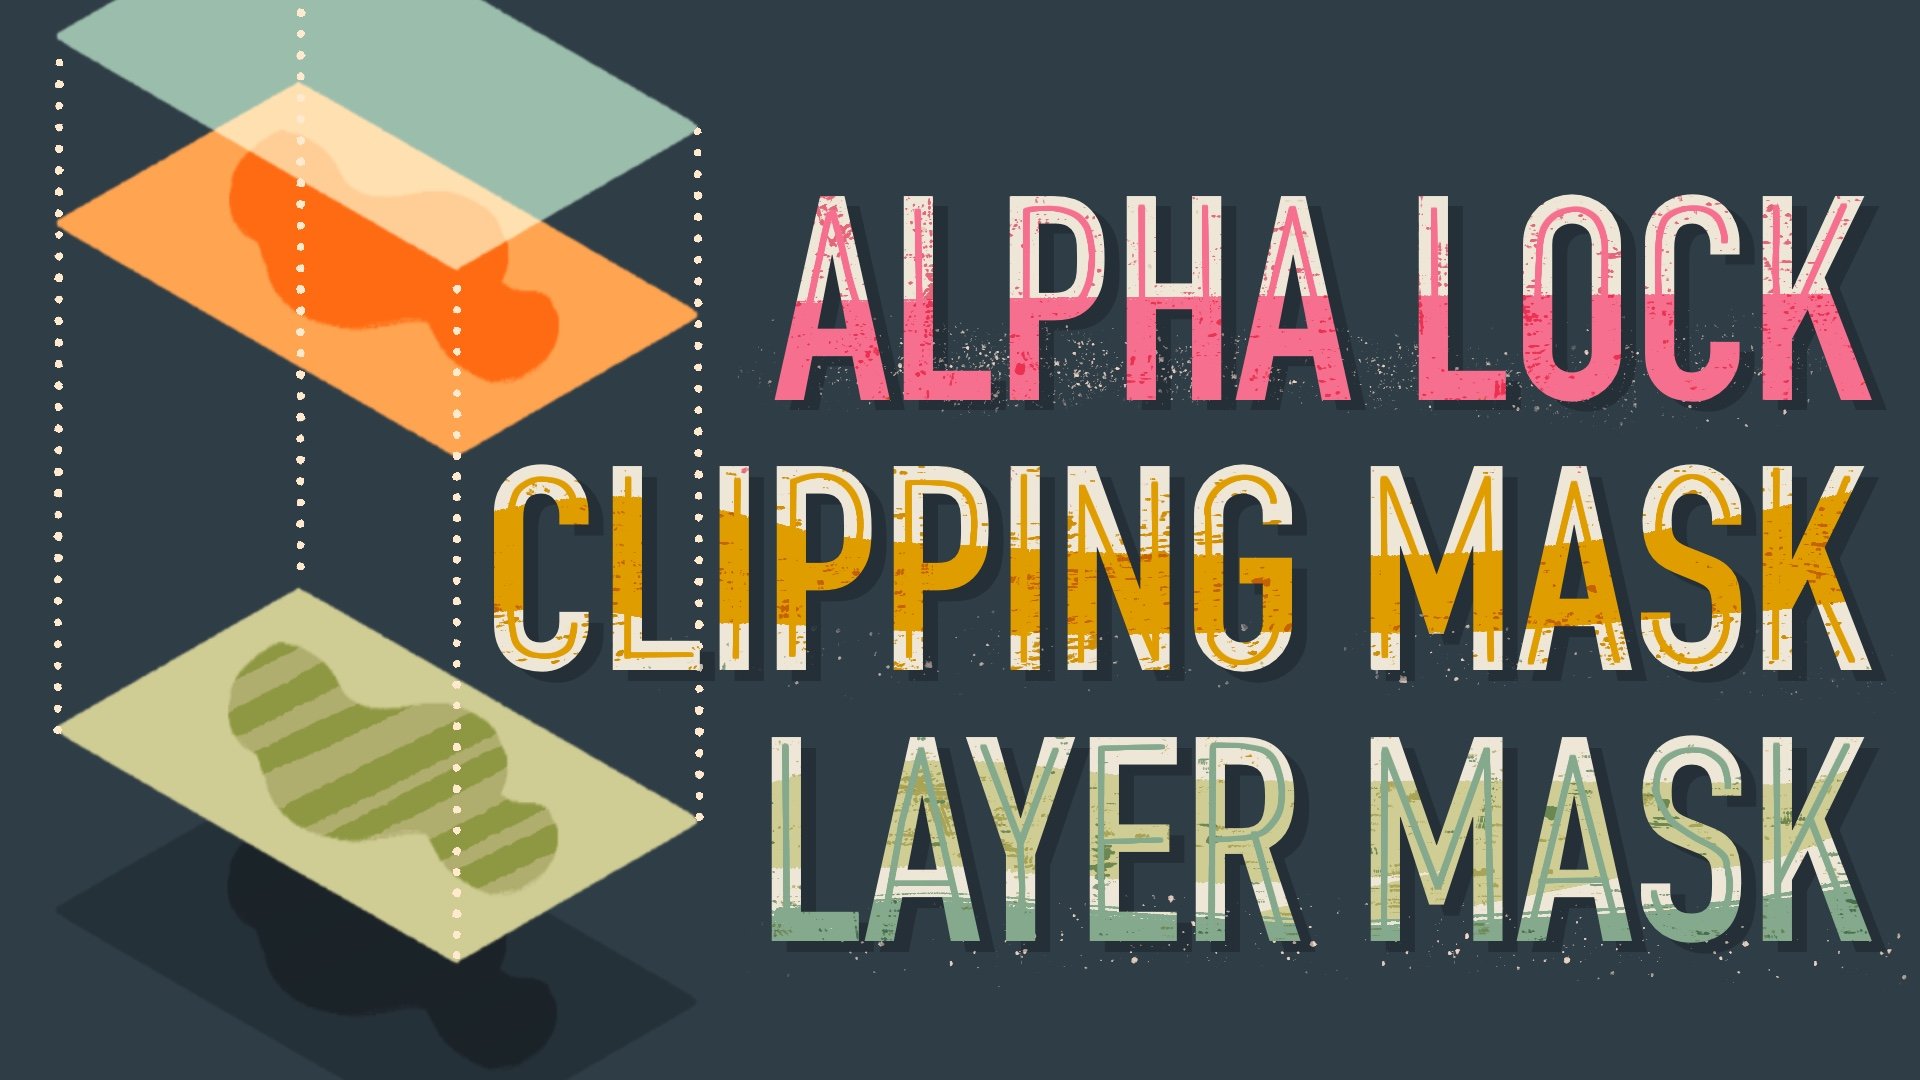
Alpha Lock vs. Clipping Masks vs. Layer Masks: Navigating the Technical Differences
New users often confuse Alpha Lock with Clipping Masks and Layer Masks. While they all serve to control visibility and transparency, their technical implementation and impact on the iPad’s system resources differ significantly.
Clipping Masks: The Flexible Alternative
A Clipping Mask uses the transparency of one layer to control the visibility of the layer above it. Unlike Alpha Lock, this is non-destructive. If you want to add a pattern to a shirt but want the ability to move that pattern around later, a Clipping Mask is the superior choice. However, Clipping Masks require two layers instead of one. In the world of Procreate, where layer counts are strictly limited by the iPad’s RAM (Random Access Memory), using too many Clipping Masks can quickly exhaust your technical overhead, especially on high-resolution canvases.
Layer Masks: Precision Transparency Control
Layer Masks allow you to hide or reveal parts of a layer using grayscale values (black hides, white reveals). This is distinct from Alpha Lock because it doesn’t limit where you can paint; rather, it limits what is visible. Layer Masks are technical tools used for complex compositing, whereas Alpha Lock is a utility for localized painting and texturing.
When to Choose Alpha Lock Over Other Features
The decision to use Alpha Lock is often a technical one based on “Layer Economy.” If you are working on an iPad with 4GB or 8GB of RAM and a 4K canvas, your layer limit might be as low as 20 or 30 layers. In this scenario, using Clipping Masks for every shadow and highlight is unsustainable. Alpha Lock allows you to keep your shading, lighting, and textures on a single layer, preserving your layer count for other elements of the composition.
Optimizing the Digital Art Workflow: Pro-Tips for Alpha Lock
Beyond basic shading, Alpha Lock offers several advanced technical shortcuts that can drastically speed up the production phase of a project.
Using the “Fill Layer” Shortcut with Alpha Lock
A powerful “tech hack” in Procreate involves combining Alpha Lock with the “Fill Layer” command. If you have a complex shape—such as a logo or a detailed character silhouette—and you want to change its entire color instantly, simply turn on Alpha Lock, select a new color, and tap the layer thumbnail to select “Fill Layer.” Because the alpha is locked, Procreate will only change the color of the existing pixels, instantly recoloring the object without affecting the background. This is significantly faster than using the Bucket Tool or painting it manually.
Integrating Alpha Lock into Complex Projects
In high-end production environments, such as game asset design or commercial illustration, Alpha Lock is used to maintain “silhouette integrity.” Artists often start with a “silhouette layer” to define the shape of an object. By keeping this layer Alpha Locked throughout the process, they ensure that the visual weight and boundaries of the object never shift accidentally during the painting process. This technical discipline ensures that different assets in a project remain consistent in scale and shape.
The Role of Alpha Lock in the Modern Tech Landscape of Illustration
As digital art software continues to advance, the focus has shifted toward tools that mimic the speed of thought. Procreate’s Alpha Lock is a testament to this philosophy. It removes the mechanical friction of staying “within the lines,” allowing the artist to focus on the creative aspects of color theory and light physics.
From a software engineering perspective, Alpha Lock is a brilliant utilization of the iPad’s GPU (Graphics Processing Unit). By creating a mask based on the alpha channel at the hardware level, Procreate delivers a lag-free experience even when using high-resolution, complex textures. This seamless integration of software features and hardware performance is what defines Procreate as a leader in the tech space.
In conclusion, Alpha Lock is more than just a “transparency toggle.” It is a strategic tool for layer management, a precision instrument for shading, and a vital component of professional digital workflow. By mastering Alpha Lock, users can navigate the technical constraints of mobile hardware while producing artwork that rivals that created on high-end desktop workstations. Whether you are a hobbyist or a professional, understanding the “what” and “how” of Alpha Lock is an essential step in your journey through the world of digital technology and design.
aViewFromTheCave is a participant in the Amazon Services LLC Associates Program, an affiliate advertising program designed to provide a means for sites to earn advertising fees by advertising and linking to Amazon.com. Amazon, the Amazon logo, AmazonSupply, and the AmazonSupply logo are trademarks of Amazon.com, Inc. or its affiliates. As an Amazon Associate we earn affiliate commissions from qualifying purchases.