
In the contemporary landscape of digital communication, few tools have achieved the ubiquity and technical necessity of Zoom. Whether you are a remote professional, a student navigating a hybrid learning environment, or a software enthusiast looking to streamline your virtual presence, mastering the initial setup of a Zoom account is the foundational step toward efficient digital collaboration. Beyond a simple sign-up process, configuring a Zoom account involves understanding the software’s architecture, security protocols, and integration capabilities to ensure a seamless user experience.
Understanding the Zoom Ecosystem: Choosing the Right Plan
Before diving into the technical steps of account creation, it is essential to evaluate which tier of the Zoom ecosystem aligns with your technical requirements. Zoom’s infrastructure is divided into several service levels, each offering different capacities for data handling, meeting duration, and administrative control.

The Basic (Free) Plan
For individual users and those testing the software’s interface, the Basic plan provides a robust entry point. It supports up to 100 participants and offers high-definition video and audio. However, from a technical standpoint, the primary limitation is the 40-minute cap on group meetings. While this version includes core features like local recording and screen sharing, it lacks the advanced administrative dashboards and cloud storage options found in higher tiers.
Pro and Business Tiers
For power users and small-to-medium enterprises, the Pro and Business plans remove the 40-minute restriction and introduce critical technical features. The Pro plan is ideal for individual creators, offering 5GB of cloud storage for recordings and social media streaming capabilities. The Business plan, designed for larger organizations, allows for up to 300 participants, managed domains, and company branding. From a software management perspective, these tiers allow for much more granular control over user permissions and meeting metadata.
Enterprise Solutions
Large-scale organizations utilize the Enterprise tier, which supports up to 1,000 participants and provides unlimited cloud storage. This level is defined by its deep integration with existing corporate IT infrastructure, offering enhanced Single Sign-On (SSO) capabilities and sophisticated analytics for monitoring network performance across thousands of simultaneous sessions.
Step-by-Step Guide to Creating Your Zoom Account
Setting up your account can be done via a web browser or directly through the Zoom application. Following a standardized process ensures that your identity is verified and your profile is correctly indexed within Zoom’s global directory.
Initial Registration and Verification
-
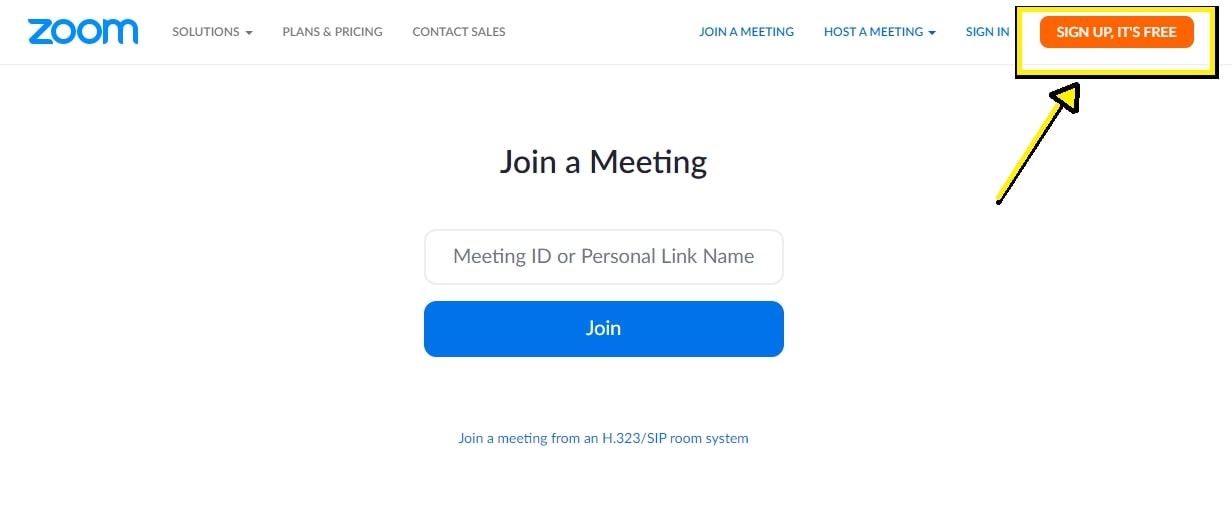
Navigate to the Portal: Access the official Zoom website (zoom.us) and locate the “Sign Up, It’s Free” button.
-
Age Verification: For compliance with international data privacy laws (such as GDPR and COPPA), you will first be asked to provide your birth year. This is a mandatory verification step that ensures the account holder meets the minimum age requirements for data processing.
-
Email Selection: You can sign up using a standard email address or opt for a “Work Email.” If your organization uses a specific domain, using your work email may automatically link you to a corporate sub-account if one exists.
Utilizing OAuth and Single Sign-On (SSO)
For users who prioritize security and convenience, Zoom supports OAuth 2.0 authentication through providers like Google, Apple, and Facebook. This method is technically superior for many users because it leverages the existing security frameworks (such as two-factor authentication) of those established providers.
-
Google/Apple Login: Selecting these options creates a Zoom account linked to your existing identity provider, streamlining the login process and ensuring that your profile picture and contact information are automatically synced.
-
Vanity URLs and SSO: In a corporate environment, you might be instructed to “Sign In with SSO.” This requires entering a company domain (e.g., companyname.zoom.us), which redirects you to your organization’s internal authentication server.
Profile Optimization
Once the account is verified via the activation link sent to your email, you must configure your profile.
-
Personal Meeting ID (PMI): Zoom assigns a unique 10-digit ID to your account. For security reasons, it is recommended to keep this private and use generated meeting IDs for most sessions.
-
Display Name and Avatar: Use a professional display name. Uploading a high-resolution avatar is beneficial for moments when your camera is disabled, as it maintains a professional presence in the gallery view.
-
Time Zone Synchronization: Ensure your time zone is correctly detected. Incorrect time zone settings are the leading cause of scheduling conflicts and missed calendar integrations.
Configuring Essential Security and Privacy Settings
In an era of increasing digital vulnerability, the security configuration of your Zoom account is perhaps the most critical phase of the setup process. Zoom has implemented several layers of defense to prevent unauthorized access and ensure data integrity.

Implementing Multi-Factor Authentication (MFA)
Even if you do not use SSO, you should enable MFA within your Zoom account settings. This requires a secondary code—typically from an authenticator app like Google Authenticator or Microsoft Authenticator—whenever a login attempt is made from a new device. This adds a vital layer of protection against credential stuffing attacks.
Meeting Security Defaults
Within the “Settings” tab of your web portal, you should toggle several default security features:
-
Waiting Rooms: By enabling the Waiting Room by default, the host must manually admit each participant. This prevents “Zoombombing,” where uninvited users join a session to disrupt it.
-
Passcodes: Ensure that all meetings require a passcode. This is often embedded in the meeting link, but requiring it manually for those dialing in via phone adds an extra barrier for attackers.
-
Screen Sharing Restrictions: Set “Who can share?” to “Host Only” by default. This can be changed during a live meeting if necessary, but starting with restricted permissions prevents participants from broadcasting malicious or inappropriate content without warning.
Data Routing and Encryption
Advanced users should review the “Data at Rest” and “Data in Transit” settings. Zoom offers End-to-End Encryption (E2EE) for meetings. While E2EE disables some features like cloud recording and join-before-host, it ensures that no one—not even Zoom’s servers—can access the decryption keys for your audio and video streams. Additionally, users in specific regions can customize which data center regions their traffic is routed through to comply with local data residency requirements.
Optimizing the Zoom Desktop Client and Mobile App
While the web portal is used for account management, the actual communication happens within the Zoom client. Installing and optimizing this software is essential for technical stability.
The Installation Process
Download the client from the Zoom Download Center. For Windows and macOS, ensure you are downloading the 64-bit version (or the ARM version for Apple Silicon Macs) to take full advantage of your hardware’s processing power. For Linux users, Zoom provides .deb and .rpm packages, though dependencies must often be managed manually via the terminal.
Video and Audio Engineering Settings
The “Settings” menu within the app allows for deep technical customization:
-
Audio Processing: Zoom uses AI-driven background noise suppression. You can set this to “Low” for high-fidelity music or “High” for environments with significant ambient noise like fans or typing.
-
Video Optimization: Enable “HD” video if your bandwidth allows. If you are experiencing high latency or “jitter” on your network, disabling “Touch up my appearance” and “Adjust for low light” can reduce the CPU load on older hardware.
-
Hardware Acceleration: Under the “Advanced” tab in video settings, you can enable hardware acceleration for video encoding and decoding. This offloads tasks from the CPU to the GPU, leading to a smoother system performance during intensive multitasking.
Network Considerations
Zoom requires a stable internet connection for high-quality streaming. For a single-screen HD video call, a minimum upload/download speed of 1.5 Mbps is required. However, for gallery views with many participants, 3.0 Mbps is recommended. If you are on a limited data plan or a congested Wi-Fi network, you can enable the “Optimize for 3rd party video editor” setting or reduce the maximum resolution in the settings to conserve bandwidth.
Advanced Integration: Syncing Zoom with Your Tech Stack
The final stage of a professional Zoom setup is integrating the account with other productivity software. This creates a cohesive ecosystem where scheduling and collaboration are automated.
Calendar and Contact Integration
By linking your Zoom account to Google Calendar or Microsoft Outlook, you can schedule meetings directly from your calendar interface. This integration automatically generates a unique meeting link and passcode for every invite, populating the “Location” field of the calendar event. This eliminates the need to manually copy and paste links between applications.
Cloud Storage and Recording Management
If you have a paid account, configure your cloud recording settings to automatically sync with storage providers like Dropbox, Google Drive, or Box. This is particularly useful for teams that need to archive meetings for compliance or internal training. You can also enable “Automatic Recording” for specific recurring meetings, ensuring that no vital information is lost due to human error.
AI Companion and Productivity Tools
Zoom has recently integrated generative AI features known as “Zoom AI Companion.” During your setup, you can decide whether to enable automated meeting summaries and chat threading. These tools use machine learning models to transcribe meetings in real-time and provide bulleted summaries of action items. From a technical standpoint, this requires granting the software permission to process your audio data, which should be weighed against your specific privacy requirements.
By meticulously following these steps—from selecting the appropriate plan to fine-tuning the hardware acceleration and security protocols—you transform a simple communication tool into a powerful, secure, and highly efficient digital workstation. Setting up a Zoom account is not merely about gaining access to a platform; it is about architecting a digital environment that supports your professional and technical goals.
aViewFromTheCave is a participant in the Amazon Services LLC Associates Program, an affiliate advertising program designed to provide a means for sites to earn advertising fees by advertising and linking to Amazon.com. Amazon, the Amazon logo, AmazonSupply, and the AmazonSupply logo are trademarks of Amazon.com, Inc. or its affiliates. As an Amazon Associate we earn affiliate commissions from qualifying purchases.