
Venmo has become an indispensable digital tool for millions, simplifying the exchange of funds between friends, family, and even small businesses. Its intuitive interface and social features make it a go-to platform for quick, casual transactions. Understanding the mechanics of receiving money through Venmo is crucial for anyone looking to leverage this popular app effectively, ensuring that funds arrive securely and are accessible when needed. This guide delves into the technical process, from initial setup to fund transfer, while highlighting critical security considerations.
Setting Up for Seamless Venmo Transactions
Before you can receive money, your Venmo account needs to be properly configured and verified. This foundational setup ensures that all transactions are legitimate and that your funds have a secure pathway to you.

Account Creation and Verification
The first step is downloading the Venmo app from your device’s app store or visiting their website. You’ll need to create an account, which typically involves providing your full name, email address, phone number, and creating a strong password. It’s vital to use accurate and up-to-date information, as this will be cross-referenced for verification purposes.
Once you’ve created your account, Venmo will guide you through a verification process. This often includes verifying your phone number via a text message code and your email address via a confirmation link. For higher transaction limits or to use all features, Venmo may require additional identity verification, such as linking a bank account or debit card, or providing the last four digits of your Social Security Number (SSN). This step is a critical digital security measure, preventing fraud and ensuring compliance with financial regulations. Without full verification, you may encounter limitations on how much money you can receive or send, or how quickly you can transfer funds to your bank.
Linking Your Bank Account or Debit Card
To make the money you receive on Venmo truly useful, you’ll need a way to move it out of the app and into your traditional financial ecosystem. This is achieved by linking a bank account or a debit card.
Linking a bank account is generally preferred for cashing out larger sums, as it typically incurs no fees for standard transfers. The process involves navigating to the “Settings” menu in the Venmo app, selecting “Payment Methods,” and then choosing “Add a bank or card.” You’ll typically be prompted to search for your bank and then securely log in using your online banking credentials. This method, often facilitated by third-party services like Plaid, allows Venmo to verify your account instantly. Alternatively, you can manually enter your bank’s routing and account numbers, which usually requires a small deposit verification process (Venmo sends two small deposits, and you confirm the amounts) that can take a few business days.
Linking a debit card offers another avenue for transferring funds, particularly if you need instant access to your money, though it usually comes with a small fee (e.g., 1.75% as of recent policies). This involves simply entering your debit card number, expiration date, and security code. While credit cards can be linked for sending money, they generally cannot be used for receiving funds or cashing out your Venmo balance. Ensure the linked bank account or debit card is in your name to avoid transfer issues.
The Mechanics of Receiving Funds
Once your account is set up, receiving money on Venmo is generally straightforward, whether it’s from a friend, family member, or a business. Venmo’s core functionality revolves around its digital wallet system.
Receiving Peer-to-Peer Payments
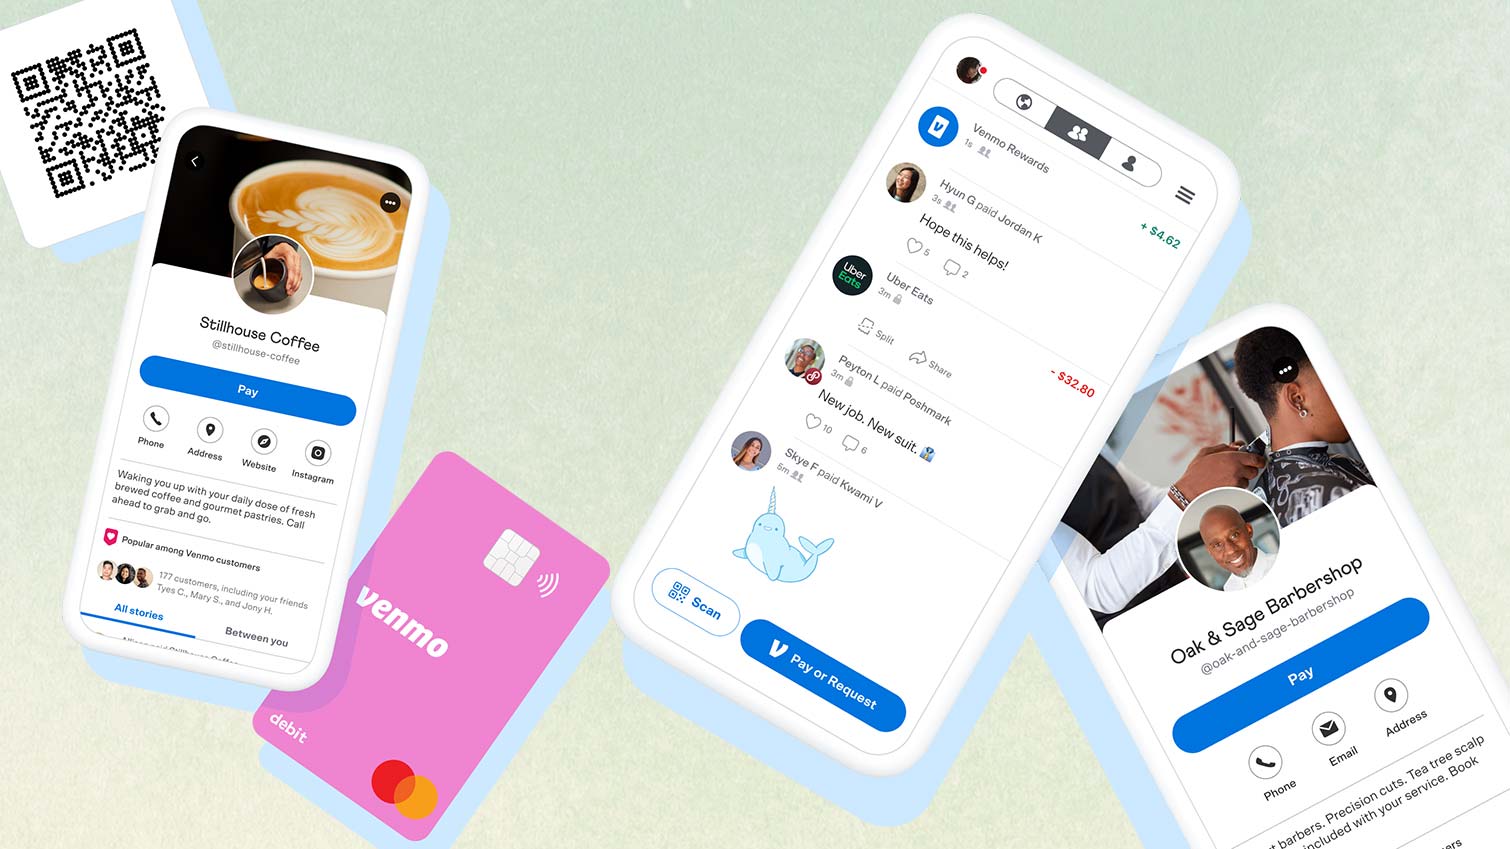
The most common way to receive money on Venmo is through direct peer-to-peer (P2P) payments. When someone sends you money, it typically appears in your Venmo balance almost instantly. You’ll receive a notification within the app and usually an email or text message, depending on your notification settings.
These payments often come with a social feed aspect, allowing senders to add notes, emojis, and specify if the payment is public, private, or visible only to friends. While the social feed is optional, it’s a distinctive feature of Venmo. The funds are added to your available Venmo balance, ready for you to use for other Venmo payments, online purchases where Venmo is accepted, or transfer to your linked bank account.
Understanding Payment Requests
Sometimes, instead of someone sending you money directly, you might send them a payment request. This is particularly useful in situations like splitting a bill, where you’ve paid upfront and need others to pay you back.
To send a request, you would tap the “Pay or Request” button, select the person you want to request money from, enter the amount, and add a note. Once sent, the recipient receives a notification and can then choose to pay you back directly through the app. The money, once paid, will appear in your Venmo balance just like a direct payment. This feature streamlines the process of getting reimbursed and minimizes awkward follow-ups.

Receiving Business Payments and QR Codes
Venmo has expanded its capabilities to allow small businesses and freelancers to accept payments. If you are operating a business, you might set up a Venmo business profile. This allows customers to pay you directly for goods or services. Payments received through a business profile often have different fee structures compared to personal P2P payments (Venmo typically charges a small fee for business transactions).
Another increasingly popular method for receiving payments, especially in person, is via Venmo QR codes. Every Venmo user has a unique QR code that can be found in the app. By displaying your personal QR code, others can simply scan it with their Venmo app to easily send you money. This eliminates the need to exchange usernames and is particularly convenient for quick, in-person transactions, like yard sales, small craft fairs, or informal services. Businesses also utilize QR codes, often displaying them prominently at points of sale, to facilitate contactless payments.
Accessing Your Venmo Balance
Once money has landed in your Venmo account, you have several options for how to manage it. You can either keep it within the Venmo ecosystem or transfer it to your external bank account.
Keeping Funds in Your Venmo Balance
One option is to simply leave the funds in your Venmo balance. This balance can then be used to make future payments to other Venmo users, purchase items from merchants that accept Venmo (both online and in-app), or even utilize the Venmo Debit Card, if you’ve opted for one. Keeping money in your Venmo balance can be convenient for frequent users who regularly make payments through the app, as it allows for immediate transactions without needing to pull from a linked bank account each time. However, it’s generally advisable not to keep very large sums of money in your Venmo balance for extended periods, as Venmo accounts typically do not offer interest, and while secure, it’s not a substitute for a traditional bank account or savings vehicle.
Instant vs. Standard Bank Transfers
The primary way most users access their received funds outside of Venmo is by transferring them to a linked bank account. Venmo offers two main options for this:
-
Standard Transfer: This is the default and free option. When you initiate a standard transfer, the funds are typically deposited into your linked bank account within 1-3 business days. The exact timing can depend on your bank’s processing times and whether the transfer is initiated on a weekend or holiday. This method is ideal if you’re not in a hurry to access the funds and want to avoid any transfer fees.
-
Instant Transfer: For immediate access to your money, Venmo offers an Instant Transfer option. This service deposits the funds into your linked debit card or eligible bank account typically within 30 minutes, even on weekends and holidays. However, this convenience comes with a fee, usually a percentage of the transfer amount (e.g., 1.75%, with a minimum fee). This option is invaluable when you need urgent access to your funds, perhaps for an unexpected expense or to cover an immediate bill.
To initiate a transfer, simply go to your “Venmo balance” screen, tap “Transfer,” enter the amount you wish to transfer, select your preferred transfer method (Standard or Instant), and confirm the transaction. Always double-check the amount and the selected destination before confirming.
Ensuring Digital Security and Troubleshooting
While Venmo offers immense convenience, maintaining digital security and knowing how to troubleshoot common issues are paramount.
Protecting Your Account and Transactions
Security is a shared responsibility. Venmo employs various measures to protect your account, but users also play a critical role.
-
Strong, Unique Passwords: Always use a complex password that you don’t reuse on other sites. Consider a password manager.
-
Two-Factor Authentication (2FA): Enable 2FA, which adds an extra layer of security by requiring a code from your phone in addition to your password when logging in from a new device.
-
Monitor Activity: Regularly check your transaction history for any unauthorized activity. Set up notifications for all incoming and outgoing payments.
-
Beware of Scams: Be cautious of requests for money from unknown individuals, enticing offers that seem too good to be true, or messages asking you to click suspicious links. Venmo transactions are generally between trusted parties. If you receive a payment from someone you don’t know for an item you haven’t sold, do not send the item or money back directly. Contact Venmo support immediately. Fraudsters often send fake payments and then request a refund, hoping you won’t notice the original payment was never legitimate.
-
Privacy Settings: Review your Venmo privacy settings. You can choose to make your transactions public, visible to friends, or private. For sensitive transactions, opting for “private” is advisable.
Common Issues and Resolutions
Despite Venmo’s reliability, users might occasionally encounter issues.
-
Payment Not Received: If someone claims to have sent you money but it hasn’t appeared, first check your transaction history. Ensure they sent it to the correct username, phone number, or email address. Sometimes, there might be a slight delay in processing, especially during peak times. If the issue persists, contact Venmo support.
-
Transfers to Bank Account Delayed: While standard transfers typically take 1-3 business days, bank holidays or internal bank processing delays can extend this. If it’s been longer than the expected timeframe, verify your linked bank account details are correct. Then, contact Venmo support and potentially your bank.
-
Suspended Account: Venmo may suspend accounts for suspected fraudulent activity or violations of their terms of service. If your account is suspended, you will typically receive an email with instructions on how to resolve the issue, which often involves contacting their support team and providing additional verification.
Understanding Venmo’s Purchase Protection
For transactions involving eligible goods and services through a business profile, Venmo offers a Purchase Protection Program. This adds a layer of security, similar to credit card chargebacks, for buyers and sellers. If you are selling items and someone pays you through a business profile, you might be covered against unauthorized transactions. Conversely, if you pay a business and don’t receive the item or it’s significantly not as described, you might be able to dispute the charge. It’s important to note that this protection generally does not apply to personal P2P payments between friends and family, which are typically final and irreversible. Always use caution and common sense when transacting with individuals you don’t fully trust, even through Venmo.
By understanding these technical aspects and security best practices, users can confidently and securely receive money through Venmo, leveraging its convenience while protecting their digital finances.
aViewFromTheCave is a participant in the Amazon Services LLC Associates Program, an affiliate advertising program designed to provide a means for sites to earn advertising fees by advertising and linking to Amazon.com. Amazon, the Amazon logo, AmazonSupply, and the AmazonSupply logo are trademarks of Amazon.com, Inc. or its affiliates. As an Amazon Associate we earn affiliate commissions from qualifying purchases.