
The Elder Scrolls V: Skyrim stands as a monumental achievement in gaming, a sprawling epic that has captivated millions since its release over a decade ago. Its vast open world, intricate lore, and endless opportunities for adventure have ensured its enduring popularity. Yet, even a masterpiece like Skyrim can be enhanced, revitalized, and expanded upon, and for many players, this journey of enhancement begins with mods. While mod managers like Nexus Mod Manager, Vortex, or Mod Organizer 2 offer streamlined solutions, there’s a profound satisfaction and deeper understanding to be gained from manually installing Skyrim mods. This method grants unparalleled control, fosters crucial troubleshooting skills, and is often indispensable for more complex modifications or when dealing with specific compatibility challenges.

This comprehensive guide will demystify the process of manual mod installation for Skyrim, whether you’re playing the original Legendary Edition or the Special Edition. We’ll delve into the essential tools, fundamental concepts, and step-by-step procedures to transform your Dragonborn’s world with precision and confidence. While it might seem daunting at first, mastering manual modding equips you with a robust skill set that not only elevates your Skyrim experience but also provides valuable insights into game file structures and software management — a true digital productivity hack for the discerning gamer.
The Foundation: Understanding Skyrim’s Modding Ecosystem
Before diving headfirst into moving files around, it’s crucial to grasp the underlying principles and procure the necessary utilities that form the bedrock of successful manual modding. Think of this as laying the groundwork for a stable and personalized digital environment.
Essential Tools and Software
Manual modding, despite its name, doesn’t mean forsaking all tools. Rather, it means selectively using core utilities that provide control and insight without fully automating the process.
- Archiving Software (7-Zip or WinRAR): The vast majority of mods are distributed as compressed archive files (e.g., .zip, .rar, .7z). A robust archiving tool is non-negotiable for extracting these files. 7-Zip is often preferred for its open-source nature, efficiency, and broad compatibility, particularly with the .7z format commonly used by modders. Ensure you have one installed and properly configured to handle these file types.
- Text Editor (Notepad++): While not strictly required for every mod, Notepad++ (or a similar advanced text editor like Visual Studio Code) becomes invaluable for examining configuration files, scripts, or troubleshooting errors. Its syntax highlighting and line numbering features make reading and editing plain text files much more manageable than Windows’ default Notepad. This can be crucial for understanding specific mod instructions or making minor tweaks.
- Skyrim Script Extender (SKSE / SKSE64): For many of Skyrim’s most impactful and complex mods – particularly those that introduce new gameplay mechanics, user interfaces, or sophisticated scripts – SKSE is an absolute necessity. SKSE is an external utility that expands the scripting capabilities of the game engine itself, allowing modders to create content that would otherwise be impossible. It’s not a mod in the traditional sense but an essential framework that runs alongside Skyrim. Understanding its function and proper installation is paramount for accessing a huge portion of the modding landscape.
- Load Order Optimization Tool (LOOT): While manual modding emphasizes control, managing your load order is one area where automation is not just convenient but often critical. LOOT is an intelligent utility that sorts your plugins (ESMs and ESPs) into an optimized order, minimizing conflicts and improving game stability. While you can manually edit your
plugins.txtfile, LOOT provides an expert-level arrangement that would take hundreds of hours to replicate by hand, making it a powerful productivity tool for modders. Even manual installers use LOOT to ensure their setup is robust. - xEdit (SSEEdit/FO4Edit): This is an advanced utility primarily used for cleaning dirty plugins, resolving complex conflicts, and viewing the detailed records within
.espand.esmfiles. While not essential for basic manual installation, xEdit is an indispensable tool for advanced users seeking to fine-tune their mod setup, troubleshoot deep-seated issues, or even create their own patches. It provides a granular look into how mods interact and modify game data.
Key Modding Concepts
Navigating the modding world requires familiarity with certain terminology and principles that govern how mods interact with your game.
- Load Order (ESM, ESP, ESL Files): Skyrim mods often come with plugin files that modify the game’s data.
- ESM (Elder Scrolls Master) files: These are master files, like the base game (
Skyrim.esm) and official DLCs (Dawnguard.esm). Other plugins often rely on them as “masters.” - ESP (Elder Scrolls Plugin) files: These are the most common type of plugin, containing most of a mod’s data.
- ESL (Elder Scrolls Light) files: Introduced with Skyrim Special Edition, ESLs are a type of plugin that do not count towards the game’s strict 255 plugin limit, making them incredibly valuable for large mod lists.
The “load order” refers to the sequence in which these files are loaded by the game. If two mods modify the same game record (e.g., the stats of an item or the appearance of a character), the mod loaded later in the sequence “wins” and its changes are applied. A correct load order is vital for stability and to ensure mods function as intended.
- ESM (Elder Scrolls Master) files: These are master files, like the base game (
- File Conflicts: These occur when two or more mods attempt to modify the same game asset or record. Conflicts can range from harmless (e.g., two texture mods for the same item, where only one will display) to game-breaking (e.g., conflicting scripts causing crashes). Manual modding requires you to be acutely aware of potential conflicts and how to resolve them, often by strategic placement in the load order or by creating compatibility patches.
- Data Folder Structure: Skyrim’s core game assets are organized within its
Datafolder. Mods typically follow this same structure, placing their textures inData/Textures, meshes inData/Meshes, sounds inData/Sound, and so on. Understanding this hierarchy is crucial for manually placing mod files correctly. - Clean Saves vs. Dirty Saves: A “clean save” refers to a game save file that has never been exposed to a particular mod. When uninstalling a mod, especially one with complex scripts, it’s often recommended to revert to a clean save or start a new game to avoid lingering data (“dirty save”) that can cause instability. This is an important consideration for long-term game stability and digital hygiene.
- The Importance of Backups: This cannot be stressed enough. Before making any significant changes to your game files, always back them up. This digital security measure acts as your safety net, allowing you to revert to a working state if something goes wrong. This isn’t just good practice for modding; it’s fundamental to any form of software customization.
Preparing Your Skyrim Installation for Modding
A successful manual modding journey begins with a well-prepared game. This involves safeguarding your existing setup and configuring the game to accept modifications.
Backup Your Game Files
Before you touch a single mod, create a robust backup. This is your insurance policy against accidental deletions, corrupt files, or irreversible mistakes.
- Backup Your Core Game Folder: Navigate to your Skyrim installation directory (e.g.,
C:Program Files (x86)SteamsteamappscommonSkyrim Special Edition). Copy the entireSkyrim Special Edition(orSkyrimfor Legendary Edition) folder to a safe location on your hard drive, perhaps an external drive or a dedicated backup folder. This can be quite large, but it’s the most comprehensive way to protect your game. - Backup Your Save Games: Your save files are located in
DocumentsMy GamesSkyrim Special EditionSaves(or similar for Legendary Edition). Copy thisSavesfolder to your backup location. Losing hours of gameplay to a mod conflict is a truly frustrating experience, so protect your progress. - Why it’s Critical: In the event of a catastrophic mod installation, you can simply delete your corrupted game folder and replace it with your clean backup, saving you from a full reinstallation and redownload. This proactive approach significantly reduces downtime and stress.
Initial Setup and Configuration
A few preliminary steps are needed to ensure Skyrim is ready to recognize and utilize your manually installed mods.
- Run Skyrim at Least Once: Launch the game through Steam or its native executable and get to the main menu. This ensures that the game generates all necessary configuration files (like
Skyrim.iniandSkyrimPrefs.ini) in yourDocumentsMy GamesSkyrim Special Editionfolder. Exiting the game after reaching the main menu is sufficient. - Enable Modding in Configuration Files: For older versions of Skyrim, and sometimes even for Special Edition, you might need to manually enable modding support.
- Navigate to
DocumentsMy GamesSkyrim Special Edition(orSkyrim). - Open
SkyrimPrefs.iniwith Notepad++ or your preferred text editor. - Locate the
[Launcher]section. If it doesn’t exist, create it. - Under
[Launcher], add or modify the line:bEnableFileSelection=1. - Save and close the file.
This step ensures the game’s launcher allows you to select plugins, even if you ultimately use LOOT for load order management.
- Navigate to
- Configure Your Archiving Tool: Ensure that your archiving software (e.g., 7-Zip) is set up to easily extract files. You should be able to right-click on an archive and see options like “Extract Here” or “Extract to [Folder Name]”. This streamlines the process of getting mod files out of their compressed containers.
The Manual Installation Process: Step-by-Step
With your game backed up and configured, you’re ready for the core process of acquiring and integrating mods into your Skyrim installation. Patience and attention to detail are paramount here.
Downloading Your Mods
The primary hub for Skyrim mods is Nexus Mods. While other sites exist, Nexus Mods boasts the largest repository, a robust community, and essential tools.
- Navigate to Nexus Mods (nexusmods.com): Search for the mods you desire.
- Read the Mod Description Carefully: This is the most critical step. A mod’s page contains vital information:
- Requirements: Does the mod need SKSE? Other mods? Specific DLCs? Ignoring these will lead to crashes.
- Installation Instructions: While this guide covers general manual installation, some mods have unique requirements or specific file placements. Always prioritize the mod author’s instructions.
- Compatibility Notes: Does the mod conflict with popular mods? Are patches available?
- Bug Reports and Posts Sections: These can highlight common issues and solutions from other users.
- Download the Files: Most mods will have a “Files” tab.
- Main Files: These are the core mod components.
- Optional Files: These might be patches, alternative textures, or additional features.
- Understanding File Types: Most downloads will be
.zip,.rar, or.7zarchives. Occasionally, you might download an executable (.exe) for a tool or an installer. For manual modding, focus on the archive files. Choose “Manual Download” if available, even if a “Mod Manager Download” option is present.
Installing Simple Texture and Mesh Mods
These are often the easiest to install manually as they typically don’t involve plugins or complex scripting.
- Extract the Mod Archive: Once downloaded, right-click the mod archive (e.g.,
BeautifulGrass.7z) and use your archiving tool to “Extract toBeautifulGrass” (or a similar option that creates a new folder). This keeps the extracted files organized. - Examine the Extracted Folder: Open the newly extracted folder. Most texture/mesh mods will have a
Datafolder inside, which itself containsTextures,Meshes, etc. Some might just haveTexturesorMeshesdirectly.- Crucial Rule: You want to copy the contents of the mod’s
Datafolder (or theTextures/Meshesfolders if they’re directly inside the extracted mod folder) into your game’sDatafolder. You should not haveSkyrim Special Edition/Data/Data/Textures– that’s incorrect. It should beSkyrim Special Edition/Data/Textures.
- Crucial Rule: You want to copy the contents of the mod’s
- Copy Files to Your Game’s Data Folder:
- Open your game’s
Datafolder (e.g.,C:Program Files (x86)SteamsteamappscommonSkyrim Special EditionData). - Drag and drop (or copy and paste) the
Textures,Meshes,Sound, etc., folders from your extracted mod into your game’sDatafolder.
- Open your game’s
- Handle Overwrites: If you’re installing multiple mods that modify the same textures or meshes, Windows will prompt you if files need to be overwritten.
- “Yes to All” / “Replace the files in the destination”: This means the new mod’s files will replace the older ones. The mod loaded later (i.e., whose files you copied last) will take precedence.
- “Skip these files”: This means the older files will be kept, and the new mod’s conflicting files will be ignored.
- Strategy: Understand which mod you want to “win.” If you want a specific mod’s textures to appear, ensure you copy its files after any conflicting mods. For manual texture/mesh installation, the last one copied wins.
Installing Plugin-Based Mods (ESPs/ESMs)
These mods come with .esp (or .esm, .esl) files that modify game records and often include scripts, new items, or quests.
- Extract the Mod Archive: Similar to texture mods, extract the archive to a dedicated folder.
- Examine the Extracted Folder: Look for the
.esp,.esm, and/or.bsafiles. These files are typically found directly within the extracted folder, or sometimes within aDatasubfolder. - Copy Files to Your Game’s Data Folder: Copy the
.esp,.esm,.bsafiles (and any associatedScriptsfolders,Interfacefolders, etc., which usually mimic the game’sDatastructure) directly into your game’sDatafolder. - Enable the Plugin: This is where things get a bit more nuanced for pure manual installation.
- The
plugins.txtfile: Skyrim uses aplugins.txtfile located inC:Users[Your Username]AppDataLocalSkyrim Special Edition(orSkyrim). This file lists all enabled plugins. Each enabled plugin should have an asterisk*before its name (e.g.,*MyAwesomeMod.esp). - Manual Editing (Not Recommended for Load Order): You could manually add
*MyAwesomeMod.espto this file. However, this file is sensitive to ordering. Misplacing an entry can cause crashes or prevent the mod from working. - Recommended Method (Even for Manual Installers): Use LOOT. Even if you manually place all your mod files, LOOT is invaluable for correctly sorting your
plugins.txt.- Ensure all your
.esp/.esm/.eslfiles are in your game’sDatafolder. - Run LOOT.
- Click the “Sort Plugins” button.
- Click “Apply” to save the new load order.
LOOT will correctly add your new plugin toplugins.txtand place it in an optimized order.
- Ensure all your
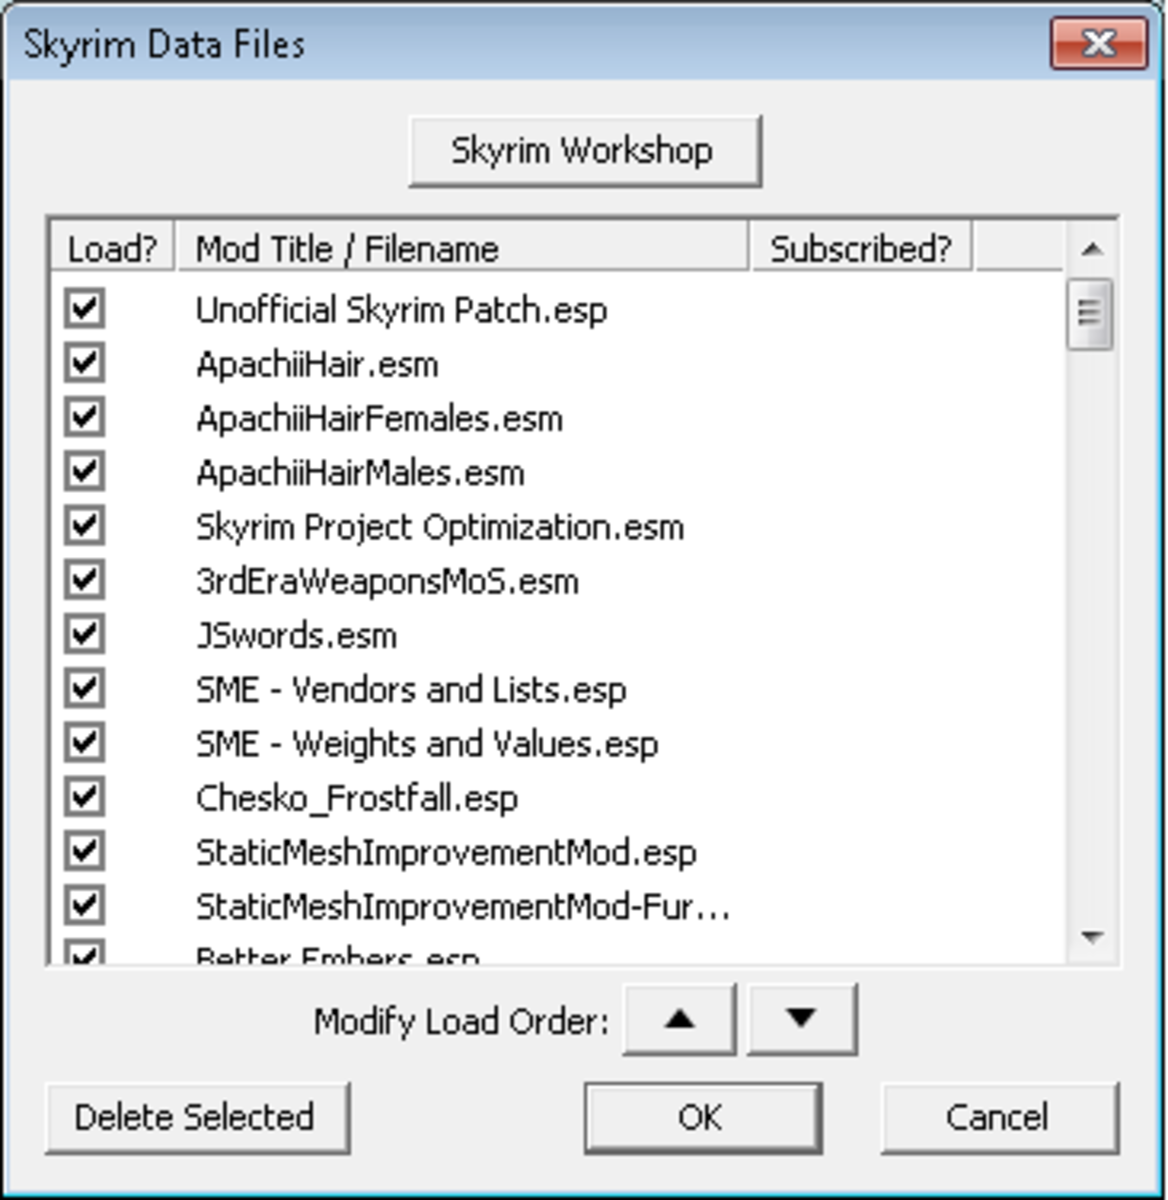
- In-Game Launcher (Limited Use): The vanilla Skyrim launcher (when run via Steam) has a “Data Files” option, but it often doesn’t show all
.eslfiles and has very limited sorting capabilities. It’s generally better to rely on LOOT.
- The
Installing Skyrim Script Extender (SKSE/SKSE64)
SKSE requires a specific installation method because it’s not a typical mod plugin.
- Download the Correct Version: Go to the official SKSE website (skse.silverlock.org) and download the version corresponding to your Skyrim edition (e.g., “Current SE build” for Special Edition). Crucially, ensure it matches your game version exactly. If your game updates, you may need a new SKSE version.
- Extract the Archive: Extract the SKSE archive to a temporary folder.
- Copy Files to Your Skyrim Game Folder (NOT Data!):
- Open the extracted SKSE folder. You’ll see a
Datafolder, several.dllfiles (e.g.,skse64_1_5_97.dll), and an executable (skse64_loader.exe). - Select all these files and folders.
- Copy them directly into your main Skyrim game folder (e.g.,
C:Program Files (x86)SteamsteamappscommonSkyrim Special Edition), not into theDatafolder within it. TheDatafolder from SKSE will merge with your game’sDatafolder, placing scripts correctly. The.dllfiles andskse64_loader.exemust reside alongside your game’s main executable (SkyrimSE.exeorTESV.exe).
- Open the extracted SKSE folder. You’ll see a
- Launch Skyrim via SKSE Loader: From now on, you must launch Skyrim using
skse64_loader.exe(orskse_loader.exefor Legendary Edition). Do not launch through Steam or the default game shortcut, or SKSE-dependent mods will not function. Consider creating a desktop shortcut forskse64_loader.exe.
Advanced Manual Modding and Troubleshooting
As your mod list grows, managing complexity and resolving issues becomes an integral part of the manual modding experience. This is where your deeper understanding of the game’s file structure truly pays off.
Managing Load Order Manually (The Hard Way)
While LOOT is highly recommended for sorting, understanding the manual process provides critical insight. The game processes plugins in the order they appear in plugins.txt.
- The
plugins.txtFile: As mentioned, this file is located inAppDataLocalSkyrim Special Edition(orSkyrim). Each line represents a plugin, with an asterisk*indicating it’s active. - Basic Rules for Manual Load Order:
- Masters First: The base game (
Skyrim.esm) and official DLCs (Update.esm,Dawnguard.esm,HearthFires.esm,Dragonborn.esm) must be at the very top of your load order, in that specific sequence. - Dependencies: Any mod that “masters” another mod (i.e., a mod requires another mod to function) must be loaded after its master.
- General Principle: Mods that modify similar content (e.g., all magic overhauls, all combat overhauls) should generally be grouped together, with the one you want to “win” loaded last in that group.
- Alphabetical Sorting (Loose Rule): For mods without strong dependencies, alphabetical sorting is a common starting point, but it’s not a guarantee of stability.
- Masters First: The base game (
- Why LOOT is Superior: Manually maintaining
plugins.txtquickly becomes a nightmare as you add more mods. LOOT possesses a vast database of mod compatibility and known load order rules, applying them intelligently to generate an optimized sequence. It handles complex dependencies and flaggings (like ESLs) automatically, saving countless hours and preventing crashes. For truly stable and extensive mod lists, LOOT is indispensable, even for die-hard manual installers.
Dealing with Conflicts and Overwrites
Conflicts are inevitable in modding. Manual installation teaches you to recognize and address them directly.
- Understanding Overwriting: When you copy files from a mod into your game’s
Datafolder, if a file has the same name and path as an existing file, Windows will prompt you to replace it.- “Replace” means “wins”: The mod whose files you copy last will overwrite any previous versions of those files, and its changes will appear in your game.
- Example: If Mod A adds a new texture for a sword and Mod B adds a different texture for the same sword, installing Mod A then Mod B will result in Mod B’s texture being used. If you install Mod B then Mod A, Mod A’s texture will be used.
- Resolving Conflicts:
- Prioritization: Decide which mod’s changes you prefer. Do you like Mod A’s trees or Mod B’s trees? Install the preferred one last.
- Compatibility Patches: Mod authors often provide “patches” specifically designed to resolve conflicts between their mod and another popular mod. These are usually small
.espfiles you install like any other plugin. - Manual Patching (Advanced with xEdit): For complex conflicts, especially with plugins, advanced users might create their own “merge patches” using xEdit. This involves manually reviewing conflicting records and deciding which changes to carry over, creating a new
.espthat combines desired elements from multiple mods. This is a powerful, albeit advanced, technique for ultimate control.
Common Pitfalls and Solutions
Even with careful manual installation, issues can arise. Knowing common problems and their fixes is part of the modding journey.
- Crash to Desktop (CTD):
- Cause: Often due to conflicting plugins, missing master files, corrupted game files, or memory issues.
- Solution:
- Check Load Order with LOOT: The most frequent culprit.
- Verify Masters: Ensure all mods have their required master files (ESMs, DLCs, other mods) present and loaded correctly.
- Install One Mod at a Time: If you’re installing multiple mods, add them one by one, testing the game after each addition. This helps pinpoint the problematic mod.
- Remove Most Recent Mod: If a CTD occurs, uninstall the last mod you installed manually.
- Clean Saves: For complex mods, starting a new game can often resolve issues related to “dirty saves.”
- Missing Textures/Meshes (Purple/Pink Textures, Yellow Exclamation Marks):
- Cause: Incorrect file paths, missing texture/mesh files, or overwrites that removed necessary assets.
- Solution:
- Check File Paths: Ensure the mod’s
TexturesandMeshesfolders are correctly placed inside your game’sDatafolder. Remember:Data/Textures/modnameis usually wrong; it should beData/Textures/architecture/modname. - Reinstall the Mod: A fresh reinstall can often correct misplaced files.
- Check for Missing Files: Confirm all expected textures/meshes are present in the extracted mod folder before copying.
- Check File Paths: Ensure the mod’s
- Game Not Launching (or SKSE Errors):
- Cause: Incorrect SKSE installation, missing game files, or critical mod conflicts.
- Solution:
- Verify SKSE Installation: Ensure
skse64_loader.exeand its associated.dllfiles are in your main Skyrim game directory, notData. - Launch via SKSE Loader: Confirm you are launching the game through
skse64_loader.exe. - Verify Game Files (Steam): Right-click Skyrim in Steam > Properties > Local Files > Verify integrity of game files. This will replace any corrupted vanilla files.
- Remove Problematic Mods: If the issue started after installing a specific mod, remove it.
- Verify SKSE Installation: Ensure
- The “Read the Description” Mantra: This cannot be overemphasized. Many issues arise from not thoroughly reading a mod’s instructions, requirements, and known incompatibilities. A few minutes spent reading can save hours of troubleshooting.
Conclusion
Manually installing Skyrim mods is a rewarding endeavor that offers a level of control and understanding that mod managers, for all their convenience, sometimes obscure. It teaches you the intricate workings of game files, the importance of digital security through backups, and develops critical thinking skills for troubleshooting complex software interactions. While it demands patience and meticulous attention to detail, the satisfaction of curating a perfectly personalized Skyrim experience, built piece by painstaking piece, is unparalleled.
Start simple, with texture packs or minor gameplay tweaks. Gradually expand your mod list, always remembering to back up your game, read mod descriptions thoroughly, and install one mod at a time to isolate potential issues. Embrace LOOT for managing your load order, even if you eschew full mod managers for file placement. As you gain experience, you’ll find that manual modding transforms you from a casual player into a true connoisseur of game customization, unlocking the full, boundless potential of Skyrim for countless hours of renewed adventure. Happy modding, Dragonborn!
aViewFromTheCave is a participant in the Amazon Services LLC Associates Program, an affiliate advertising program designed to provide a means for sites to earn advertising fees by advertising and linking to Amazon.com. Amazon, the Amazon logo, AmazonSupply, and the AmazonSupply logo are trademarks of Amazon.com, Inc. or its affiliates. As an Amazon Associate we earn affiliate commissions from qualifying purchases.