Minecraft, the sandbox phenomenon, offers an almost limitless canvas for creativity. Yet, for many players, the vanilla experience, while profound, eventually paves the way for a yearning for more. This desire is often satiated by the vibrant world of Minecraft mods – user-created modifications that can introduce anything from new blocks and items to entirely new dimensions, creatures, and gameplay mechanics. While some mod packs offer automated installations, understanding how to manually install Minecraft mods is a fundamental skill for any dedicated player, granting unparalleled control, flexibility, and the ability to curate a truly personalized gaming experience. This comprehensive guide will walk you through every step, ensuring you can confidently transform your Minecraft world.

The Gateway to Endless Minecraft Possibilities
Venturing into the realm of manual mod installation might seem daunting at first, but it’s a rewarding journey that opens up an entirely new dimension of Minecraft. It empowers you to pick and choose exactly which enhancements you want, resolve compatibility issues independently, and truly understand the inner workings of your game.
Why Manually Install Mods?
Automated modpack launchers are convenient, offering pre-selected collections of mods that are usually tested for compatibility. However, they come with limitations. They often force you to play with mods you don’t necessarily want, can be resource-intensive due to the sheer volume of mods, and limit your ability to experiment with newer, niche, or less popular mods not included in large packs.
Manually installing mods provides several key advantages:
- Precision Control: You decide every single mod that goes into your game, allowing for a highly customized experience tailored to your preferences.
- Resource Efficiency: By only installing what you need, you can maintain better game performance, especially if your system has limited resources.
- Troubleshooting Skills: Learning the manual process equips you with essential troubleshooting skills, helping you diagnose and fix issues when they arise, rather than being reliant on a launcher’s capabilities.
- Access to the Latest and Niche Mods: Newer mods or those from smaller creators might not be integrated into large modpacks immediately, but you can install them manually.
- Deeper Understanding: It fosters a deeper understanding of how Minecraft and its modifications interact, which can be invaluable for advanced users or aspiring mod developers.
Understanding Mod Loaders: Forge vs. Fabric vs. NeoForge
Before you even think about downloading individual mods, you need a “mod loader.” A mod loader is a fundamental piece of software that modifies your Minecraft client to allow it to run other mods. It acts as an intermediary, enabling different mods to interact with the game and each other without causing conflicts. The three most prominent mod loaders in the Minecraft community are Forge, Fabric, and the newer NeoForge.
- Minecraft Forge: For a long time, Forge was the undisputed king of mod loaders. It has an extensive library of mods, especially for older versions of Minecraft, and is known for its robust API that allows complex modifications. Many large-scale, content-rich mods like IndustrialCraft, Thermal Expansion, and Twilight Forest were built primarily for Forge. If you’re looking for stability and a vast selection for older game versions, Forge is an excellent choice.
- Minecraft Fabric: Fabric emerged as a lighter, more modern alternative to Forge, particularly gaining traction with newer Minecraft versions. It’s known for its faster load times, more minimalist design, and often quicker updates to support the latest Minecraft releases. While its mod library has grown significantly, especially for recent versions, some of the very largest, most established mods might still be exclusive to Forge. Fabric is often preferred by players who want performance, quick updates, and a slightly different mod selection.
- Minecraft NeoForge: NeoForge is a relatively new player in the mod loader space, emerging from a fork of the Forge project. It aims to offer modern improvements, better performance, and a more streamlined development experience while maintaining compatibility with many existing Forge mods where possible. It’s designed to be a future-proof successor to Forge, offering updated features and a commitment to new Minecraft versions. If you’re looking for the successor to Forge with modern sensibilities, NeoForge is a strong contender, especially for newer Minecraft versions.
Your choice of mod loader will largely dictate which mods are available to you, as mods are typically built for one specific loader. It’s crucial to select the loader that supports the mods you intend to use.
Essential Preparations Before You Begin
Before diving into the installation process, a few preparatory steps are critical. These steps ensure a smooth installation, prevent potential data loss, and lay the groundwork for a stable modded experience.
Ensuring Java is Up-to-Date
Minecraft, especially older versions and many mods, relies heavily on Java. An outdated or incorrect Java installation can lead to performance issues, crashes, or prevent mods from working altogether.
- Check Your Java Version: For most modern Minecraft versions (1.17 and newer), you’ll need Java 17 or higher. Older versions of Minecraft (1.16.5 and below) typically use Java 8. The Minecraft Launcher often bundles its own Java runtime for recent versions, but mod loaders and some standalone mods might still require a system-wide Java installation.
- Download and Install: Visit the official Oracle Java website or Adoptium (Eclipse Adoptium Temurin) to download the correct Java Development Kit (JDK) for your operating system and Minecraft version. Follow the installation instructions carefully. Ensure your system’s PATH variable is correctly updated, or that your mod launcher is configured to use the correct Java executable.
Backing Up Your Minecraft World
This is perhaps the most critical preparatory step. Modifying your game files, while generally safe, always carries a small risk of corruption or incompatibility. If something goes wrong, you don’t want to lose hours of progress on your meticulously crafted world.
- Locate Your Saves Folder: Navigate to your
.minecraftdirectory (we’ll detail how to find this shortly). Inside, you’ll see a folder namedsaves. - Copy to a Safe Location: Copy the entire
savesfolder to a different location on your computer, such as your desktop or a dedicated backup drive. This creates a safeguard that you can restore if any issues arise with your modded game.
Identifying Your Minecraft Version
Mods are highly version-specific. A mod designed for Minecraft 1.18.2 will almost certainly not work on 1.19.4 or 1.16.5, and attempting to do so will likely result in a crash.
- Check the Minecraft Launcher: The version of Minecraft you intend to mod will be clearly displayed in your Minecraft Launcher. Ensure you make a note of this exact version (e.g., 1.20.1).
- Consistency is Key: Every mod and your chosen mod loader (Forge, Fabric, or NeoForge) must be for the exact same Minecraft version. Incompatibility here is the leading cause of mod-related issues.
Step-by-Step Guide to Installing a Mod Loader
With your preparations complete, the next crucial step is to install your chosen mod loader. We’ll cover the installation for Forge, Fabric, and NeoForge.
Choosing Your Mod Loader: Forge, Fabric, or NeoForge?
Before proceeding, reaffirm your choice based on the mods you wish to use and the Minecraft version you’re targeting. Most mod download sites will specify which loader a mod requires. You can only have one mod loader active for a given Minecraft profile at a time.
Installing Minecraft Forge
- Download the Installer: Go to the official Forge website (files.minecraftforge.net).
- Select Your Version: On the left sidebar, choose the exact Minecraft version you want to mod (e.g., 1.20.1).
- Download Recommended Version: Click on “Installer” under the “Download Recommended” section. Avoid “Latest” unless you know what you’re doing, as “Recommended” is typically more stable.
- Run the Installer: Locate the downloaded
.jarfile and double-click it. (If it opens with an archiving program, you might need to right-click and select “Open with” > “Java(TM) Platform SE binary” or ensure Java is installed correctly). - Install Client: In the Forge installer window, ensure “Install client” is selected and click “OK.” Forge will download the necessary files.
- Confirmation: Once complete, a message will confirm successful installation.
Installing Minecraft Fabric
- Download the Installer: Go to the official Fabric website (fabricmc.net/use).
- Download Universal JAR: Click the “Download universal .JAR” link.
- Run the Installer: Double-click the downloaded
.jarfile. - Select Your Version: In the Fabric installer window, ensure the “Client” tab is selected. Choose your desired Minecraft version (e.g., 1.20.1) and the recommended Fabric Loader version.
- Install: Click the “Install” button.
- Confirmation: A message will confirm successful installation.
Installing Minecraft NeoForge
- Download the Installer: Visit the official NeoForge website (neoforge.net).
- Select Your Version: Choose the exact Minecraft version you want to mod.
- Download Installer: Click on “Download Installer” for the latest recommended version.
- Run the Installer: Double-click the downloaded
.jarfile. - Install Client: Ensure “Install client” is selected and click “OK.”
- Confirmation: A message will confirm successful installation.
Verifying Mod Loader Installation
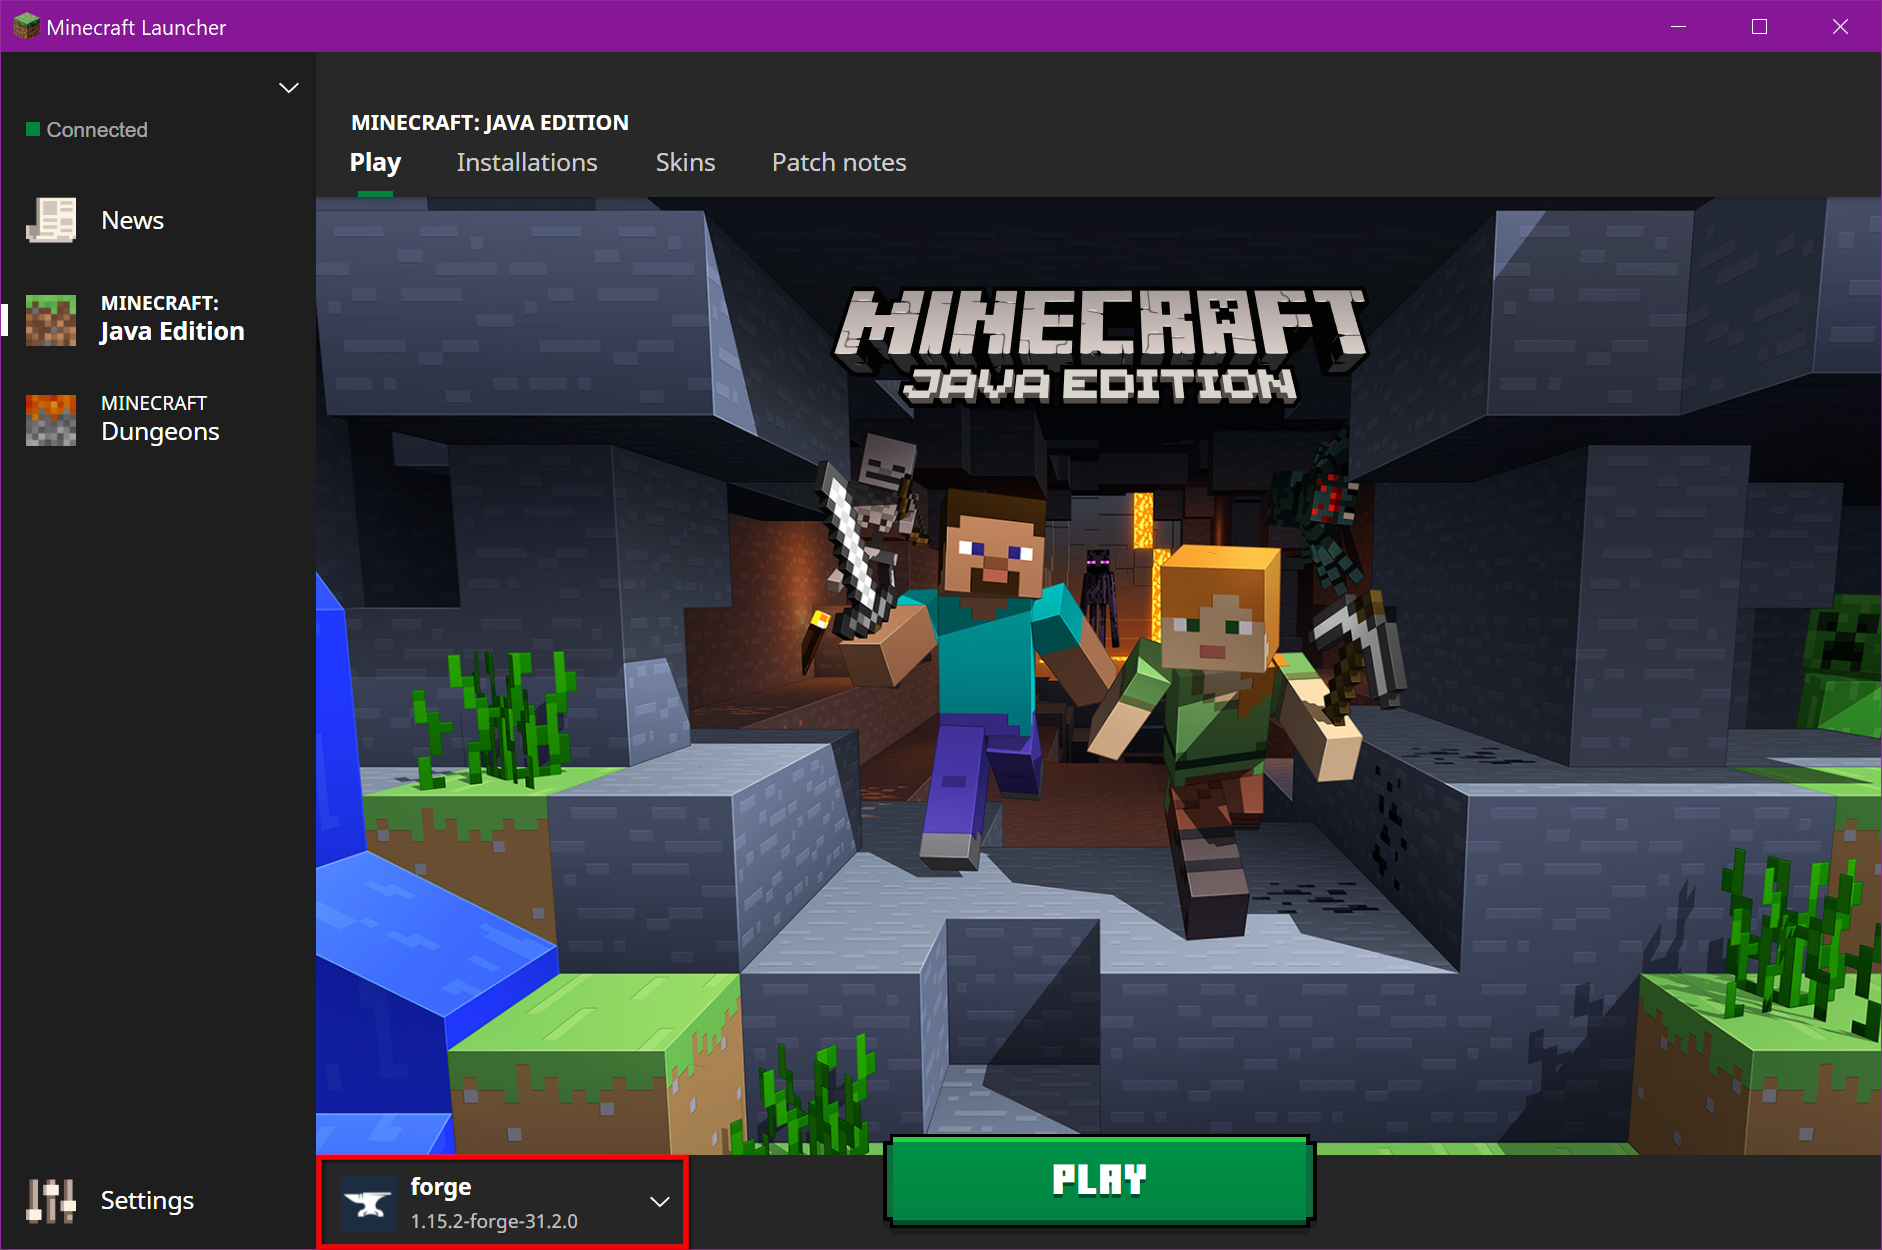
After installing your chosen mod loader, open the official Minecraft Launcher. You should now see a new profile available in the bottom-left corner of the launcher (e.g., “forge 1.20.1”, “fabric-loader-1.20.1”, or “neoforge 1.20.1”). Select this profile and click “Play.” Minecraft should launch, and you’ll typically see a message on the main menu indicating that it’s a modded client (e.g., “Minecraft* [Modded]” or a specific Forge/Fabric/NeoForge version). If you don’t see this, or the game crashes, do not proceed; re-check your Java installation and ensure you selected the correct Minecraft version during the loader installation.
Locating, Downloading, and Installing Your Mods
With the mod loader successfully installed, you’re now ready for the main event: adding your desired mods to the game.
Finding Compatible Mods: The Best Sources
The safety and compatibility of your mods are paramount. Stick to reputable sources to minimize risks of malware or poorly coded mods.
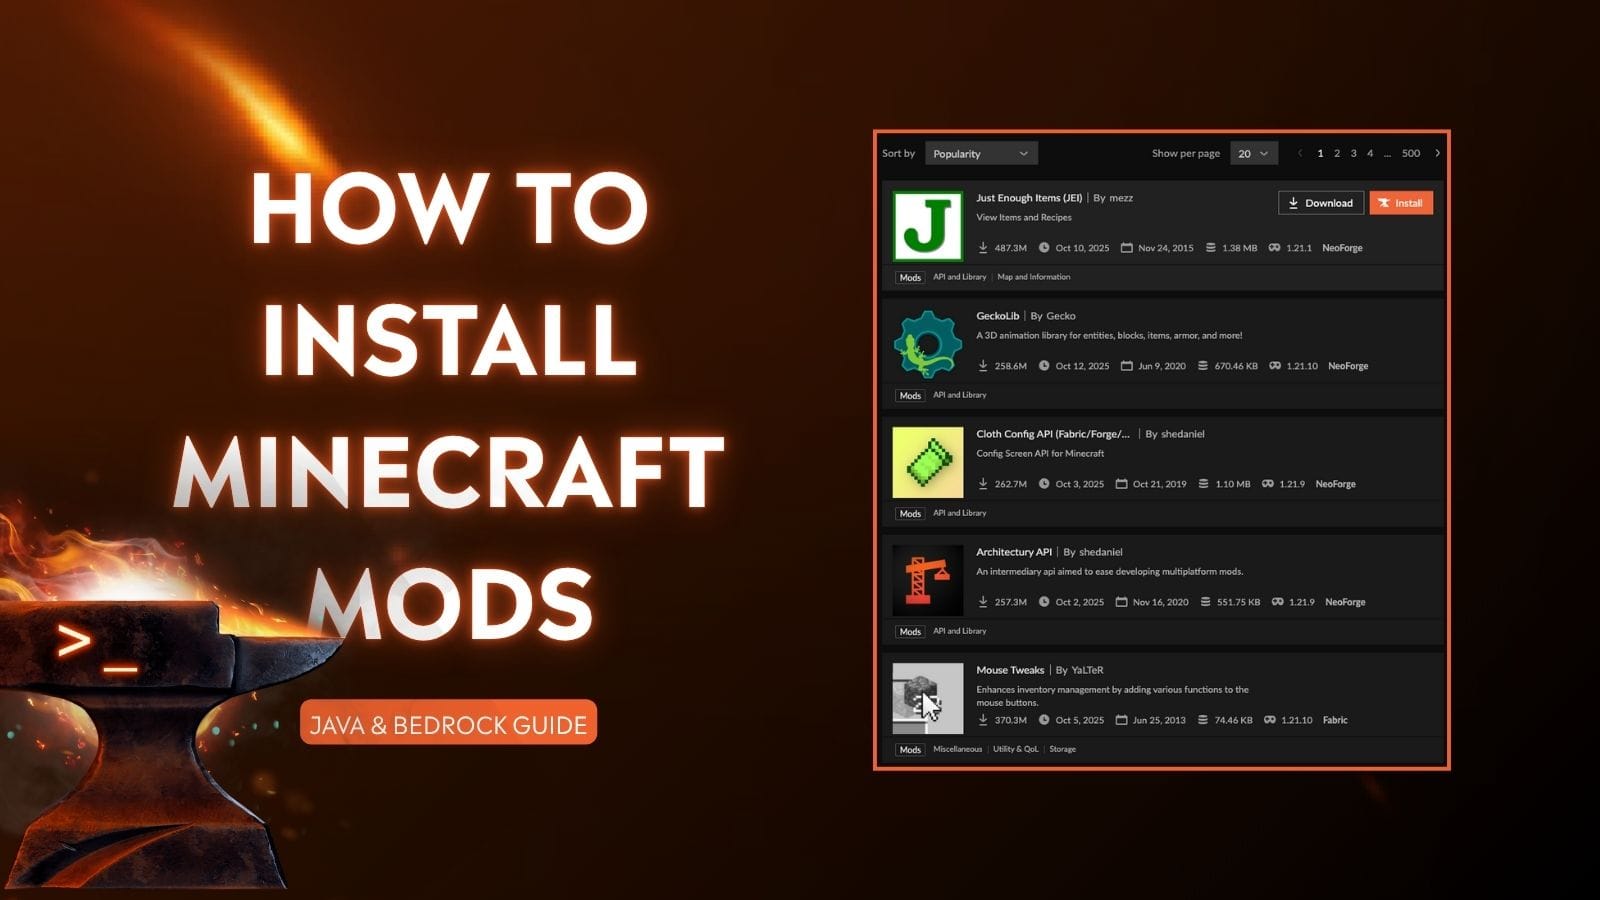
- CurseForge (curseforge.com): This is by far the largest and most reliable repository for Minecraft mods. You can filter by game version, mod loader, and category. Each mod page provides detailed descriptions, installation instructions, and user comments.
- Modrinth (modrinth.com): A newer, community-driven platform gaining popularity, especially for Fabric mods. It offers a clean interface and often hosts a good selection of performance-enhancing and utility mods.
- Official Mod Websites/Forums: Some developers host their mods directly on their own websites or dedicated forums. Always verify the authenticity of these sources.
When browsing for mods, always check:
- Minecraft Version: Does it match your game version (e.g., 1.20.1)?
- Mod Loader: Is it compatible with Forge, Fabric, or NeoForge (whichever you installed)?
- Dependencies: Does the mod require any other mods to function (e.g., “API” mods like Architectury, GeckoLib, or CoFH Core)? Download these first if needed.
Downloading Your Chosen Mods
Once you’ve identified a mod you want, download it.
- Navigate to the Download Page: On CurseForge or Modrinth, find the “Files” tab or download button.
- Select the Correct File: Choose the
.jarfile that matches your Minecraft version and mod loader. Be wary of advertisements or “download managers” that might try to trick you into downloading something else. - Save the File: Download the
.jarfile to an easily accessible location, like your “Downloads” folder. Do not run these.jarfiles; they are for placing into the game’smodsfolder, not for execution.
Navigating to Your .minecraft Directory
This is the central hub for all your Minecraft game files, including saves, resource packs, and, crucially, your mods folder.
- Through the Minecraft Launcher: Open the Minecraft Launcher. Go to the “Installations” tab. Hover over the Forge/Fabric/NeoForge profile you created, click the three dots, and select “Open Folder.” This will take you directly to your
.minecraftdirectory. - Manual Navigation (Windows): Press
Win + R, type%appdata%, and press Enter. This will open the Roaming folder. Double-click the.minecraftfolder. - Manual Navigation (macOS): Open Finder, click “Go” in the menu bar, then “Go to Folder…”. Type
~/Library/Application Support/minecraftand press Enter. - Manual Navigation (Linux): Navigate to
~/.minecraft(note the leading dot, which makes it a hidden folder).
Placing Mods in the mods Folder
Inside your .minecraft directory, you should now see a new folder named mods. If it’s not there, you can manually create it (ensure it’s named exactly mods in lowercase).
- Open the
modsFolder: Double-click to open this folder. - Drag and Drop: Drag and drop all the downloaded mod
.jarfiles (and any dependency.jarfiles) into thismodsfolder. Do not extract them; keep them as.jarfiles.
Launching Minecraft with Mods
- Open Minecraft Launcher: Launch the official Minecraft Launcher.
- Select Modded Profile: Ensure the Forge, Fabric, or NeoForge profile is selected from the dropdown menu (bottom-left).
- Click Play: Click the “Play” button.
- Verify: If everything is installed correctly, Minecraft will launch. On the main menu, you should often see a “Mods” button, a “Config” button, or an indication that the game is running a modded version. You can click the “Mods” button to see a list of all active mods. Start a new world or load an existing one to experience your new modifications!
Common Troubleshooting and Best Practices
Even with careful installation, issues can sometimes arise. Knowing how to troubleshoot effectively is a vital part of manual modding.
Minecraft Crashes on Startup
This is the most common issue.
- Check Crash Log: After a crash, Minecraft usually generates a crash report in the
.minecraft/crash-reportsfolder. Open the latest one with a text editor. Look for keywords likeCaused by:oratlines, which often point to the problematic mod or a missing dependency. - Remove Mods Incrementally: If you added multiple mods, remove them all from the
modsfolder. Add them back one by one, launching the game after each addition, until you find the culprit. - Version Mismatch: Double-check that all mods, the mod loader, and your Minecraft game version are an exact match.
- Java Issues: Ensure you have the correct Java version installed and that the launcher is using it.
Mods Not Appearing In-Game
- Check
modsFolder: Ensure the.jarfiles are directly inside themodsfolder, not in subfolders, and that they are indeed.jarfiles (not.zipfiles that need extraction). - Mod Loader Profile: Confirm you’re launching the game using the correct Forge/Fabric/NeoForge profile in the Minecraft Launcher, not the vanilla profile.
- Dependencies: Did the mod require another “API” mod? Make sure all dependencies are also in the
modsfolder. - Client-Side vs. Server-Side: Some mods are purely client-side (visuals, minimaps) and won’t appear as “items” in-game, but will modify your GUI or interaction. Others are server-side and require installation on both client and server to function fully.
Version Mismatches and Incompatibility
As mentioned, this is a prime culprit for errors. Always download mods specifically for your Minecraft and mod loader versions. When updating Minecraft, you will almost certainly need to update your mod loader and all your mods to compatible versions.
Managing Mod Conflicts
Sometimes, two perfectly good mods might conflict if they try to modify the same game elements in incompatible ways.
- Isolate Conflicts: Use the incremental removal method to find the conflicting mods.
- Read Mod Documentation: Some mod developers provide information about known conflicts and potential workarounds.
- Seek Community Help: Forums, Discord servers, and Reddit communities are great places to ask for help with specific mod conflicts.
Regular Updates and Maintenance
- Keep Mods Updated: Periodically check for updates to your installed mods. Updates often fix bugs, improve performance, and add new features.
- Clean Up: Remove any old or unused mod
.jarfiles from yourmodsfolder to prevent clutter and potential issues. - Back Up Regularly: Continue backing up your game saves, especially before making significant changes to your mod list or updating Minecraft versions.
The Broader Impact: Beyond Just Gameplay
Manual mod installation isn’t just about enhancing a game; it’s a deep dive into the technical side of software customization, touching upon aspects relevant to the broader digital landscape the website covers.
Community and Creativity
The modding community is a powerful example of decentralized, user-driven innovation. Developers pour countless hours into creating mods, and players contribute by testing, reporting bugs, and providing feedback. This collaborative spirit not only enriches the game but also showcases the potential for open-source-like development and knowledge sharing within a passion-driven niche. Understanding how to integrate these community creations gives you a direct link to this vast network of digital artisans.
Digital Security Considerations
As you manually download files from the internet, digital security becomes a prominent concern. Sticking to reputable sources like CurseForge and Modrinth is crucial. Unverified downloads can harbor malware, adware, or other malicious software. This experience reinforces the importance of safe downloading practices, verifying file integrity, and understanding the risks associated with executing or placing unknown code on your system – a lesson applicable far beyond Minecraft. Just as with any software, vigilance against phishing and suspicious links is paramount.
Productivity Through Modding?
While seemingly counterintuitive for a game, the modding process itself can foster a unique form of productivity. The meticulous attention to detail required, the problem-solving in troubleshooting conflicts, and the research involved in finding compatible versions all hone critical digital literacy skills. Furthermore, some “productivity” mods genuinely enhance the in-game experience, from better inventory management to advanced mapping tools, streamlining repetitive tasks within the game world. This demonstrates how even in leisure, the pursuit of optimization and personalized tooling can build valuable digital proficiency.
Conclusion: Unleash Your Minecraft Adventure
Manually installing Minecraft mods is a rite of passage for many players, transforming them from passive consumers into active curators of their gaming experience. It’s a journey that might start with a simple mod but can lead to a sophisticated understanding of game architecture, digital security, and community-driven development. By following this guide, you now possess the knowledge and confidence to explore the endless possibilities that mods offer, truly unleashing your Minecraft adventure. So, go forth, customize your worlds, and discover the true depth of what this incredible sandbox game has to offer. Happy modding!
aViewFromTheCave is a participant in the Amazon Services LLC Associates Program, an affiliate advertising program designed to provide a means for sites to earn advertising fees by advertising and linking to Amazon.com. Amazon, the Amazon logo, AmazonSupply, and the AmazonSupply logo are trademarks of Amazon.com, Inc. or its affiliates. As an Amazon Associate we earn affiliate commissions from qualifying purchases.