In the ever-evolving digital landscape of Windows 10, keeping track of what you’ve recently added to your system can sometimes feel like navigating a maze. Whether you’re a tech enthusiast eager to explore new software, a professional managing critical applications, or simply a user who occasionally installs a new app, knowing how to easily identify these recent additions is a fundamental skill. This guide delves into the various methods Windows 10 offers to help you pinpoint those recently installed programs, providing a clear path through the system’s functionalities. Understanding these tools can significantly enhance your digital organization, streamline troubleshooting, and ensure you’re always in control of your computing environment.
The importance of knowing what’s recently installed extends beyond mere curiosity. For tech-savvy individuals, it’s about staying ahead of the curve, evaluating new software for its potential to boost productivity or enhance their digital security. For professionals, it might be about verifying that a crucial piece of software has been installed correctly or identifying any unwanted programs that might be consuming valuable resources. Even for casual users, a quick glance at recent installations can help recall which application is responsible for a new feature or, conversely, a potential performance hiccup. Windows 10, with its user-friendly interface and robust feature set, provides several intuitive ways to access this information, making it accessible to users of all technical backgrounds.
Navigating Your Recently Installed Software: The Control Panel and Settings App
Windows 10 consolidates many of its core functionalities across two primary interfaces: the traditional Control Panel and the more modern Settings app. Both offer pathways to view your installed programs, and each has its own strengths and nuances. Understanding how to leverage both will give you a comprehensive overview of your software landscape.
The Classic Control Panel: A Time-Tested Method
For many years, the Control Panel has been the go-to location for managing system settings, including installed programs. While the Settings app has become more prominent, the Control Panel remains a powerful and familiar tool for many users, especially those who have been using Windows for a while.
Accessing the Programs and Features List
The most direct way to see a list of your installed programs in the Control Panel is through the “Programs and Features” applet. This list provides a detailed breakdown of every application that has been installed on your system, along with information such as the publisher, installation date (though not always consistently populated for older installs), and version number.
- Open the Control Panel: The quickest way to access the Control Panel is by typing “Control Panel” into the Windows search bar and selecting it from the results.
- Navigate to Programs and Features: Once the Control Panel is open, look for “Programs” and then click on “Programs and Features.” If your Control Panel is set to Category view, you might need to click on “Uninstall a program” under the “Programs” category.
- Sort by Installation Date: Within the “Programs and Features” window, you’ll see a list of all installed applications. By default, this list might be sorted alphabetically. To find recently installed software, click on the “Installed On” column header. Clicking it once will sort the list in ascending order (oldest first), and clicking it again will reverse the order, showing the most recently installed programs at the top. This is often the most effective way to quickly identify new additions.
While the “Installed On” date is incredibly helpful, it’s important to note that not all programs populate this field reliably. Some older applications or those installed through less conventional methods might not have a precise installation date recorded. However, for the vast majority of modern software, this sorting method is highly accurate.
The Modern Settings App: A Sleek and Integrated Approach
The Settings app, introduced with Windows 10, offers a more streamlined and visually appealing interface for managing system preferences. It also provides a dedicated section for managing your applications.
Finding Apps and Features
The Settings app categorizes installed software differently, often distinguishing between traditional desktop applications and newer Universal Windows Platform (UWP) apps. This distinction can be useful for understanding the type of software you’re dealing with.
- Open the Settings App: You can open the Settings app by clicking the Start button and then selecting the gear icon, or by pressing the
Windows key + Ishortcut. - Navigate to Apps: Within the Settings app, click on “Apps.”
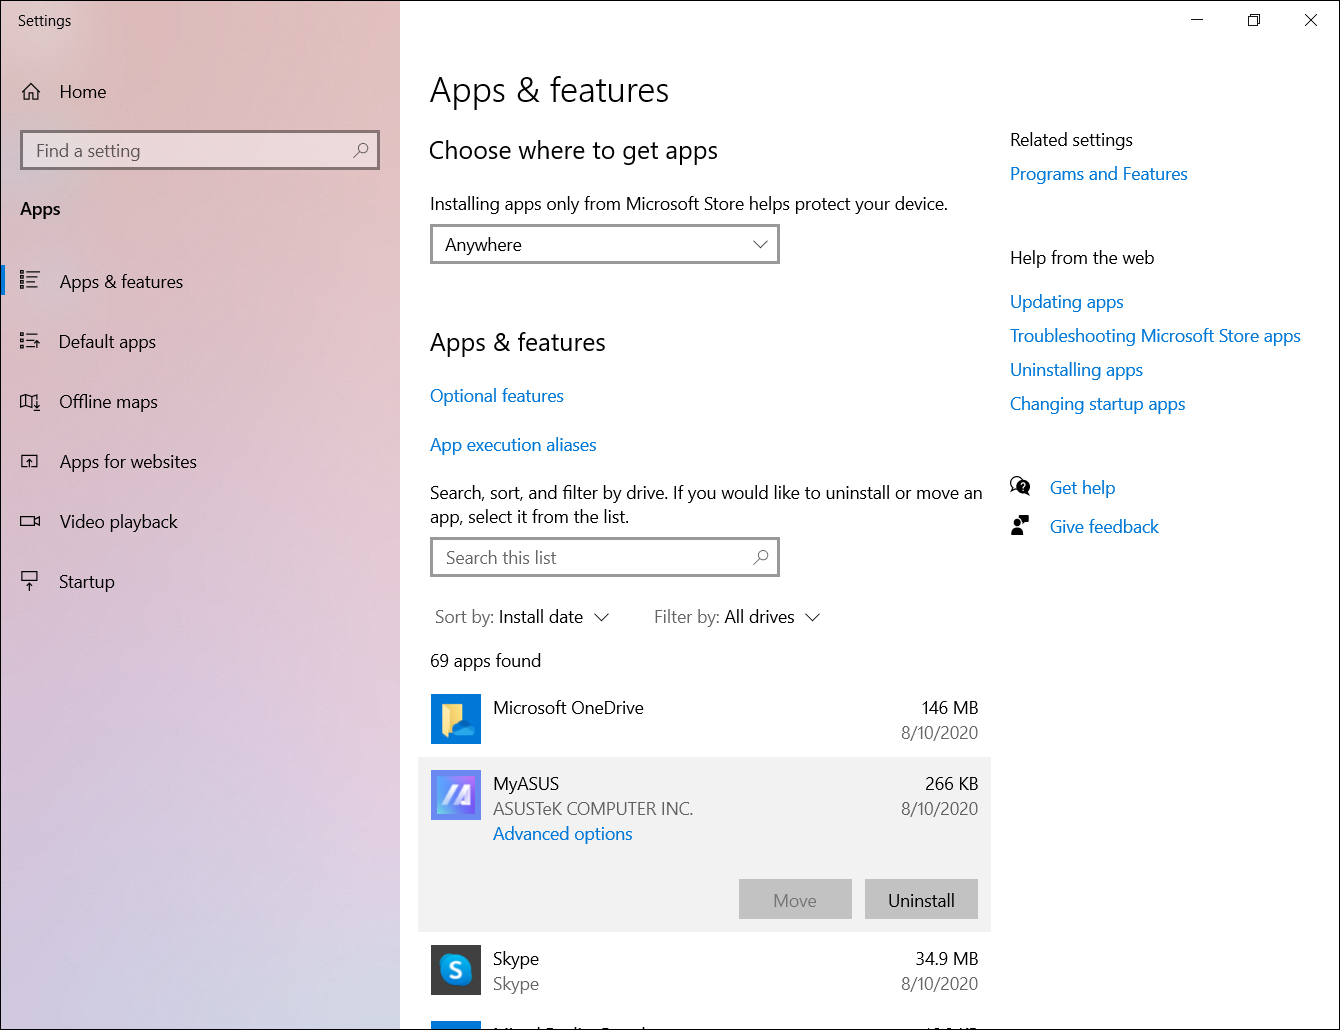
- Select Apps & Features: On the left-hand sidebar, click on “Apps & features.” This will display a list of all installed applications.
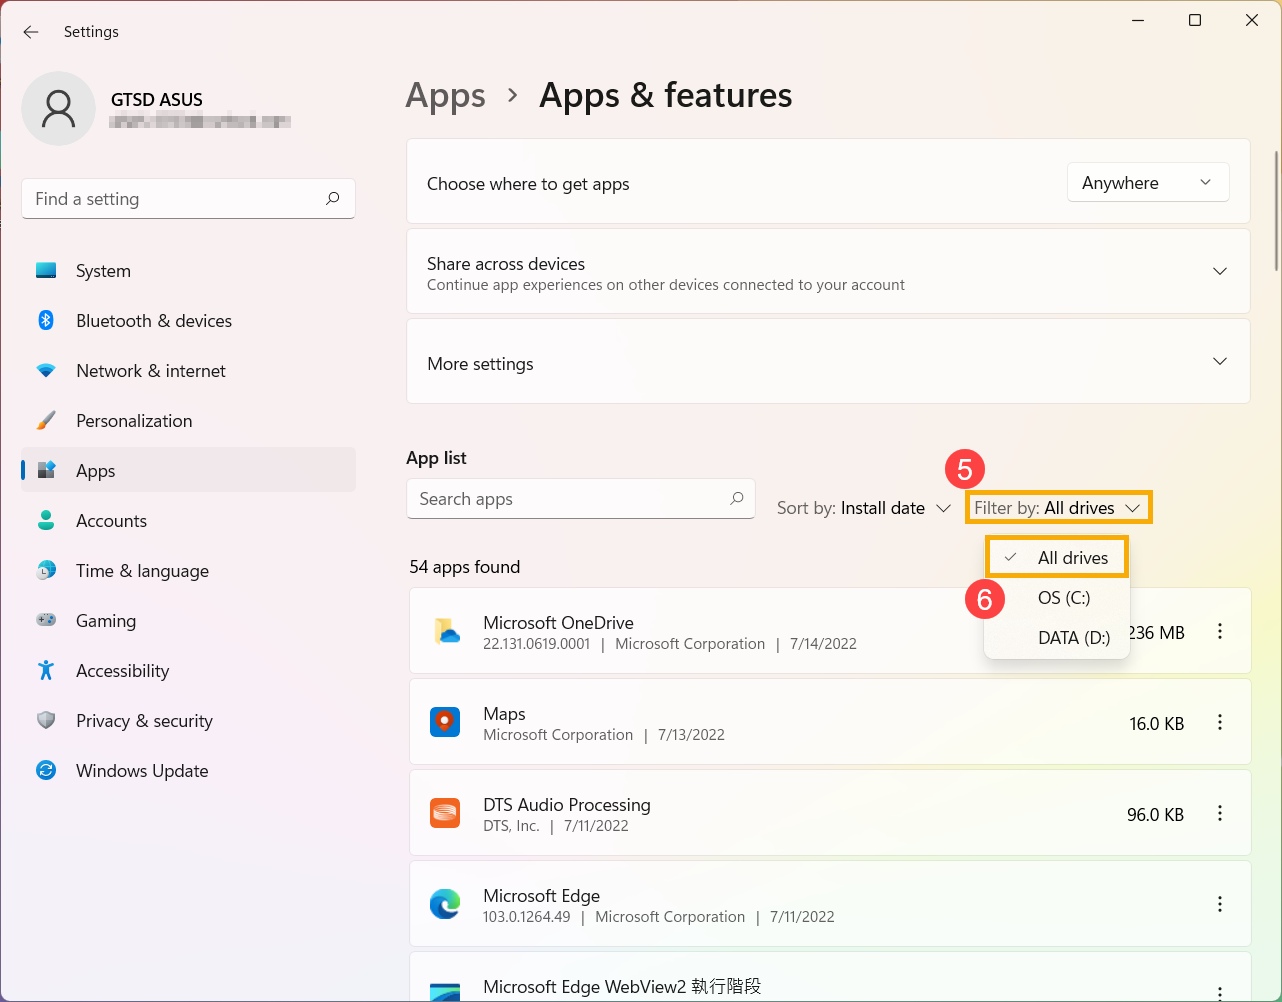
- Sort by Install Date: Similar to the Control Panel, the “Apps & features” list can be sorted. Look for a “Sort by” dropdown menu, usually located near the top of the list. Select “Install date” from the options. This will arrange your applications with the most recently installed ones appearing at the beginning of the list.
The “Apps & features” section in the Settings app is particularly good at listing UWP apps downloaded from the Microsoft Store. It also lists traditional desktop programs. One advantage here is that you can often uninstall or modify applications directly from this interface, making it a convenient all-in-one hub for app management.
Beyond the Standard Lists: Exploring Other Indicators of Recent Activity
While the Control Panel and Settings app are the primary destinations for viewing installed software, Windows 10 also offers subtle clues and alternative methods to help you identify what’s new. These can be particularly useful if you’re trying to recall a program you installed but can’t find on the standard lists, or if you suspect a program was installed without your explicit knowledge.
Examining Program Files and Shortcuts
Sometimes, the installation process leaves behind tangible evidence that can be a strong indicator of recent activity.
Locating Installation Folders
Most programs are installed in specific directories within your Program Files or Program Files (x86) folders. The creation or modification dates of these folders can sometimes point to recent installations.
- Open File Explorer: Press
Windows key + Eto open File Explorer. - Navigate to Program Files: Browse to
C:Program FilesandC:Program Files (x86). - Sort by Date Modified: Within these folders, you can sort the contents by “Date modified.” Look for folders with recent modification dates that correspond to when you believe you installed a new program. This method requires a bit more manual detective work, as you’ll need to recognize program names and their associated folders.
Checking Desktop and Start Menu Shortcuts
When programs are installed, they often create shortcuts on your desktop or within the Start Menu. The creation date of these shortcuts can be a giveaway.
- Desktop Shortcuts: Right-click on your desktop, select “View,” and ensure “Show desktop icons” is checked. You can then sort the icons by “Date modified” or “Date created” by right-clicking in an empty space on the desktop, selecting “Sort by,” and choosing your preferred option.
- Start Menu Shortcuts: Access the Start Menu by clicking the Windows icon. Navigate to “All apps.” Within the list of applications, you can sometimes find recently added ones highlighted, or you can scroll through the alphabetical list. While there isn’t a direct “sort by date” for Start Menu items within the interface itself, the visual prominence of newly added tiles or folders can be a hint.
Utilizing Windows Search and System Information Tools
Windows 10’s powerful search functionality and system information tools can also be employed to uncover recent software activity.
Leveraging Windows Search
The Windows search bar is not just for finding files; it can also help you locate applications you’ve recently installed.
- Type Program Names: If you have an idea of the name of the program you installed, simply type it into the Windows search bar. Windows will prioritize installed applications in its search results.
- Explore Search Results: Pay attention to the order of search results. If a program you recently installed appears at the top, it’s a good indication of its recent presence.
System Information and Event Viewer
For a more in-depth analysis, you can delve into system tools that record program installations and system events.
- System Information: Press
Windows key + R, typemsinfo32, and press Enter. While this tool doesn’t directly list recently installed programs, it provides a comprehensive overview of your system’s hardware and software components, which can be useful for cross-referencing if you’re troubleshooting. - Event Viewer: This is a more advanced tool that logs system events, including application installations.
- Press
Windows key + R, typeeventvwr.msc, and press Enter. - Navigate to “Windows Logs” > “Application.”
- In the right-hand pane, click “Filter Current Log.”
- Under “Event sources,” you can select “MsiInstaller” to filter for Windows Installer events. This will show you a chronological log of installations and uninstalls, allowing you to pinpoint recent software additions by their timestamp. This method is powerful but requires a bit more understanding of event logs.
- Press
By combining these various methods, you can effectively track and manage the software you install on your Windows 10 computer. Whether it’s for organization, security, or simply staying informed about your digital environment, mastering these techniques will ensure you’re always in control of your system.
The Broader Context: Why Keeping Track Matters
Understanding how to view recently installed software is more than just a technical exercise; it’s an integral part of responsible digital citizenship and efficient personal or professional management. In the realm of technology, staying aware of system changes can prevent unforeseen issues and optimize performance.
Digital Security and Unwanted Software
One of the most critical reasons to monitor recent installations is for digital security. Malicious software, often disguised as legitimate applications or bundled with other downloads, can infiltrate your system without your explicit knowledge. Regularly reviewing your installed programs allows you to:
- Identify Potentially Unwanted Programs (PUPs): These are programs that may not be overtly malicious but can slow down your computer, display unwanted ads, or collect your data. They are often installed as “extras” during the installation of other software.
- Detect Malware: Suspicious programs that you don’t remember installing could be a sign of malware. Prompt identification and removal are crucial to prevent data theft, system damage, or ransomware attacks.
- Verify Software Sources: Knowing what you’ve installed helps you confirm that you’ve only downloaded software from trusted sources. If an unfamiliar program appears, it warrants immediate investigation.
Performance Optimization and Resource Management
Over time, installing numerous applications can impact your system’s performance. Some programs run in the background, consuming CPU, RAM, and disk space, even when you’re not actively using them. Regularly checking your installed software, particularly recent additions, helps you:
- Pinpoint Resource Hogs: If your computer starts running slower after installing new software, you can check the “Apps & features” list or Control Panel to see if a particular program is consuming an excessive amount of resources.
- Free Up Disk Space: Unused or unnecessary programs take up valuable storage space. Identifying recently installed software that you no longer need allows you to uninstall it and reclaim that space.
- Manage Startup Programs: Many applications are configured to launch automatically when Windows starts, which can significantly increase boot times. While not directly a list of installed programs, the process of reviewing installations often leads to an examination of what’s running in the background, which is a critical aspect of performance tuning.

Brand and Personal Productivity
In a professional context, managing software installations can directly influence your brand and productivity.
- Maintaining a Professional Environment: For individuals building a personal brand, their digital workspace is an extension of their professional image. A clean, organized system with only relevant and reputable software reflects positively. Unwanted or outdated software can detract from this.
- Streamlining Workflows: Identifying and utilizing the most efficient software for your tasks is key to productivity. Regularly reviewing your installed applications ensures you are aware of all available tools and can choose the best ones for your specific needs. This might involve discovering new productivity apps or uninstalling redundant ones.
- Compliance and Licensing: For businesses or professionals dealing with software licenses, keeping an accurate inventory of installed software is essential for compliance and avoiding legal issues. Knowing what’s installed helps in managing licenses and ensuring you are not using pirated or unauthorized software.
In conclusion, the ability to effectively view and manage recently installed software on Windows 10 is a fundamental skill that empowers users to maintain a secure, efficient, and productive computing experience. It bridges the gap between the technological capabilities of the operating system and the user’s need for control and understanding.
aViewFromTheCave is a participant in the Amazon Services LLC Associates Program, an affiliate advertising program designed to provide a means for sites to earn advertising fees by advertising and linking to Amazon.com. Amazon, the Amazon logo, AmazonSupply, and the AmazonSupply logo are trademarks of Amazon.com, Inc. or its affiliates. As an Amazon Associate we earn affiliate commissions from qualifying purchases.