
Live streaming has evolved from a niche activity to a mainstream communication channel, enabling real-time interaction and community building. YouTube, as a dominant platform for video content, offers robust tools for creators to connect with their audience live. Understanding the technical requirements and best practices is crucial for a successful broadcast, whether for gaming, tutorials, Q&A sessions, or live events. This guide delves into the technical intricacies of setting up and managing a YouTube live stream, ensuring a professional and engaging experience for both creator and viewer.
I. Preparing for Your First YouTube Live Stream
Before pressing the “Go Live” button, several technical prerequisites and equipment considerations must be addressed to ensure a smooth and high-quality broadcast.
A. Meeting YouTube’s Requirements
YouTube imposes specific conditions for live streaming access to maintain platform integrity and quality.
- Channel Verification: Your YouTube channel must be verified. This involves a simple phone number verification process, which YouTube uses to confirm you are a real person. Access to live streaming is typically enabled 24 hours after verification.
- No Live Streaming Restrictions: Your channel must not have any live streaming restrictions imposed in the last 90 days. Violations of YouTube’s Community Guidelines can lead to temporary or permanent bans from live streaming.
- Subscriber Threshold for Mobile: While live streaming from a computer typically doesn’t have a subscriber requirement, streaming directly from the YouTube mobile app requires your channel to have at least 50 subscribers. Channels with fewer than 50 subscribers can still live stream using other methods, such as an encoder software connected to a mobile device.
B. Essential Equipment for Quality Streaming
The quality of your live stream is heavily dependent on the equipment you use. Investing in reliable gear pays dividends in viewer engagement and retention.
Camera
- Webcams: For basic streaming, a decent external webcam (e.g., Logitech C920, Razer Kiyo) offers a significant upgrade over most built-in laptop cameras. They provide better resolution, low-light performance, and often superior auto-focus.
- DSLR/Mirrorless Cameras: For professional-grade video, a DSLR or mirrorless camera with a clean HDMI output (meaning it doesn’t display camera settings on the HDMI feed) connected via a capture card provides excellent image quality, depth of field, and flexibility with lenses.
- Smartphones: Modern smartphones boast impressive camera capabilities. When used with a tripod and good lighting, they can produce high-quality video, especially for mobile live streams or as a secondary camera.
Microphone
Audio quality often outweighs video quality in viewer importance. A clear, crisp microphone is paramount.
- USB Microphones: Easy to set up and use, USB mics like the Blue Yeti or Rode NT-USB Mini offer substantial improvements over built-in computer microphones. They are excellent for single-person setups.
- XLR Microphones with Audio Interface: For advanced setups, an XLR microphone (e.g., Shure SM7B, Rode Procaster) paired with an audio interface (e.g., Focusrite Scarlett 2i2, GoXLR) provides professional-grade sound, greater control over audio processing, and allows for multiple audio inputs.
- Headset Microphones: Convenient for gaming or interactive sessions, but often compromise on overall sound quality compared to dedicated microphones.
Internet Connection
A stable and fast internet connection is non-negotiable for live streaming.
- Wired Connection: Always prefer an Ethernet connection over Wi-Fi. It provides greater stability and consistent speeds, reducing the risk of dropped frames or buffering.
- Upload Speed: Focus on upload speed, not just download. YouTube recommends minimum upload speeds depending on your desired resolution and bitrate:
- 1080p @ 60fps: 4.5-9 Mbps
- 720p @ 30fps: 2.5-4 Mbps
- A good rule of thumb is to have an upload speed at least twice your chosen bitrate. Use an online speed test (e.g., Speedtest.net) to verify your speeds.
Lighting
Proper lighting enhances video quality significantly, making you look more professional and your content more engaging.
- Natural Light: Position yourself facing a window for soft, even illumination. Avoid backlighting.
- Ring Lights: Popular for streamers, ring lights provide even, flattering light directly in front of the subject, reducing shadows.
- Softboxes/LED Panels: For more controlled and professional lighting setups, softboxes or LED panels can illuminate your space effectively, reducing harsh shadows and creating a more polished look.
Computer/Device
Your computer or mobile device needs sufficient processing power and memory to handle encoding video in real-time.
- Minimum Specs (PC/Mac): Intel Core i5/Ryzen 5 equivalent or better, 8GB RAM (16GB recommended), a dedicated graphics card (NVIDIA GTX 10-series or AMD RX 500-series equivalent or better).
- Mobile Devices: Newer flagship smartphones are generally capable of live streaming without significant performance issues.
II. Choosing Your Live Streaming Method
YouTube offers several ways to go live, each suited for different use cases and technical expertise levels.
A. Mobile Live Streaming (YouTube App)
This is the simplest method, ideal for on-the-go content or quick updates.
- Requirements: As mentioned, your channel needs at least 50 subscribers to stream directly from the app.
- Steps:
- Open the YouTube app on your smartphone or tablet.
- Tap the
+icon at the bottom center. - Select “Go Live.”
- Grant camera and microphone permissions if prompted.
- Enter a title, description, adjust privacy settings (Public, Unlisted, Private), audience settings (Made for Kids or not), and location.
- Choose your thumbnail or take a new one.
- Tap “Go Live.”
- To end the stream, tap “Finish” at the top right.
- Limitations: Offers limited control over overlays, multiple camera angles, or advanced audio mixing. Quality is typically capped by phone hardware and network conditions.
B. Webcam Live Streaming (YouTube Studio)
This browser-based method is straightforward for desktop users who want to stream directly from their computer’s webcam and microphone without additional software.
- Steps:
- Go to YouTube Studio on your desktop browser.
- Click the “Create” button (camera icon with a
+) in the top right corner. - Select “Go Live.”
- Choose the “Webcam” option.
- Enter a title, description, privacy settings, and audience settings.
- YouTube will prompt you to select your webcam and microphone.
- Click “Go Live” to start.
- To end the stream, click “End Stream.”
- Use Cases: Perfect for quick Q&As, basic presentations, or casual desktop streams.
C. Encoder Live Streaming (Software/Hardware Encoders)
This is the most versatile and professional option, allowing for complex productions with multiple cameras, custom graphics, and refined audio. An encoder is a program or device that takes your video and audio feeds, compresses them, and sends them to YouTube.
Software Encoders
These are programs installed on your computer.
- Popular Choices: OBS Studio (free and open-source, highly recommended), Streamlabs Desktop (based on OBS, user-friendly interface), vMix (paid, professional features), XSplit (paid, professional features).
- Key Features:
- Scene Management: Create different “scenes” with various layouts (e.g., full camera, camera + game, custom graphics).
- Sources: Add multiple video sources (webcam, game capture, screen capture, media files), audio sources (microphones, desktop audio), and overlays (images, text, web pages).
- Transitions: Smoothly switch between scenes with various transition effects.
- Filters: Apply color correction, noise suppression, and other effects to your video and audio.
- Basic OBS Studio Setup (Example):
- Install OBS Studio.
- Add Sources: In the “Sources” box, click
+to add your webcam (Video Capture Device), microphone (Audio Input Capture), screen (Display Capture), or game (Game Capture). - Create Scenes: In the “Scenes” box, click
+to create different layouts. - Configure Stream Settings: Go to “Settings” > “Stream.”
- Select “YouTube/YouTube Gaming” as the service.
- Copy your Stream Key from YouTube Studio (explained below) and paste it here.
- Configure Output Settings: Go to “Settings” > “Output.”
- Set “Output Mode” to “Advanced” for fine-tuning.
- Streaming Tab: Adjust video bitrate (e.g., 4500-6000 kbps for 1080p30), encoder (hardware encoders like NVENC or AMF are preferred if available, otherwise x264), and audio bitrate (160 or 192 kbps).
- Configure Video Settings: Go to “Settings” > “Video.”
- Set “Base (Canvas) Resolution” to your monitor’s resolution.
- Set “Output (Scaled) Resolution” to your desired stream resolution (e.g., 1920×1080 or 1280×720).
- Set “Common FPS Values” (e.g., 30 or 60).
- Click “Start Streaming” in OBS. This sends your feed to YouTube. You’ll then finalize going live in YouTube Studio.
Hardware Encoders
These are dedicated physical devices (e.g., Elgato Game Capture, Blackmagic Design ATEM Mini) that handle the encoding process, offloading it from your computer’s CPU. They are often used for multi-camera setups, outdoor streaming, or situations where maximum reliability is needed.
III. Setting Up Your Live Stream in YouTube Studio
Regardless of your streaming method, YouTube Studio is your central hub for managing live streams, configuring settings, and monitoring performance.
A. Scheduling a Live Stream
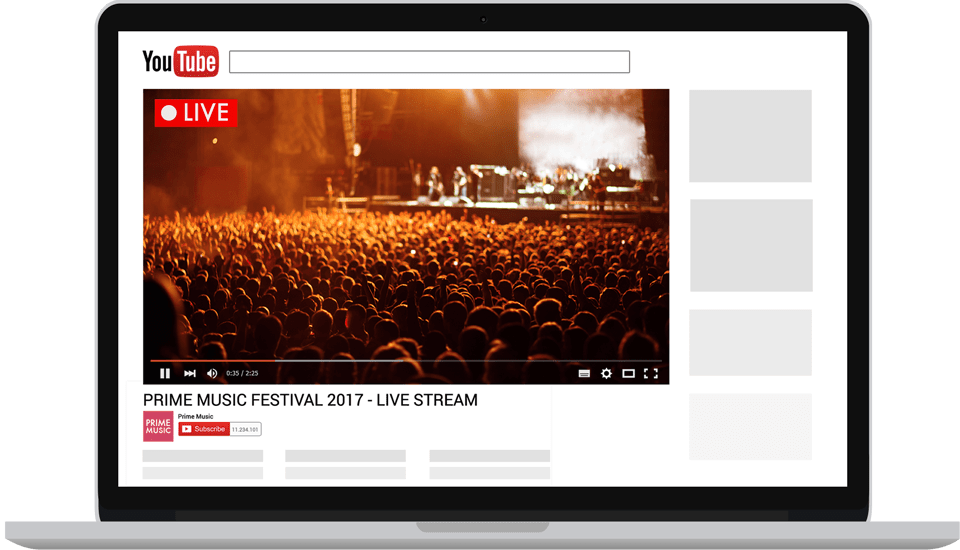
Scheduling your stream in advance allows you to promote it and build anticipation among your audience.
- Steps:
- Go to YouTube Studio.
- Click “Create” > “Go Live.”
- Select “Manage” on the left menu, then click “Schedule Stream.”
- Fill in details: title, description, thumbnail, audience settings, categories, tags.
- Set the date and time.
- You can enable or disable chat, and configure other advanced settings like monetization (if eligible).
- Click “Create Stream.”
- Benefits: Generates a public watch page link that you can share, allowing viewers to set reminders.
B. Stream Key and Server URL
These are crucial for connecting your encoder software to YouTube.
- Finding Them: When you create a new live stream or manage an existing one in YouTube Studio, you’ll find the “Stream Key” and “Stream URL” (or “RTMP URL”) under the “Stream Settings” tab.
- Importance:
- Stream Key: This is a unique identifier that tells YouTube which channel your broadcast belongs to. Treat it like a password; never share it publicly.
- Stream URL: This is the address of YouTube’s ingest server where your encoder sends the video data.
- Connection: You’ll paste the Stream Key and Stream URL into the streaming software (e.g., OBS Studio) to establish the connection.
C. Live Stream Settings and Moderation
YouTube Studio offers several settings to optimize your stream and manage viewer interaction.
- Latency Options:
- Normal Latency: Highest quality, but a noticeable delay (15-30 seconds). Good for pre-recorded style content.
- Low Latency: Balanced quality and delay (5-10 seconds). Suitable for most interactive streams.
- Ultra-Low Latency: Minimal delay (1-5 seconds), but potentially lower quality and more susceptible to buffering. Best for highly interactive content like gaming or Q&As.
- Chat Moderation:
- Live Chat: Enable or disable it.
- Slow Mode: Restrict how frequently viewers can send messages.
- Banned Words: Create a list of words or phrases that will be automatically blocked.
- Moderators: Appoint trusted viewers to help manage chat, remove inappropriate comments, and hide users.
- Analytics: During and after your stream, monitor the “Stream Health” tab in YouTube Studio to check for dropped frames, bitrate stability, and overall connection quality. YouTube Analytics provides detailed insights into viewer count, watch time, and demographics post-stream.
IV. Going Live and Post-Stream Management
With everything set up, the final steps involve initiating the broadcast, interacting with your audience, and managing the content afterward.
A. Pre-Live Checks
A quick checklist can prevent common issues.
- Audio Check: Ensure all microphones are active, levels are correct, and there’s no background noise. Monitor your audio through headphones.
- Video Check: Confirm your camera feed is visible, in focus, and properly lit.
- Internet Speed: Run a quick speed test to ensure consistent upload speeds.
- Encoder Settings: Double-check that your stream key and server URL are correctly entered and that your video/audio bitrates are appropriate for your internet speed.
- Test Stream (Optional but Recommended): For critical broadcasts, you can run a private or unlisted test stream to verify all settings are working correctly before going public.
B. Interacting During Your Stream
Engagement is key to building a loyal audience.
- Monitor Chat: Actively read and respond to viewer comments and questions. Acknowledge new viewers.
- Call to Actions: Encourage likes, shares, subscriptions, and super chats.
- Stream Health Dashboard: Keep an eye on the YouTube Studio dashboard for any alerts regarding stream quality or connection issues, allowing you to react quickly.
C. Ending Your Stream
A professional end to your stream is as important as the start.
- Graceful Exit: Thank your viewers, summarize key points, and announce future streams or content.
- Stop Encoder: First, click “Stop Streaming” in your encoder software (e.g., OBS Studio). This signals to YouTube that the incoming feed has stopped.
- End Stream in YouTube Studio: Then, navigate back to YouTube Studio and click the “End Stream” button. This officially concludes the broadcast on YouTube’s side.
D. Post-Stream Actions
Your live stream’s lifecycle doesn’t end when you go offline.
- Video Availability: After ending, YouTube automatically processes and archives your live stream as a video. You can set its visibility (Public, Unlisted, Private) or delete it.
- Editing: In YouTube Studio, you can use the built-in editor to trim the start and end of your live stream to remove dead air, or cut out unwanted sections from the middle.
- Downloading: You have the option to download an archive of your live stream, which can be useful for backup or re-editing in external software.
- Analytics: Review your stream’s performance in YouTube Analytics. Key metrics include peak concurrent viewers, total watch time, average view duration, and chat engagement, providing valuable insights for future broadcasts.
V. Troubleshooting Common Live Streaming Issues
Even with careful preparation, technical glitches can occur. Knowing how to diagnose and resolve common problems is essential.
A. Poor Video Quality / Dropped Frames
This is a frequent issue, often indicating a bottleneck in your system.
- Internet Speed: Insufficient upload bandwidth is the most common cause. Check your actual upload speed and compare it to your encoder’s bitrate settings. Reduce bitrate if necessary.
- Encoder Settings: Ensure your resolution, frame rate, and bitrate settings in your encoder are appropriate for your hardware and internet. A higher bitrate requires more bandwidth and CPU power.
- CPU Usage: If your CPU usage is consistently high (above 80-90%) during streaming, your processor may be struggling to encode the video. Close unnecessary applications, reduce in-game graphics settings, or consider upgrading your hardware. Use a hardware encoder (NVENC, AMF) if available, as they offload encoding from the CPU to the GPU.
- Network Congestion: Other devices on your network consuming bandwidth can impact your stream. Disconnect them if possible.
B. Audio Problems
Audio issues can range from complete silence to distracting background noise.
- No Sound: Check that the correct microphone is selected in your encoder and system settings. Ensure audio levels are not muted.
- Echo/Feedback: Use headphones to monitor your audio, preventing your speaker output from being picked up by your microphone.
- Poor Clarity/Background Noise: Use a dedicated microphone placed close to your mouth. Enable noise gates or noise suppression filters in your encoder software (e.g., OBS Studio filters) to reduce background noise. Ensure your microphone gain is not set too high.
C. Connection Issues
Difficulty connecting to YouTube or frequent disconnections.
- Incorrect Stream Key/Server URL: Double-check that you’ve correctly copied and pasted the stream key and server URL from YouTube Studio into your encoder.
- Firewall/Antivirus: Your computer’s firewall or antivirus software might be blocking your encoder from connecting to YouTube. Ensure your encoder is whitelisted.
- YouTube Server Status: Occasionally, YouTube’s live streaming ingest servers might experience issues. Check official YouTube support channels or third-party status monitors.
- Router Restart: A simple router restart can sometimes resolve network-related connectivity problems.
D. Overheating Equipment
High CPU/GPU usage during encoding can cause your computer to overheat, leading to performance throttling or system crashes.
- Ventilation: Ensure your computer has adequate airflow. Clean dust from fans and vents.
- Monitor Temperatures: Use software like HWMonitor or MSI Afterburner to keep an eye on CPU and GPU temperatures. If they consistently run too hot, you may need better cooling solutions or to reduce stream quality settings.
Mastering live streaming on YouTube involves a blend of technical preparation, strategic execution, and continuous learning. By understanding the tools, optimizing your setup, and troubleshooting effectively, you can deliver high-quality, engaging content that connects with your audience in real time.
aViewFromTheCave is a participant in the Amazon Services LLC Associates Program, an affiliate advertising program designed to provide a means for sites to earn advertising fees by advertising and linking to Amazon.com. Amazon, the Amazon logo, AmazonSupply, and the AmazonSupply logo are trademarks of Amazon.com, Inc. or its affiliates. As an Amazon Associate we earn affiliate commissions from qualifying purchases.