Xcode is more than just an Integrated Development Environment (IDE); it’s the official suite of tools for building applications for all Apple platforms – macOS, iOS, iPadOS, tvOS, and watchOS. Whether you’re an aspiring app developer dreaming of launching your next big idea on the App Store, a seasoned programmer looking to expand your skillset, or a tech enthusiast eager to dive into the intricacies of Apple’s ecosystem, understanding how to install and set up Xcode is your crucial first step. This comprehensive guide will walk you through the entire process, from ensuring your system meets the requirements to troubleshooting common issues, all within the context of the broader technology landscape.
Understanding the Xcode Ecosystem: More Than Just an Installer
Before we jump into the installation process, it’s vital to grasp what Xcode represents within the Apple development sphere and how it connects to the wider tech and even brand strategies. Apple’s approach to its operating systems and hardware is famously integrated, and Xcode is the central piece of that integration for developers.
The Technical Backbone of Apple Development
At its core, Xcode is a powerful piece of software that provides everything a developer needs: a source code editor, a graphical user interface builder (Interface Builder), debugging tools, performance analysis tools, and much more. It supports multiple programming languages, with Swift and Objective-C being the primary ones for Apple platforms. Understanding the technical requirements for Xcode is paramount. This isn’t just about downloading a file; it’s about preparing your machine to run a sophisticated development environment.
The ever-evolving landscape of technology means that Xcode is constantly updated to support the latest features, security patches, and operating system versions. This implies that staying current with Xcode is not merely a convenience but a necessity for building modern, compatible applications. The integration of tools like the Simulator, which allows you to test your apps on virtual devices, streamlines the development workflow significantly, reducing the need for physical hardware at every stage.
Branding and Development: A Synergistic Relationship
For individuals and businesses, the act of developing for Apple platforms, powered by Xcode, is intrinsically linked to branding. Apple’s brand is synonymous with quality, innovation, and a premium user experience. When developers create apps using Xcode, they are inherently aligning with these brand values. The design principles, user interface guidelines, and overall polish expected from an Apple platform app are all influenced by Apple’s strong brand identity.
A well-designed app, built with Xcode and adhering to Apple’s Human Interface Guidelines, not only functions flawlessly but also reinforces the user’s positive perception of the app and, by extension, the developer’s brand. Case studies of successful apps often highlight the meticulous attention to detail in their design and functionality, which are directly facilitated by the tools within Xcode. For personal branding as a developer, showcasing proficiency with Xcode and the ability to create high-quality Apple apps can be a significant differentiator.
Financial Implications of Xcode and App Development
While installing Xcode itself is free, the journey into app development, especially commercial app development, has financial considerations. Developing a high-quality app often requires investment in time, learning, and potentially marketing. The “Money” aspect of our website’s focus comes into play here.
- Time Investment: Learning Swift and Objective-C, mastering Xcode, and designing a compelling user experience all take time – a valuable commodity that translates to financial opportunity cost.
- Development Costs: While Xcode is free, you’ll need a Mac, which is a significant upfront investment. Access to Apple Developer Program membership is also required to test on physical devices and distribute apps on the App Store, which has an annual fee.
- Online Income and Side Hustles: For many, developing apps with Xcode is a path to generating online income, either as a primary career or a lucrative side hustle. The App Store is a massive marketplace, and a successful app can generate substantial revenue.
- Business Finance: For larger businesses, app development is an investment in their product portfolio and customer engagement strategy. The ROI of app development needs to be carefully considered within their overall business finance strategy.
Preparing Your Mac for Xcode Installation
Before you embark on the download and installation journey, ensuring your Mac is ready is a critical precursor. This involves checking system requirements, managing storage, and understanding the different versions of Xcode available.
System Requirements: The Foundation of a Smooth Installation
Xcode has specific hardware and software requirements that must be met for a successful installation and optimal performance. Ignoring these can lead to installation failures, slow performance, or an inability to use certain features.
- macOS Version: Each version of Xcode is compatible with a specific range of macOS versions. Newer versions of Xcode typically require newer versions of macOS. Apple’s official documentation will always list the precise macOS compatibility for the latest Xcode release. It’s generally recommended to have the latest stable version of macOS installed on your Mac to ensure compatibility with the most recent Xcode.
- Hardware: While Xcode can run on a range of Macs, performance will vary significantly based on your hardware. A Mac with a faster processor (e.g., an M-series Apple Silicon chip or a recent Intel Core i7/i9), ample RAM (16GB or more is highly recommended for a smooth experience), and a fast Solid State Drive (SSD) will provide a much better development experience. Large projects and running the simulator alongside Xcode can be memory-intensive.
- Storage Space: Xcode is a large application, and its associated tools, components, and project files can consume a considerable amount of disk space. Apple typically recommends at least 50GB of free space for Xcode itself, but for active development, having 100GB or even more free is advisable. This is crucial for downloading the Xcode application, its command-line tools, simulators, and any SDKs you might need.
Managing Storage: A Prerequisite for Success
Given the substantial storage needs of Xcode and its associated development assets, proactively managing your Mac’s storage is a vital step.
Checking Available Disk Space
To check your available disk space:
- Click the Apple menu in the top-left corner of your screen.
- Select “About This Mac.”
- Click the “Storage” tab.
This will give you a visual breakdown of how your storage is being used and how much space is remaining.
Freeing Up Space
If you find your storage is low, consider these common methods for freeing up space:
- Empty the Trash: This might seem obvious, but items in the Trash still occupy space until permanently deleted.
- Delete Unnecessary Applications: Review your Applications folder and uninstall any apps you no longer use.
- Clear Browser Cache and Downloads: Web browsers accumulate cache data, and your Downloads folder can quickly fill up with large files.
- Optimize Storage: macOS offers built-in storage optimization features, such as storing iCloud Drive files only when needed, optimizing Mac storage, and emptying the bin automatically. Access these through Apple menu > About This Mac > Storage > Manage.
- Move Large Files to External Drives: Consider backing up large media files or project archives to an external hard drive or cloud storage service.
Choosing the Right Xcode Version
Apple typically releases a new major version of Xcode annually, alongside frequent minor updates. There are usually two primary ways to obtain Xcode:
- Mac App Store: This is the most straightforward and recommended method for most users. It ensures you get the latest stable release, and updates are handled automatically or with a simple click.
- Apple Developer Website: For developers who need to test beta versions of Xcode or need to maintain older versions of Xcode for specific project requirements, downloading directly from the Apple Developer website is an option. This often requires an Apple Developer account.
For a first-time installation, the Mac App Store is your best bet. It’s simpler, more secure, and managed easily.
The Installation Process: Step-by-Step Guide
With your Mac prepared, you’re ready to install Xcode. The process is generally straightforward, especially when using the Mac App Store.
Method 1: Installation via the Mac App Store (Recommended)
This is the simplest and most recommended method for installing Xcode.
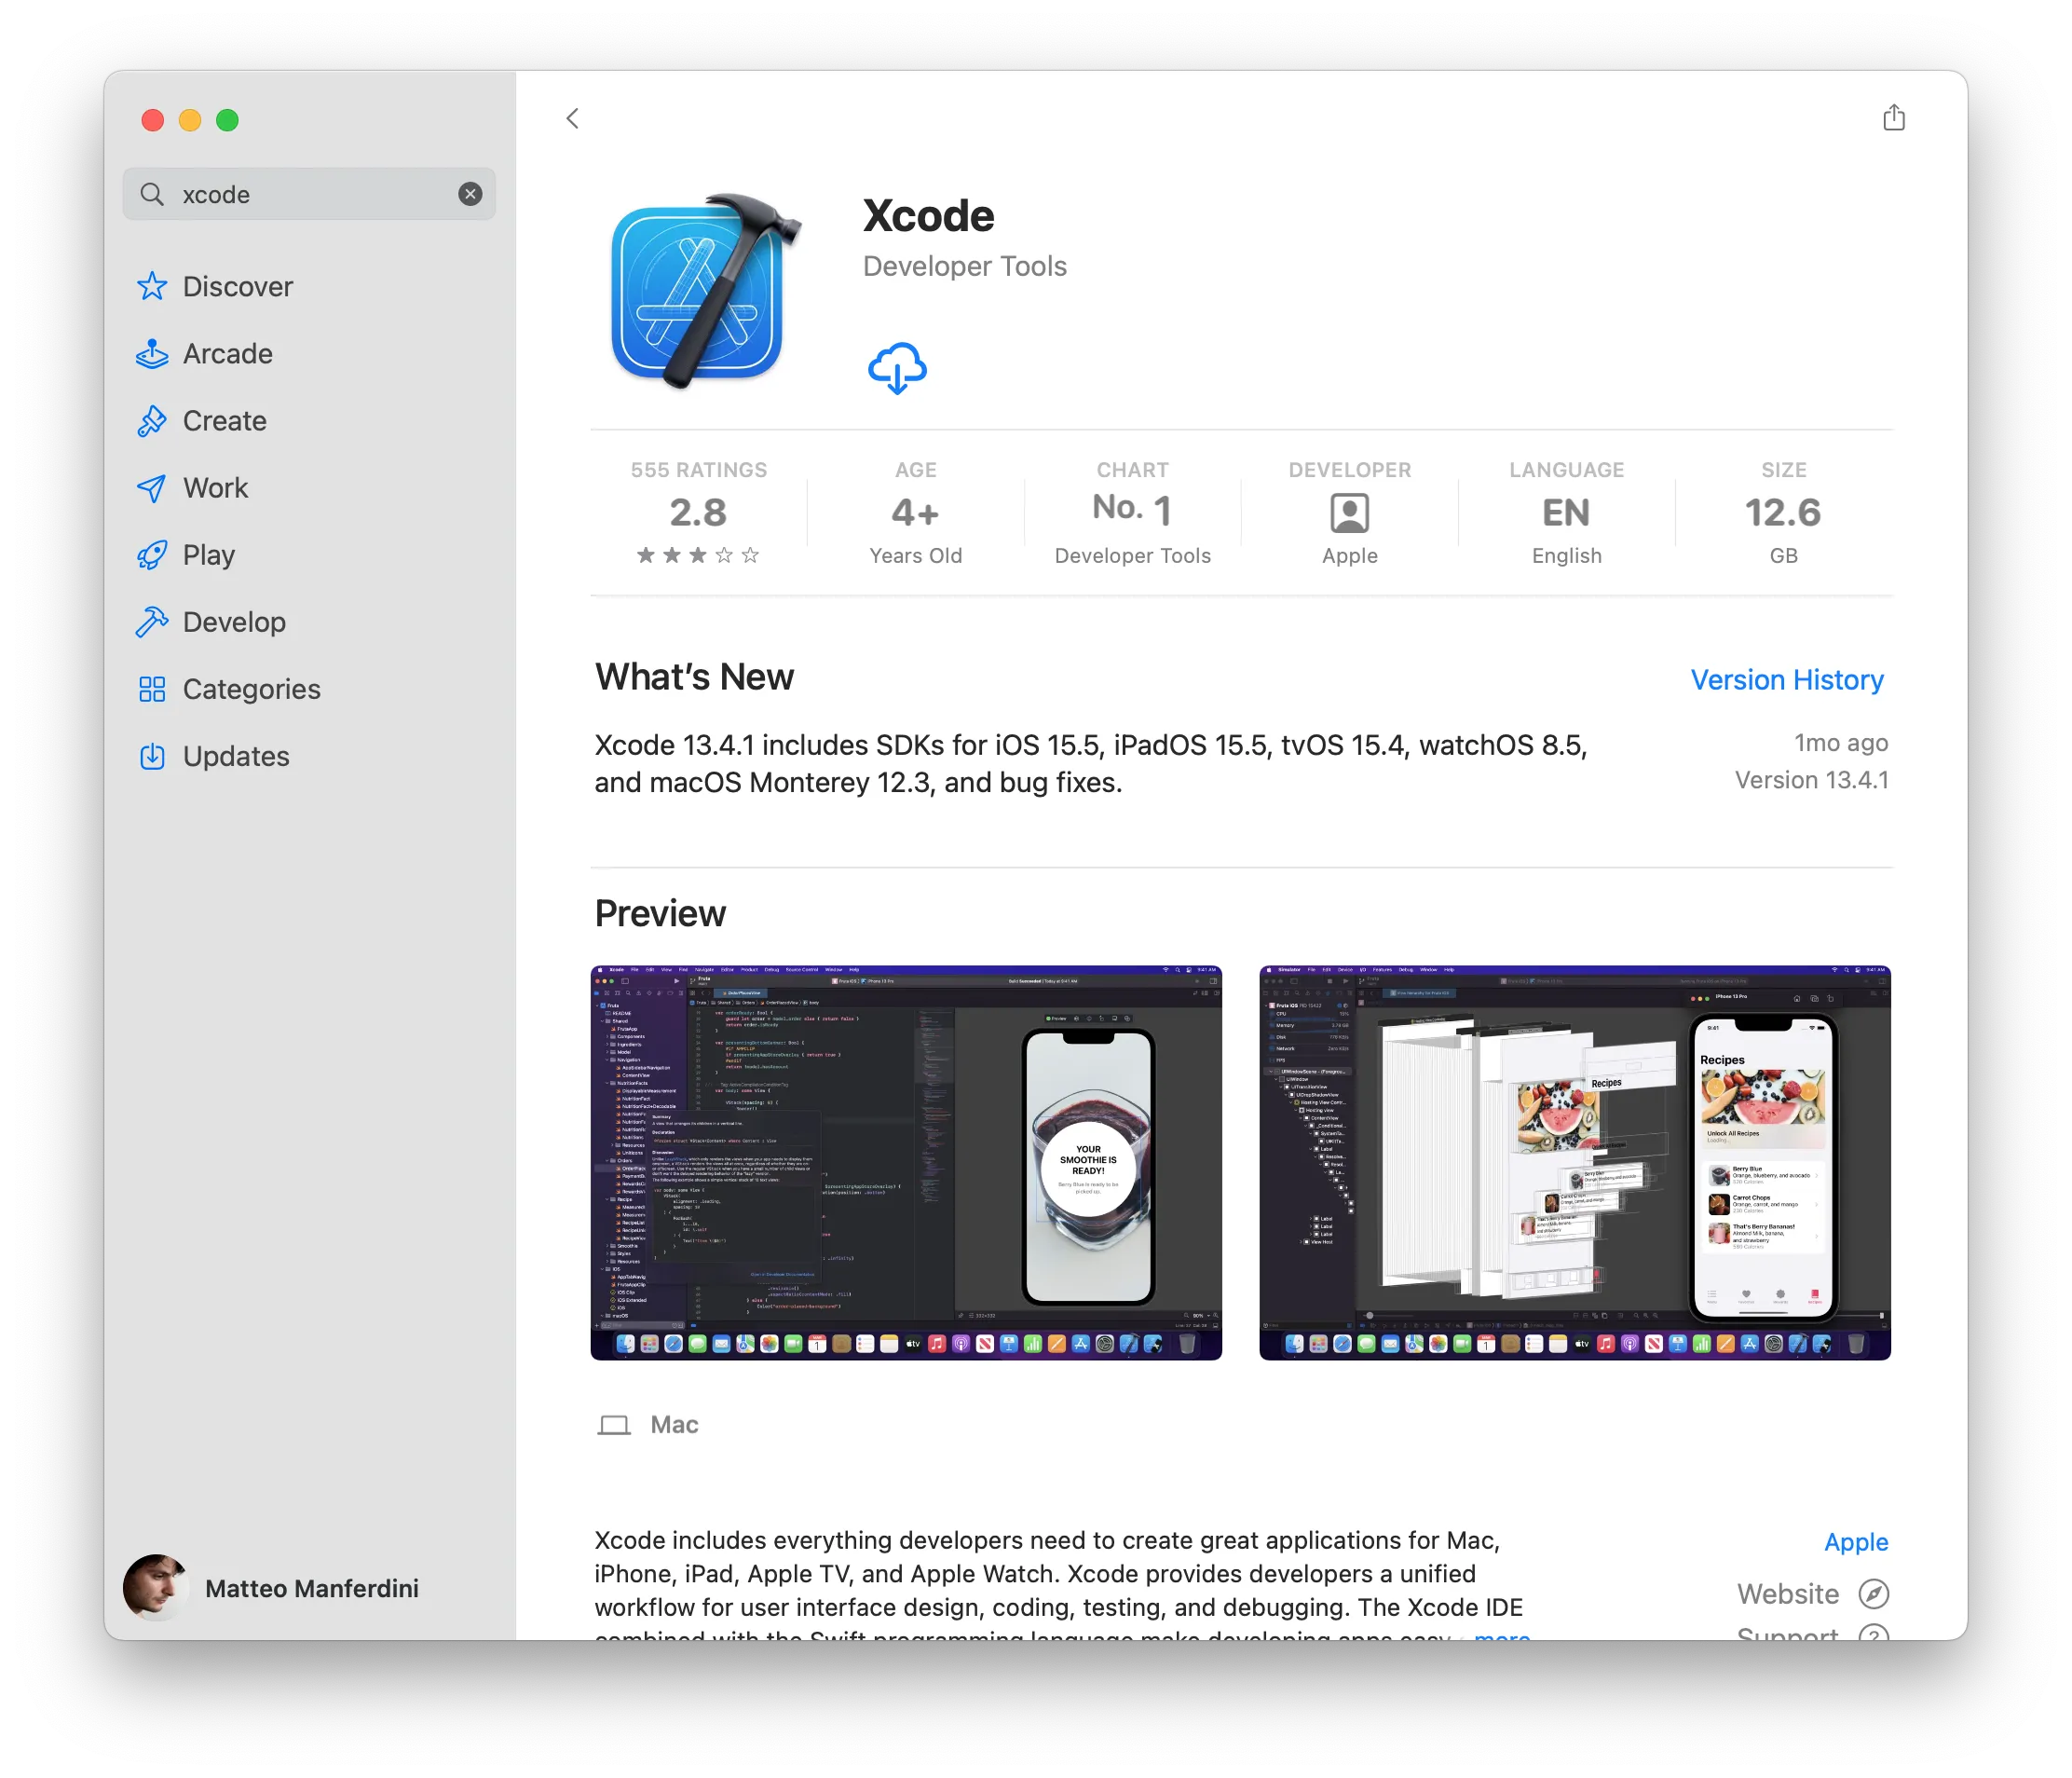
- Open the App Store: Click the App Store icon in your Dock or search for it using Spotlight (Command + Spacebar, then type “App Store”).
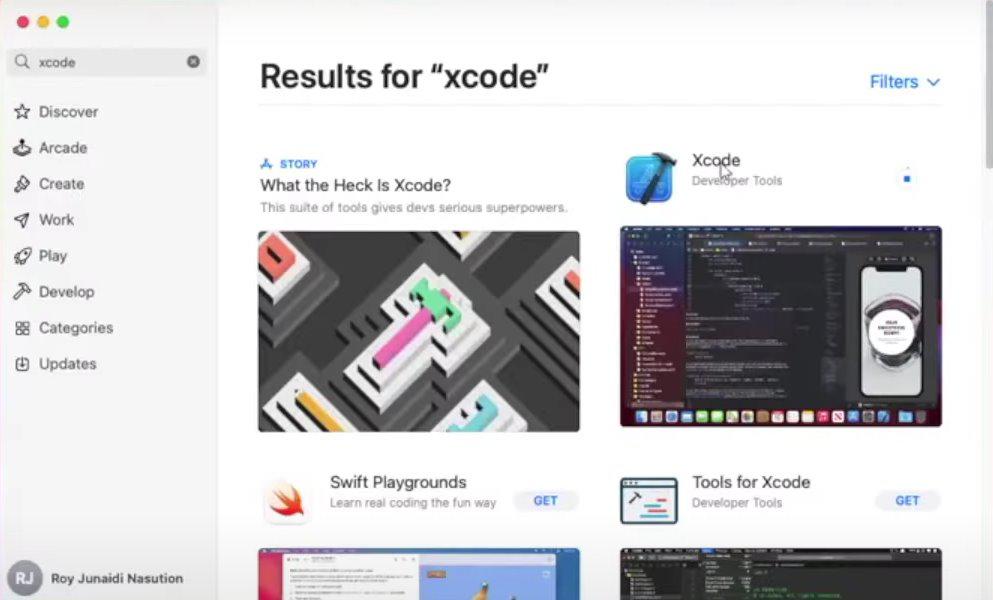
- Search for Xcode: In the search bar at the top-left of the App Store window, type “Xcode” and press Enter.
- Locate and Select Xcode: The official Xcode application should appear in the search results. Click on it to view its details.
- Click “Get” and then “Install”: You’ll see a button that likely says “Get” (if you’ve never downloaded it) or “Download” (if you have in the past). Click this, and then click “Install.”
- Authenticate with your Apple ID: You will be prompted to enter your Apple ID password to authorize the download and installation. This is a security measure.
- Download and Installation: The download will begin. Xcode is a very large application, so the download can take a significant amount of time depending on your internet speed. Once downloaded, the installation will proceed automatically. You’ll see a progress bar indicating the installation status.
- Launch Xcode: Once the installation is complete, you can find Xcode in your Applications folder. Click its icon to launch it.
Post-Installation Setup: The First Launch Experience
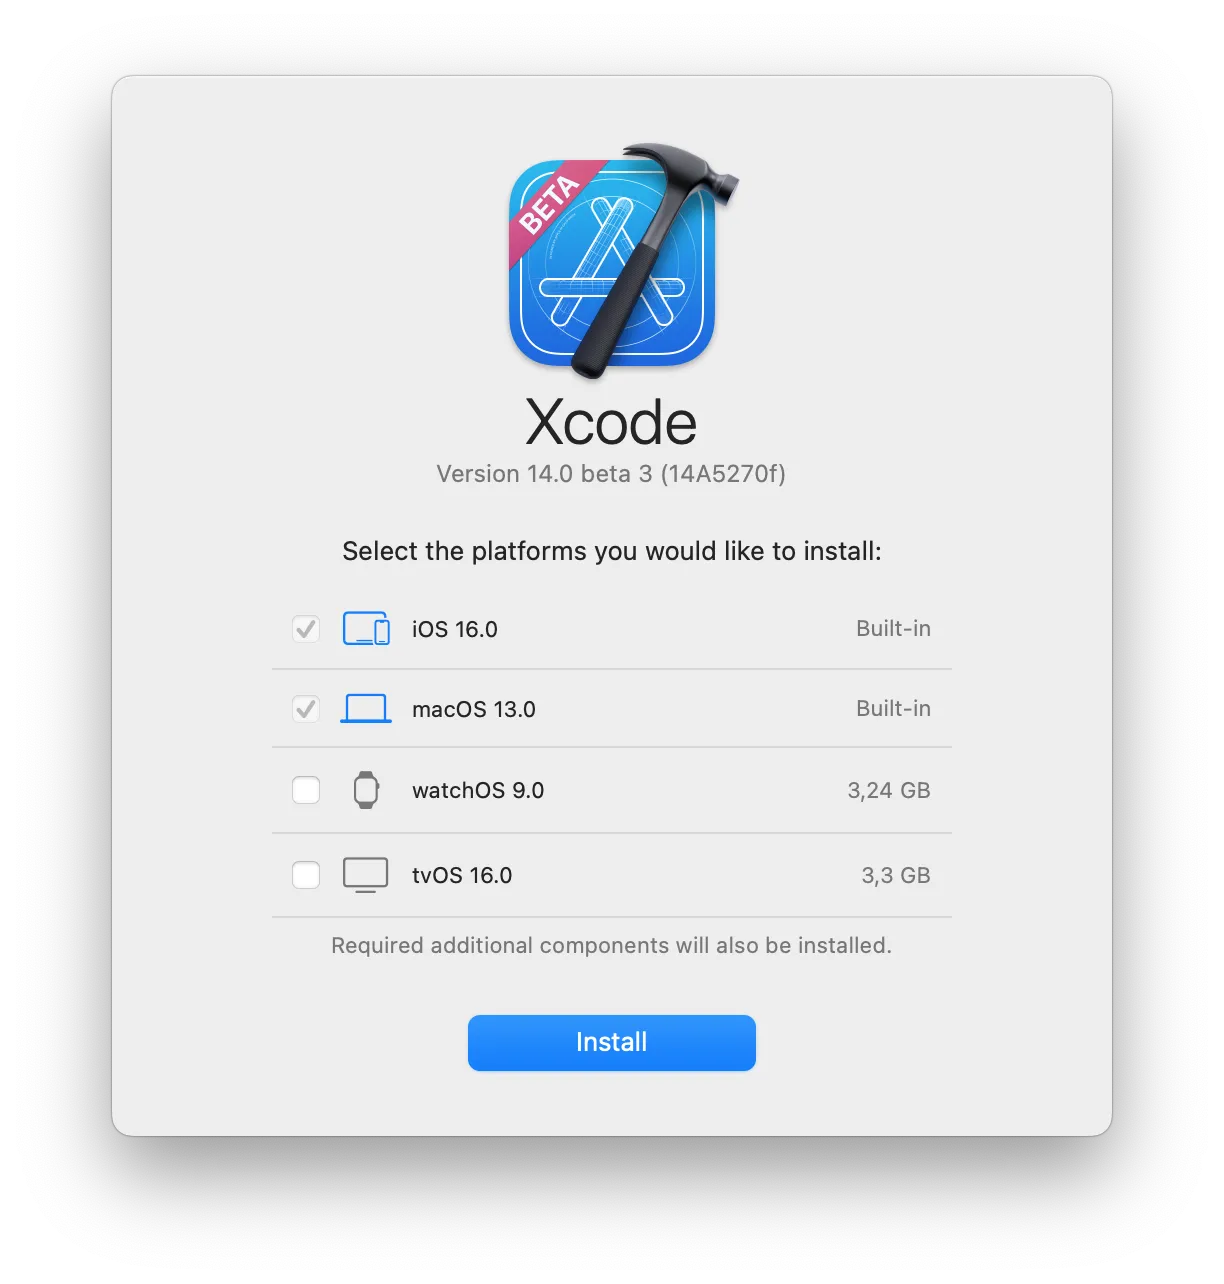
The first time you launch Xcode, it will perform some additional setup tasks. This often includes installing additional components, such as simulators for different iOS, iPadOS, tvOS, and watchOS versions.
- Install Additional Components: Xcode might prompt you to install additional components. This is crucial for being able to run your apps on simulators. It’s recommended to install these when prompted.
- Accept the License Agreement: You’ll need to review and accept Xcode’s license agreement.
Method 2: Installation from the Apple Developer Website (Advanced)
This method is typically used by developers who need specific versions or beta releases.
- Visit the Apple Developer Website: Go to developer.apple.com.
- Sign In: You’ll need to sign in with your Apple Developer account. If you don’t have one, you can create one.
- Navigate to Downloads: Look for the “Downloads” section, which is usually found under “Account” or a dedicated “Developer Tools” menu.
- Find Xcode: Browse or search for the desired version of Xcode. Beta versions will be clearly marked.
- Download the .xip file: Click the download link for the Xcode version you want. This will download a large
.xipfile (a compressed archive). - Extract the Archive: Once the download is complete, double-click the
.xipfile to extract it. This process can take some time and will create an “Xcode.app” file. - Move to Applications: Drag and drop the extracted “Xcode.app” file into your Applications folder.
- Launch and Post-Installation Setup: Launch Xcode from your Applications folder. Similar to the App Store installation, it will likely prompt you to install additional components.
Managing Xcode and its Components
Installing Xcode is just the beginning. To be an effective developer, you’ll need to understand how to manage its various components and keep it updated.
Updating Xcode: Staying Current with Apple’s Innovations
The tech world moves fast, and Apple is at the forefront of innovation. To leverage the latest features, APIs, and security enhancements, keeping Xcode updated is essential.
- App Store Updates: If you installed Xcode from the Mac App Store, updates will appear in the “Updates” section of the App Store. You can choose to update automatically or manually. It’s generally recommended to keep Xcode updated to the latest stable version.
- Developer Website Updates: If you downloaded Xcode from the developer website, you’ll need to repeat the download and installation process for new versions. You can often uninstall the older version first to save space.
Installing Command Line Tools
While Xcode provides a comprehensive GUI for development, many command-line utilities are also essential for building and managing projects, especially when working with tools like Git, Fastlane, or certain build scripts.
- Launch Xcode: Open Xcode.
- Open Preferences: Go to Xcode > Preferences.
- Select Locations: Click on the “Locations” tab.
- Install Command Line Tools: At the bottom of the “Locations” tab, you’ll see an option for “Command Line Tools.” If they are not installed, there will be a dropdown menu. Click on it and select “Install.”
- Follow Prompts: You will be prompted to grant permission and enter your administrator password. The installation will proceed.
Alternatively, you can install them via the Terminal:
- Open Terminal (Applications > Utilities > Terminal).
- Type the command:
xcode-select --install - Follow the on-screen prompts.
Managing Simulators
Simulators allow you to test your applications on virtual iPhone, iPad, Apple Watch, and Apple TV devices without needing physical hardware for every screen size and OS version.
- Open Xcode: Launch Xcode.
- Access Device Manager: Go to Xcode > Window > Devices and Simulators.
- Select Simulators Tab: Click on the “Simulators” tab.
- Download Additional Simulators: You will see a list of available simulators. If you need to test on specific iOS or iPadOS versions, or different device types, click the “+” button at the bottom left to add a new simulator, or look for the download icons next to available simulator runtimes.
- Manage Existing Simulators: You can delete simulators you no longer need to free up disk space by selecting them and clicking the “-” button.
Troubleshooting Common Installation Issues
Even with a smooth process, you might encounter a hiccup. Here are some common issues and their solutions:
- “Xcode installation requires a newer version of macOS”: As mentioned earlier, ensure your macOS is up to date. Check Apple’s official documentation for the exact macOS version required by your chosen Xcode version.
- Insufficient Disk Space: This is a common problem. Follow the storage management tips provided earlier. You might need to delete applications, old project files, or large downloads.
- Download Interruption: A large download can be interrupted by network issues. Ensure a stable internet connection. If the download fails, simply restart the download from where you left off in the App Store or re-download the
.xipfile. - Installation Failed Error: This can be due to corrupted download files or system conflicts. Try deleting the partially downloaded Xcode (from Applications or Downloads folder) and re-downloading it. Restarting your Mac can also resolve temporary system glitches.
- Command Line Tools Not Found: If you receive errors related to
xcode-selector command-line tools, ensure you have installed them as described in the previous section. Sometimes, re-installing them can fix issues. - Xcode Won’t Launch or Crashes: This can be a sign of corrupted installation files. Try deleting Xcode and re-installing it from scratch. If the issue persists, check Apple Developer Forums for similar reported problems.
Conclusion: Your Development Journey Begins
Installing Xcode is the foundational step into the exciting world of Apple development. It’s a powerful tool that, when coupled with your creativity and technical skills, can bring your app ideas to life. By understanding the system requirements, managing your storage, and following the installation process carefully, you’ll be well on your way. Remember that development is an iterative process, and staying updated with Xcode and its components is key to building modern, high-quality applications that resonate with users and uphold the strong brand values associated with Apple products. Happy coding!
aViewFromTheCave is a participant in the Amazon Services LLC Associates Program, an affiliate advertising program designed to provide a means for sites to earn advertising fees by advertising and linking to Amazon.com. Amazon, the Amazon logo, AmazonSupply, and the AmazonSupply logo are trademarks of Amazon.com, Inc. or its affiliates. As an Amazon Associate we earn affiliate commissions from qualifying purchases.