
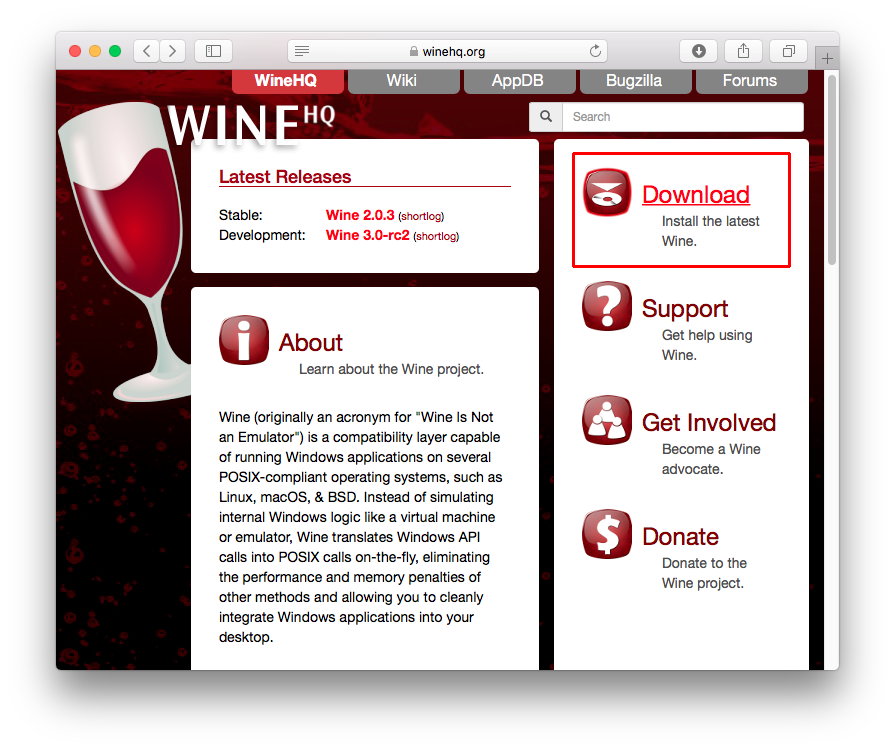
For Mac users, the allure of running Windows applications directly on their macOS is a persistent one. While Apple’s ecosystem is robust and offers a vast array of software, there are still instances where compatibility with Windows-specific programs is essential. This is where Wine comes into play. Wine, which stands for “Wine Is Not an Emulator,” is a free and open-source compatibility layer that allows you to run Windows applications on other operating systems, including macOS. Unlike traditional emulators that simulate entire hardware environments, Wine translates Windows API calls into POSIX calls on the fly. This means it’s not about creating a virtual Windows machine, but rather enabling Windows programs to think they are running on Windows when they’re actually executing on your Mac.
This guide will walk you through the process of installing and using Wine on your Mac, opening up a world of possibilities for those seeking to bridge the gap between operating systems. We’ll delve into the prerequisites, the installation methods, and some essential tips for a smooth experience.
Understanding Wine and Its Role on macOS
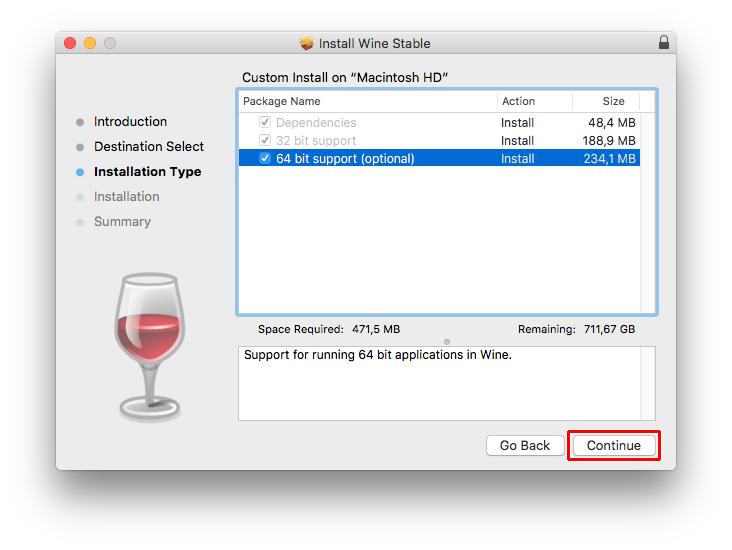
Before we dive into the installation, it’s crucial to understand what Wine is and isn’t. As mentioned, Wine is a compatibility layer. This distinction is important because it means Wine doesn’t require you to purchase a Windows license, nor does it consume the significant system resources that a full virtual machine would. Instead, it acts as a translator, interpreting the instructions from Windows applications and re-routing them to be understood by macOS.
The benefits of using Wine on a Mac are numerous:
- Access to Windows-Only Software: This is the primary driver for most users. Whether it’s a specific legacy application, a piece of business software, or even some older games, Wine can potentially bring them to your Mac.
- Cost Savings: Eliminates the need to buy a Windows license, which can be a significant saving, especially for casual or occasional users of Windows software.
- Resource Efficiency: Compared to running a virtual machine, Wine generally uses fewer system resources, leading to a snappier performance for your Mac and the Windows application.
- Flexibility: It allows you to maintain your preferred macOS environment while still having access to the Windows applications you need.
However, it’s also important to set realistic expectations. Wine is not a silver bullet. Compatibility can vary significantly from application to application. Some programs will run flawlessly, others might have minor glitches, and some may not run at all. The Wine development community is constantly working to improve compatibility, but it’s an ongoing process.
Pre-Installation Considerations
Before you begin installing Wine on your Mac, there are a few crucial steps and considerations that will make the process smoother and more successful.
1. System Requirements and Updates
Ensuring your macOS is up-to-date is a good practice for any software installation. While Wine generally works across various macOS versions, the latest releases often bring better compatibility and stability. Check Apple’s System Preferences or System Settings to ensure your operating system is current.
2. Command Line Tools for Xcode
Wine relies on certain command-line utilities that are part of Apple’s developer tools. These tools are essential for compiling and building software on macOS.
- How to Install:
- Open the Terminal application. You can find this in
Applications > Utilities. - Type the following command and press Enter:
bash

xcode-select --install
- A dialog box will appear prompting you to install the Command Line Tools. Click “Install” and follow the on-screen instructions. This process might take a few minutes as it downloads and installs the necessary components.
- Open the Terminal application. You can find this in
3. Homebrew: The Package Manager for macOS
The easiest and most recommended way to install Wine on macOS is by using Homebrew, a popular package manager for macOS. Homebrew simplifies the installation of software by automating the download, compilation, and installation process.
-
Why Use Homebrew?
- Simplified Installation: Homebrew handles dependencies and complex build processes, so you don’t have to.
- Easy Updates: Keeping Wine updated is as simple as running a single command with Homebrew.
- Vast Software Repository: Homebrew supports thousands of other useful command-line tools and applications.
-
How to Install Homebrew:
- Open the Terminal application.
- Paste the following command into the Terminal and press Enter. This script will download and run the Homebrew installer:
bash

/bin/bash -c "$(curl -fsSL https://raw.githubusercontent.com/Homebrew/install/HEAD/install.sh)"
- Follow the on-screen instructions. You’ll likely be asked to enter your password to proceed with the installation. The process can take some time as it downloads the necessary files.
- Once Homebrew is installed, it might prompt you to add Homebrew to your PATH. Follow these instructions carefully, usually involving copying and pasting a couple of commands into your Terminal. This ensures that Homebrew commands can be recognized from any directory.
With these prerequisites in place, you’re ready to move on to the actual installation of Wine.
Installing Wine on Your Mac
Installing Wine on macOS is straightforward, especially when leveraging Homebrew. This section will guide you through the process of getting Wine up and running on your system.
The Homebrew Installation Process
Homebrew provides a convenient formula for installing Wine. This means that with a few simple commands in your Terminal, you can have Wine installed and ready to use.
1. Updating Homebrew
Before installing any new package, it’s always a good idea to update Homebrew itself to ensure you have the latest package information and dependencies.
- Command:
bash

brew update
This command will fetch the latest information about available packages from Homebrew’s repositories.
2. Installing Wine
Now, you can proceed to install Wine. Homebrew offers different versions, but the standard installation is usually sufficient for most users.
- Command:
bash

brew install wine
This command will download the Wine package and all its dependencies, then compile and install it on your Mac. This process can take a significant amount of time, depending on your internet speed and your Mac’s processing power, as Wine is a complex piece of software. You’ll see a lot of text scrolling in the Terminal as it compiles.
3. Verifying the Installation
Once the installation is complete, you can verify that Wine has been installed correctly.
- Command:
bash

wine --version
This command should output the installed version of Wine. If you see a version number, congratulations, Wine is successfully installed on your Mac!
Setting Up Wine for the First Time
The very first time you run a Wine command, or the first time you attempt to run a Windows application using Wine, Wine will create a default Wine environment, often referred to as a “Wine prefix.” This prefix is essentially a directory structure that mimics a Windows installation and stores all the necessary configurations, libraries, and installed applications.
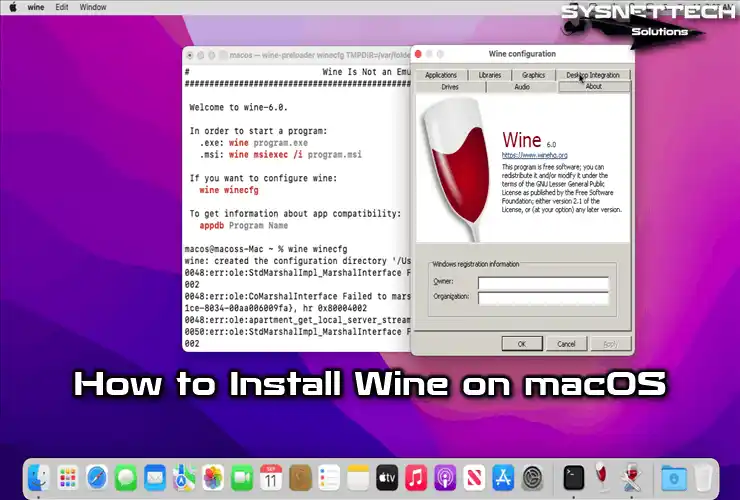
When you run a Wine command for the first time, you might see messages about creating a Wine prefix. This is a normal part of the setup process. For instance, if you were to run a command like winecfg (a Wine configuration tool), it would trigger the creation of this environment.
- Running
winecfg:
bash

winecfg
This command will open a graphical configuration window for Wine. It’s a good way to confirm that Wine is working and to explore some basic settings, although most users won’t need to delve deeply intowinecfgfor basic installations.
By default, the Wine prefix is created in your user’s home directory, typically at ~/.wine. This directory will contain subfolders like drive_c (which simulates your C: drive), Program Files, users, and various configuration files.
With Wine installed and the initial environment set up, you are now ready to start running Windows applications.
Running Windows Applications with Wine
The primary purpose of installing Wine is to run Windows applications on your Mac. This section will guide you through the process of launching your first Windows program.
The Basics of Running an Executable
Running a Windows executable file (.exe) with Wine is done directly from the Terminal. You will use the wine command followed by the path to the executable file.
1. Locating Your Windows Application
First, ensure you have the Windows application installer (usually a .exe file) or the unzipped application folder on your Mac. For demonstration purposes, let’s assume you have an installer file named my_windows_app.exe located in your Downloads folder.
2. Executing the Installer
Open your Terminal application and navigate to the directory where your executable is located. You can use the cd command to change directories.
- Example: If your
my_windows_app.exeis in your Downloads folder, you would type:
bash

cd ~/Downloads
(The~symbol is a shortcut for your home directory.)
Now, execute the application using the wine command:
- Command:
bash

wine my_windows_app.exe
This command will launch the installer. You will see the familiar Windows installer interface appear on your Mac. Follow the on-screen prompts to install the application as you would on a Windows machine. The application will be installed within the Wine prefix, typically in a Program Files directory inside ~/.wine/drive_c/.
3. Launching Installed Applications
Once an application is installed using Wine, you can launch it directly from the Terminal. Navigate to the directory where the application was installed within the Wine prefix.
- Example: If
my_windows_app.exewas installed in~/.wine/drive_c/Program Files/MyApp, you would navigate to that directory and run the application’s executable:
bash

cd ~/.wine/drive_c/Program Files/MyApp

wine my_windows_app.exe
(Note the backslash before the space in “Program Files” to escape the space character.)
4. Using Winebottler (Optional, for easier management)
While direct Terminal commands are powerful, managing multiple Windows applications and their Wine configurations can become complex. This is where Winebottler can be incredibly helpful. Winebottler is a macOS application that wraps Wine and your Windows applications into standalone macOS applications (.app bundles).
-
Benefits of Winebottler:
- Simplified Launching: You can launch your Windows applications by simply double-clicking their
.appicon, just like any other Mac application. - Easy Installation Management: Winebottler allows you to create installers for your Windows applications, making it easier to share or re-install them.
- Customizable Prefixes: You can create separate Wine prefixes for different applications to avoid conflicts and manage their settings independently.
- Simplified Launching: You can launch your Windows applications by simply double-clicking their
-
How to Use Winebottler:
- Download Winebottler: You can download Winebottler from its official website.
- Install Winebottler: Drag the Winebottler application to your Applications folder.
- Run Winebottler: Launch Winebottler. It will likely prompt you to download the latest Wine core, which it will then manage.
- Create a
.appBundle:- Open Winebottler.
- Drag your Windows
.exeinstaller file into the Winebottler window. - Follow the prompts to create an
.appbundle. You can choose to install the application directly into the bundle or have it download and install later. - Winebottler will guide you through the process of setting up a dedicated Wine environment for this application.
Once you have created an .app bundle using Winebottler, you can find it in your Applications folder and launch it with a simple click. This is often the preferred method for users who want a more integrated and user-friendly experience.
Troubleshooting and Advanced Tips
While Wine aims to be as seamless as possible, you might encounter issues. This section covers common problems and advanced techniques to enhance your Wine experience.
Common Issues and Solutions
-
Application Crashes or Doesn’t Launch:
- Check Compatibility: Visit the Wine Application Database (AppDB) to see if your application is known to work with Wine and if there are specific instructions or workarounds.
- Update Wine: Ensure you are using the latest version of Wine via Homebrew (
brew upgrade wine). - Graphics Drivers: For older applications or games, ensure your macOS graphics drivers are up to date.
- Dependencies: Some applications require specific Windows libraries (DLLs). Winebottler can sometimes help manage these, or you might need to manually install them using tools like
winetricks(a companion script for Wine that simplifies the installation of various runtimes and components). To installwinetricks:brew install winetricks. Then you can use commands likewinetricks corefontsorwinetricks dotnet45. - Run in a Different Prefix: Sometimes, an application might conflict with other software within the default Wine prefix. You can create a new, clean prefix for a specific application.
- Command to create a new prefix:
bash

WINEPREFIX=~/.wine_myapp WINEARCH=win32 winecfg
(Replace~/.wine_myappwith your desired prefix name andwin32withwin64if needed.) - Then run your application with that prefix:
bash

WINEPREFIX=~/.wine_myapp wine my_windows_app.exe
- Command to create a new prefix:
-
Poor Performance:
- Graphics Acceleration: Ensure Wine has access to graphics acceleration. Newer versions of Wine have better support.
- System Resources: Close unnecessary applications on your Mac to free up RAM and CPU.
- Wine Settings: Experiment with settings in
winecfg. Sometimes, disabling certain Windows features or enabling others can help.
-
Sound or Audio Issues:
winecfgSettings: Check the Audio tab inwinecfgto ensure the correct audio driver is selected.winetricks: Some audio codecs might need to be installed.
Advanced Techniques
-
Multiple Wine Prefixes: As mentioned, creating separate Wine prefixes for different applications can prevent conflicts and allow you to tailor the environment for each program. This is crucial for complex setups or when dealing with applications that have very specific requirements.
- You can manage these prefixes by explicitly setting the
WINEPREFIXenvironment variable before running any Wine command.
- You can manage these prefixes by explicitly setting the
-
Wine Configuration (
winecfg):- Drives Tab: Map your macOS drives to appear as Windows drives within Wine. This allows your Windows applications to access files on your Mac.
- Graphics Tab: Adjust settings related to screen resolution, depth, and virtual desktop. Running applications in a virtual desktop can sometimes improve stability.
- Applications Tab: Set compatibility settings for specific Windows versions.
-
Winetricks: This script is indispensable for installing common Windows components and runtimes that many applications rely on, such as .NET Framework, Visual C++ Redistributables, specific fonts, and DirectX components.
- Common uses:
- Install fonts:
winetricks corefonts - Install .NET Framework:
winetricks dotnet48(or the desired version) - Install DirectX:
winetricks d3dx9
- Install fonts:
- Common uses:
By understanding these troubleshooting steps and advanced techniques, you can significantly improve your success rate in running Windows applications on your Mac. The Wine community is a valuable resource, and checking forums and the Wine AppDB for specific application issues will often provide the solution you need. Enjoy the expanded capabilities that Wine brings to your macOS experience!
aViewFromTheCave is a participant in the Amazon Services LLC Associates Program, an affiliate advertising program designed to provide a means for sites to earn advertising fees by advertising and linking to Amazon.com. Amazon, the Amazon logo, AmazonSupply, and the AmazonSupply logo are trademarks of Amazon.com, Inc. or its affiliates. As an Amazon Associate we earn affiliate commissions from qualifying purchases.