
The world of technology is constantly evolving, pushing the boundaries of what’s possible with our devices. Chromebooks, once primarily known for their cloud-centric functionality and simplified operating system, are increasingly becoming versatile machines capable of handling a wider range of applications. A significant hurdle for many Chromebook users who wish to run traditional desktop applications has been the absence of native Windows software support. However, a groundbreaking solution exists in the form of Wine, a compatibility layer that allows Linux and other operating systems to run Windows applications. As Wine continues its rapid development, the release of Wine 9.0 promises enhanced performance, broader application compatibility, and a more stable experience for users. This guide will walk you through the process of installing Wine 9.0 on your Chromebook, unlocking a new realm of possibilities for your device.
The prospect of running your favorite Windows programs on a Chromebook might seem daunting, but with the right approach and a clear understanding of the underlying technologies, it’s an achievable goal. This guide is designed to demystify the process, breaking down each step into manageable instructions. We’ll delve into the prerequisites, the necessary configurations, and the actual installation process, ensuring that you can confidently bring Windows applications to your Chrome OS environment.
Preparing Your Chromebook for Wine 9.0 Installation
Before we dive into the installation of Wine 9.0, it’s crucial to ensure your Chromebook is properly set up to support this advanced software. This preparation involves a few key steps that will lay the groundwork for a smooth and successful installation.
Enabling Linux (Beta) on Your Chromebook
The foundation for running Wine on a Chromebook lies in enabling the Linux development environment, often referred to as “Linux (Beta)”. This feature allows you to install and run Linux applications directly on your Chrome OS device. If you haven’t already enabled this, follow these steps:
- Access your Chromebook’s Settings: Click on the time in the bottom-right corner of your screen, then click on the gear icon (Settings).
- Navigate to the “Advanced” section: In the Settings menu, scroll down and click on “Advanced” to expand the options.
- Locate the “Developers” tab: Within the Advanced settings, find and click on “Developers”.
- Turn on “Linux development environment”: You will see an option to enable the Linux development environment. Click the “Turn on” button.
- Follow the on-screen prompts: A setup wizard will appear. This wizard will guide you through allocating disk space for Linux and setting up a username. It’s generally recommended to allocate a decent amount of storage for Linux to accommodate Wine and the applications you intend to run. The default settings are often sufficient for many users, but you can customize them if you have specific needs.
- Wait for the installation to complete: This process can take a few minutes. Once finished, a Linux terminal window will automatically open, indicating that your Linux environment is ready.
Once Linux (Beta) is enabled, your Chromebook can download and run packages from the vast Linux software repositories. This is the crucial first step that opens the door to installing Wine.
Updating Your Linux Environment
After enabling the Linux (Beta) environment, it’s a good practice to ensure that all your Linux packages are up-to-date. This includes the Linux kernel, system libraries, and other essential components. Running the latest versions helps prevent compatibility issues and ensures you have access to the most recent security patches.
To update your Linux environment, open the Linux terminal window (you can find it by searching for “Terminal” in your app launcher). Then, execute the following commands one by one, pressing Enter after each:
sudo apt update
This command downloads the latest package information from the software repositories.
sudo apt upgrade -y
This command installs any available updates for your installed packages. The -y flag automatically answers “yes” to any prompts, making the process more streamlined.
These commands are fundamental to maintaining a healthy and functional Linux environment on your Chromebook, which is essential for a successful Wine 9.0 installation.
Installing Wine 9.0 on Your Chromebook
With your Linux environment prepared and updated, we can now proceed with installing Wine 9.0. Wine’s installation process can vary slightly depending on the Linux distribution your Chromebook is using (typically Debian-based). We will focus on the most common and recommended method using apt.
Adding the Wine Repository and Installing Wine 9.0
Wine 9.0 may not be available in the default Debian repositories immediately upon its release. Therefore, we often need to add a specific Wine repository to our apt sources to get the latest version. The official WineHQ repositories are the most reliable source for this.
Important Note: As of the time of writing, Wine 9.0 is likely in development or has just been released. The exact repository commands might change slightly with future updates. Always check the official WineHQ website for the most current instructions if you encounter issues.
Here are the general steps and commands to add the WineHQ repository and install Wine 9.0:
-
Open the Linux Terminal: If it’s not already open, launch the Terminal application.
-
Install
wgetand other necessary tools: If you don’t already havewgetinstalled, you’ll need it to download files.sudo apt install -y wget software-properties-common -
Add the WineHQ repository: This command adds the official WineHQ repository to your system’s software sources.
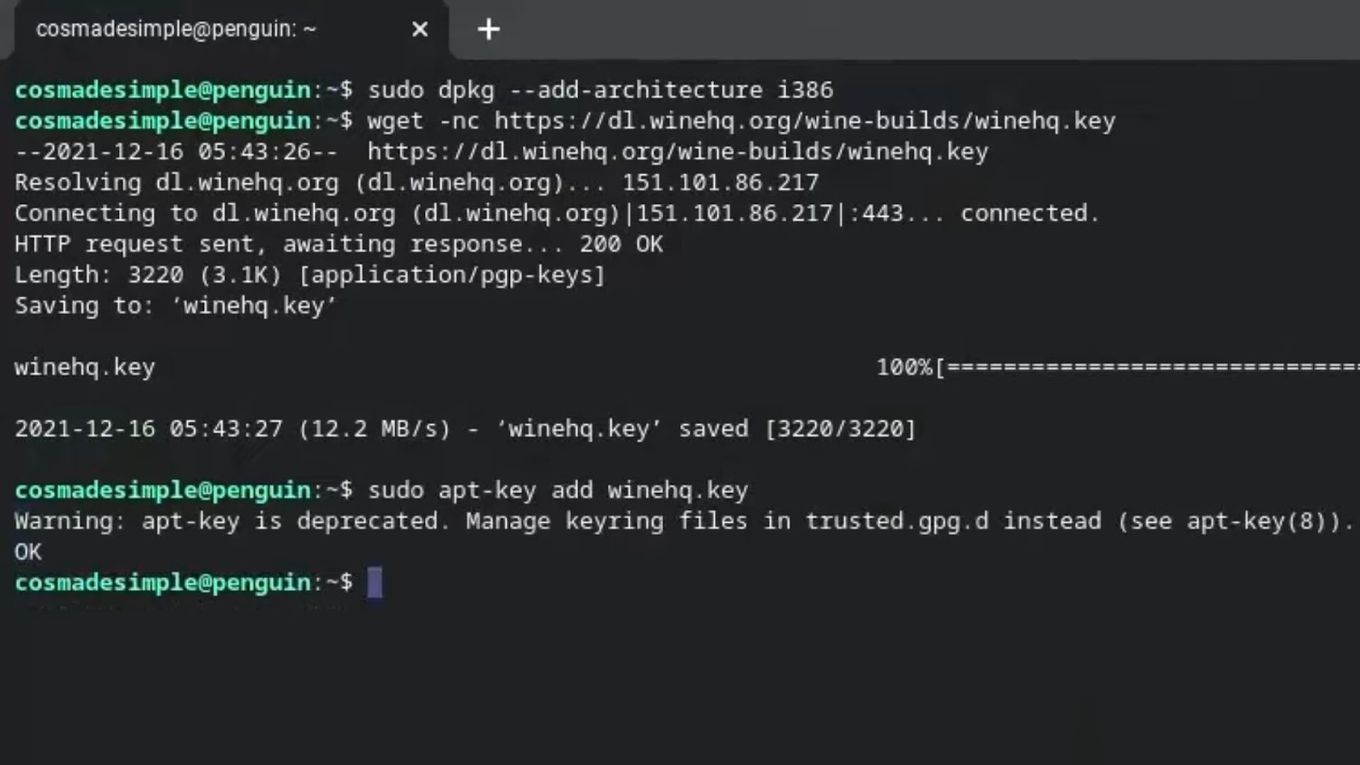
sudo dpkg --add-architecture i386
wget -qO- https://dl.winehq.org/wine-builds/winehq.key | sudo apt-key add -
sudo add-apt-repository 'deb https://dl.winehq.org/wine-builds/debian/ stable main'
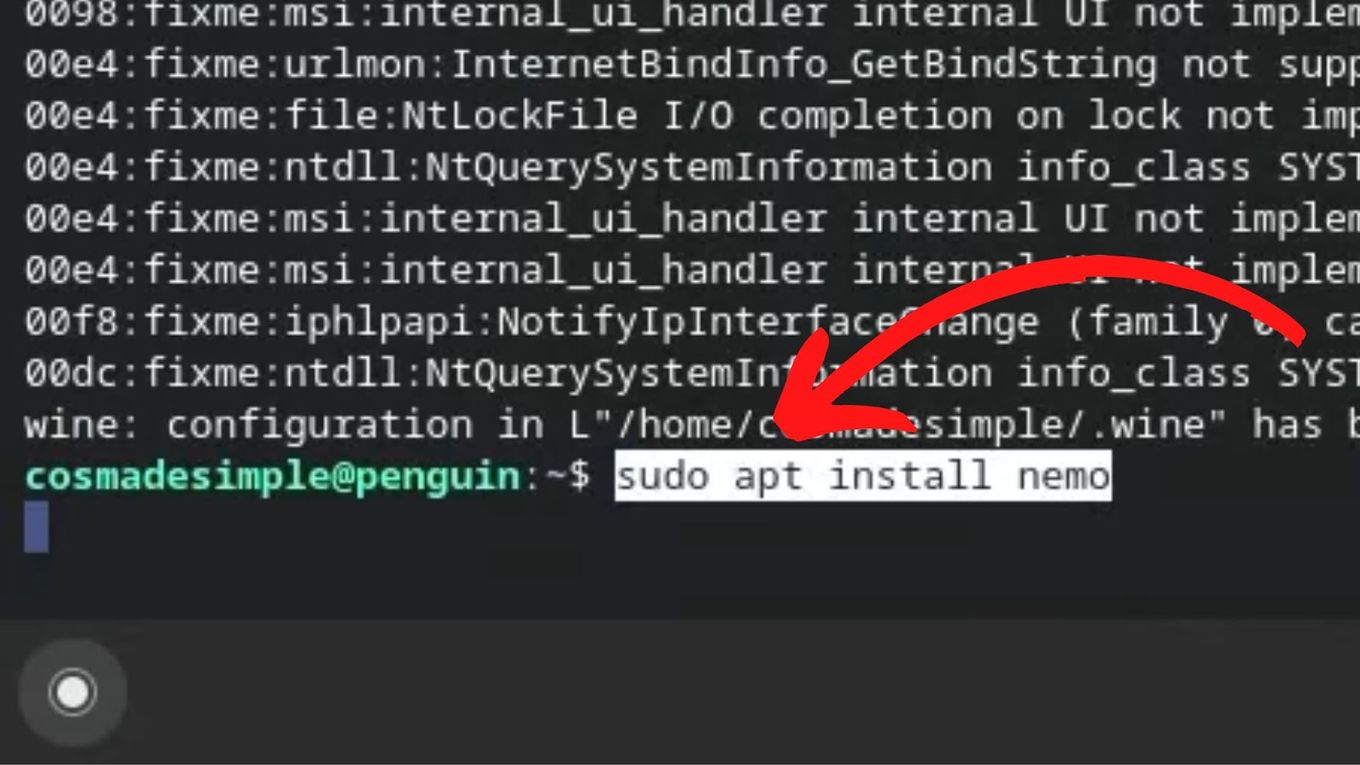
**Explanation of the commands:**
*   `sudo dpkg --add-architecture i386`: This enables the installation of 32-bit applications, which many older Windows programs still rely on.
*   `wget -qO- https://dl.winehq.org/wine-builds/winehq.key | sudo apt-key add -`: This downloads the WineHQ GPG key and adds it to your system's trusted keys, allowing `apt` to verify packages from the WineHQ repository.
*   `sudo add-apt-repository 'deb https://dl.winehq.org/wine-builds/debian/ stable main'`: This adds the WineHQ repository to your list of software sources. The `stable` part refers to the stable branch of Wine. For Wine 9.0, you might need to specify a development or staging branch if it's not yet in the stable repository. You can consult WineHQ documentation for the exact branch name if needed.
-
Update the package list again: After adding the new repository, you need to update your package list so
aptrecognizes the new software sources.sudo apt update -
Install Wine 9.0: Now, you can install Wine 9.0. The exact package name might vary slightly, but it’s typically
winehq-stablefor the stable version. If you want to install the development or staging branch (which would be more appropriate for Wine 9.0 if it’s not yet stable), you’d usewinehq-develorwinehq-stagingrespectively. For Wine 9.0, you would likely use:sudo apt install --install-recommends winehq-stagingOr if Wine 9.0 is officially in the stable branch by the time you’re reading this:
sudo apt install --install-recommends winehq-stableUsing
--install-recommendsensures that all necessary recommended packages are installed along with Wine, which can improve compatibility. -
Handle potential dependency issues: Sometimes,
aptmight encounter dependency conflicts. If this happens,aptwill usually provide instructions on how to resolve them. Common solutions include runningsudo apt --fix-broken install.
Once the installation is complete, Wine 9.0 should be installed on your Chromebook. You can verify the installation by opening the terminal and typing:
wine --version
This command should display the installed Wine version, confirming that Wine 9.0 is ready for use.
Initializing the Wine Environment
The first time you run a Windows application using Wine, or when you run a command like winecfg, Wine will create a default Wine prefix directory (usually ~/.wine). This directory acts as a virtual C: drive and contains the necessary configuration files and registry settings for Windows applications.
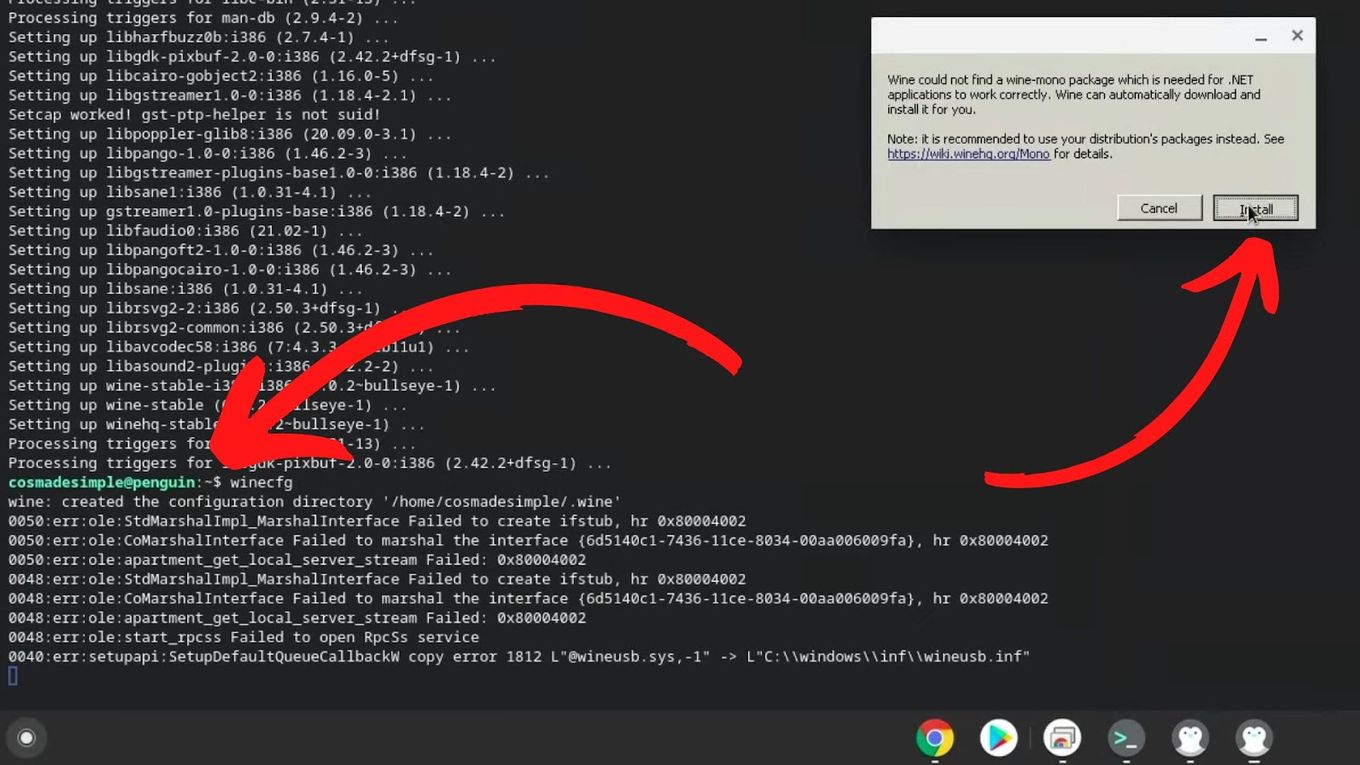
When Wine initializes, it will also prompt you to install essential Windows components like Mono and Gecko. These are crucial for running many applications that rely on .NET Framework or Internet Explorer’s rendering engine. It’s highly recommended to install these components when prompted. You can either click “Install” when the pop-ups appear, or you can install them manually later if you choose to skip them initially.
To manually trigger the creation of the Wine prefix and potentially the installation of Mono and Gecko, you can run:
winecfg
This command will open the Wine configuration utility. If the prefix hasn’t been created yet, it will be created now. You might be prompted to install Mono and Gecko during this process.
Running Windows Applications with Wine 9.0
With Wine 9.0 successfully installed and your environment initialized, you are now ready to run Windows applications on your Chromebook. This is the ultimate goal of this entire process, and it opens up a world of possibilities.
Installing and Launching Applications
There are several ways to install and launch Windows applications using Wine:
Method 1: Using Executable Installers (.exe files)
This is the most common method. If you have an application installer file (e.g., setup.exe), you can run it directly using Wine.
- Download the Windows application installer: Obtain the
.exeinstaller file for the application you want to install from its official website. - Transfer the installer to your Linux files: Chromebooks have a “My files” section. Within that, there’s a “Linux files” folder. You can place the
.exefile directly into this folder. - Open the Linux Terminal.
- Navigate to the directory where you saved the installer: Use the
cdcommand. For example, if you saved it in the “Linux files” folder, you might type:
bash

cd ~/Linux files/
(Note the backslash to escape the space in “Linux files”). - Run the installer with Wine: Execute the following command, replacing
your_application_installer.exewith the actual name of your installer file:
bash

wine your_application_installer.exe
- Follow the on-screen prompts: The Windows installer will launch within your Linux environment. Follow the standard installation steps as you would on a Windows PC.
Method 2: Using Wine Packages (e.g., PlayOnLinux, Lutris)
For a more streamlined experience, especially for games, you can use front-end applications that manage Wine installations and provide pre-configured settings for various applications. PlayOnLinux and Lutris are popular choices.
- Install PlayOnLinux or Lutris: Open your Linux terminal and install them using
apt:
bash

sudo apt update

sudo apt install playonlinux  # For PlayOnLinux
or
bash

sudo apt update

sudo apt install lutris      # For Lutris
- Launch PlayOnLinux or Lutris: Find them in your app launcher.
- Install Applications: Within these applications, you can usually search for the software you want to install. They will often guide you through the process, sometimes automatically downloading specific Wine versions or applying necessary tweaks.
Troubleshooting Common Issues
While Wine 9.0 aims for better compatibility, you might still encounter issues when running certain applications. Here are some common problems and their potential solutions:
- Application Crashes or Doesn’t Launch:
- Check for missing dependencies: Some applications require specific DLL files or runtimes (like .NET Framework or Visual C++ Redistributables). You can try installing these using
winetricks. Open your terminal and type:
bash

sudo apt install winetricks

winetricks
This will launch a graphical tool where you can select and install various Windows components. - Try a different Wine version: If Wine 9.0 (especially a development build) is unstable for a particular app, you might have to revert to an older stable version or try a different branch (e.g., development instead of staging).
- Check application compatibility: Visit the Wine Application Database (AppDB) (appdb.winehq.org) to see if your application is known to work with Wine and if there are any specific instructions or workarounds.
- Check for missing dependencies: Some applications require specific DLL files or runtimes (like .NET Framework or Visual C++ Redistributables). You can try installing these using
- Graphical Glitches or Performance Issues:
- Update your Chromebook’s graphics drivers: While Chrome OS generally handles this automatically, ensure your system is up-to-date.
- Check WineHQ AppDB: Some applications require specific Wine configurations or patches for optimal graphics performance.
- Consider 32-bit vs. 64-bit: Ensure you’re running the correct version of the application (32-bit or 64-bit) for your Wine setup. Most Chromebooks have 64-bit processors, but some older or specific applications might only be available in 32-bit.
- Audio or Input Problems:
- Ensure your Linux environment has access to audio devices: This is usually handled by default, but sometimes specific configurations are needed.
- Check the Wine configuration (
winecfg): Experiment with different audio drivers inwinecfg.
The journey of installing and running Windows applications on your Chromebook with Wine 9.0 is an exciting one. By following these steps carefully, you can unlock the full potential of your device, bridging the gap between Chrome OS and the vast ecosystem of Windows software. Remember to consult the official WineHQ documentation and community forums for the most up-to-date information and support.
aViewFromTheCave is a participant in the Amazon Services LLC Associates Program, an affiliate advertising program designed to provide a means for sites to earn advertising fees by advertising and linking to Amazon.com. Amazon, the Amazon logo, AmazonSupply, and the AmazonSupply logo are trademarks of Amazon.com, Inc. or its affiliates. As an Amazon Associate we earn affiliate commissions from qualifying purchases.