
Embarking on the journey with a brand-new PC is an exciting prospect, brimming with possibilities for enhanced productivity, seamless connectivity, and immersive digital experiences. However, before you can dive into your favorite applications, create compelling content, or engage with the latest digital trends, there’s a crucial first step: installing the operating system. For the vast majority of users worldwide, that operating system is Microsoft Windows. While the idea of installing an OS might sound daunting, especially for those new to the intricacies of PC hardware and software, it’s a remarkably straightforward process when armed with the right knowledge and a clear, step-by-step guide.
This article, tailored for readers interested in the Tech section of our website, will demystify the process of installing Windows on a new PC, transforming what could be a challenging task into an empowering experience. Whether you’ve just assembled a custom rig, purchased a barebones system, or simply need to reinstall Windows for a fresh start, understanding these steps is fundamental. A successful installation not only ensures your hardware components communicate effectively but also lays the groundwork for a secure, efficient, and personalized computing environment, directly impacting your digital security and overall productivity. We’ll cover everything from the initial preparations and media creation to navigating BIOS settings, executing the installation, and performing essential post-setup configurations. By the end of this guide, you’ll not only have Windows running flawlessly but also possess the confidence to tackle similar tech challenges in the future.
Laying the Foundation: Essential Preparations Before You Begin
Before you even think about plugging in your new PC or turning it on for the first time, a bit of foresight and preparation can save you considerable time and frustration. Think of this stage as gathering all your tools and blueprints before starting construction. These initial steps are critical for a smooth and successful Windows installation, ensuring you have the necessary components and information at your fingertips.
Acquiring Your Windows Installation Media
The first and most vital step is to obtain the Windows installation files and transform them into a bootable format that your new PC can recognize. This typically involves downloading an ISO file – a single file containing all the Windows installation data – and then writing it to a USB flash drive.
- Downloading the Windows ISO File:
- Source: Always download Windows installation media directly from Microsoft’s official website. This ensures you receive a legitimate, untampered version of the operating system, free from malware or unauthorized modifications. For Windows 10 or Windows 11, navigate to Microsoft’s “Download Windows” page.
- Choosing the Right Version: Microsoft typically offers several editions, primarily Windows Home and Windows Pro. For most home users, Windows Home suffices, providing all essential features. Windows Pro offers additional functionalities beneficial for businesses or advanced users, such as BitLocker encryption, Remote Desktop, and Group Policy management. Ensure you select the correct architecture (64-bit for modern PCs).
- Creating Bootable Installation Media:
- USB Flash Drive Requirements: You’ll need a USB flash drive with at least 8GB of storage for Windows 10 and 16GB for Windows 11. Crucially, any data on this drive will be erased during the process, so back up anything important beforehand.
- Tools for Creation:
- Microsoft Media Creation Tool: This is Microsoft’s official, user-friendly tool. It automates the process of downloading the ISO and creating a bootable USB drive. It’s highly recommended for its simplicity and reliability. Just run the tool, select “Create installation media (USB flash drive, DVD, or ISO file) for another PC,” and follow the prompts.
- Rufus (Third-Party): For advanced users seeking more control, Rufus is a popular open-source utility. It’s faster and offers more options for partition schemes (MBR or GPT) and target systems (UEFI or BIOS), which can be useful in specific scenarios. You’ll need to manually download the ISO file first, then use Rufus to write it to the USB drive.
Pre-Installation Checklist: Hardware, Licenses, and Data Safety
Beyond the installation media, a few other considerations are paramount before proceeding.
- Hardware Requirements Check: While you’re likely working with new hardware, it’s wise to briefly confirm that your PC meets the minimum system requirements for your chosen Windows version. Modern PCs almost always exceed these, but a quick check provides peace of mind. Key components include CPU (processor speed and core count), RAM (memory), storage (SSD/HDD capacity), and graphics card compatibility.
- Windows License Key:
- Digital License: Many new PCs or pre-built systems come with a digital license linked to the hardware. In such cases, Windows will automatically activate once connected to the internet during or after installation.
- Product Key: If you purchased a retail copy of Windows or a separate product key, ensure you have it readily available. It’s a 25-character alphanumeric code. You’ll be prompted to enter it during the installation process, though you can often skip this step and activate later.
- Data Backup (If Applicable): Although you’re installing on a new PC, if there’s any pre-existing data on the drive you intend to use (e.g., if you’re repurposing an old drive or have a system that came with a basic OS you want to replace), ensure all critical files are backed up to an external drive or cloud storage. This step is a cornerstone of digital security and productivity, preventing irreversible data loss. For a truly blank, new drive, this step is less critical but good practice to keep in mind for future re-installations.
Navigating the BIOS/UEFI: Guiding Your PC to Boot Correctly
Once your bootable Windows installation media is ready, the next step involves instructing your new PC to start from this media rather than attempting to boot from an empty hard drive. This is achieved through the system’s firmware interface, known as BIOS (Basic Input/Output System) or its modern successor, UEFI (Unified Extensible Firmware Interface). Understanding how to access and configure these settings is a fundamental skill for any tech enthusiast.
Accessing and Prioritizing Boot Devices
The BIOS/UEFI interface allows you to control low-level hardware settings, including the boot order – the sequence in which your PC attempts to load an operating system from different devices.
- Entering BIOS/UEFI Setup:
- Common Keys: Immediately after powering on your PC (or restarting it), you’ll need to repeatedly press a specific key to enter the BIOS/UEFI setup. The most common keys are
Delete,F2,F10,F12, orEsc. This key varies depending on your motherboard manufacturer (e.g., ASUS, MSI, Gigabyte, Dell, HP, Lenovo). Watch for a brief message on the screen during startup, often saying “Press [Key] to enter Setup” or “Press [Key] for BIOS.” - Timing is Key: You often have only a narrow window of opportunity to press the key, so start pressing it as soon as you hit the power button. If you miss it, simply restart your PC and try again.
- Common Keys: Immediately after powering on your PC (or restarting it), you’ll need to repeatedly press a specific key to enter the BIOS/UEFI setup. The most common keys are
- Setting USB as the Primary Boot Device:
- Navigate to Boot Options: Once in the BIOS/UEFI, use your keyboard (or mouse, in some modern UEFI interfaces) to navigate through the menus. Look for sections typically labeled “Boot,” “Boot Options,” “Boot Priority,” or “Startup.”
- Change Boot Order: Within the boot options, you’ll see a list of detected bootable devices (e.g., your hard drive/SSD, CD/DVD drive, USB drive). You need to move your USB flash drive (it might be listed by its brand name, model, or simply “USB HDD”) to the top of the boot order list. This tells your PC to look for an operating system on the USB drive first.
- Save and Exit: After making the necessary changes, find the “Save and Exit” or “Exit Saving Changes” option. Confirm your choice, and the PC will restart, now attempting to boot from your USB installation media.
Understanding Secure Boot and CSM Settings
While setting the boot order is usually sufficient, some newer systems with UEFI firmware may require adjustments to Secure Boot or CSM (Compatibility Support Module) settings, especially if you encounter issues.
- Secure Boot:
- Purpose: Secure Boot is a security feature primarily found in UEFI systems. It helps prevent malicious software from loading during the boot process by only allowing digitally signed and trusted operating systems (like Windows 10/11) and drivers to run.
- When to Adjust: For a standard Windows 10/11 installation, Secure Boot should typically be enabled. However, if you’re trying to install an older version of Windows or another operating system, or if you’re experiencing boot issues, you might temporarily need to disable it. It’s usually found under the “Security,” “Boot,” or “Authentication” sections of the BIOS/UEFI.
- CSM (Compatibility Support Module) / Legacy Mode:
- Purpose: CSM, or Legacy mode, allows UEFI systems to emulate a traditional BIOS environment. This is useful for booting from older devices or installing operating systems that are not UEFI-aware.
- When to Adjust: For modern Windows installations (Windows 8 and newer), you should generally prefer UEFI mode with CSM disabled for better performance and security features. However, if your installation media or hardware combination struggles with UEFI, enabling CSM (sometimes called “Legacy Support”) can sometimes resolve boot problems. This setting is usually found under the “Boot” or “Advanced” sections.
- Important Note: It’s generally recommended to install Windows in UEFI mode for a new PC, especially when using an SSD, as it offers advantages like faster boot times and support for larger drives (GPT partitioning). Make sure your installation media is created for UEFI if you plan to use this mode.
Once these settings are configured, save your changes and exit. Your PC should now restart and boot directly into the Windows installation environment from your USB drive.
The Core Process: Installing Windows Step-by-Step
With your PC successfully booting from the installation media, you’re now entering the heart of the Windows setup process. This stage involves making critical decisions about language, licensing, and how Windows will be structured on your hard drive. Proceed carefully through each prompt to ensure a clean and optimized installation.
Initial Setup and Product Key Activation
The first few screens are straightforward, guiding you through the foundational settings before the actual file transfer begins.
- Language, Time, and Keyboard Settings: The initial screen will prompt you to select your preferred language, time and currency format, and keyboard or input method. Make your selections and click “Next.”
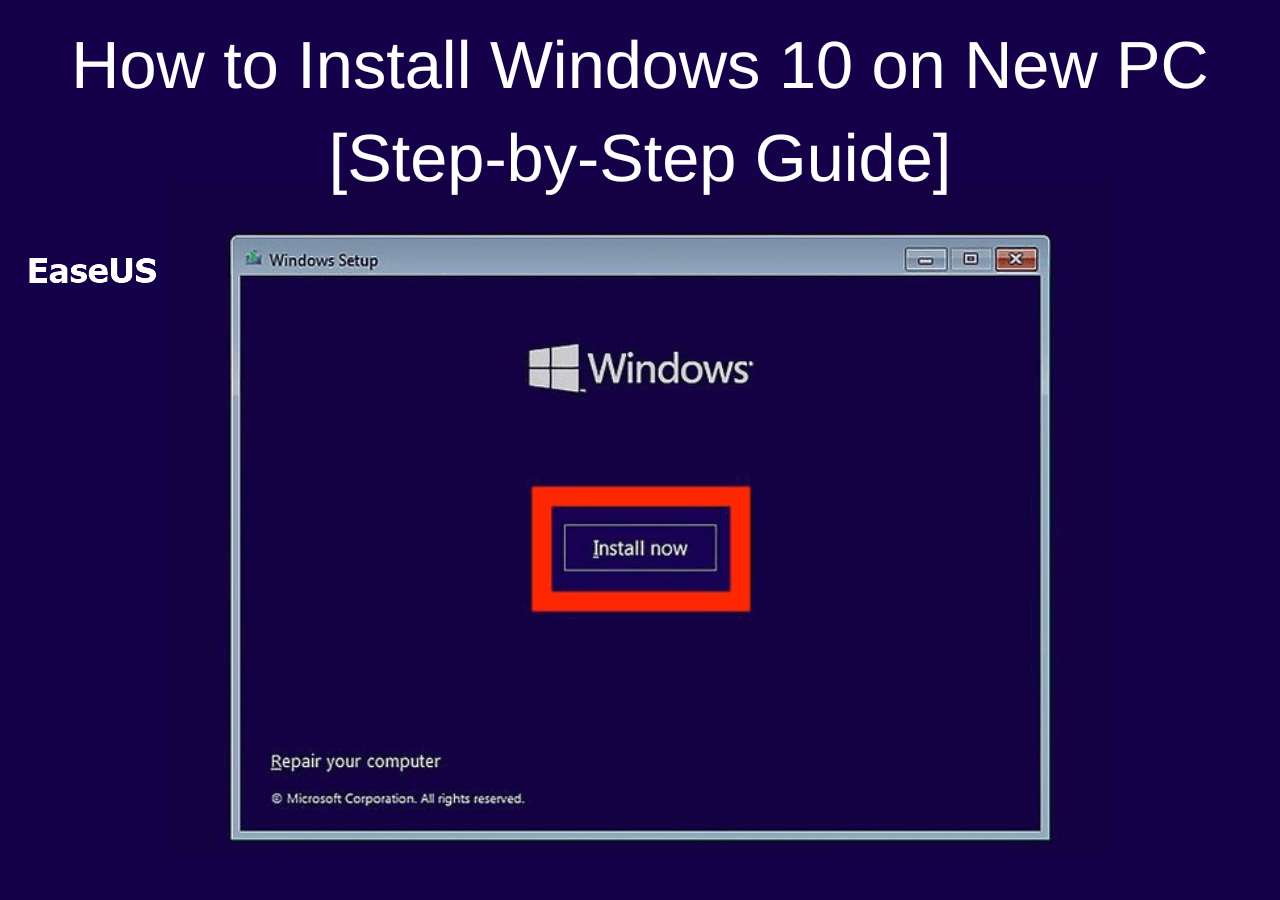
- “Install now” Button: On the subsequent screen, click the prominent “Install now” button to commence the setup.
- Product Key Entry:
- You will be asked to enter your Windows product key. If you have one, enter it here.
- “I don’t have a product key”: If your PC has a digital license linked to its hardware (common for pre-installed systems or after a previous activated installation), or if you plan to activate Windows later, select “I don’t have a product key.” Windows will often activate automatically once connected to the internet.
- Edition Selection: If you didn’t enter a product key and the installation media contains multiple Windows editions (e.g., Home and Pro), you’ll be prompted to choose the specific edition you wish to install. Select the one corresponding to your license or preference.
- License Terms: Read through the Microsoft Software License Terms. To proceed, you must accept these terms by checking the box and clicking “Next.”
Strategic Drive Partitioning for Optimal Performance
This is arguably the most critical step in the installation process, as it dictates how Windows will interact with your storage drive. For a new PC with a blank drive, this section involves setting up the drive structure from scratch.
- Choosing Installation Type:
- You will be presented with two options: “Upgrade: Install Windows and keep files, settings, and applications” or “Custom: Install Windows only (advanced).”
- Always select “Custom: Install Windows only (advanced)” for a new PC. The “Upgrade” option is meant for existing Windows installations, not for a fresh install on a new or blank drive.
- Partitioning Your Drive:
- Identifying Your Drive: You’ll see a list of drives and any existing partitions. On a new PC, you’ll likely see “Drive 0 Unallocated Space” or a single large partition if the drive had a basic factory OS.
- Deleting Existing Partitions (If Applicable): If your drive isn’t completely blank and contains any factory recovery partitions or unwanted old OS installations, select each partition and click “Delete.” Confirm any warnings. The goal is to return the drive to a single “Unallocated Space.”
- Creating New Partitions:
- For most users: Simply select the “Unallocated Space” and click “New,” then “Apply.” Windows will automatically create the necessary system partitions (e.g., System Reserved, MSR, Recovery) and a primary partition for Windows itself. These system partitions are small but crucial for booting and recovery; do not delete them.
- Advanced users: You can manually create multiple partitions here (e.g., a smaller partition for the OS and a larger one for data). However, for simplicity and optimal performance on modern SSDs, a single primary partition for Windows is often recommended.
- Selecting the Installation Partition: After creating partitions, you will have at least one “Primary” partition. Select this primary partition (it will be the largest one, typically labeled “Drive 0 Partition X” or similar) as the destination for Windows and click “Next.”
The Automated Installation Phase

Once you’ve selected the target partition, the hands-on part of the installation is mostly complete. The system will now begin copying files and setting up the core operating system.
- Copying Files and Initial Setup: Windows will now copy all necessary files from your USB media to the selected drive. This process can take anywhere from 10 to 30 minutes, depending on your PC’s speed (especially the speed of your SSD/HDD) and the USB drive.
- Getting Devices Ready: After copying files, Windows will automatically prepare your hardware, install basic drivers, and perform initial configurations.
- Multiple Restarts: Your PC will restart multiple times during this phase. Do not remove the USB installation media until the very first restart cycle is complete and you see the Windows logo, or preferably, until you reach the Out-Of-Box Experience (OOBE) setup screen. If you leave the USB in and it tries to boot from it again, simply remove it and let the PC continue booting from its internal drive.
Once these automated steps are finished, your PC will be ready for the final configuration steps, leading you into your brand-new Windows environment.
Post-Installation Mastery: Setting Up Your New Digital Workspace
After the core installation of Windows is complete, your PC will reboot into what’s known as the Out-Of-Box Experience (OOBE). This guided setup helps you configure essential system settings, connect to the internet, and create user accounts, personalizing your digital workspace right from the start. This phase is critical not only for immediate usability but also for establishing proper digital security and maximizing your productivity from day one.
Completing the Out-Of-Box Experience (OOBE)
The OOBE guides you through a series of interactive screens to finalize your Windows setup.
- Region and Keyboard Layout: Select your country/region and confirm your keyboard layout. You may be prompted to add a second keyboard layout if desired.
- Network Connection: You’ll be asked to connect to a network. For a stable installation and to enable immediate updates and activation, it’s highly recommended to connect to Wi-Fi or plug in an Ethernet cable.
- Account Setup:
- Microsoft Account: Windows strongly encourages signing in with a Microsoft account. This links your PC to cloud services like OneDrive, Office 365, and synchronization settings, offering convenience and enhancing productivity across devices. If you don’t have one, you can create it here.
- Local Account (Limited Options): While Windows 11 often requires an internet connection and a Microsoft account during OOBE, Windows 10 offers the option to create a local account if you prefer not to use a Microsoft account. Look for “Offline account” or “Skip for now.”
- PIN Creation: Microsoft prompts you to create a PIN for faster and more secure login than a full password. This is a highly recommended security feature.
- Privacy Settings: You’ll encounter screens allowing you to review and adjust various privacy settings, such as location services, diagnostic data, and tailored experiences. Take a moment to review these and make choices that align with your personal preferences and digital security concerns.
- Cortana, OneDrive, and Other Services: Windows might ask about enabling Cortana, setting up OneDrive backups, or trying other Microsoft services. You can accept or decline these based on your needs.
After completing these steps, Windows will finalize its setup, and you’ll be greeted by the familiar desktop.
Critical Driver Installation and System Updates
While Windows installs basic drivers during setup, it’s crucial to ensure all your hardware components have the latest and most optimized drivers. Outdated drivers can lead to performance issues, system instability, and even security vulnerabilities.
- Windows Update First: The very first thing you should do after reaching the desktop is run Windows Update.
- Go to
Settings > Update & Security (Windows 10) / Windows Update (Windows 11) > Check for updates. - Windows Update is surprisingly effective at finding and installing many necessary drivers (especially for graphics, chipset, and network adapters), as well as critical security patches and feature updates. Restart your PC as prompted. Repeat this process until no more updates are found. This step is fundamental for digital security and system stability.
- Go to
- Manufacturer-Specific Drivers:
- Motherboard Chipset: Visit your motherboard manufacturer’s website (e.g., ASUS, MSI, Gigabyte, ASRock) and download the latest chipset drivers for your specific model. These are crucial for overall system performance and component communication.
- Graphics Card: If you have a dedicated graphics card (NVIDIA GeForce, AMD Radeon), download the latest drivers directly from NVIDIA or AMD’s website. Gaming performance, display output, and various graphical features depend heavily on these drivers.
- Other Peripherals: Check for drivers for any specialized peripherals like Wi-Fi adapters, sound cards, or printers if they aren’t working correctly after Windows Update.
Essential Software and Personalization
With your system stable and drivers updated, it’s time to install your go-to applications and personalize your Windows experience.
- Antivirus Software: While Windows Defender (now Microsoft Defender) is built-in and provides robust protection, you might prefer a third-party antivirus solution. Install it early to maintain strong digital security.
- Web Browser: Download your preferred web browser (Chrome, Firefox, Edge, Brave, etc.) as this is typically one of the first applications you’ll use.
- Productivity Suite: Install your office productivity suite (e.g., Microsoft Office, LibreOffice, Google Workspace apps).
- Utility Software: Consider tools like file compression software (7-Zip, WinRAR), media players (VLC), or cloud storage clients (Dropbox, Google Drive).
- Personalization:
- Desktop Background and Theme: Right-click on the desktop and select “Personalize” to change your background, colors, lock screen, and themes.
- Taskbar and Start Menu: Adjust settings for the taskbar (location, icons) and customize the Start menu (pin/unpin tiles, app organization) to optimize your workflow and productivity.
- Power Options: Configure power settings to balance performance and energy consumption (e.g., screen timeout, sleep mode).
By carefully completing these post-installation steps, you’re not just installing an operating system; you’re crafting a finely tuned, secure, and productive digital environment tailored to your needs.
Troubleshooting Common Hurdles and Ensuring a Smooth Ride
Even with meticulous preparation, the installation process can sometimes present unexpected challenges. Knowing how to identify and address common issues is a valuable skill that enhances your tech literacy and ensures you can resolve problems efficiently, minimizing downtime and frustration.
Addressing Installation Errors and Driver Issues
Some of the most frequent problems encountered during or immediately after a Windows installation relate to boot failures, general installation errors, or hardware not functioning correctly.
- Installation Failing (Boot Loop, Blue Screen of Death – BSOD):
- Cause: This can be due to corrupt installation media, incompatible hardware, incorrect BIOS/UEFI settings, or a faulty drive.
- Solution:
- Recreate Installation Media: If you suspect corruption, try creating the bootable USB again, perhaps using a different USB stick or tool (e.g., Rufus instead of Media Creation Tool, or vice-versa).
- Check Hardware: Ensure all components (RAM, CPU, GPU, storage drives) are properly seated. Try installing with minimal hardware (e.g., one stick of RAM) to isolate issues.
- BIOS/UEFI Settings: Double-check boot order, Secure Boot, and CSM settings. Resetting BIOS to default settings can sometimes resolve conflicts, then reconfigure boot priority.
- Drive Issues: If the installer consistently fails to detect the drive or format it, the drive itself might be faulty. Test it in another system if possible.
- Driver Conflicts or Missing Drivers:
- Cause: While Windows installs generic drivers, specific hardware may require proprietary drivers that aren’t immediately available or correctly installed, leading to non-functional devices (e.g., no Wi-Fi, distorted display, no sound).
- Solution:
- Device Manager: Open Device Manager (
Windows Key + X > Device Manager). Look for devices with yellow exclamation marks. Right-click and choose “Update driver” or “Uninstall device” and then restart the PC to let Windows try again. - Manufacturer Websites: This is the most reliable method. As discussed in post-installation, manually download the latest chipset, graphics, and network drivers from your motherboard, GPU, and peripheral manufacturers’ official websites. Store them on another USB drive if you have no internet access on the new PC.
- Windows Update: Ensure Windows Update has been run multiple times and all optional updates (which sometimes include drivers) have been installed.
- Device Manager: Open Device Manager (
Resolving Activation and Performance Glitches
Even after a seemingly successful installation, you might encounter issues with Windows activation or general system sluggishness.
- Activation Problems:
- Cause: Incorrect product key, issues with digital license recognition, or internet connectivity problems.
- Solution:
- Internet Connection: Ensure your PC is connected to the internet. Digital licenses activate automatically online.
- Check Product Key: Double-check your entered product key for typos.
- Troubleshooter: Go to
Settings > Update & Security (Windows 10) / System > Activation (Windows 11). Use the “Troubleshoot” option. This can often diagnose and fix common activation issues, especially if you recently changed hardware or are reactivating a digital license. - Microsoft Support: If all else fails, contact Microsoft Support with your product key or digital license details.
- Slow Performance After Installation:
- Cause: Missing or outdated drivers, excessive background apps, insufficient system resources, or bloatware.
- Solution:
- Update Drivers and Windows: Ensure all drivers are up to date and Windows Update is fully patched.
- Startup Programs: Check Task Manager (
Ctrl + Shift + Esc) > “Startup” tab. Disable unnecessary programs from launching with Windows to speed up boot times and free up RAM. - Disk Cleanup/Defragment: For HDDs, run Disk Defragmenter. For SSDs, ensure TRIM is enabled (usually automatic). Run Disk Cleanup to remove temporary files.
- Malware Scan: Perform a full scan with Microsoft Defender or your chosen antivirus to rule out any malicious software that might have snuck in.
- Resource Monitoring: Use Task Manager to identify any applications or processes consuming excessive CPU, RAM, or disk I/O.
- Power Settings: Ensure your power plan (in Control Panel > Power Options) is set to “Balanced” or “High Performance” rather than “Power saver” if you need maximum responsiveness.
By systematically approaching troubleshooting with these steps, you can often pinpoint and resolve issues efficiently, allowing you to quickly get back to enjoying your new, fully functional PC. Leveraging online forums and support communities can also provide valuable insights for more obscure problems.

Conclusion
Installing Windows on a new PC might seem like a complex technical undertaking, but as this comprehensive guide demonstrates, it’s a manageable process that empowers you to build the digital foundation of your new system. From meticulously preparing your installation media and navigating the crucial BIOS/UEFI settings to executing the step-by-step installation and fine-tuning your system post-setup, each stage contributes to a robust, secure, and highly productive computing experience.
By following these instructions, you’ve not only successfully installed a world-leading operating system but also gained invaluable insights into the inner workings of your PC. This foundational knowledge is a cornerstone of digital literacy, enhancing your understanding of technology trends, digital security best practices, and overall system management – all key themes for the modern tech user. A fresh Windows installation offers numerous benefits, including optimal performance, enhanced security features, and a clean slate free from pre-installed bloatware, paving the way for maximum productivity.
Now that your new PC is fully equipped with a pristine Windows installation, you’re ready to explore the vast capabilities it offers. Dive into your favorite applications, personalize your workspace, and enjoy the seamless performance of your newly configured machine. Welcome to your optimized digital future!
aViewFromTheCave is a participant in the Amazon Services LLC Associates Program, an affiliate advertising program designed to provide a means for sites to earn advertising fees by advertising and linking to Amazon.com. Amazon, the Amazon logo, AmazonSupply, and the AmazonSupply logo are trademarks of Amazon.com, Inc. or its affiliates. As an Amazon Associate we earn affiliate commissions from qualifying purchases.