
In an increasingly digital world, the ability to control and customize your computing environment offers unparalleled freedom. Whether you’re a seasoned tech enthusiast, a privacy-conscious user, or someone looking to explore new operating systems without altering your main setup, installing Ubuntu on a USB drive is a powerful skill. This comprehensive guide will walk you through every step of transforming a simple flash drive into a portable, fully functional Ubuntu system, unlocking a new realm of possibilities for productivity, digital security, and tech exploration. We’ll delve into the practicalities, the underlying benefits, and even touch upon how mastering such a skill aligns with broader themes of technology independence, personal branding in the tech space, and smart financial decisions.
Why Choose a Bootable Ubuntu USB? Unlocking New Tech Possibilities
A bootable Ubuntu USB isn’t just a convenience; it’s a versatile tool that empowers users in numerous ways. From maintaining privacy on public computers to serving as a digital survival kit, its applications are vast and invaluable.
The Power of Portability: Your OS, Anywhere
Imagine carrying your entire operating system, complete with your preferred applications, settings, and files, in your pocket. A bootable Ubuntu USB makes this a reality. You can plug it into almost any computer—be it a friend’s laptop, a school computer, or an old desktop—and boot into your familiar Ubuntu environment. This means consistent productivity regardless of the host machine’s configuration or operating system. For those who frequently work on different devices or travel, this level of portability is a game-changer, ensuring that your workflow is never interrupted and your digital tools are always at hand. This concept ties into the broader “Tech” theme by showcasing how portable software solutions enhance user experience and flexibility across various computing scenarios.
A Secure Sandbox: Exploring Ubuntu Without Commitment
One of the most compelling reasons to use a live Ubuntu USB is its “try before you buy” functionality. When you boot Ubuntu from a USB without installing it to the hard drive, it runs entirely from the RAM (Random Access Memory) and the USB drive. This creates a secure, isolated environment where any changes you make (unless explicitly saved to another drive or the persistent storage on the USB) are wiped clean upon reboot. This “sandbox” approach is perfect for:
- Testing Hardware Compatibility: Before committing to a full installation, you can check if Ubuntu recognizes all your computer’s components, like Wi-Fi, graphics card, and peripherals.
- Software Exploration: Experiment with various Linux applications, desktop environments, and configurations without fear of affecting your primary operating system.
- Maintaining Privacy: Browsing the internet or handling sensitive information from a live USB session ensures that no traces are left behind on the host computer’s hard drive, a significant advantage for digital security and personal data protection.
This low-risk environment encourages experimentation, making it an excellent learning tool for anyone new to Linux or open-source software, building confidence and technical aptitude—valuable assets for personal branding in the tech sector.
Troubleshooting and Recovery: A Digital Lifesaver
Beyond exploration and portability, a bootable Ubuntu USB serves as an indispensable tool for system maintenance and disaster recovery. When your primary operating system (Windows, macOS, or another Linux distro) encounters critical errors, fails to boot, or becomes infected with malware, your Ubuntu USB can be your digital lifeline.
- Data Recovery: You can use the live Ubuntu environment to access files on a corrupted hard drive, copy them to an external drive, or even attempt repairs.
- Malware Removal: Scan your primary drive for viruses and malware from a clean, uninfected Ubuntu environment.
- System Diagnostics: Run diagnostic tools to identify hardware failures or resolve boot issues without needing to access your main OS.
- Password Reset: In some cases, you can even use a live Ubuntu session to reset forgotten passwords for your primary operating system.
These capabilities highlight the practical, problem-solving aspects of technology, transforming a simple USB drive into an essential item in any tech toolkit.
Essential Preparations: Gathering Your Tools for a Seamless Installation
Before diving into the installation process, a few crucial preparations are necessary. Gathering the right tools and understanding some fundamental concepts will ensure a smooth and successful creation of your bootable Ubuntu USB.
Selecting the Right USB Drive: Speed, Size, and Reliability
The foundation of your portable Ubuntu system is, naturally, the USB drive itself. Not all USB drives are created equal, and choosing the right one can significantly impact performance and reliability.
- Size: For a basic live Ubuntu system, an 8GB USB drive is usually sufficient. However, if you plan to enable “persistent storage” (which allows you to save files and settings on the USB drive, making it feel more like a permanent installation), a 16GB or 32GB drive is highly recommended. Larger drives offer more space for applications, updates, and personal data.
- Speed: This is perhaps the most critical factor. USB 3.0 or newer drives offer substantially faster read and write speeds compared to older USB 2.0 drives. Since Ubuntu will be running directly from this drive, a faster drive translates to quicker boot times, snappier application performance, and a generally more responsive user experience. While USB 3.0 drives cost slightly more, the investment is well worth it for the improved performance, reflecting a smart “Money” decision for long-term tech satisfaction. Look for drives labeled “USB 3.1” or “USB 3.2 Gen 1/2” for even better performance, ensuring your portable OS is as efficient as possible.
- Reliability: Opt for reputable brands known for quality and durability. A failing USB drive can lead to data loss or an unusable portable OS.
Acquiring the Ubuntu ISO: Your Gateway to Linux
The Ubuntu ISO file is essentially a digital snapshot of the entire Ubuntu operating system. You’ll need to download this file to write it onto your USB drive.
- Where to Download: Always download the ISO file from the official Ubuntu website:
ubuntu.com/download. This ensures you get an authentic, untampered version of the OS. - Which Version? Ubuntu typically releases a new Long Term Support (LTS) version every two years, which receives five years of security and maintenance updates. Non-LTS versions are released every six months and supported for nine months. For stability and long-term use, especially on a portable drive, an LTS version is generally recommended. At the time of writing, Ubuntu 22.04 LTS (Jammy Jellyfish) is a popular choice.
- Verification (Optional but Recommended): After downloading, you can verify the integrity of the ISO file using its SHA256 checksum, provided on the Ubuntu download page. This step ensures that the file hasn’t been corrupted during download or tampered with, enhancing your digital security.
Choosing Your Bootable USB Creator: Rufus, Etcher, and Beyond
To transfer the Ubuntu ISO onto your USB drive in a bootable format, you’ll need a specialized tool. Several excellent options are available, each with its strengths:
- Rufus (Windows Only): Rufus is a fast, lightweight, and highly popular utility for Windows users. It’s known for its efficiency and offers advanced options, including the ability to create persistent storage (more on this later). Its intuitive interface makes it a top choice for many.
- Balena Etcher (Cross-Platform – Windows, macOS, Linux): Etcher is celebrated for its simplicity and user-friendly graphical interface. It’s an excellent choice for beginners, as it guides you through a clear three-step process: select image, select drive, flash! It also validates the write process, reducing errors.
- UNetbootin (Cross-Platform): UNetbootin is another popular choice that allows you to create bootable live USB drives for various Linux distributions. While it might look a bit older, it’s still very functional and supports persistence for some distributions.
- Ventoy (Advanced, Cross-Platform): For advanced users, Ventoy allows you to create a single bootable USB drive that can hold multiple ISO files. Instead of rewriting the USB for each OS, you just copy ISOs onto it. This is incredibly efficient for IT professionals or enthusiasts who manage several operating systems, showcasing advanced “Tech” solutions for optimized workflows.
Choose the tool that best fits your operating system and comfort level. All these tools are free and open-source, aligning with the “Money” theme by providing powerful solutions without cost.
Crucial Pre-Installation Checklist: Backups and BIOS
Before proceeding with the actual creation, take a moment for these vital checks:
- Backup Your USB Drive: The process of creating a bootable USB will erase ALL data on the target USB drive. Ensure you have backed up any important files from the drive before you begin. This emphasizes proactive digital security and data management, preventing potential financial or personal loss.
- Charge Your Laptop (if applicable): If you’re using a laptop, ensure it’s fully charged or, even better, plugged into power during the bootable USB creation and initial testing phases. Unexpected power loss can corrupt the process.
- Familiarize Yourself with BIOS/UEFI Access: You will need to access your computer’s BIOS or UEFI settings to change the boot order and prioritize the USB drive. Common keys to access these settings during startup include F2, Del, F10, F12, Esc, or specific function keys depending on your motherboard manufacturer (e.g., ASUS, Dell, HP, Lenovo). Knowing this beforehand will save you time and frustration later.
Step-by-Step Installation: Crafting Your Portable Ubuntu Environment
With your preparations complete, you’re ready to embark on the core process of creating your bootable Ubuntu USB drive. Follow these steps meticulously for a successful outcome.
Downloading the Ubuntu ISO Image
- Navigate to the Official Ubuntu Website: Open your web browser and go to
ubuntu.com/download/desktop. - Select Your Version: Choose the recommended LTS (Long Term Support) version for stability. Click the “Download” button next to your chosen version (e.g., Ubuntu 22.04 LTS).
- Save the File: Your browser will prompt you to save the
.isofile. Choose a location on your computer where you can easily find it, such as your “Downloads” folder or Desktop. The file size is typically around 3-5 GB, so the download time will vary based on your internet speed.
Setting Up Your USB Creator Tool
Assuming you’ve chosen a tool like Rufus (for Windows) or Balena Etcher (for cross-platform):
- For Rufus (Windows):
- Download Rufus from its official website (
rufus.ie). - Rufus is a portable application, so you typically don’t need to “install” it. Simply double-click the downloaded
.exefile to run it. - If prompted by User Account Control (UAC), click “Yes” to allow it to make changes.
- Download Rufus from its official website (
- For Balena Etcher (Windows, macOS, Linux):
- Download Etcher from its official website (
balena.io/etcher). - Install Etcher as you would any other application for your operating system.
- Once installed, launch the application.
- Download Etcher from its official website (
Writing the Ubuntu Image to Your USB Drive
This is the most critical step. Ensure you select the correct USB drive to avoid accidentally erasing data from another drive.
- Using Rufus (Windows):
- Plug in your USB drive.
- In Rufus, under “Device,” select your target USB drive from the dropdown menu. DOUBLE-CHECK this is the correct drive.
- Click “SELECT” next to “Boot selection” and browse to locate the Ubuntu
.isofile you downloaded. - Keep “Partition scheme” as “MBR” and “Target system” as “BIOS or UEFI.”
- For “Persistent partition size,” you can increase this slider if you want to save changes to your USB drive. A good starting point is 4GB or more, but remember this reduces the available space for a live session. If you don’t need persistence, leave it at 0.
- You can change the “Volume label” to something like “Ubuntu Live USB” for easier identification.
- Click “START.” Rufus might warn you about downloading additional files (like
syslinux), agree to this. - It will then warn you that all data on the USB drive will be destroyed. Confirm by clicking “OK.”
- Wait for the process to complete. This can take several minutes. Once done, Rufus will show “READY.” You can then close the application.
- Using Balena Etcher (Cross-Platform):
- Plug in your USB drive.
- In Etcher, click “Flash from file” and select your downloaded Ubuntu
.isofile. - Click “Select target” and choose your USB drive. DOUBLE-CHECK this is the correct drive. Etcher often tries to prevent you from selecting system drives, but caution is still advised.
- Click “Flash!”
- Etcher will write the image and then validate it. This process can take several minutes. Once complete, it will indicate success. You can then close the application.
Configuring Your PC to Boot from USB
Now that your bootable USB is ready, you need to tell your computer to boot from it instead of its internal hard drive.
- Restart your computer with the bootable Ubuntu USB drive still plugged in.
- Access BIOS/UEFI Settings: As your computer starts, repeatedly press the key designated for entering BIOS/UEFI setup. Common keys include F2, Del, F10, F12, or Esc. (If you miss it, restart and try again).
- Navigate to Boot Options: Once in the BIOS/UEFI menu, look for a “Boot,” “Boot Order,” “Boot Priority,” or similar section.
- Change Boot Order: Move your USB drive (it might be listed by its brand name, e.g., “Kingston DataTraveler,” or as “USB HDD”) to the top of the boot priority list. This tells your computer to try booting from the USB first.
- Save and Exit: Find the option to “Save Changes and Exit” (often F10). Your computer will restart.
Navigating the Ubuntu Live Environment
If all steps were followed correctly, your computer should now boot from the USB drive.
- Ubuntu GRUB Menu: You’ll likely see a GRUB boot menu with options like “Try Ubuntu without installing,” “Install Ubuntu,” and “OEM install.”
- “Try Ubuntu”: Select “Try Ubuntu without installing” (usually the default, just press Enter). This will load the full Ubuntu desktop environment from your USB drive into your computer’s RAM. You can now explore Ubuntu, browse the web, test applications, and even save files if you configured persistent storage.
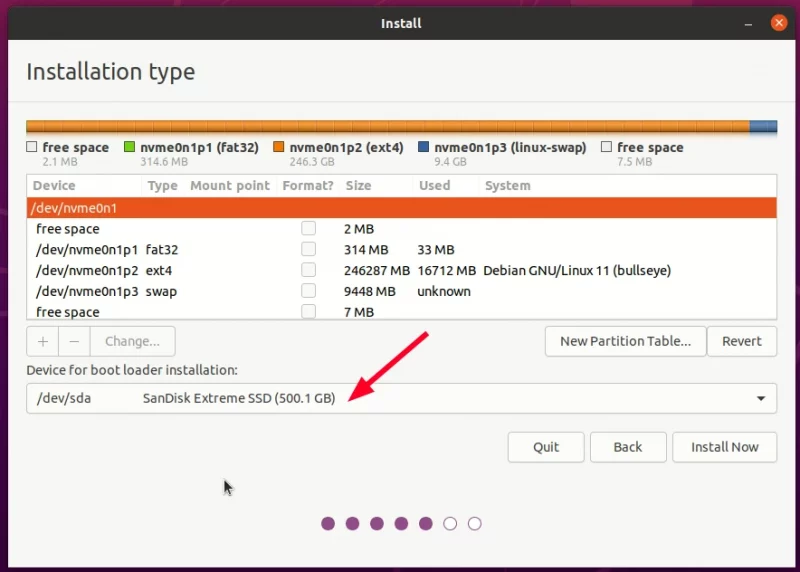
- “Install Ubuntu”: If you later decide to install Ubuntu permanently to your computer’s hard drive, you can select this option or launch the installer from within the live environment. For the purpose of a portable OS, “Try Ubuntu” is your primary mode of operation.
Enhancing Your Portable Ubuntu Experience: Persistence and Beyond
While a basic live USB is fantastic for testing, adding persistent storage transforms it into a truly personal and productive portable operating system.
What is Persistent Storage and Why You Need It
By default, a live Ubuntu USB operates in a “stateless” mode: any changes you make, files you create, or software you install are lost as soon as you reboot. Persistent storage addresses this limitation.
- How it Works: When you enable persistent storage during the USB creation process (as offered by tools like Rufus or UNetbootin), a special file or partition is created on your USB drive. This area acts like a mini-hard drive, storing your configurations, saved documents, browser history, and even newly installed applications.
- Why It’s Essential: Persistence turns your generic live USB into a personalized, consistent workspace. It means you don’t have to reconfigure Wi-Fi, reinstall your favorite browser extensions, or download your work documents every time you boot. This significantly boosts productivity and convenience, making your portable Ubuntu much more practical for regular use, a clear benefit for “Tech” users prioritizing efficiency.
Implementing Persistence During USB Creation
As noted earlier, tools like Rufus offer a straightforward slider to allocate space for persistent storage.
- During Rufus Setup: When selecting your ISO and USB drive, look for the “Persistent partition size” slider. Drag it to allocate a desired amount of space (e.g., 4GB, 8GB, or more). The more space you allocate, the more changes you can save.
- Limitations: Note that persistence primarily works for saving user data and some system changes. Major system upgrades or kernel updates might sometimes not persist perfectly and might require a fresh recreation of the USB. However, for everyday use, it’s highly effective. Etcher currently does not natively support creating persistent storage, making Rufus or UNetbootin preferable if this feature is a priority.
Exploring Ubuntu’s Potential: From Productivity to Digital Security
With your portable Ubuntu drive ready, the possibilities are vast.
- Productivity Suite: Ubuntu comes with LibreOffice, a free and powerful office suite compatible with Microsoft Office formats. You can install other productivity tools like Notion, Visual Studio Code, or GIMP for graphic design.
- Web Development & Coding: Ubuntu is a developer-friendly OS. You can set up development environments for Python, Node.js, Java, and more, all from your portable drive. This is an excellent way to practice coding skills or work on side projects without affecting your main system, potentially leading to online income or career advancement.
- Digital Security & Privacy: Leverage Ubuntu’s robust security features. Use privacy-focused browsers like Firefox with enhanced tracking protection, utilize VPNs, and explore tools for data encryption. The live environment itself is inherently more secure for sensitive tasks than an unknown public computer, reinforcing good digital security practices.
- Educational Tool: For students or aspiring IT professionals, a portable Ubuntu provides a safe environment to learn about Linux commands, file systems, and system administration, enhancing practical tech skills that are valuable for personal branding and career growth.
Troubleshooting Common Roadblocks
Even with careful preparation, issues can arise. Here are some common problems and solutions:
- USB Not Booting:
- Check BIOS/UEFI settings: Reconfirm that your USB drive is the top boot priority.
- Secure Boot/CSM: In some UEFI systems, “Secure Boot” might prevent Linux from booting. Try disabling Secure Boot in your BIOS/UEFI settings. Also, ensure “CSM” (Compatibility Support Module) is enabled if your system is older or you used an MBR partition scheme.
- Another USB Port: Try plugging the USB into a different port (especially a USB 2.0 port if you’re using a 3.0 drive, as some older BIOS/UEFI might have compatibility issues).
- Re-create USB: If all else fails, the USB creation might have been corrupted. Try writing the ISO to the USB again, or even try a different USB drive or a different USB creation tool.
- Slow Performance:
- USB Speed: If you’re using a USB 2.0 drive, performance will inherently be slower. A USB 3.0/3.1 drive is crucial for a responsive experience.
- Host Computer Resources: The host computer’s RAM and CPU still influence performance. A machine with limited RAM will struggle more.
- Persistence Not Working:
- Tool Support: Ensure the tool you used (e.g., Rufus, UNetbootin) explicitly supports persistence and that you allocated space for it. Etcher does not.
- Space Allocation: Check if you allocated enough space for persistence. If it’s too small, it might fill up quickly.
- Major Updates: As mentioned, sometimes major system updates from a persistent drive can cause issues. For significant changes, a fresh recreation might be needed.
The Broader Impact: Ubuntu, Open Source, and Your Digital Journey
Beyond the immediate technical steps, understanding how Ubuntu and the open-source philosophy fit into the wider digital landscape offers profound insights into technology trends, financial wisdom, and personal growth.
The Cost-Effectiveness of Open Source for Personal and Business Finance
Ubuntu is completely free to download, use, and distribute. This inherent cost-effectiveness is a major advantage, especially for individuals, startups, or small businesses operating on tight budgets.
- Zero Software Licensing Costs: Unlike proprietary operating systems and software suites that can cost hundreds or thousands of dollars, Ubuntu and its vast ecosystem of open-source applications (LibreOffice, GIMP, Firefox, VLC, etc.) come at no financial cost. This frees up capital for other investments or reduces operational overhead.
- Extended Hardware Lifespan: Linux distributions like Ubuntu are often less resource-intensive than modern Windows versions, allowing older hardware to run efficiently. This means you can postpone costly hardware upgrades, saving money in the long run.
- Community Support: The vibrant open-source community provides extensive free support through forums, wikis, and online guides, reducing the need for paid technical assistance.
Embracing Ubuntu and open source is a fiscally smart “Money” decision, demonstrating how technology can be leveraged to optimize financial resources.
Personal Branding and Tech Proficiency: Leveraging Linux Skills
In today’s competitive job market, showcasing diverse technical skills can significantly boost your personal brand. Proficiency in Linux, particularly Ubuntu, is a highly valued asset.
- Versatility: Demonstrating comfort with a non-Windows or non-macOS environment indicates adaptability and a broader understanding of computing principles.
- Problem-Solving: The process of setting up and troubleshooting a Linux system cultivates strong problem-solving skills, which are transferable to many professional roles.
- Developer-Friendly: Linux is the backbone of most web servers, cloud infrastructure, and many development tools. Familiarity with it is almost a prerequisite for roles in software development, cybersecurity, data science, and DevOps.
- Curiosity and Initiative: Learning Ubuntu signifies intellectual curiosity and initiative – qualities highly sought after by employers.
By mastering skills like installing Ubuntu on a USB, you are not just learning a technical procedure; you are investing in your “Brand” as a capable, adaptable, and forward-thinking tech professional.

Digital Security and Privacy: A Core Ubuntu Advantage
Ubuntu, like other Linux distributions, has a strong reputation for security and privacy, making it an excellent choice for users concerned about their digital footprint.
- Open Source Transparency: The source code for Ubuntu is publicly available for scrutiny. This transparency allows a global community of developers to identify and fix vulnerabilities quickly, making it generally more secure than closed-source alternatives.
- Fewer Malware Targets: While no OS is completely immune, the vast majority of malware targets Windows, simply due to its larger market share. This inherent characteristic makes Linux a less frequent target for common viruses and ransomware.
- Granular Control: Ubuntu provides users with extensive control over system permissions, privacy settings, and data. This allows for a more personalized and robust defense against unauthorized access and tracking.
- Live Session Privacy: As discussed, booting from a live USB ensures that no personal data or browsing history is left on the host computer, offering an unparalleled level of privacy for sensitive tasks or when using shared machines.
In a world increasingly concerned with data breaches and digital surveillance, choosing Ubuntu for critical tasks, especially via a portable USB, is a proactive step towards enhancing your “Digital Security.”
In conclusion, installing Ubuntu on a USB drive is more than a simple technical task; it’s an empowering act that grants you flexibility, security, and a deeper understanding of the computing world. Whether for convenience, privacy, troubleshooting, or skill development, your portable Ubuntu system will prove to be an invaluable asset in your digital journey, aligning perfectly with the innovative spirit of technology, smart financial management, and a strong personal brand.
aViewFromTheCave is a participant in the Amazon Services LLC Associates Program, an affiliate advertising program designed to provide a means for sites to earn advertising fees by advertising and linking to Amazon.com. Amazon, the Amazon logo, AmazonSupply, and the AmazonSupply logo are trademarks of Amazon.com, Inc. or its affiliates. As an Amazon Associate we earn affiliate commissions from qualifying purchases.