In the vibrant world of PC gaming, modification (modding) stands as a testament to player creativity and the desire to push boundaries. Mods can transform games, adding new content, improving graphics, or even entirely altering gameplay mechanics. Among these, “broken script mods” occupy a unique and often misunderstood niche. These aren’t necessarily malicious or permanently flawed; rather, they are typically experimental, unoptimized, or conflict-prone scripts that promise incredible enhancements but come with inherent instability. Installing such a mod requires a blend of technical acumen, careful preparation, and a healthy dose of caution.
This guide will walk you through the intricate process of installing a “broken script mod,” equipping you with the knowledge to navigate potential pitfalls, troubleshoot common issues, and ultimately enhance your gaming experience safely. We’ll delve into the necessary precautions, step-by-step installation methods, and essential troubleshooting techniques, ensuring you can unlock these advanced functionalities without inadvertently corrupting your game files or system. Whether you’re a seasoned modder looking to tackle a particularly challenging script or a curious newcomer venturing into advanced modifications, understanding the nuances of these “broken” scripts is paramount.
Understanding the “Broken Script Mod” Phenomenon
Before diving into the installation process, it’s crucial to grasp what a “broken script mod” truly entails and why players are often compelled to seek them out despite their inherent instability. This understanding forms the foundation for responsible and successful modding, aligning with the “Tech” focus of our platform on software stability and user experience.
What Exactly Makes a Script “Broken”?
The term “broken script mod” can be misleading. It rarely implies a completely defunct or malicious piece of software. Instead, it typically refers to a mod that exhibits one or more of the following characteristics:
- Experimental or Incomplete: Many “broken” scripts are early versions of ambitious projects. Developers might release them to gather feedback or simply to share their work in progress. They might contain bugs, unhandled exceptions, or unfinished features that can cause crashes or unexpected behavior.
- Compatibility Issues: A script might be perfectly functional on its own but “broken” when introduced into a complex modded environment. Conflicts with other mods, differing game versions, or specific hardware/software configurations can lead to script errors, infinite loading screens, or game instability. This is a common challenge in the “Tech” domain, where different software components interact.
- Resource Intensive: Some scripts, particularly those adding complex new systems or visual effects, might be poorly optimized, leading to significant performance drops, stuttering, or even system crashes, especially on less powerful machines. This relates directly to the “Tech” aspect of system performance and optimization.
- Unofficial or Unsupported: “Broken” scripts often come from smaller, independent developers or are abandonware. This means there might be limited or no ongoing support, making troubleshooting more challenging and updates infrequent.
- Requires Specific Workarounds: To function, a “broken” script mod might demand unusual installation steps, specific load orders, or manual editing of game files that fall outside typical modding conventions. This complexity is what often deters casual modders.
The allure lies in the unique experiences these mods offer. They might introduce features no official DLC ever would, fix long-standing game issues, or provide completely novel gameplay loops. For many, the challenge of getting a “broken” script to work is part of the fun, a puzzle to be solved that ultimately enhances their personal gaming journey.
The Double-Edged Sword: Risks vs. Rewards
Venturing into the territory of “broken script mods” is akin to exploring uncharted digital terrain. The rewards can be substantial, offering unparalleled customization and depth to your favorite games. However, these benefits are invariably accompanied by a spectrum of risks that demand careful consideration. From a “Tech” perspective, we’re talking about software stability and digital security; from a “Money” standpoint, we’re protecting your investment in the game itself.
Potential Rewards:
- Unprecedented Customization: Broken scripts often push the boundaries of what’s possible, introducing unique mechanics, lore, or graphical enhancements that simply aren’t available elsewhere.
- Problem Solving & Learning: Successfully installing and troubleshooting a complex mod can be a rewarding intellectual exercise, deepening your understanding of game engines, modding tools, and general technical problem-solving. This aligns perfectly with the “Tech” pillar of learning and productivity.
- Community Contribution: Sharing your experiences and solutions for “broken” mods can be a valuable contribution to the modding community, helping others overcome similar hurdles. This touches upon the “Brand” aspect of building a positive reputation within a niche community.
- Extended Game Longevity: Breathing new life into an older game with fresh content can significantly extend its replayability, offering greater value for your initial investment in the game (a subtle “Money” connection).
Inherent Risks:
- Game Instability & Crashes: The most immediate and common risk. Poorly written or conflicting scripts can cause frequent game crashes, freezing, or even render the game unplayable.
- Save File Corruption: A particularly dangerous risk. Malfunctioning scripts can permanently corrupt your save files, leading to hours of lost progress. This is where the “Money” aspect subtly surfaces – losing progress can mean having to restart, diminishing the value of time invested.
- Performance Degradation: Unoptimized scripts can severely impact frame rates, introduce stuttering, or cause memory leaks, making the game less enjoyable.
- Digital Security Concerns: While less common in reputable modding communities, downloading mods from untrusted sources always carries the risk of malware, viruses, or spyware. This is a critical “Tech” and “Digital Security” concern.
- Time Sink: Troubleshooting “broken” mods can consume significant time and effort, potentially outweighing the enjoyment derived from the mod itself. This directly impacts “Productivity,” a core “Tech” focus.
Navigating this risk-reward landscape requires diligence. The following sections will guide you in minimizing these risks while maximizing your chances of a successful and rewarding modding experience.
Essential Pre-Installation Rituals: Preparing for the Unpredictable
Before you even think about downloading that intriguing “broken script mod,” a series of preparatory steps are absolutely vital. These rituals are not mere suggestions; they are non-negotiable safeguards designed to protect your game, your data, and your sanity. Think of them as your pre-flight checklist for a potentially turbulent digital journey, emphasizing “Digital Security” and “Productivity” from the “Tech” perspective, and indirectly “Personal Finance” by protecting your existing game investment.
The Golden Rule: Back Up Your Game Files
This is perhaps the single most important step in installing any mod, let alone a “broken script mod.” Imagine spending hundreds of hours in your favorite RPG, only for an experimental script to corrupt your save files or render your game unlaunchable. Without a backup, you could face hours of re-downloading, re-installing, and potentially losing all your progress.
What to Back Up:
- Game Installation Directory: Copy the entire game folder to a separate location (e.g., another drive, an external HDD). This creates a clean, working version of your game that you can revert to if anything goes wrong.
- Save Game Files: Locate your game’s save folder (often in “Documents,” “AppData,” or within the game’s installation directory). Copy all save files. These are irreplaceable.
- Configuration Files: Back up any
.inior.jsonconfiguration files, especially if you’ve made manual tweaks.
How to Back Up:
- Manual Copy-Paste: The simplest method. Navigate to the directories, select all files, and copy them to a designated “Game Backups” folder.
- Archiving Software (e.g., 7-Zip, WinRAR): Compress the game folder into a
.zipor.7zarchive. This saves space and keeps everything neatly bundled. - Cloud Storage: For smaller saves and config files, cloud services like Google Drive or Dropbox can be convenient.
- Version Control (Advanced): For highly technical users, using a local Git repository for config files can provide granular control over changes.
This backup strategy is your ultimate safety net, ensuring that even if the “broken” script lives up to its name, your primary game installation and hard-earned progress remain secure. It’s a direct application of “Digital Security” principles to your gaming assets, protecting your investment (“Money”).
Gathering Your Arsenal: Required Tools and Software
Successful modding, especially with complex scripts, often necessitates specialized tools. Having these at the ready streamlines the process and provides capabilities essential for managing and troubleshooting modifications. This falls squarely under the “Tech” umbrella, focusing on software tools and productivity.
- Archive Extractor (7-Zip, WinRAR): Most mods are distributed in compressed archives (
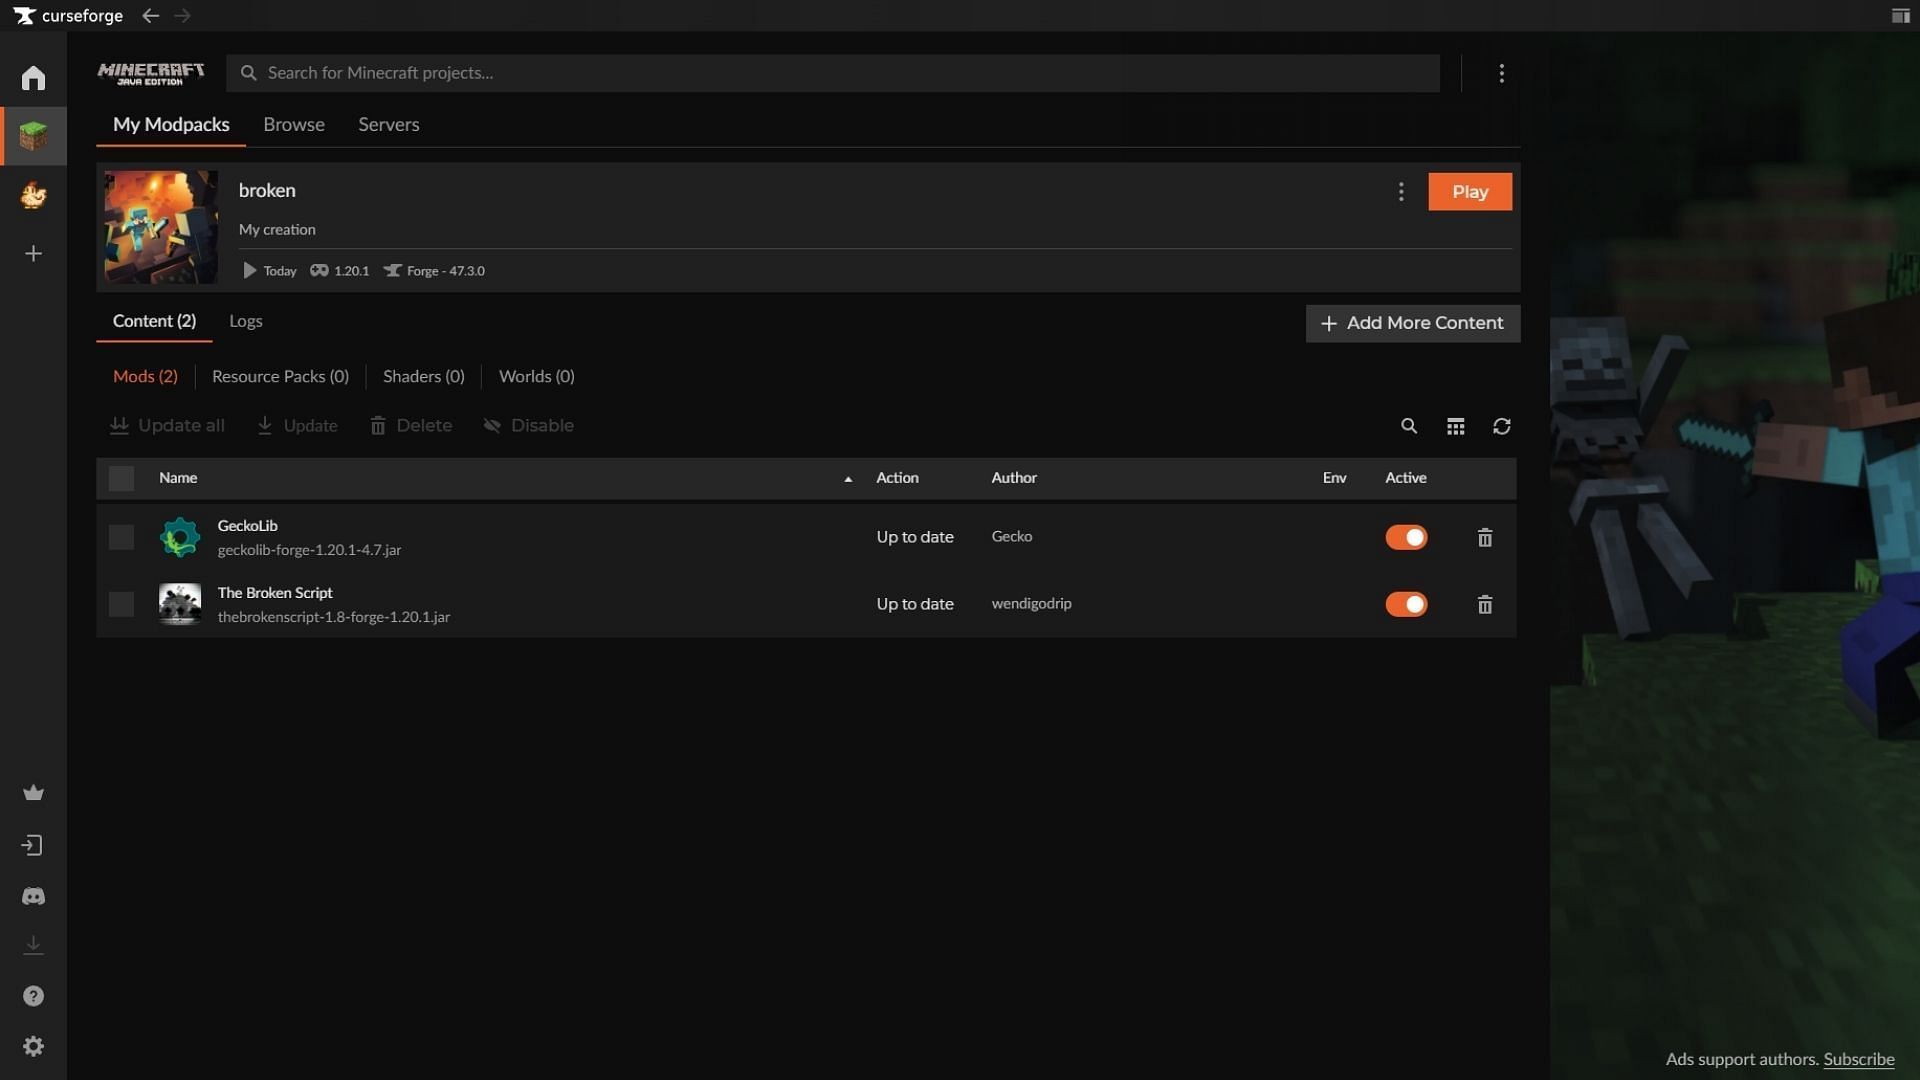
.zip,.rar,.7z). You’ll need an extractor to unpack them. 7-Zip is free, open-source, and highly recommended. - Mod Manager (Nexus Mod Manager, Mod Organizer 2, Vortex): For games with extensive modding communities (e.g., Skyrim, Fallout, Cyberpunk 2077), a mod manager is indispensable.
- Benefits: Automates installation, manages load order, identifies conflicts, allows easy uninstallation, and often creates virtual installations, leaving your game’s core files untouched. For “broken” scripts, this isolation can be a lifesaver.
- Recommendation: Mod Organizer 2 (MO2) is highly regarded for its virtual file system, which keeps mods separate from your game directory, making it safer to experiment. Vortex, from Nexus Mods, is also user-friendly.
- Script Extender (SKSE for Skyrim, F4SE for Fallout 4): Many advanced mods, especially those with complex scripts, require a script extender to function. This tool expands the game’s scripting capabilities, allowing modders to do things the base game engine doesn’t natively support. Ensure you download the correct version for your game and its specific patch.
- Text Editor (Notepad++, VS Code): You might need to manually edit
.inifiles,.jsonfiles, or even simple script files to configure the mod or resolve conflicts. Notepad++ or Visual Studio Code are far superior to Windows Notepad, offering syntax highlighting and other developer-friendly features. - Dependency Checkers/Cleaners: Some games have tools (e.g., LOOT for Bethesda games) that help sort load orders and identify missing dependencies or dirty edits, crucial for game stability.
Investing time in understanding and setting up these tools upfront will save you countless hours of frustration later. It’s a key aspect of maximizing “Productivity” within the “Tech” framework.
System & Game Version Compatibility Check
Before proceeding, verify that your system meets any specific requirements for the mod and that your game version is compatible.
- Game Version: Most mods are developed for specific game patches. An outdated or too-new game version can render a mod incompatible, leading to crashes or non-functionality. Always check the mod description for required game versions.
- Script Extender Version: If a script extender is required, ensure you have the precise version that matches your game’s current patch. A mismatch here is a common source of “broken” behavior.
- Hardware Requirements: While rare for simple script mods, complex overhauls might demand more CPU, GPU, or RAM. Ensure your system can handle the increased load to avoid performance issues.
- Conflicting Mods: If you have other mods installed, specifically identify any that might modify the same game aspects as your new “broken script mod.” Overlapping changes are a primary cause of conflicts. Use your mod manager’s conflict detection tools if available.
This proactive compatibility check is a preventative measure, minimizing the chances of encountering immediate issues post-installation and reinforcing good “Tech” practices.
The Installation Odyssey: A Step-by-Step Guide
With your preparations complete, you are now ready to embark on the actual installation process. This section provides a detailed walkthrough, covering both manual and mod manager installations, tailored to the complexities often associated with “broken script mods.” This is the core “Tech” tutorial aspect, emphasizing precision and methodical execution.
Sourcing the “Broken” Mod Responsibly
The first step in any mod installation is acquiring the mod itself. However, with “broken script mods,” this step carries an added layer of importance due to potential instability and security risks. Your source directly impacts “Digital Security” and touches upon “Brand” in terms of community reputation.
- Prioritize Reputable Sources: Always download mods from well-established modding websites such as Nexus Mods, Mod DB, or the official forums of the game developers (if they host mods). These platforms usually have moderation, user reviews, and virus scanning in place. Avoid obscure websites or direct downloads from untrusted forum posts without verification.
- Read the Mod Description Thoroughly: “Broken script mods” often come with detailed descriptions outlining known issues, specific installation instructions, troubleshooting tips, and required dependencies. Do not skip this step. It will often reveal the “broken” aspects and how to mitigate them.
- Check User Comments and Bug Reports: Before downloading, scroll through the comments section and bug reports. This is invaluable for gauging the mod’s actual stability, common problems encountered by other users, and potential workarounds. A mod with many unresolved critical bugs might be best avoided for now.
- Scan Downloaded Files: Even from reputable sources, it’s a good practice to run a quick virus scan on the downloaded mod archive using your antivirus software, especially if the mod comes from a less common developer or seems highly experimental. This is a basic “Digital Security” measure.
Once downloaded, place the mod archive in a dedicated “Mods to Install” folder, separate from your game directory, to keep your workspace organized.
Deconstructing the Package: Manual Installation
Manual installation is often necessary for “broken script mods” that lack a mod manager installer, or when precise control over file placement is required to resolve conflicts. This method demands meticulous attention to detail.
- Extract the Mod Archive: Using your archive extractor (e.g., 7-Zip), extract the contents of the mod archive to a temporary folder on your desktop. Do not extract directly into your game folder yet.
- Examine the Extracted Files: Look for a
Readme.txtorInstall.txtfile within the extracted folder. This document is critical and will contain specific instructions from the mod author. Pay close attention to file paths mentioned.- Common structures include
Datafolders, which often contain subfolders likeScripts,Meshes,Textures, etc. - Standalone
.dllor.exefiles might also be present.
- Common structures include
- Identify the Game’s Root Directory: This is where the main game executable (e.g.,
game.exe) is located. - Copy Files into Place: Carefully follow the
Readme.txtinstructions. Generally, you will copy the extracted folders (likeData) into your game’s root directory. The operating system will often prompt you to merge folders or overwrite existing files.- Important: If prompted to overwrite files, proceed with caution. Only overwrite if the mod author explicitly instructs you to, or if you are confident the new files are intended to replace older ones. If unsure, consider backing up the specific files that would be overwritten before allowing the overwrite.
- Special Cases for Script Extender Mods:
- If the mod includes
.dllfiles that require a script extender, these often go into a specific subfolder within the game’sDatadirectory (e.g.,Data/SKSE/Pluginsfor Skyrim). - Ensure the script extender itself is correctly installed and configured before installing any mods that depend on it.
- If the mod includes
- Edit Configuration Files (If Required): Some “broken” scripts might require manual edits to
.inifiles in your game directory or your “Documents” folder. Use Notepad++ for this. Make a backup of any.inifile before editing it.
This manual process, while tedious, grants you granular control, which can be crucial for coaxing a “broken” script into submission.
Streamlining with Mod Managers (When Applicable)
For games with robust mod managers, using one is generally the preferred and safer method, even for “broken” scripts. Mod managers simplify installation, manage conflicts, and make uninstallation much cleaner.
- Launch Your Mod Manager: Open your chosen mod manager (e.g., Mod Organizer 2, Vortex).
- Add the Mod Archive: Most mod managers have an “Add Mod” or “Install from Archive” option. Point it to the
.zip,.rar, or.7zfile you downloaded. - Install the Mod: The manager will typically install the mod, placing its files into a virtual directory or the game’s data folder.
- Manage Load Order & Conflicts:
- Load Order: Crucial for stability. Ensure your “broken script mod” is placed correctly in the load order, especially relative to its dependencies and any mods it might conflict with. Mod managers often have automatic sorting features (e.g., LOOT integration) that provide a good starting point.
- Conflict Resolution: Mod managers will highlight potential conflicts. Carefully examine these. For “broken” scripts, you might need to manually set rules to ensure the “broken” mod’s files take precedence (or are overwritten by other mods) as per the author’s instructions.
- Enable the Mod: After installation, ensure the mod is activated within the manager.
- Deploy/Run Game Through Manager: Always launch your game through the mod manager (or its integrated script extender launcher) to ensure all mods are properly loaded.
While mod managers automate much of the process, it’s still vital to consult the mod’s documentation for any special instructions or post-installation steps unique to a “broken” script.
The Moment of Truth: Post-Installation Verification
You’ve installed the mod. Now comes the critical step of confirming it works as intended – or at least doesn’t immediately crash your game.
- Launch the Game: Use the method prescribed by your mod setup (e.g., through your mod manager, via the script extender executable).
- Load a Test Save: It’s often wise to load an older, non-critical save file first, or even start a new game briefly, to minimize the risk to your main progress if things go wrong.
- In-Game Verification:
- Check for Mod Features: Does the mod’s new menu appear? Are its items present? Do its effects manifest?
- Monitor Performance: Are there any immediate frame rate drops, stutters, or strange visual artifacts?
- Console Commands: Some script mods have console commands for testing or configuration. Consult the mod’s documentation.
- Quick Save and Reload: Perform a quick save and then immediately reload it. This can sometimes expose save corruption issues early on.
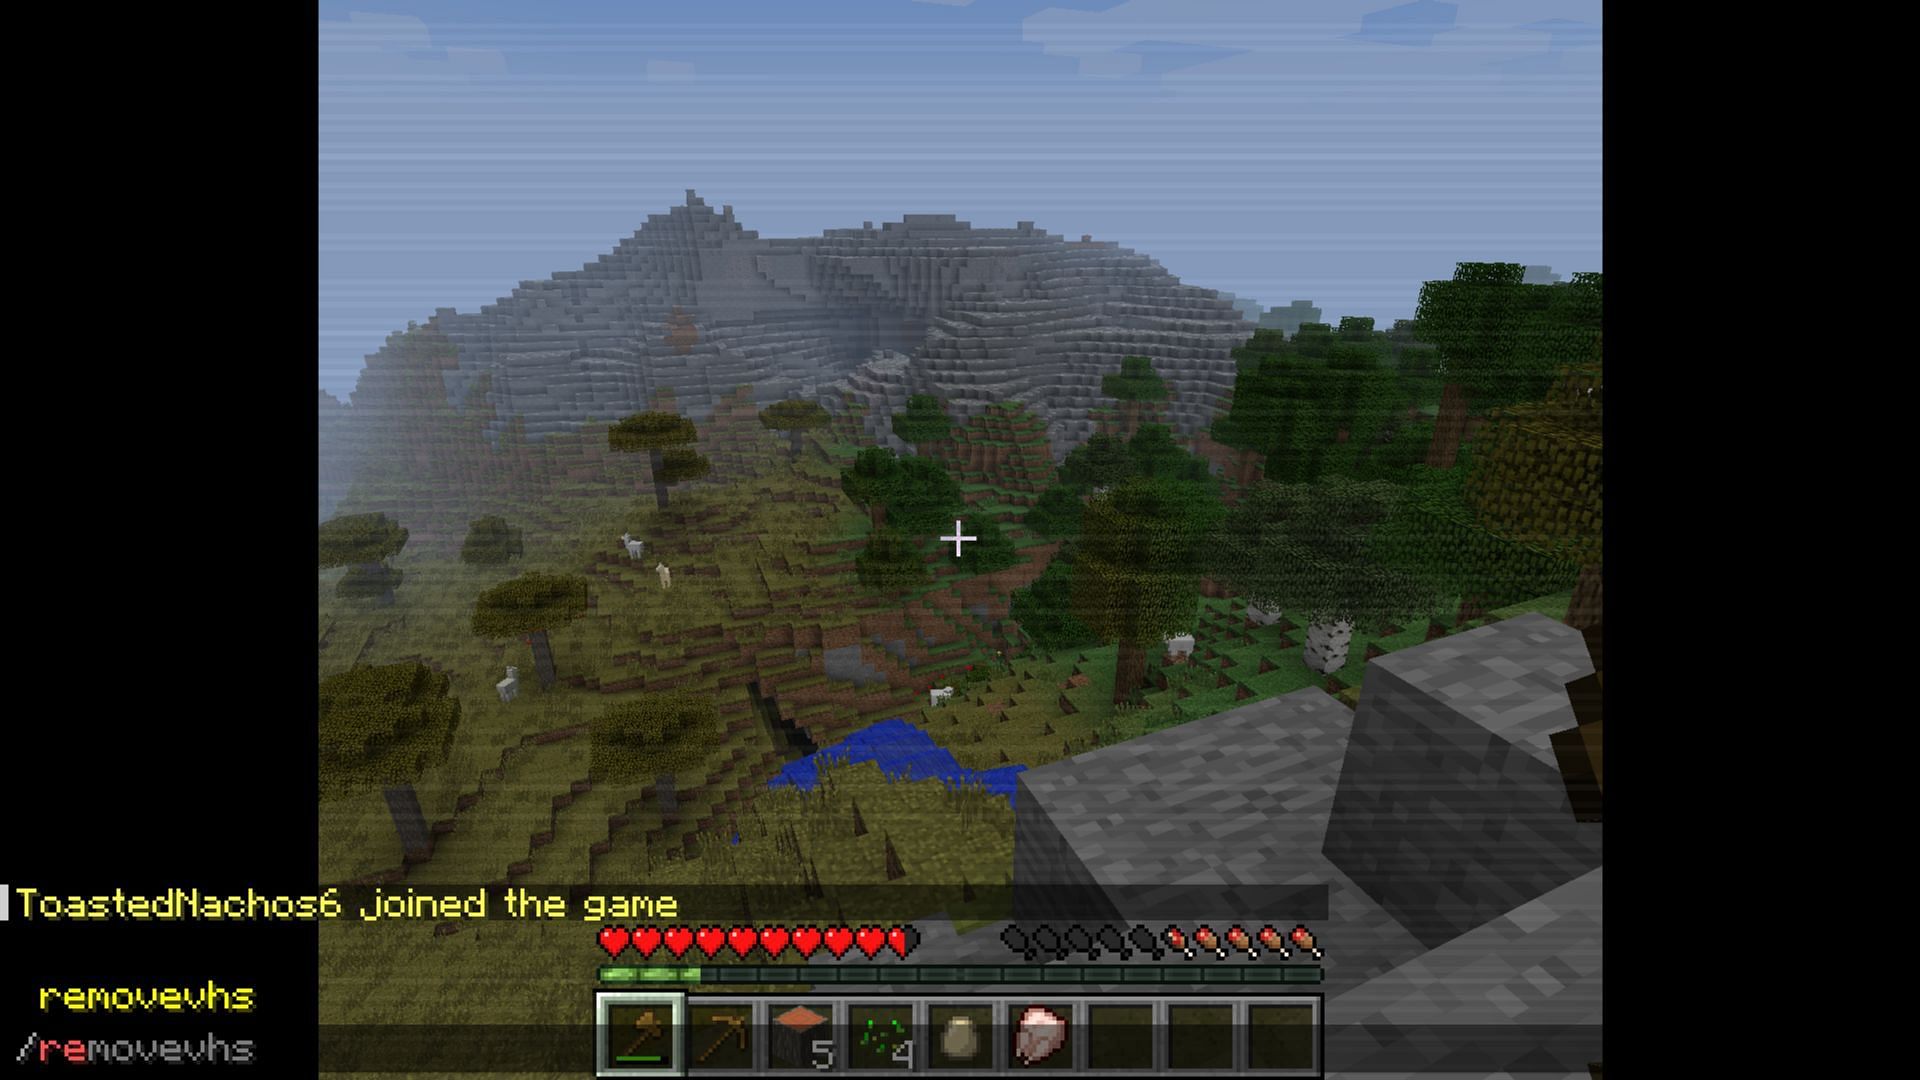
- Play for a Short Period: Don’t just verify and immediately dive into a long session. Play for 15-30 minutes to ensure stability over time. Engage in activities the mod is supposed to affect.
If your game is stable and the mod appears functional, congratulations! You’ve successfully navigated the initial hurdles. If not, prepare for the next phase: troubleshooting.
Navigating the Aftermath: Troubleshooting and Beyond
Even with meticulous preparation and careful installation, “broken script mods” often live up to their name, presenting challenges post-installation. This final section focuses on identifying and resolving issues, emphasizing “Tech” skills in problem-solving and leveraging “Brand” via community support. It also touches on best practices for long-term modding health.
Diagnosing the Glitches: Common Problems and Solutions
When a “broken script mod” acts up, a methodical approach to troubleshooting is your best friend. Resist the urge to panic or randomly uninstall mods.
-
Identify the Symptoms:
- Game Crashes to Desktop (CTD): Occurs suddenly, often without an error message.
- Infinite Loading Screens: The game never fully loads a save or new game.
- Script Errors (On-screen messages or console output): The game explicitly tells you a script has failed.
- Missing Features/Items: The mod is installed but its content isn’t appearing.
- Performance Drops: Severe frame rate loss, stuttering.
- Visual Glitches: Textures missing, objects flickering, incorrect lighting.
-
Check for Error Messages: If the game provides an error message, search for it online. Even cryptic codes can often point to specific issues or conflicting mods. Game logs (often in the game directory or “My Documents”) can also contain invaluable diagnostic information.
-
The “One Mod At A Time” Rule: If you’re installing multiple mods, never install them all at once, especially a “broken script mod.” Install one, verify, then move to the next. If an issue arises, you know exactly which mod caused it.
-
Common Fixes and Workarounds:
- Load Order Adjustments: Often the culprit for conflicts. Use your mod manager’s sorting tools (e.g., LOOT) and manually adjust if needed, ensuring dependencies are loaded before the dependent mod.
- Clean Installation of the Mod: If you suspect a corrupted download or installation, completely remove the mod and re-install it from scratch.
- Verify Game Files: Use your game launcher (Steam, Epic Games, GOG Galaxy) to verify the integrity of your game files. This can fix issues caused by corrupted vanilla files or accidentally overwritten ones.
- Disable Conflicting Mods: If another mod modifies the same game aspect, try temporarily disabling it to see if the “broken” script then functions.
- Check for Patches/Updates: The mod author might have released a fix or an updated version that addresses the issues you’re facing.
- Re-read the Mod Page: Sometimes, during the excitement of installation, crucial details (like required configuration edits) are missed.
- Roll Back to a Previous Save: If your current save is corrupted, revert to an older one from your backups.
- Consult the Mod Author’s Documentation: Many “broken” mods have specific troubleshooting sections.
This systematic approach minimizes wasted effort and helps pinpoint the exact source of the problem, a cornerstone of effective “Tech” support.
Embracing the Community: Where to Find Support
You don’t have to troubleshoot alone. The modding community is a vast and invaluable resource, aligning with the “Brand” aspect of community engagement and collective knowledge.
- Mod Page Comments Section: The first place to look. Other users might have already encountered and solved your exact problem. You might find detailed solutions or workarounds.
- Official Modding Forums: Websites like Nexus Mods, Mod DB, and official game forums often have dedicated sections for mod support. Post detailed descriptions of your problem, including error messages, steps taken, and your mod list.
- Discord Servers: Many mod authors and modding communities host Discord servers. These offer real-time help and a more interactive environment for troubleshooting.
- YouTube Tutorials: For particularly complex mods, video tutorials can offer visual guidance that text instructions might lack.
When seeking help, be polite, patient, and provide as much detail as possible. Remember, the people helping you are often volunteers. Contributing your own solutions once you’ve resolved an issue also strengthens the community.
Best Practices for Sustainable Modding
To ensure your gaming experience remains enhanced rather than constantly interrupted by crashes, adopt these best practices for long-term modding health:
- Maintain Regular Backups: Not just game files, but also your mod manager profiles and specific mod configurations.
- Keep Mods Organized: Use a mod manager. Categorize mods, and keep their archives downloaded for easy reinstallation.
- Understand Load Order: For games like Skyrim or Fallout, a stable load order is paramount. Invest time in learning how tools like LOOT function and how to manually fine-tune when necessary.
- Read Before You Install: Always, always read the mod description, requirements, and user comments.
- Don’t Overdo It: While tempting to install every cool mod, a smaller, carefully curated mod list is often more stable and enjoyable than a gigantic, conflict-ridden one.
- Stay Updated (Selectively): While keeping your game and script extenders updated is generally good, be cautious with mod updates. Always check the changelog, especially for “broken” scripts, as new updates can sometimes introduce new problems.
- Know When to Let Go: If a “broken script mod” consistently causes instability despite all your efforts, sometimes the best solution is to uninstall it. Not every mod is worth the headache.
By adhering to these principles, you not only improve your “Tech” proficiency in managing software but also subtly protect your “Money” investment by preserving your game’s integrity and extending its playability. You create a more positive “Brand” for yourself as a knowledgeable and responsible member of the modding community.
Conclusion
Installing a “broken script mod” is undeniably a challenging endeavor, but one that promises immense rewards for the dedicated gamer. It requires a blend of technical foresight, meticulous execution, and the patience to troubleshoot. By meticulously preparing your game environment, carefully following installation protocols, and leveraging the collective wisdom of the modding community, you transform what appears to be a flaw into an opportunity for advanced customization and a truly unique gaming experience.
Remember, the journey of modding is as much about learning and problem-solving as it is about playing. Approach each “broken” script with caution, curiosity, and the knowledge that you are equipped to navigate its complexities. Happy modding, and may your scripts run smoothly!
aViewFromTheCave is a participant in the Amazon Services LLC Associates Program, an affiliate advertising program designed to provide a means for sites to earn advertising fees by advertising and linking to Amazon.com. Amazon, the Amazon logo, AmazonSupply, and the AmazonSupply logo are trademarks of Amazon.com, Inc. or its affiliates. As an Amazon Associate we earn affiliate commissions from qualifying purchases.