
The MacBook, renowned for its elegant design, robust performance, and intuitive macOS operating system, is a powerful tool for creativity, productivity, and entertainment. However, its true potential is unlocked only when you equip it with the right software. Installing applications on a MacBook can seem daunting to newcomers, given the variety of methods available, from the tightly curated App Store to more advanced command-line tools. This comprehensive guide will demystify the process, walking you through each installation method, offering best practices, and ensuring your digital security, allowing you to confidently build a powerful, personalized tech ecosystem.
The Official Channels: App Store and Apple-Verified Software
Apple has engineered macOS with user safety and ease of use in mind, making its official channels the most straightforward and secure ways to acquire software. Understanding these methods is fundamental to any MacBook user.
Discovering and Installing via the Mac App Store
The Mac App Store is Apple’s primary digital distribution platform for macOS applications. It’s akin to a curated marketplace, offering a vast selection of software, from productivity suites and creative tools to games and utilities. For most users, it’s the first and often only place they’ll need to look for new applications.
Benefits of Using the Mac App Store:
- Security and Trust: Every app in the Mac App Store undergoes a rigorous review process by Apple. This ensures that apps meet Apple’s security, privacy, and performance standards, significantly reducing the risk of malware or harmful software. This aligns perfectly with digital security and helps maintain your personal brand by using reliable tools.
- Automatic Updates: Apps installed from the App Store are automatically updated in the background (or with a simple click), ensuring you always have the latest features, security patches, and bug fixes without manual intervention. This contributes to better productivity and a seamless user experience.
- Ease of Installation and Uninstallation: Installation is a one-click process, and uninstallation is as simple as dragging the app icon from your Applications folder to the Trash.
- Purchasing and Subscriptions: Integrated billing means all purchases and subscriptions are managed through your Apple ID, offering convenience and centralized financial tracking.
How to Install from the Mac App Store:
- Open the App Store: Click the blue App Store icon in your Dock or search for “App Store” using Spotlight (Cmd + Space).
- Browse or Search: Use the search bar in the top-left corner to find specific applications, or browse categories, curated collections, and editor’s picks on the main page.
- Select an App: Click on an app’s icon to view its product page, which includes screenshots, descriptions, reviews, system requirements, and pricing information.
- Install the App:
- For free apps, click the “Get” button, which will then change to “Install.” Click “Install.”
- For paid apps, the button will display the price. Click it, then click “Buy.”
- Authenticate: You may be prompted to enter your Apple ID password, use Touch ID, or Face ID to confirm the installation or purchase.
- Download and Install: The app will begin downloading and installing automatically. A progress indicator will appear in the App Store and on the app’s icon in your Launchpad. Once complete, the app will be available in your Applications folder and Launchpad.
Direct Downloads from Developer Websites (and Gatekeeper)
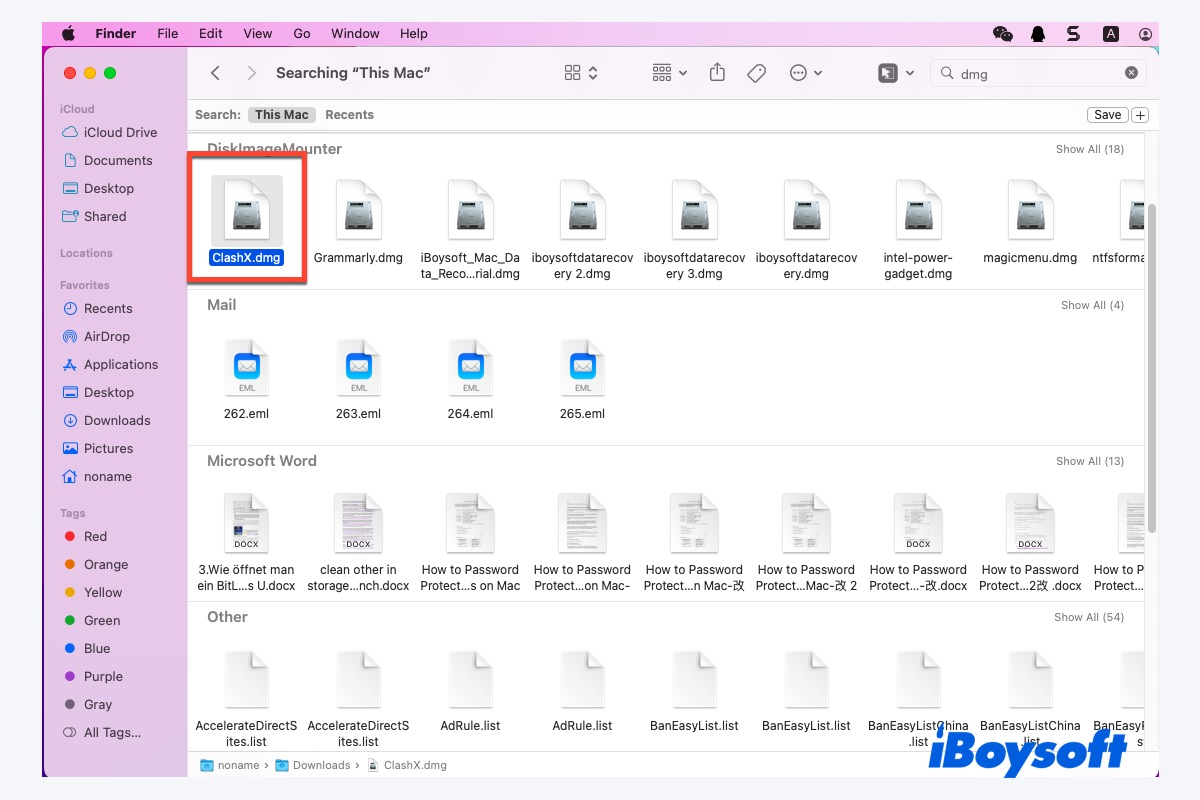
While the Mac App Store is excellent, many professional-grade applications and utilities are not distributed through it. Developers often prefer to offer their software directly from their websites, providing more control over distribution, updates, and monetization. This is where .dmg (Disk Image) files come into play, the most common format for self-contained application bundles on macOS.
Understanding .dmg Files and Gatekeeper:
A .dmg file is essentially a virtual disk drive. When you open it, macOS mounts it as if it were a physical drive, revealing the application bundle inside. Installing software this way is straightforward, but it introduces Apple’s security feature, Gatekeeper.
Gatekeeper’s role is to ensure that only trusted software runs on your Mac. By default, it allows apps downloaded from the App Store and “identified developers” (developers who have registered with Apple and digitally signed their applications). If you try to open an app from an “unidentified developer,” Gatekeeper will display a warning. This is a crucial digital security layer that protects users from potentially malicious software downloaded from unknown sources.
How to Install using a .dmg File:
- Download the
.dmg: Visit the official developer’s website and download the.dmgfile. Always ensure you are downloading from a legitimate source to protect your digital security. - Open the
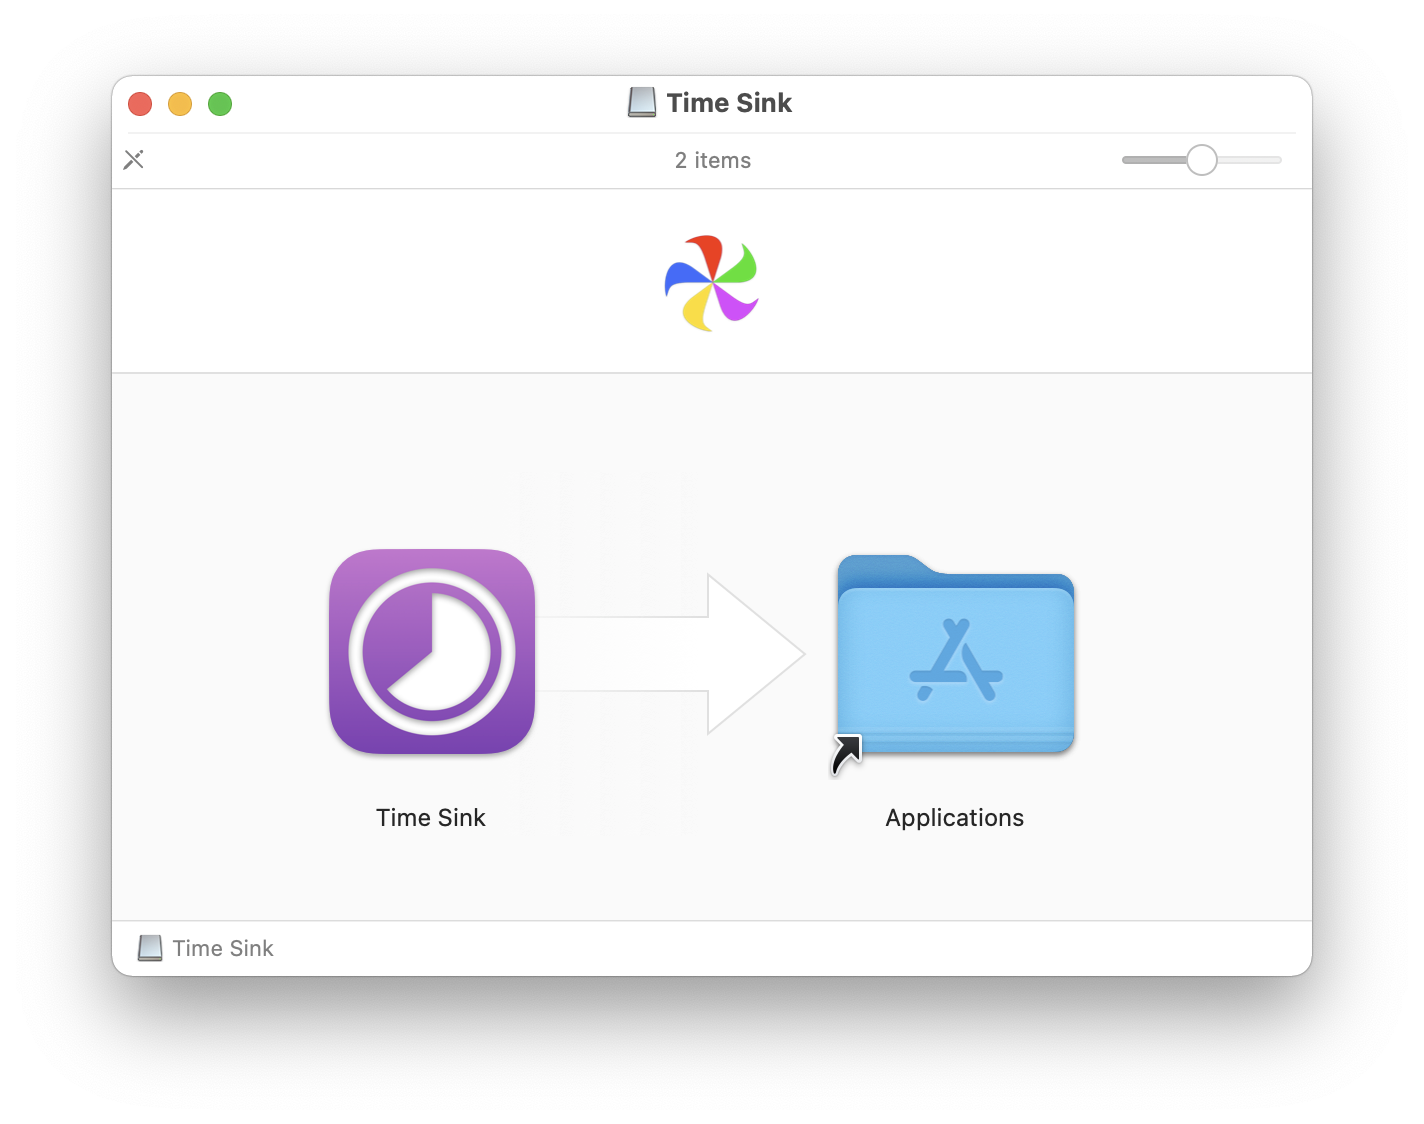
.dmgFile: Locate the downloaded.dmgfile (usually in your Downloads folder) and double-click it. macOS will mount it as a virtual drive, and a new Finder window will typically open, displaying the application icon and often an “Applications” folder alias. - Drag to Applications Folder: Drag the application icon (e.g., “Google Chrome.app”) from the
.dmgwindow to the “Applications” folder alias shown in the same window. This copies the application to your Mac’s Applications folder. - Eject the
.dmg: Once the copy is complete, drag the virtual disk icon (named after the.dmgfile) from your Desktop or Finder sidebar to the Trash, or right-click it and select “Eject.” This unmounts the virtual disk. You can then delete the original.dmgfile from your Downloads folder if you wish. - Launch the Application (and Gatekeeper Bypass if needed):
- Find the newly installed app in your Applications folder or Launchpad and double-click to open it.
- Gatekeeper Warning: If it’s the first time you’re opening an app not from the App Store, you might see a warning stating, ” ‘[App Name]’ cannot be opened because the developer cannot be verified.”
- To bypass (for trusted apps): Go to
System Settings>Privacy & Security. Scroll down, and you’ll see a section under “Security” mentioning the blocked app with an “Open Anyway” button. Click it, and then confirm in the subsequent dialog. This action is recorded, and you won’t be prompted for that specific app again. Only do this if you are absolutely certain the software is legitimate and from a trusted developer.
Beyond the App Store: Package Installers and Third-Party Managers
For more complex software, system-level tools, or for power users and developers, alternative installation methods offer greater flexibility and control.
Navigating .pkg Files for Complex Installations
While .dmg files are for self-contained applications, .pkg (Package) files are used for more intricate installations. These are essentially installer wizards, much like .exe files on Windows, designed for software that needs to install components in various system directories, modify system settings, or include multiple applications within one bundle. Examples include Microsoft Office, Adobe Creative Cloud desktop apps, or drivers for peripherals.
When .pkg Files are Used:
- System-Level Components: When an application requires installing files outside the standard Applications folder (e.g., system extensions, frameworks, or command-line tools).
- Bundled Software: To install multiple applications or components as part of a single suite.
- Driver Installations: For hardware drivers that need to integrate deeply with macOS.
How to Install using a .pkg File:
- Download the
.pkg: Obtain the.pkgfile from the official developer’s website. Again, verify the source carefully. - Open the
.pkgFile: Double-click the.pkgfile. This will launch the macOS Installer application. - Follow the Installer Wizard: The installer will guide you through a series of steps:
- Introduction: Provides information about the software. Click “Continue.”
- License Agreement: Review the software license. You must “Agree” to proceed.
- Destination Select: Choose where the software will be installed (usually your main hard drive).
- Installation Type: For some installers, you might have options for “Standard” or “Custom” installation, allowing you to select specific components.
- Installation Summary: Displays a final overview before installation.
- Install: Click “Install” to begin the process.
- Authenticate: You will likely be prompted to enter your administrator password or use Touch ID/Face ID to authorize the installation, as
.pkgfiles often make system-wide changes. - Complete Installation: Once the installation is finished, you’ll see a “Summary” screen. Click “Close.” The application(s) will now be in your Applications folder. You can safely delete the
.pkgfile after installation.
The Power of Homebrew: Command-Line Installation for Developers and Power Users
For developers, IT professionals, and power users, managing software can extend beyond GUI applications. Command-line tools, programming languages, and specialized utilities often require a more efficient installation and management system. This is where Homebrew shines. Homebrew is a free and open-source package manager for macOS (and Linux) that simplifies the installation and updating of software that isn’t typically available through the App Store or as .dmg or .pkg files.
Benefits of Homebrew:
- Efficiency: Install, update, and uninstall software with simple command-line entries. This significantly boosts productivity for those who frequently use such tools.
- Dependency Management: Homebrew automatically resolves and installs any prerequisite software (dependencies) an application needs, saving you from manual hunting.
- Vast Repository: Homebrew offers a massive collection of “formulae” (recipes for installing command-line tools) and “casks” (recipes for installing GUI applications).
- Version Control: Easily switch between different versions of software if needed.
How to Install Homebrew (and then software with it):
- Install Xcode Command Line Tools: Homebrew requires Apple’s command-line tools for Xcode. Open Terminal (search for “Terminal” in Spotlight) and run:
bash

xcode-select --install
Follow the prompts to install them. - Install Homebrew: Once the Xcode tools are installed, paste the following command into Terminal and press Enter:
bash

/bin/bash -c "$(curl -fsSL https://raw.githubusercontent.com/Homebrew/install/HEAD/install.sh)"
You’ll be prompted to enter your administrator password and confirm the installation. Follow the on-screen instructions. - Verify Installation: After Homebrew installs, run:
bash

brew doctor
It will check for any issues and confirm if Homebrew is ready. - Install Command-Line Tools with Homebrew:
To install a command-line utility (e.g.,wget,htop, Python 3):
bash

brew install <package_name>

# Example: brew install python
- Install GUI Applications with Homebrew Cask:
Homebrew Cask extends Homebrew to manage macOS desktop applications.
bash

brew install --cask <app_name>

# Example: brew install --cask google-chrome

# Example: brew install --cask vlc
This method downloads the.dmgor.pkgin the background and performs the installation for you.
Modern Approaches: Web Apps, Cloud Solutions, and Cross-Platform Tools
The digital landscape is constantly evolving, with new paradigms for software delivery emerging. Web applications and cloud-based services are increasingly popular, offering unique advantages.
Embracing Web-Based Applications and PWAs
Many services that once required dedicated desktop software are now accessible entirely through a web browser. These web applications (e.g., Google Docs, Canva, Slack web client) require no installation on your MacBook, reducing clutter and disk space usage. They run within your browser (Safari, Chrome, Firefox) and are inherently cross-platform, working identically regardless of your operating system.
Progressive Web Apps (PWAs): Some web apps can be “installed” as Progressive Web Apps (PWAs). These bridge the gap between web apps and native desktop apps. Browsers like Chrome and Safari allow you to create a desktop shortcut (or add to your Dock) for a PWA, making it launch in its own window, often without the browser’s UI, feeling more like a native app. This combines the convenience of web access with the focused experience of a dedicated application, enhancing productivity by reducing browser tab clutter.
Cloud-Based Software and SaaS Models
The rise of Software as a Service (SaaS) models has revolutionized how many businesses and individuals access and pay for software. Instead of purchasing a license for a desktop application, you subscribe to a service that hosts the software in the cloud, accessible over the internet. Examples include Adobe Creative Cloud, Microsoft 365, Salesforce, and countless others.
Benefits of Cloud-Based Software:
- Accessibility: Access your software and data from any device with an internet connection, anywhere.
- Automatic Updates & Maintenance: The provider handles all updates, security patches, and server maintenance, eliminating your need for manual software installation or updates. This aligns with reducing IT overhead and improving efficiency, critical for both personal and business finance.
- Scalability: Easily scale your usage up or down based on your needs, paying only for what you use.
- Collaboration: Many cloud services are designed for real-time collaboration, boosting team productivity.
- Cost-Effectiveness (often): While subscriptions are ongoing, they can reduce upfront costs and offer predictable budgeting compared to perpetual licenses.
Best Practices, Security, and Troubleshooting
Installing software is just the beginning. Maintaining a healthy, secure, and efficient software environment requires ongoing attention to best practices.
Essential Security Tips for Software Installation
Digital security is paramount, particularly when installing software. Malicious applications can compromise your data, privacy, and the performance of your MacBook.
- Always Download from Trusted Sources: Stick to the Mac App Store, official developer websites, or well-known, reputable package managers like Homebrew. Avoid downloading software from unofficial repositories, file-sharing sites, or suspicious links in emails. These are common vectors for malware.
- Verify Developer Identity: Pay attention to Gatekeeper warnings. If an app is from an “unidentified developer,” research the app and developer thoroughly before overriding the warning. A quick search can reveal if the software is legitimate or a known threat.
- Read Permissions Carefully: When installing apps via
.pkgfiles or granting access to third-party tools, pay attention to the permissions requested. Does a calculator app really need access to your camera or contacts? Be suspicious of excessive permission requests. - Keep macOS and All Software Updated: Software updates often include critical security patches. Enable automatic updates for macOS and App Store apps, and regularly check for updates for software installed via
.dmg,.pkg, or Homebrew (brew update && brew upgrade). - Consider Antivirus/Anti-Malware: While macOS has robust built-in security, supplementing it with a reputable anti-malware solution can offer an additional layer of protection, especially if you frequently download software from various sources or handle sensitive data.
Common Installation Issues and Solutions
Even with careful steps, you might encounter issues. Here’s how to troubleshoot common problems:
- “App can’t be opened because it is from an unidentified developer.”
- Solution: As described earlier, for trusted apps, go to
System Settings>Privacy & Securityand click “Open Anyway.” If you’re unsure, do not bypass.
- Solution: As described earlier, for trusted apps, go to
- “Not enough disk space.”
- Solution: Check your storage (Apple menu >
System Settings>General>Storage). Delete unnecessary files, clear caches, or uninstall old apps.
- Solution: Check your storage (Apple menu >
- Corrupted Download/Installation:
- Solution: Delete the downloaded
.dmgor.pkgfile and re-download it. Ensure a stable internet connection during download. If issues persist, try downloading from an alternative mirror if available.
- Solution: Delete the downloaded
- Application Crashing on Launch:
- Solution: Check the app’s system requirements against your MacBook’s specifications. Ensure your macOS is up to date. Reinstall the app. Sometimes a restart of your MacBook can resolve temporary glitches.
- Permissions Issues:
- Solution: If an app is having trouble writing files, you might need to repair disk permissions or ensure your user account has administrative privileges. For command-line tools, ensure proper PATH variables are set (Homebrew usually handles this).
Efficient Software Management: Updates and Uninstallation
A well-maintained MacBook is a productive MacBook. Regularly managing your software ensures optimal performance and security.
- Updating Software:
- Mac App Store Apps: Updates are handled automatically or via the “Updates” tab in the App Store.
- Directly Installed Apps: Many apps have an “Check for Updates” option within their menus (e.g.,
[App Name]>Check for Updates). Otherwise, visit the developer’s website to download the latest version and reinstall over the old one, or use a tool like Homebrew. - Homebrew Apps: Simply run
brew update && brew upgradein Terminal to update all installed Homebrew formulae and casks. - macOS Updates: Go to
System Settings>General>Software Update. Keep your OS updated for the latest security and features.
- Uninstalling Software:
- Most
.dmgInstalled Apps: Drag the application from your Applications folder to the Trash. Then, empty the Trash. For a cleaner uninstall, third-party uninstaller apps can remove associated preference files and caches, but this is often overkill for simple apps. .pkgInstalled Apps: Some.pkginstallers come with a dedicated uninstaller program (often found within the application’s folder or in the original.pkgfile’s mounted disk image). If not, it typically requires manually deleting files from specific system locations, which is best done with caution or by consulting the developer’s instructions.- Homebrew Apps: To uninstall a Homebrew formula or cask, use the command:
bash

brew uninstall <package_name>

# Example: brew uninstall python

brew uninstall --cask <app_name>

# Example: brew uninstall --cask google-chrome
- Most
By understanding these diverse methods of software installation and adhering to best practices, you can effectively manage your MacBook’s software ecosystem. This not only enhances your productivity and digital security but also ensures you harness the full power of your device, making it a reliable and tailored tool for all your technology, brand, and even financial pursuits. Choose the right tools, keep them updated, and maintain a vigilant approach to security, and your MacBook will serve you well for years to come.
aViewFromTheCave is a participant in the Amazon Services LLC Associates Program, an affiliate advertising program designed to provide a means for sites to earn advertising fees by advertising and linking to Amazon.com. Amazon, the Amazon logo, AmazonSupply, and the AmazonSupply logo are trademarks of Amazon.com, Inc. or its affiliates. As an Amazon Associate we earn affiliate commissions from qualifying purchases.