In today’s hyper-connected world, a smartphone is more than just a communication device; it’s a gateway to information, entertainment, and a vital tool for productivity. At the heart of this connectivity lies the Subscriber Identity Module, or SIM card. Without a properly installed SIM card, your Android phone can’t access cellular networks for calls, texts, or mobile data. Whether you’ve just purchased a new Android device, are switching to a different mobile carrier, or need to replace a damaged SIM, understanding the installation process is essential. This guide will walk you through every step, ensuring you can get your phone up and running with full network functionality.

The process might seem daunting to first-time users, but it’s generally straightforward. We’ll cover everything from identifying the SIM card slot and tray to handling different SIM card sizes and troubleshooting common issues. Our goal is to empower you with the knowledge to confidently manage your Android phone’s SIM card, ensuring seamless connectivity for all your technological needs.
Understanding Your Android Phone’s SIM Card Needs
Before you even think about physically inserting a SIM card, it’s crucial to understand what you need and what to look for. This involves identifying the type of SIM card your phone supports and locating the SIM tray.
Types of SIM Cards: Size Matters
SIM cards have evolved significantly over the years, shrinking in size to accommodate increasingly compact smartphones. Most modern Android phones utilize one of three primary SIM card sizes:
- Standard SIM (Mini-SIM): This is the largest and oldest type of SIM card, measuring 25mm x 15mm. While still found in some older feature phones, it’s rarely used in contemporary smartphones.
- Micro-SIM: Measuring 15mm x 12mm, the Micro-SIM was the standard for many early smartphones. You might encounter it if you’re using an older Android device.
- Nano-SIM: This is the smallest and most prevalent SIM card size in modern smartphones, measuring just 12.3mm x 8.8mm. The vast majority of Android phones released in the last decade are designed to accommodate Nano-SIMs.
Why is knowing the size important? Inserting a SIM card of the wrong size into your phone’s tray can cause damage to both the SIM and the tray itself, rendering them unusable. If you’re unsure about your phone’s SIM size, consult your device’s manual or check the manufacturer’s website. Most mobile carriers will provide you with the correct size when you purchase a new SIM card or activate a plan. If you receive a larger SIM card but your phone requires a smaller one, you can often use a SIM card adapter or have the carrier cut it down to the correct size.
Locating the SIM Card Tray and Slot
The location of the SIM card tray can vary significantly between Android phone models. However, there are a few common places to look:
- Side of the Phone: This is the most common location. You’ll usually find a small, almost invisible slot on the side edge of your phone. This slot is designed to hold a thin metal tray that ejects when a SIM tool or a small, pointed object is inserted into the hole next to it.
- Top or Bottom Edge: In some models, especially older ones, the SIM tray might be located on the top or bottom edge of the device.
- Under the Battery (Rare in Modern Phones): Older Android phones, particularly those with removable batteries, might have the SIM card slot located underneath the battery. If your phone has a removable back panel and battery, this is a possibility. However, this design is increasingly rare in modern smartphones.
Once you’ve located the SIM tray area, look for a small pinhole. This pinhole is the release mechanism for the SIM tray.
The Step-by-Step SIM Card Installation Process
With your SIM card in hand and the tray location identified, you’re ready to begin the installation. This process is generally straightforward and can be completed in a few minutes.
Step 1: Power Down Your Android Phone
Safety first! Before you attempt to insert or remove a SIM card, it’s crucial to power off your Android phone completely. This prevents any potential electrical surges that could damage your device or the SIM card. Simply press and hold the power button, then select “Power off” or “Restart” from the on-screen menu. Wait for the phone to fully shut down before proceeding.
Step 2: Ejecting the SIM Card Tray
Using the dedicated SIM ejector tool that typically comes with your Android phone, or a small, thin, and sturdy object like a paperclip, carefully insert the tip into the pinhole next to the SIM tray. Apply gentle, steady pressure. You should feel a slight click as the tray pops out.
- Important Note: Be gentle. Excessive force can damage the tray or the internal mechanisms of your phone. If the tray doesn’t eject easily, double-check that you’re inserting the tool into the correct pinhole and try again with a bit more pressure. Do not force it.
Once the tray is partially ejected, you can carefully pull it out the rest of the way using your fingers.
Step 3: Placing the SIM Card Correctly
Now, examine your SIM card and the ejected SIM tray.
- SIM Card Orientation: SIM cards have a specific shape, often with one corner notched or cut off. This notch is a key indicator for correct orientation.
- Tray Orientation: Your SIM tray will have a corresponding cutout or shape designed to perfectly fit the SIM card. Many trays have a diagram indicating the correct placement.
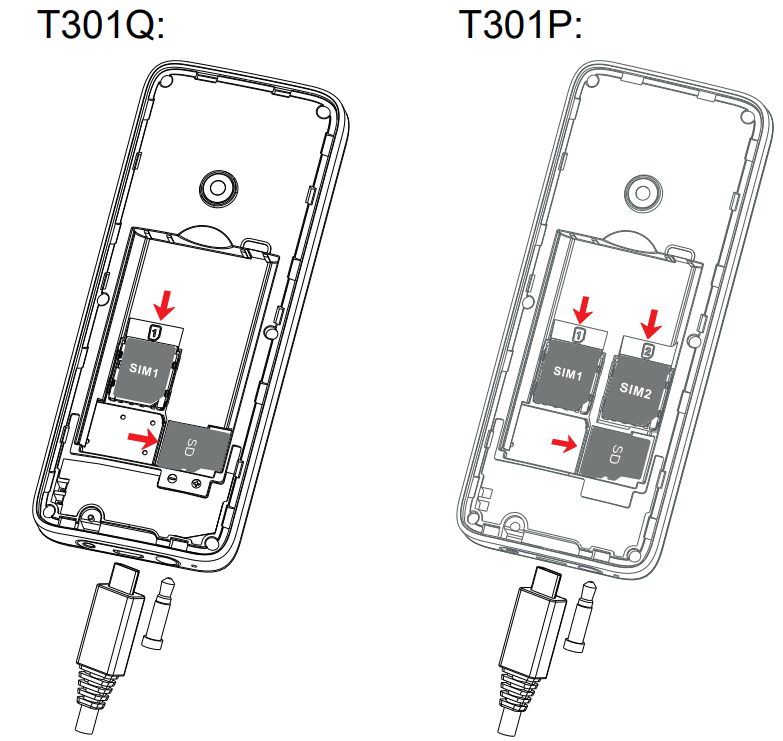
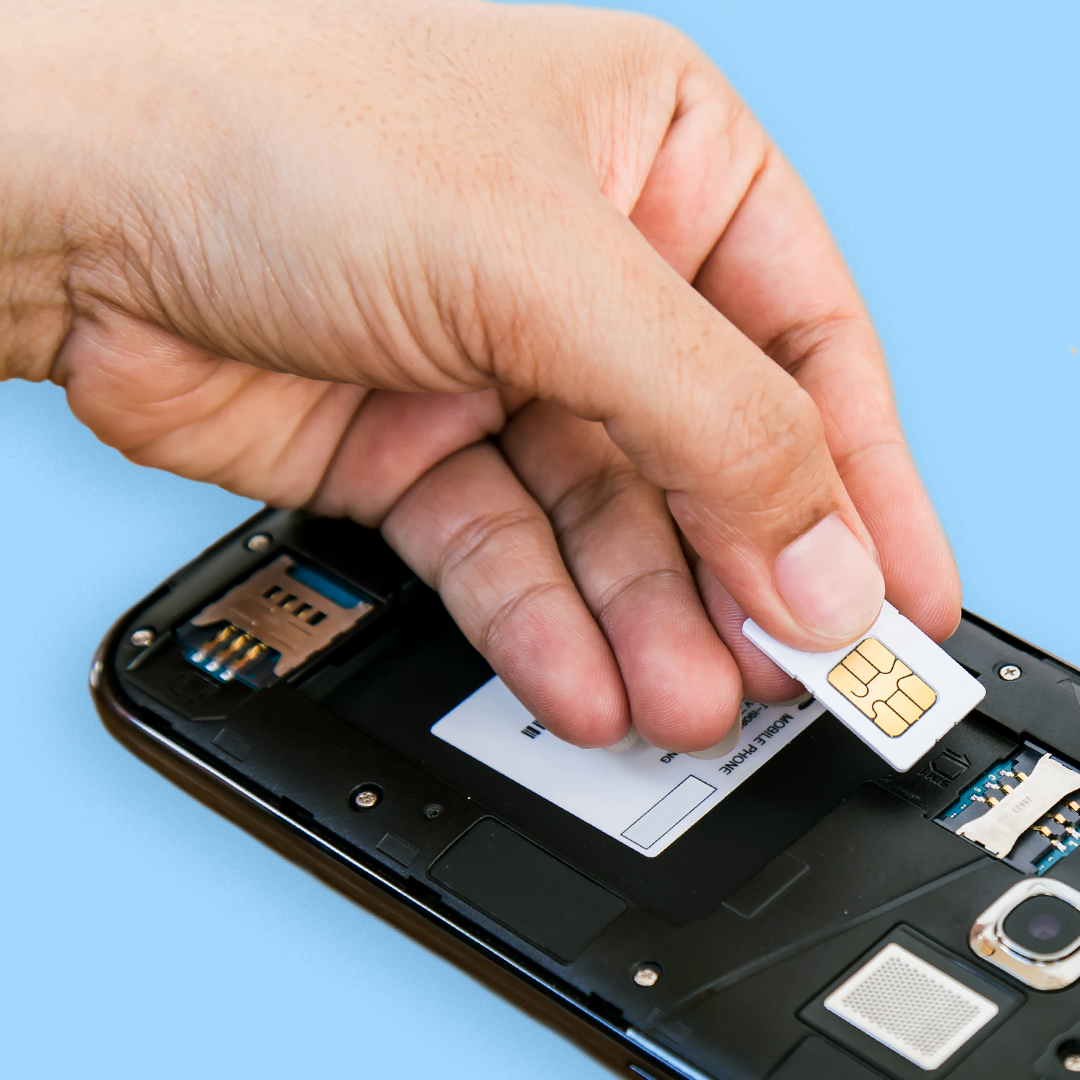
Align the notched corner of your SIM card with the corresponding cutout on the SIM tray. The gold contacts on the SIM card should be facing downwards, towards the phone’s internals. Gently press the SIM card into the tray, ensuring it sits flush and securely. If you have a dual-SIM phone, you’ll typically have two slots on the tray, and you’ll repeat this process for the second SIM card.
Step 4: Reinserting the SIM Card Tray
Once the SIM card is securely seated in the tray, carefully align the tray with the slot on your phone. Gently push the tray back into the phone until it clicks into place and sits flush with the phone’s edge. Ensure it’s fully inserted and doesn’t protrude.
Step 5: Powering On Your Android Phone
With the SIM card successfully installed, you can now power on your Android phone. Press and hold the power button until the device boots up.
Upon booting, your phone will attempt to detect the SIM card and connect to your mobile carrier’s network. You should see your carrier’s name appear in the status bar at the top of the screen, along with signal strength indicators.
Troubleshooting Common SIM Card Installation Issues
While the process is generally smooth, you might encounter a few hiccups. Here are some common issues and their solutions:
“No SIM Card” or “Invalid SIM” Errors
If your phone displays an error message indicating no SIM card is inserted or that the SIM is invalid, don’t panic. Here’s what to check:
- Is the SIM Card Properly Seated? The most common cause is a loosely fitted SIM card. Power off your phone, eject the tray, and ensure the SIM card is sitting correctly and flush within the tray. Reinsert it firmly.
- Is the SIM Card Damaged? Inspect the SIM card for any visible signs of damage, such as scratches or bent contacts. If it appears damaged, you may need to contact your mobile carrier for a replacement.
- Is the SIM Card Compatible? While less common with reputable carriers, ensure the SIM card is activated and compatible with your phone and network.
- Is the SIM Tray Damaged? Inspect the SIM tray for any bent pins or damage. If the tray itself appears faulty, you might need to contact your phone manufacturer or a repair service.
- Restart Your Phone: Sometimes, a simple restart can resolve detection issues.
Poor Signal Strength or No Service
If your phone detects the SIM card but you have weak signal or no service at all, consider these points:
- Are You in a Coverage Area? Ensure you are in an area with adequate mobile network coverage from your carrier.
- Network Settings: Navigate to your phone’s settings and check your mobile network settings. Ensure that “Mobile Data” is enabled and that the correct network operator is selected. Sometimes, manually selecting your carrier can help.
- Airplane Mode: Make sure Airplane Mode is turned off.
- SIM Card Health: A slightly damaged SIM card might still be detected but offer poor performance. If other troubleshooting steps fail, consider a replacement SIM from your carrier.
Dual SIM Functionality Issues
If you’re using a dual-SIM phone and encountering problems with one or both SIMs:
- Check Both SIMs: Ensure both SIM cards are correctly inserted and detected.
- SIM Slot Preference: In your phone’s settings, you can often designate which SIM is preferred for calls, texts, and mobile data. Verify these settings are as you intend.
- Carrier Compatibility: Ensure both SIMs are from compatible carriers. Some phones might have restrictions on using SIMs from certain network types simultaneously.
Beyond Installation: Managing Your SIM and Network
Once your SIM card is installed and working, there are a few additional aspects to consider for optimal usage and security, especially relevant to the “Brand” and “Money” categories of our website.
Optimizing for Productivity and Cost
A correctly installed SIM card is the foundation for leveraging your Android phone as a productivity tool. Mobile data allows you to access cloud services, communication apps, and online resources from anywhere.
- Data Management: Monitor your data usage through your phone’s settings or your carrier’s app. This is crucial for avoiding overage charges and managing your “Money” effectively. Understand your plan’s data limits and consider Wi-Fi whenever possible.
- App Usage: Numerous productivity apps (task managers, note-taking apps, cloud storage) rely on a stable internet connection. Ensure your SIM card provides reliable data to maximize their utility.
- International Roaming: If you travel abroad, understanding your carrier’s roaming rates is vital. Incorrectly assuming a local SIM will work or not managing your data can lead to significant unexpected costs. Research international plans or local SIM options before your trip.
Digital Security and Your SIM Card
While not directly related to installation, the security of your SIM card is paramount.
- SIM Card PIN: Most SIM cards come with a default PIN. It is highly recommended to change this to a secure, unique PIN. You can usually do this within your phone’s security settings under “SIM card lock.” This prevents unauthorized access to your SIM card if it’s lost or stolen.
- Carrier Account Security: Protect your mobile carrier account credentials. This is where you manage your plan, billing, and often, your SIM card’s activation status. A compromised account could lead to unauthorized SIM swaps or plan changes.
Upgrading Your SIM and Network Experience
As technology advances, so do SIM card capabilities. You might encounter or consider:
- eSIMs: Many newer Android phones support eSIM technology. An eSIM is a digital SIM that’s built into your device and can be activated remotely without needing a physical card. If your phone supports eSIM, you might opt for this for convenience, especially when switching carriers. The “Tech” trends section of our website often covers these advancements.
- 5G Connectivity: If your phone and SIM card support 5G, you’ll experience significantly faster download and upload speeds, enhancing your overall digital experience and productivity.
In conclusion, the process of installing a SIM card in an Android phone is a fundamental step in unlocking your device’s full potential. By understanding the different SIM card sizes, locating the SIM tray, and following the simple installation steps, you can ensure your phone is ready to connect you to the world. Furthermore, by being mindful of data management, security, and emerging technologies like eSIMs, you can optimize your mobile experience for productivity, financial prudence, and technological advancement.
aViewFromTheCave is a participant in the Amazon Services LLC Associates Program, an affiliate advertising program designed to provide a means for sites to earn advertising fees by advertising and linking to Amazon.com. Amazon, the Amazon logo, AmazonSupply, and the AmazonSupply logo are trademarks of Amazon.com, Inc. or its affiliates. As an Amazon Associate we earn affiliate commissions from qualifying purchases.