
In the rapidly evolving digital landscape, the ability to interact programmatically with web services and APIs is no longer a niche skill but a fundamental requirement for developers, data scientists, and automation enthusiasts alike. Python, with its unparalleled versatility and vast ecosystem of libraries, stands out as a premier language for this task. Among its many powerful tools, the requests library emerges as the de facto standard for making HTTP requests, praised for its elegant API and “human-friendly” design.
This comprehensive guide will walk you through everything you need to know about installing requests in your Python environment. We’ll cover the prerequisites, the core installation steps, best practices like using virtual environments, and effective troubleshooting techniques. By the end, you’ll not only have requests up and running but also understand how to leverage it to unlock a new dimension of web interaction, streamlining your workflows and expanding your technical capabilities.
Understanding the Power of Python’s Requests Library
Before diving into the mechanics of installation, it’s crucial to grasp what requests is and why it has become an indispensable tool in the modern developer’s toolkit. Understanding its significance will underscore the importance of integrating it into your development process, whether you’re building sophisticated web applications or simply automating daily tasks.
What is requests and Why is it Essential?
At its core, requests is an HTTP library for Python, designed to simplify the process of sending HTTP/1.1 requests. While Python’s standard library includes urllib for handling URLs, requests was created to improve upon its predecessor’s user experience, offering a much more intuitive and readable interface. It abstract away the complexities of making web requests, allowing developers to focus on the task at hand rather than wrestling with low-level HTTP details.
Consider the diverse applications where requests proves invaluable:
- API Integration: Interacting with RESTful APIs is perhaps its most common use case. Whether you’re pulling data from a social media platform, automating tasks in a cloud service, or integrating with payment gateways,
requestsmakes sending GET, POST, PUT, DELETE, and other HTTP methods straightforward. This capability is critical for building interconnected systems and enhancing the functionality of modern applications. - Web Scraping: For extracting data from websites,
requestsis the first step. It fetches the HTML content of a page, which can then be parsed by libraries like BeautifulSoup or Scrapy to extract specific information. This is invaluable for data analysis, market research, and content aggregation. - Automation: From checking website availability to submitting forms automatically,
requestscan automate a wide array of web-based tasks. This can significantly boost productivity, especially for repetitive operations that would otherwise consume valuable human time. For businesses, this translates directly into efficiency gains, potentially freeing up resources that can be redirected to more strategic initiatives. - Testing: Developers often use
requeststo test their own web services and APIs, ensuring they respond correctly under various conditions. Its simplicity makes it ideal for writing unit and integration tests that simulate client interactions.
The elegance of requests lies in its simplicity. With just a few lines of code, you can send requests, handle redirects, manage sessions, upload files, and much more, all while benefiting from clear, readable syntax. This emphasis on usability is what makes requests a truly “human-friendly” library, significantly contributing to a developer’s productivity and the overall quality of software solutions.
The Role of pip in Python Package Management
To install requests or indeed almost any third-party Python library, you’ll need to use pip. pip stands for “Preferred Installer Program” (or sometimes “pip Installs Packages”) and is Python’s official package installer. It’s the cornerstone of managing external dependencies in your Python projects, connecting you to the vast ecosystem of packages available on the Python Package Index (PyPI).
Here’s why pip is indispensable:
- Access to PyPI: PyPI is a repository of over 400,000 Python packages, including
requests.pipacts as the command-line interface to browse, download, and install these packages directly into your Python environment. - Dependency Resolution: When you install a package like
requests, it often relies on other packages to function correctly (these are called dependencies).pipintelligently identifies and installs all necessary dependencies, ensuring that the main package works out of the box. - Version Management:
pipallows you to install specific versions of packages, upgrade them, or even uninstall them. This precision is critical for maintaining compatibility across different projects and environments. - Standardization:
pipprovides a standardized way to manage packages across the Python community, making it easier for developers to share code and collaborate on projects without encountering environment-specific issues.
Understanding pip is fundamental to any serious Python development. It empowers you to tap into the collective intelligence of the Python community, leveraging pre-built solutions for complex problems and accelerating your development cycles.
Step-by-Step Installation: Getting Started
Installing requests is a straightforward process, primarily involving a single command. However, ensuring your environment is correctly set up beforehand is crucial for a smooth experience. This section details each step, from checking prerequisites to verifying your successful installation.
Prerequisites: Ensuring Your Environment is Ready
Before you can install requests, you need to ensure that Python itself is installed on your system, and that pip is available and correctly configured.
-
Python Installation:
requestsis a Python library, so having Python installed is the first and most obvious prerequisite. We highly recommend using Python 3 (specifically Python 3.7 or newer) as Python 2 has reached its end-of-life and is no longer supported.-
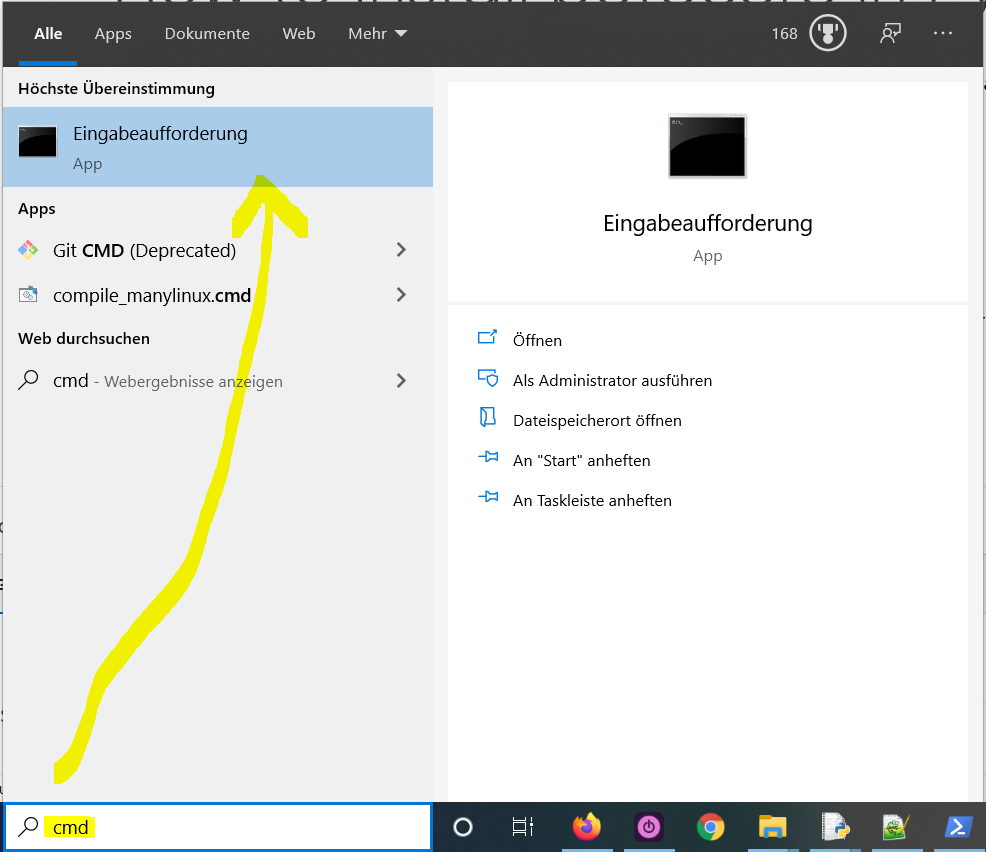
How to check if Python is installed: Open your terminal or command prompt and type:
python --versionor, if you have both Python 2 and Python 3 installed:
python3 --versionYou should see an output similar to
Python 3.9.7. If you receive an error like “command not found,” Python is not installed or not in your system’s PATH. -
How to install Python:
- Windows/macOS: Download the appropriate installer from the official Python website (python.org). Follow the installation wizard. On Windows, make sure to check the box that says “Add Python to PATH” during installation.
- Linux: Python 3 often comes pre-installed. If not, you can install it using your distribution’s package manager (e.g.,
sudo apt install python3on Debian/Ubuntu,sudo dnf install python3on Fedora,sudo pacman -S pythonon Arch Linux).
-
-
pipInstallation:
pipis usually bundled with Python 3.4 and later versions. If you’ve installed a recent version of Python,pipshould already be available.-
How to check if
pipis installed: In your terminal or command prompt, type:pip --versionor, for Python 3 specific
pip:pip3 --versionYou should see an output like
pip 21.2.4 from /path/to/python/lib/python3.x/site-packages/pip (python 3.x). -
How to install
pip(if missing): Ifpipis not found, you can install it using a small bootstrap script:- Download
get-pip.py:
bash

curl https://bootstrap.pypa.io/get-pip.py -o get-pip.py
(On Windows, you might need to use a browser to download or PowerShell:(New-Object System.Net.WebClient).DownloadFile('https://bootstrap.pypa.io/get-pip.py', 'get-pip.py')) - Run the script with Python:
bash

python get-pip.py
or
bash

python3 get-pip.py
After installation, verify withpip --versionorpip3 --version. It’s also a good practice to upgradepipto its latest version:
bash

python -m pip install --upgrade pip
or
bash

python3 -m pip install --upgrade pip
- Download
-
The Core Installation Command
Once your prerequisites are met, installing requests is remarkably simple. Open your terminal or command prompt and execute the following command:
pip install requests
If you have multiple Python versions installed and pip defaults to Python 2, or you explicitly want to ensure installation for Python 3, use pip3:
pip3 install requests
What happens next?
pip will connect to PyPI, download the requests package and any of its dependencies (like charset_normalizer, idna, urllib3, and certifi), and then install them into your Python environment. You’ll see progress messages indicating the download and installation of each component. Upon successful completion, you’ll typically see a message similar to “Successfully installed requests-2.31.0 …”.
Verifying Your requests Installation
After running the installation command, it’s a good practice to verify that requests has been installed correctly and is accessible to your Python interpreter.
-
Using the Python Interactive Shell:
Open your terminal or command prompt and typepython(orpython3) to enter the Python interactive shell:pythonThen, try to import
requestsand print its version:import requests print(requests.__version__)You should see the version number of
requestsprinted (e.g.,2.31.0). If you encounter anModuleNotFoundError, it meansrequestswas not installed correctly or is not in your Python’s path. -
Running a Simple Script:
Alternatively, create a small Python file (e.g.,test_requests.py) with the following content:import requests try: response = requests.get('https://www.google.com') print(f"Successfully imported requests and made a request! Status code: {response.status_code}") print(f"Requests version: {requests.__version__}") except Exception as e: print(f"An error occurred: {e}") print("Requests might not be installed correctly or there's a network issue.")Save the file and run it from your terminal:
python test_requests.pyA successful run will print the status code (e.g.,
200) and therequestsversion, confirming that the library is functional.
Best Practices and Troubleshooting Common Issues
While the installation of requests is generally smooth, understanding best practices and knowing how to troubleshoot common issues can save significant time and prevent headaches down the line. This section focuses on setting up robust development environments and resolving typical installation challenges.
Harnessing Virtual Environments for Clean Development
One of the most crucial best practices in Python development is the use of virtual environments. A virtual environment is an isolated Python environment that allows you to install packages for a specific project without interfering with other projects or your global Python installation.
Why are virtual environments essential?
- Dependency Isolation: Different projects often require different versions of the same library. Without virtual environments, installing
requestsversion X for project A and version Y for project B could lead to conflicts or break one of the projects. Virtual environments prevent this by giving each project its own set of dependencies. - Cleaner Global Environment: Your global Python installation remains pristine, free from project-specific packages. This keeps your system tidy and reduces the risk of system-wide issues.
- Reproducibility: When you share your project, you can easily share its virtual environment configuration (e.g., via
requirements.txt), ensuring that anyone else can set up an identical environment and run your code without compatibility problems. This is vital for collaborative “Tech” projects and maintaining a professional “Brand” through reliable software. - Permissions: You can install packages within a virtual environment without needing administrator/root privileges, avoiding potential security risks or complex permission issues.
How to use virtual environments (using venv module, built-in since Python 3.3):
- Create a virtual environment:
Navigate to your project directory in the terminal and run:
bash

python -m venv my_project_env
Replacemy_project_envwith a descriptive name for your environment (e.g.,.venvorenv). This creates a new directory containing a copy of the Python interpreter andpip.
-
Activate the virtual environment:
- On macOS/Linux:
bash

source my_project_env/bin/activate
- On Windows (Command Prompt):
bash

my_project_envScriptsactivate.bat
- On Windows (PowerShell):
bash

my_project_envScriptsActivate.ps1
Once activated, your terminal prompt will typically show the name of the active environment (e.g.,(my_project_env) your_user@your_machine:~/my_project_folder$).
- On macOS/Linux:
-
Install
requestswithin the active environment:
Now, with your virtual environment activated, installrequestsas usual:pip install requestsThis command will install
requestsonly into this specific virtual environment, leaving your global Python untouched. -
Deactivate the virtual environment:
When you’re done working on your project, you can deactivate the environment by simply typing:
bash

deactivate
Your terminal prompt will return to its normal state.
Always remember to activate your virtual environment before installing packages or running Python scripts for that project.
Addressing Installation Errors: A Practical Approach
Despite pip‘s robustness, you might occasionally encounter errors during installation. Here are some common issues and their solutions:
-
pipnot found or not recognized:- Symptom: “pip: command not found” or “‘pip’ is not recognized as an internal or external command.”
- Cause:
pipis not installed, or its directory is not in your system’s PATH. - Solution:
- Re-check Python installation (ensure “Add Python to PATH” was selected on Windows).
- Install
pipusingget-pip.pyas described in the prerequisites section. - If
pipis installed but not in PATH, try usingpython -m pip install requestsorpython3 -m pip install requests. This explicitly tells Python to run thepipmodule.
-
Permission Denied Error:
- Symptom: “Permission denied” or “Operation not permitted” when installing packages.
- Cause: You’re trying to install a package globally (outside a virtual environment) into a system-protected directory without sufficient privileges.
- Solution:
- Recommended: Use a virtual environment. This is the safest and cleanest solution, as installations within a virtual environment do not require elevated permissions.
- Not recommended for global installs: On Linux/macOS, you might use
sudo pip install requests. On Windows, you could run your terminal as an administrator. However, usingsudoor administrator privileges forpipis generally discouraged for global installs as it can lead to permission issues with other packages or system instability. Prioritize virtual environments. - User-level install: As a last resort for global installs, you can install packages to your user’s home directory:
pip install requests --user. These packages will be available to your user, but not system-wide, and may cause confusion if you’re not careful.
-
Network-Related Errors (Timeout, SSL Certificate Errors):
- Symptom: Installation hangs, “Read timed out,” or “SSL certificate verify failed.”
- Cause: Internet connectivity issues, corporate firewalls, proxy servers, or outdated SSL certificates.
- Solution:
- Check your internet connection.
- If you are behind a corporate proxy, see the “Proxy Settings” section below.
- For SSL errors (less common with modern
pip), ensure your system’s root certificates are up to date. Sometimes, temporarily disabling SSL verification withpip install requests --trusted-host pypi.org --trusted-host files.pythonhosted.orgcan help, but this should be used cautiously as it compromises security.
-
Package Version Conflicts:
- Symptom: Issues with other libraries after installing
requests(less common forrequestsitself, but generalpipissue). - Cause: A newly installed package or
requestsitself has a dependency that conflicts with a dependency of another package already installed. - Solution:
- Again, virtual environments are the primary defense against this.
- If you must install globally, consider installing a specific version of
requests:pip install requests==2.31.0. - To upgrade an existing
requestsinstallation, usepip install --upgrade requests.
- Symptom: Issues with other libraries after installing
Proxy Settings and Offline Installation Considerations
Working in enterprise environments or with limited internet access presents unique challenges for package installation.
-
Proxy Settings:
Many corporate networks use proxy servers for internet access.pipcan be configured to use a proxy:-
Environment Variables: Set
HTTP_PROXYandHTTPS_PROXYenvironment variables before runningpip:- Linux/macOS:
bash

export HTTP_PROXY="http://proxy.example.com:8080"

export HTTPS_PROXY="http://proxy.example.com:8080"

pip install requests
- Windows (Command Prompt):
bash

set HTTP_PROXY=http://proxy.example.com:8080

set HTTPS_PROXY=http://proxy.example.com:8080

pip install requests
Replaceproxy.example.com:8080with your actual proxy address and port. If your proxy requires authentication, include it in the URL:http://user:password@proxy.example.com:8080.
- Linux/macOS:
-
pipCommand Line: Use the--proxyflag directly withpip:
bash

pip install requests --proxy http://proxy.example.com:8080
-
-
Offline Installation:
For environments with no internet access, you can perform an offline installation.-
Step 1: Download Packages (on a machine with internet access):
Usepip downloadto downloadrequestsand all its dependencies into a specified directory:pip download requests -d /path/to/downloadsThis will create a collection of
.whl(wheel) and.tar.gzfiles in/path/to/downloads. -
Step 2: Transfer and Install (on the offline machine):
Transfer the/path/to/downloadsdirectory to your offline machine. Then, on the offline machine, navigate to that directory and run:
bash

pip install --no-index --find-links=/path/to/downloads requests
The--no-indexflag tellspipnot to look in PyPI, and--find-linkstells it where to find the downloaded packages locally. This method ensures that all dependencies are installed from your local cache.
-
Beyond Installation: Your First requests Interaction
With requests successfully installed, you’re ready to tap into its full potential. The best way to solidify your understanding is to make your very first HTTP request. This initial interaction will demonstrate the library’s simplicity and power, providing a foundation for more complex web interactions.
A Simple Example: Making Your First HTTP Request
Let’s make a basic GET request to a public API, like GitHub’s API, to retrieve some information.
Create a new Python file (e.g., github_info.py) and add the following code:
import requests

# Define the URL for the GitHub API
github_api_url = 'https://api.github.com'

try:
    # Make a GET request to the API
    response = requests.get(github_api_url)

    # Check if the request was successful (status code 200)
    if response.status_code == 200:
        print(f"Successfully connected to {github_api_url}")
        print(f"Status Code: {response.status_code}")

        # The API returns JSON data, so we can parse it directly
        data = response.json()
        print("nSome data from the GitHub API:")
        for key, value in list(data.items())[:5]: # Print first 5 key-value pairs
            print(f"  {key}: {value}")

    elif response.status_code == 403:
        print(f"Access Denied (403 Forbidden). You might be rate-limited or require authentication.")
        print(f"Response headers: {response.headers.get('X-RateLimit-Remaining')}, {response.headers.get('Retry-After')}")

    else:
        print(f"Failed to connect. Status Code: {response.status_code}")
        print(f"Response text: {response.text}")

except requests.exceptions.RequestException as e:
    print(f"An error occurred during the request: {e}")
except Exception as e:
    print(f"An unexpected error occurred: {e}")

print(f"nRequests library version: {requests.__version__}")
Now, save the file and run it from your terminal (making sure your virtual environment is activated, if you’re using one):
python github_info.py
Explanation of the Code:
import requests: This line imports therequestslibrary, making its functions available in your script.requests.get(github_api_url): This is the core of the request. Therequests.get()method sends an HTTP GET request to the specified URL. It returns aResponseobject.response.status_code: TheResponseobject contains the HTTP status code (e.g., 200 for success, 404 for not found, 500 for server error).response.json(): If the server returns JSON data (common for APIs), this method conveniently parses it into a Python dictionary or list.response.text: This attribute holds the raw content of the server’s response as a string.- Error Handling: The
try...exceptblock is crucial for handling potential network issues (requests.exceptions.RequestException) or other unexpected errors gracefully.
This simple script demonstrates the ease with which requests allows you to fetch data from the web. Beyond get(), requests also supports other HTTP methods like post(), put(), delete(), and more, making it versatile for any API interaction.
Integrating requests into Larger Projects
While the basic example is illuminating, requests truly shines when integrated into larger, more complex applications. It forms the backbone for a variety of functionalities:
- Building API Clients: If your application needs to consume multiple external APIs (e.g., weather data, payment processors, social media),
requestsprovides the foundation for building robust and reusable API client modules. You can wraprequestscalls in your own functions or classes, abstracting away the HTTP details and focusing on the data. - Data Aggregation and ETL: For data scientists and analysts,
requestsis vital for Extract, Transform, Load (ETL) processes, pulling raw data from various web sources to be cleaned, transformed, and loaded into databases for analysis. This is a direct contributor to building “Money”-making data-driven applications. - Web Automation Tools: Beyond simple fetching,
requestscan be used in conjunction with other libraries (likeBeautifulSoupfor parsing orSeleniumfor browser automation) to create powerful web automation tools for tasks like monitoring competitor websites, submitting bulk data, or generating reports. Such tools significantly enhance “Tech” productivity. - Microservices Communication: In modern microservice architectures,
requestsis frequently used for inter-service communication, allowing different parts of an application to exchange data over HTTP.
By mastering requests, you equip yourself with a fundamental skill that underpins much of modern web development and automation. It’s a skill that not only streamlines your technical tasks but also significantly boosts your professional Brand by enabling you to build more connected and dynamic applications.
Conclusion: Unlocking Web Interaction Capabilities
The requests library is more than just a utility; it’s a gateway to the vast world of web services and APIs. Throughout this guide, we’ve systematically explored how to install requests Python, from ensuring proper prerequisites to navigating best practices and troubleshooting common pitfalls. You’ve learned the critical role of pip in package management and discovered the indispensable value of virtual environments for maintaining clean, reproducible, and conflict-free development workflows.
By following the step-by-step instructions, you should now have requests successfully installed and verified in your Python environment. The simple example demonstrated just how easy it is to interact with web resources, laying the groundwork for more ambitious projects.
The ability to programmatically interact with the web is a cornerstone of modern software development, data science, and automation. With requests in your arsenal, you are well-equipped to build more dynamic applications, gather valuable data, and automate repetitive tasks, thereby enhancing your productivity and expanding your technical horizons. Embrace this powerful library, explore its comprehensive documentation, and start building the next generation of interconnected Tech solutions. Your journey into advanced web interaction with Python has just begun, paving the way for innovations that can directly contribute to efficiency and potentially new revenue streams (“Money”) while solidifying your expertise (“Brand”).