In an increasingly digital world, projectors have evolved from niche business tools into versatile gadgets that enhance everything from home entertainment to educational experiences and professional presentations. Whether you’re dreaming of a cinematic experience in your living room, seeking to deliver impactful presentations, or creating an immersive gaming setup, correctly installing your projector is paramount to maximizing its potential. This comprehensive guide, drawing on cutting-edge technological insights, will walk you through every step of the projector installation process, ensuring you achieve optimal performance, longevity, and a truly engaging viewing experience. From initial planning and component selection to precise setup and calibration, we’ll delve into the nuances that transform a mere device into a powerful visual hub.
I. Laying the Foundation: Pre-Installation Planning and Considerations
Before you even unbox your projector, meticulous planning is the cornerstone of a successful installation. This initial phase helps you select the right equipment, identify the ideal placement, and anticipate potential challenges, ultimately saving you time, effort, and possibly additional expenses down the line. It’s an investment in understanding your technology and tailoring it to your specific environment.
A. Defining Your Projector’s Purpose and Environment
The first step is to clarify what you intend to use your projector for, as this significantly influences your hardware choices and setup strategy.
-
Home Theater vs. Business/Education: Are you aiming for a vibrant, immersive home cinema for movies and gaming, or a crisp, clear display for detailed spreadsheets, presentations, or classroom instruction? Home theaters often prioritize color accuracy, contrast, and quiet operation, while business projectors might emphasize brightness (lumens) for well-lit rooms and portability. Understanding your primary use case is crucial for selecting a projector with the right feature set, often preventing the common mistake of overspending on unnecessary features or underspending on critical ones.
-
Ambient Light Conditions: The amount of light in your room is a critical factor. A projector’s brightness (measured in ANSI lumens) needs to counteract ambient light to produce a clear, vibrant image.
- Dark Room (Dedicated Home Theater): 1,500-2,500 lumens might suffice. Here, contrast and color accuracy are more important.
- Moderately Lit Room (Living Room, Conference Room): 2,500-4,000 lumens are generally recommended.
- Bright Room (Classroom, Sunlit Office): 4,000+ lumens might be necessary. In such environments, specialized ALR (Ambient Light Rejecting) screens can also make a significant difference, reflecting light from the projector while absorbing light from other sources.
-
Room Dimensions and Seating: Measure your room’s length, width, and height. This will determine the maximum screen size you can accommodate and the possible projector placement options. Consider your typical seating arrangement; viewers should have a comfortable, unobstructed view of the screen, ideally with their eyes at approximately two-thirds the height of the screen when seated. Also, think about audience size; a larger audience may necessitate a larger screen and a brighter projector for optimal visibility.
B. Choosing the Right Projector and Screen
With your purpose and environment defined, you can now narrow down your hardware options. This is where technological specifications truly matter.
-
Projector Types (DLP, LCD, Laser, LED):
- DLP (Digital Light Processing): Known for sharp images, good contrast, and often higher brightness. Some single-chip DLP projectors can exhibit a “rainbow effect” for sensitive viewers, though modern iterations have minimized this.
- LCD (Liquid Crystal Display): Offers excellent color saturation and no rainbow effect. Often found in home theater projectors, they can be larger and sometimes have a visible “screen door effect” at very close viewing distances, though this is rare with modern high-resolution models.
- Laser & LED Projectors: These are newer technologies offering longer lifespan light sources (up to 20,000-30,000 hours, compared to 2,000-5,000 for traditional lamps), instant on/off, and often better color consistency. They are generally more expensive but offer significant long-term value and reduced maintenance.
-
Resolution, Brightness (Lumens), Contrast Ratio:
- Resolution (e.g., 1080p, 4K UHD): Determines the sharpness and detail of the image. For home theater, 1080p is a good baseline, but 4K UHD offers a significantly more detailed and future-proof experience. For presentations, WXGA (1280×800) or 1080p is usually sufficient.
- Brightness (ANSI Lumens): As discussed, crucial for overcoming ambient light. Don’t solely rely on the highest number; consider the room conditions.
- Contrast Ratio: The difference between the brightest white and the darkest black. A higher contrast ratio (e.g., 10,000:1 or more) provides deeper blacks and more vibrant colors, essential for a cinematic experience, especially in dark rooms.
-
Throw Distance and Ratio: This is the distance a projector needs to be from the screen to produce a desired image size.
- Throw Ratio: A projector’s throw ratio (e.g., 1.5:1) tells you how far away it needs to be for a certain screen width.
Throw Distance = Throw Ratio x Screen Width. - Standard Throw: Most common, placed a good distance from the screen.
- Short Throw: Placed closer to the screen (e.g., 3-8 feet for a 100-inch image). Reduces shadows from presenters.
- Ultra-Short Throw (UST): Placed inches from the screen, often mounted directly above or below it. Excellent for small rooms or avoiding ceiling mounts and long cable runs. These projectors cast an image from an extremely steep angle, making them increasingly popular for home theaters where space is a premium.
- Throw Ratio: A projector’s throw ratio (e.g., 1.5:1) tells you how far away it needs to be for a certain screen width.
-
Screen Type and Size:
- Fixed Frame: Provides the flattest surface and best image quality, ideal for dedicated home theaters.
- Retractable (Manual or Electric): Offers flexibility, disappearing when not in use. Can sometimes have slight “waves” or wrinkles over time.
- Projector Paint: A cost-effective solution for a clean wall, but won’t match the image quality of a dedicated screen.
- Screen Gain: Refers to the screen’s reflectivity. A gain of 1.0 is neutral. Higher gain screens boost brightness but narrow viewing angles. Lower gain (e.g., 0.8) improves contrast but slightly reduces brightness. ALR screens, as mentioned, are specialized for fighting ambient light.
- Size: Once you’ve calculated the throw distance, determine the largest screen size that comfortably fits your wall and allows for comfortable viewing from all seating positions. Remember to leave space for speakers and other decor.
-
Sound System Integration: While some projectors have built-in speakers, they are rarely adequate for an immersive experience. Plan for an external sound system (soundbar, AV receiver with surround sound speakers) and how it will connect to your source devices.
C. Site Selection: Optimal Placement for Projector and Screen
With your equipment chosen, the next crucial step is pinpointing the exact location for your projector and screen. Precision here is key to achieving a perfectly aligned and impactful display.
- Ideal Viewing Angles: Position the screen so that the center is roughly at eye level when viewers are seated. Avoid placing the screen where windows or direct light sources will cause reflections.
- Calculating Throw Distance and Image Size: Use an online projector calculator (many manufacturers provide these) or the projector’s specifications to determine the precise throw distance required for your desired screen size. Mark the projected image boundaries on your wall.
- Mounting Options (Ceiling Mount, Tabletop, Rear Projection):
- Ceiling Mount: The most common and aesthetically pleasing for permanent installations, keeping the projector out of the way. Requires running cables through the ceiling or walls.
- Tabletop/Shelf Placement: Simplest for temporary setups or if your projector has lens shift capabilities that allow for flexible placement. Ensure a stable, level surface.
- Rear Projection: Projector is placed behind a translucent screen. Offers a very clean look but requires significant space behind the screen and a specialized screen type.
- Power Outlets and Cable Management Paths: Identify nearby power outlets. Plan your cable runs for video (HDMI, DisplayPort), audio, and network (if smart features are used). Concealing cables in walls, ceilings, or using cable raceways is highly recommended for safety (preventing tripping hazards) and aesthetics, contributing to a cleaner, more professional setup. This also falls under good “Tech” practice, ensuring a secure and efficient installation.
II. The Installation Process: Step-by-Step Setup
With thorough planning complete, it’s time to bring your vision to life. This section details the practical steps for installing your projector and screen, focusing on precision and safety.
A. Preparing Your Space and Tools
Safety and preparation are paramount before beginning any physical installation.
- Safety First: Always disconnect power to any circuits you might be working near. Clear the installation area of furniture and obstacles. If working at height, use a sturdy ladder.
- Essential Tools Checklist: Gather all necessary tools beforehand:
- Measuring Tape: For accurate placement.
- Pencil/Marker: For marking drill points.
- Stud Finder: Crucial for locating wall/ceiling studs/joists for secure mounting.
- Drill with Appropriate Bits: For pilot holes and mounting screws.
- Level: Absolutely essential for ensuring a straight screen and level projector.
- Screwdrivers (Phillips and Flathead): For assembling mounts and projector adjustments.
- Cable Ties/Velcro Straps: For neat cable management.
- Wire Strippers/Crimpers (if custom cabling is needed): Less common for basic setups.
- Safety Goggles: Protect your eyes from debris.
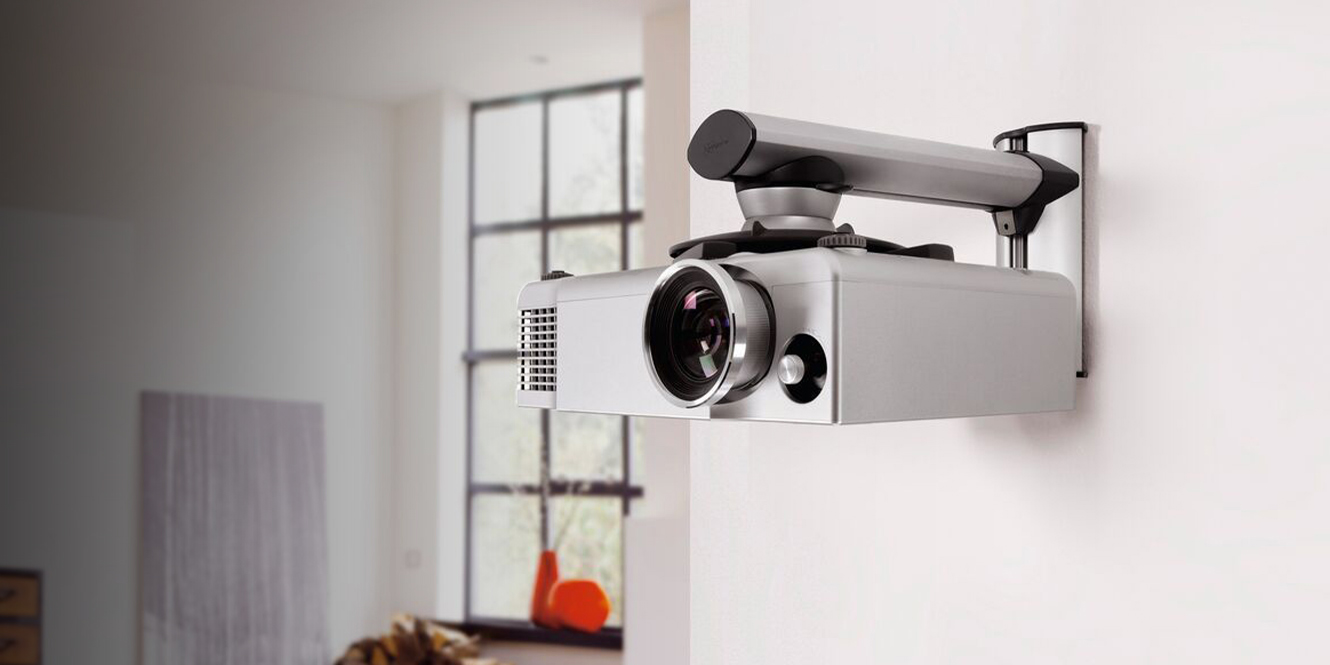
B. Mounting the Projector (Ceiling Mount Focus)
Ceiling mounting is the most common permanent installation method, providing a dedicated, out-of-the-way solution.
- Locating Studs/Joists for Secure Mounting: Use a stud finder to locate the wooden joists (in a ceiling) or studs (in a wall) that provide structural support. Never mount a projector or screen directly into drywall without anchoring it to a stud or using appropriate heavy-duty drywall anchors. This is a critical safety step to prevent the projector from falling. Mark the center points of the joists.
- Attaching the Mount Bracket: Most projector mounts come with a ceiling plate. Align this plate with the marked stud/joist locations, ensuring it is perfectly level using your spirit level. Drill pilot holes as recommended by the mount manufacturer, then securely screw the plate into the joists using lag bolts or heavy-duty wood screws.
- Securing the Projector to the Mount: Projectors have universal mounting holes (typically 3 or 4) on their underside. Attach the projector-specific bracket (which connects to the ceiling plate) to these holes. Once the bracket is secured to the projector, attach the entire assembly to the ceiling plate according to the mount’s instructions. Ensure all screws are tightened but do not overtighten, which could strip the threads or damage the projector casing. Adjust the tilt and swivel mechanisms loosely for initial positioning.
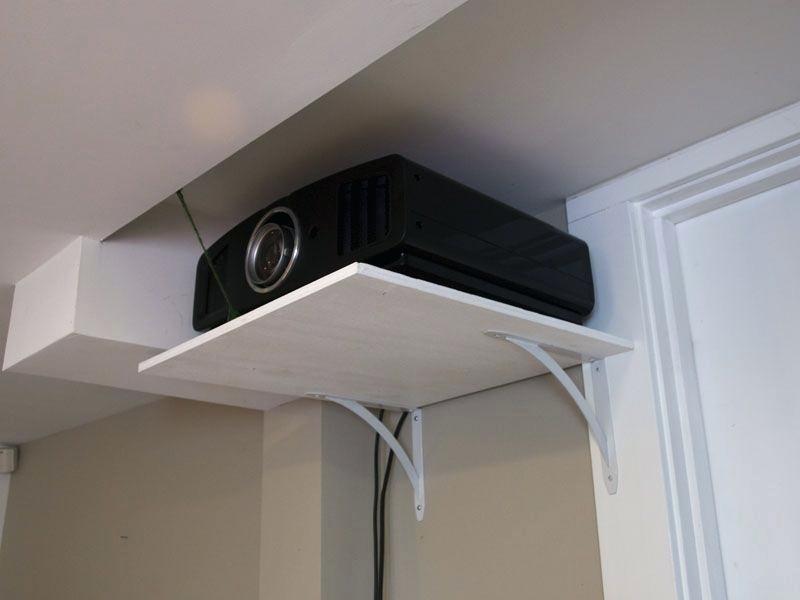
- Alternative: Tabletop/Shelf Placement: If you’re not ceiling mounting, place the projector on a stable, level surface. Ensure it’s positioned to achieve the desired image size and alignment, accounting for any lens shift or keystone correction capabilities. Ensure proper ventilation around the projector.

C. Installing the Projector Screen
The screen is just as important as the projector for image quality.
- Mounting Fixed or Retractable Screens:
- Fixed Screens: Assemble the frame according to instructions. Mount the hanging brackets to the wall, again locating studs for security. Ensure these brackets are perfectly level and spaced correctly. Hang the assembled screen on the brackets.
- Retractable Screens: These typically come with wall or ceiling mounting brackets. Use a stud finder to locate secure mounting points. Drill pilot holes and securely fasten the brackets. Hang the screen case onto the brackets. For electric screens, ensure a power outlet is nearby for the motor.
- Ensuring Level and Centered Placement: Use your level meticulously. A crooked screen will make the projected image appear distorted, regardless of projector adjustments. The screen should be centered horizontally on your viewing wall relative to your primary seating area.
D. Connecting Your Devices and Cables
A clean and organized cabling system is vital for both functionality and aesthetics.
- Video Sources (HDMI, DisplayPort): Connect your source devices (Blu-ray player, streaming stick, gaming console, PC) to the projector using the appropriate cables, typically HDMI. Use high-quality, certified cables, especially for longer runs or 4K signals, to prevent signal degradation. If running cables through walls or ceilings, use plenum-rated cables for fire safety.
- Audio Connections: If using an external sound system, connect your source devices to your AV receiver or soundbar first, and then run an HDMI cable from the AV receiver’s “OUT” port to the projector’s HDMI “IN” port. This ensures audio is processed by your sound system before video is sent to the projector.
- Power Supply: Connect the projector’s power cable to a reliable power outlet. Avoid using extension cords unless absolutely necessary, and ensure they are heavy-duty enough for the projector’s power draw.
- Effective Cable Management Strategies: This is where good “Tech” practices truly shine.
- Concealment: For a permanent setup, consider running cables through walls or ceilings. Consult an electrician if unsure. Use low-voltage conduit for future upgrades.
- Bundling: Use cable ties or Velcro straps to bundle cables neatly. This prevents tangles, reduces clutter, and makes troubleshooting easier.
- Labeling: Label both ends of each cable to identify its purpose and destination. This is invaluable for future modifications or troubleshooting.
- Leave Service Loops: Leave a small amount of slack in cables near connection points to allow for minor adjustments or future accessibility.
III. Calibration and Optimization: Fine-Tuning Your Viewing Experience
Once your projector and screen are physically installed and connected, the real magic happens during calibration. This step transforms a functional setup into an optimized viewing experience, leveraging the full potential of your “Tech” investment.
A. Initial Power-Up and Basic Settings
Turn on your projector and source device for the first time.
- Focus and Zoom Adjustment: This is your primary image shaping tool. Use the projector’s focus ring/button to sharpen the image until text and fine details are crisp. Use the zoom function (if available) to fill your screen perfectly without overshooting the edges. These are mechanical adjustments, so make them first.
- Keystone Correction (Use Sparingly): If the projector isn’t perfectly perpendicular to the screen, the image might appear trapezoidal. Keystone correction digitally warps the image to make it rectangular. However, it achieves this by sacrificing pixels, which can reduce image sharpness. Use it only if mechanical alignment is impossible. Aim to get the projector as square to the screen as possible to minimize keystone correction.
- Lens Shift (If Available): Many higher-end projectors feature lens shift, allowing you to physically move the lens up/down or left/right to adjust the image position without moving the projector itself or resorting to destructive keystone correction. This is an excellent feature for fine-tuning.
B. Picture Quality Adjustments
Dive into the projector’s on-screen menu to refine the image.
- Brightness, Contrast, Color, Tint: These are fundamental adjustments. Use test patterns (easily found online or on calibration discs) to set these correctly.
- Brightness (Black Level): Adjust until you can see subtle details in dark areas without the blacks looking grey.
- Contrast (White Level): Adjust until you can see subtle details in bright areas without whites looking clipped or overly bright.
- Color Saturation: Adjust for natural-looking colors.
- Tint (Hue): Primarily for NTSC signals, often set correctly by default for modern digital signals.
- Aspect Ratio: Ensure the projector is set to the correct aspect ratio for your content (e.g., 16:9 for widescreen movies, 4:3 for older content).
- Picture Modes: Most projectors offer pre-set picture modes (e.g., Cinema, Dynamic, Standard, Game). “Cinema” or “Movie” mode often provides the most color-accurate starting point for film content, while “Game” mode might reduce input lag. Experiment to find what looks best for different types of media.
C. Audio Setup and Synchronization
While the projector handles visuals, integrated audio is vital for the complete experience.
- Connecting to External Audio Systems: Confirm your audio sources are correctly connected to your AV receiver or soundbar. Ensure the sound system is receiving audio from the correct input.
- Lip Sync Adjustment: Sometimes, the audio and video can be slightly out of sync. Many AV receivers or projectors offer a lip-sync delay setting (audio delay) to perfectly match the sound to the on-screen action.
IV. Maintaining Your Projector and Troubleshooting Common Issues
Proper maintenance extends your projector’s lifespan and preserves its performance. Knowing how to troubleshoot common issues can also save you time and potential repair costs, maximizing the “Money” aspect of your investment.
A. Routine Maintenance for Longevity
Projectors, like any sophisticated “Tech” gadget, require a bit of care.
- Cleaning the Lens and Air Filters: Regularly clean the projector lens with a microfiber cloth and a specialized lens cleaner (never use abrasive materials). Check and clean or replace air filters every few months or as recommended by the manufacturer. Clogged filters restrict airflow, leading to overheating.
- Lamp/Light Source Replacement (When Applicable): If your projector uses a traditional lamp, pay attention to its rated lifespan. When the image dims or a lamp warning appears, replace it with an original manufacturer lamp to ensure optimal performance and safety. Laser and LED light sources have much longer lifespans and generally do not require replacement.
- Ensuring Proper Ventilation: Always ensure the projector has adequate space around its vents for airflow. Do not block vents or place the projector in an enclosed, unventilated space, as this will lead to overheating and premature component failure.
B. Addressing Common Installation and Performance Problems
Even with careful installation, issues can arise. Here’s a quick troubleshooting guide:
- No Image/Signal Issues:
- Check Cables: Ensure all video cables (HDMI, etc.) are securely connected at both the source and projector ends. Try re-seating them.
- Select Correct Input: Confirm the projector is set to the correct input source (e.g., HDMI 1, HDMI 2).
- Source Power/Output: Ensure your source device is powered on and configured to output video to the correct port. Try a different source device or cable.
- Projector Lamp/Light Source: Check if the lamp is working (if applicable) or if there’s a light source error message.
- Distorted or Unfocused Image:
- Focus Ring: Re-adjust the focus ring.
- Keystone/Lens Shift: If the image is trapezoidal, adjust keystone correction (sparingly) or use lens shift.
- Projector/Screen Alignment: Ensure the projector is perpendicular to the screen and the screen itself is level.
- Lens Cleanliness: A dirty lens can cause blurriness.
- Overheating Warnings:
- Ventilation: Check if vents are blocked. Ensure adequate space around the projector.
- Air Filters: Clean or replace clogged air filters.
- Room Temperature: Ensure the room isn’t excessively hot.
- Audio Problems:
- Source Output: Ensure your source device is outputting audio to the correct channel (HDMI to AV receiver).
- AV Receiver/Soundbar Input: Confirm the sound system is on the correct input.
- Volume: Check volume levels on all devices.
- Cables: Re-check audio cables.
- Remote Control Malfunctions:
- Batteries: Replace batteries.
- Line of Sight: Ensure nothing is blocking the IR signal to the projector.
- Interference: Move away from sources of strong electromagnetic interference.
Conclusion
Installing a projector, whether for a dedicated home theater, a dynamic presentation space, or an immersive gaming setup, is a rewarding endeavor that significantly elevates your visual experience. By meticulously following this comprehensive guide, from the initial planning stages and hardware selection to the precise physical installation, thorough calibration, and diligent maintenance, you empower yourself to unlock the full potential of this versatile technology. Understanding the interplay of ambient light, throw distance, resolution, and careful cable management ensures not only a stunning visual display but also a safe, efficient, and long-lasting setup.
Embrace the blend of technical precision and aesthetic considerations, and you’ll transform a blank wall into a canvas for entertainment, education, and inspiration. With your projector expertly installed and finely tuned, you are now ready to enjoy larger-than-life visuals, making every movie night, presentation, or gaming session an unforgettable event.
aViewFromTheCave is a participant in the Amazon Services LLC Associates Program, an affiliate advertising program designed to provide a means for sites to earn advertising fees by advertising and linking to Amazon.com. Amazon, the Amazon logo, AmazonSupply, and the AmazonSupply logo are trademarks of Amazon.com, Inc. or its affiliates. As an Amazon Associate we earn affiliate commissions from qualifying purchases.