
In the rapidly evolving landscape of PC hardware, the prevailing wisdom suggests that “newer is always better.” We are conditioned to click “Update” the moment a notification appears, chasing the latest performance optimizations and security patches. However, for many power users, gamers, and creative professionals, the latest NVIDIA Game Ready Driver isn’t always the most stable. Whether it is a regression in frame rates for a specific title, compatibility issues with professional rendering software, or the sunsetting of support for older GPU architectures, knowing how to properly install old NVIDIA drivers is a critical skill for maintaining system stability.
This guide provides a deep dive into the technical nuances of driver downgrading, ensuring that you can revert to a stable environment without leaving behind “driver sludge” that could hamper your system’s performance.
Understanding the Necessity of Legacy Drivers
While NVIDIA’s engineering team works tirelessly to optimize their software for the latest releases, the sheer diversity of PC configurations makes it impossible to guarantee universal stability. There are several scenarios where moving backward in version numbers is actually a step forward in productivity.
Stability Over Cutting-Edge Performance
The most common reason to seek out an older driver is the “broken update” phenomenon. A new driver might introduce “TDR” (Timeout Detection and Recovery) errors, leading to desktop crashes, or it might cause micro-stuttering in games that previously ran smoothly. For users who prioritize a stable experience—such as those in the middle of a high-stakes competitive season or a critical project deadline—reverting to a “known good” version is often the most logical troubleshooting step.
Resolving Software Incompatibilities
Creative professionals using the Adobe Creative Cloud suite, DaVinci Resolve, or CAD software often find that certain driver versions are “certified” for their specific applications. NVIDIA’s Studio Driver branch aims to solve this, but even then, a specific plugin or hardware acceleration feature might break with a new update. In these niche technical environments, matching the driver version to the software’s requirements is more important than having the latest optimizations for Cyberpunk 2077.
Hardware Constraints and End-of-Life (EOL) Support
As GPU architectures age, they eventually move to “Legacy” status. For example, NVIDIA moved the Kepler architecture (GTX 600 and 700 series) to legacy support in 2021. If you are refurbishing an older machine or maintaining a secondary workstation with an older card, the latest drivers available on the main NVIDIA landing page might not even support your hardware. In these cases, navigating the archives is the only way to get the GPU functioning correctly.
Preparing Your System for a Driver Downgrade
Before you begin the process of installing an older driver, you must prepare the operating system. Simply running an older installer over a newer one can lead to “version mismatch” errors or registry conflicts that can cause the dreaded Blue Screen of Death (BSOD).
Identifying Your Exact GPU and OS Requirements
To find the correct old driver, you need precise information. Right-click the Start button and select “Device Manager.” Under “Display adapters,” note your exact model (e.g., NVIDIA GeForce RTX 3070). Additionally, verify your Windows version (Windows 10 vs. Windows 11) and whether you require a Standard or DCH driver type. While NVIDIA has largely moved to DCH (Declarative Componentized Hardware) drivers, some older systems still rely on the Standard architecture.
Creating a System Restore Point
Before making changes to core system files, always create a System Restore point. This acts as a safety net. If the driver installation fails or the system becomes unstable, you can revert the entire Windows registry and system state to the point before you began the downgrade.
The Role of Display Driver Uninstaller (DDU)
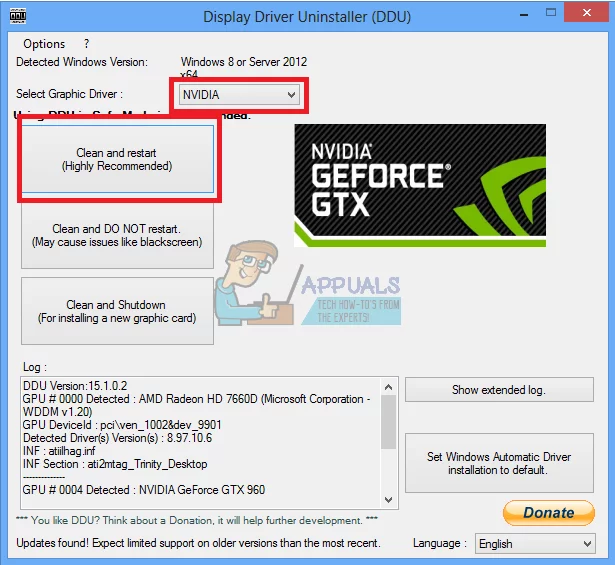
The most important tool in your arsenal is “Display Driver Uninstaller” (DDU). Windows’ built-in uninstaller often leaves behind orphaned registry keys and DLL files that can interfere with a clean installation. DDU is a lightweight utility that scrubs every trace of NVIDIA software from your system. To use it effectively, it should be run in Windows Safe Mode with the internet disconnected to prevent Windows Update from automatically installing a generic driver the moment you reboot.
How to Locate and Download Official Archive Drivers

NVIDIA does not make it immediately obvious where to find older drivers on their homepage, as they prefer users to stay on the latest version. However, they maintain a comprehensive public archive.
Navigating the NVIDIA Advanced Search Page
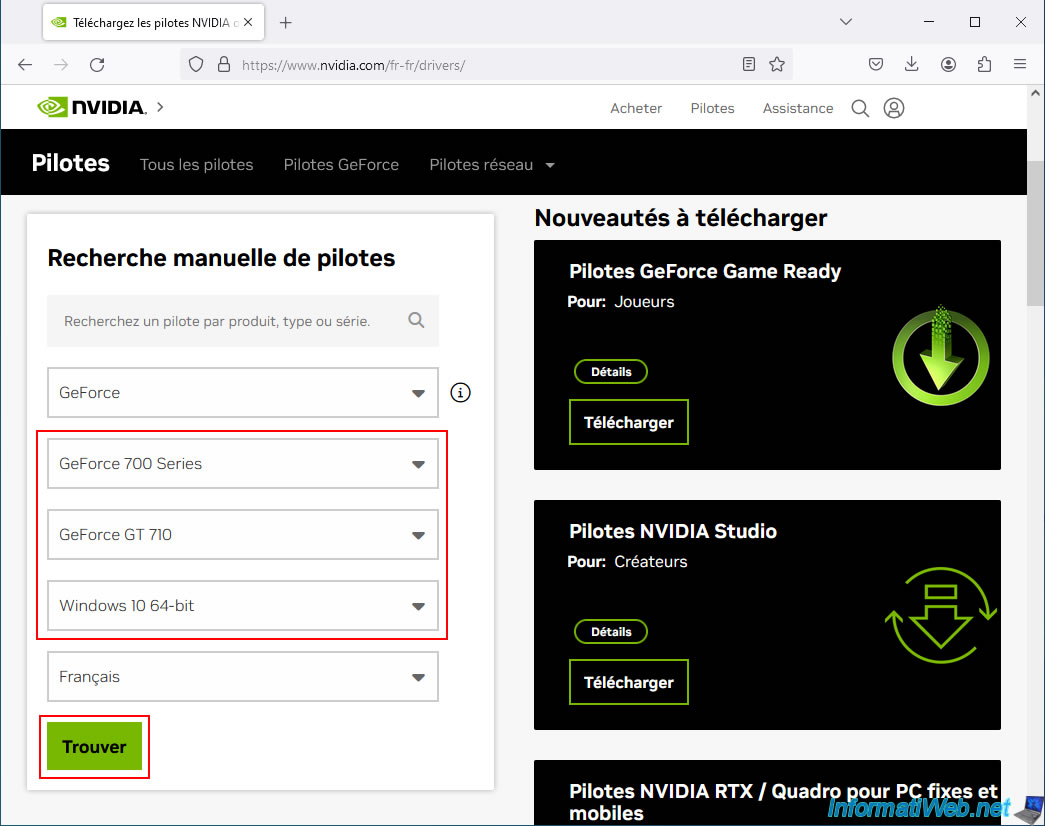
To find legacy versions, you must bypass the standard download page and use the “NVIDIA Official Advanced Driver Search.” This portal allows you to filter by product type, series, and operating system, but crucially, it provides a list of all previously released versions rather than just the most recent one.
When searching the archives, you will often see two types of drivers:
- Game Ready Drivers (GRD): Optimized for the latest gaming releases and frequent updates.
- Studio Drivers (SD): Tested extensively against creative applications and released less frequently, focusing on long-term stability.
If you are downgrading due to crashes, switching from a GRD to a slightly older SD version is often a highly effective solution.
Avoiding Third-Party Mirror Sites
It is tempting to download drivers from third-party “driver update” websites, especially if NVIDIA’s archive search feels slow. However, this is a significant security risk. GPU drivers operate at the kernel level of your operating system. A compromised driver from an unverified source could allow malware to bypass standard security protocols. Always ensure the URL begins with nvidia.com.
The Step-by-Step Installation Process
Once you have downloaded the correct .exe file from the archive and cleaned your system with DDU, you are ready to install.
Performing a “Clean Install” via the NVIDIA Wizard
Even though you have used DDU, it is a best practice to use the “Custom (Advanced)” installation option within the NVIDIA installer.
- Launch the installer and wait for the extraction process.
- Select “NVIDIA Graphics Driver” (you can choose to skip GeForce Experience if you want a leaner system).
- On the “Installation options” screen, select Custom (Advanced) and click Next.
- Check the box at the bottom that says “Perform a clean installation.” This acts as a secondary safeguard to ensure the driver profiles are reset to factory defaults.
Monitoring the Installation
During the process, your screen will likely flicker or turn black momentarily. This is normal, as the OS is switching from the basic Microsoft Display Adapter driver to the specialized NVIDIA driver. Once the process is complete, restart your computer—even if the installer doesn’t explicitly ask you to—to finalize the registry changes.
Managing Windows Update and Future-Proofing
One of the most frustrating aspects of installing an old driver is that Windows 10 and 11 are designed to be “always up to date.” Often, within minutes of installing your preferred old driver, Windows Update will detect it as “outdated” and automatically overwrite it with a newer (potentially unstable) version.
Disabling Automatic Driver Updates
To prevent Windows from interfering with your chosen driver version, you can adjust the System Properties.
- Open the Control Panel and navigate to System and Security > System.
- Click on Advanced system settings.
- Select the Hardware tab and click Device Installation Settings.
- Choose “No (your device might not work as expected)” and save changes.
Note that this prevents Windows from updating all drivers. For a more surgical approach, tech-savvy users can use the “Show or Hide Updates” troubleshooter tool from Microsoft to specifically block the NVIDIA update while allowing others to proceed.
Knowing When to Move Forward
Installing an old driver is often a temporary fix. As new security vulnerabilities (like those related to “Spectre” or “Meltdown” variations) are discovered, NVIDIA patches them in newer releases. Furthermore, new games will eventually require newer APIs (like DirectX 12 Ultimate features) that older drivers simply do not support.
Periodically check tech forums, the NVIDIA subreddit, or the official patch notes. Once a newer driver is released that explicitly mentions fixing the bug that forced your downgrade, it is worth attempting an update again. By following the clean installation steps outlined in this guide, you can toggle between versions with the confidence that your system remains optimized and stable, regardless of which version number you choose to run.
aViewFromTheCave is a participant in the Amazon Services LLC Associates Program, an affiliate advertising program designed to provide a means for sites to earn advertising fees by advertising and linking to Amazon.com. Amazon, the Amazon logo, AmazonSupply, and the AmazonSupply logo are trademarks of Amazon.com, Inc. or its affiliates. As an Amazon Associate we earn affiliate commissions from qualifying purchases.