
In the fast-evolving world of technology, keeping your hardware running at peak performance is paramount, especially when it comes to the heart of your visual experience: the graphics processing unit (GPU). For millions of users worldwide, NVIDIA GPUs are the powerhouse behind everything from high-fidelity gaming and professional content creation to cutting-edge AI computations. However, possessing a powerful NVIDIA graphics card is only half the battle; ensuring it operates optimally requires regularly installing and updating its drivers.
This comprehensive guide will walk you through the intricate yet essential process of installing and updating your NVIDIA drivers, ensuring you unlock the full potential of your hardware. Whether you’re a seasoned PC enthusiast or a new user looking to enhance your system’s performance, understanding the nuances of driver management is a critical skill for anyone navigating the digital landscape. We’ll delve into why these updates matter, the crucial steps to take before installation, the various methods of installing drivers, and how to troubleshoot common issues, all within the context of maximizing your technological investment.
Why Updating Your NVIDIA Driver is Crucial for Performance and Productivity
Drivers are the essential software bridges that allow your operating system and applications to communicate effectively with your hardware. Think of them as translators; without the correct, up-to-date translation, your GPU can’t understand or execute commands efficiently. For NVIDIA graphics cards, this communication is vital for everything from rendering complex 3D graphics in games to accelerating intensive workloads in professional applications like video editing, 3D modeling, and even AI development.
Regularly updating your NVIDIA driver isn’t just a recommendation; it’s a necessity for maintaining system health, boosting performance, and accessing the latest features. Neglecting driver updates can lead to a myriad of problems, including reduced frame rates, graphical glitches, system instability, and even security vulnerabilities.
Unlocking Performance Boosts and Game-Ready Optimizations
One of the most immediate and noticeable benefits of installing the latest NVIDIA drivers is the significant performance improvement, particularly for gamers. NVIDIA consistently releases “Game Ready Drivers” that are specifically optimized for new game titles just before or at their launch. These drivers often contain critical optimizations that can dramatically increase frame rates, reduce stuttering, and improve the overall visual fidelity in newly released games. For competitive gamers, even a slight increase in performance can make a substantial difference in gameplay fluidity and responsiveness. Beyond gaming, these optimizations extend to professional applications, where updated drivers can accelerate rendering times, improve responsiveness in CAD software, and speed up computations in scientific simulations.
Accessing New Features and Enhancements
Beyond raw performance, NVIDIA drivers frequently introduce new features and technological advancements. These can range from enhanced visual settings like NVIDIA DLSS (Deep Learning Super Sampling) and Reflex Low Latency Technology, which revolutionize gaming experiences, to new capabilities for creative professionals, such as improved CUDA acceleration for video encoding or new features in their broadcast software. For users leveraging their NVIDIA GPU for AI and machine learning, driver updates often bring support for new frameworks, improved library compatibility, and performance enhancements for demanding computational tasks. Staying updated ensures you can leverage these innovations as soon as they become available, keeping your system at the forefront of technological capability.
Enhancing Stability and Digital Security
Outdated drivers are a common culprit behind system instability, ranging from application crashes to the dreaded “blue screen of death.” Manufacturers continuously identify and patch bugs and compatibility issues through driver updates, leading to a more stable and reliable computing experience. For professionals whose livelihoods depend on stable software performance, this reliability is non-negotiable. Furthermore, updated drivers can also address potential security vulnerabilities that might be exploited by malicious actors. In an era where digital security is paramount, ensuring your software, including drivers, is up-to-date forms a crucial layer of defense against potential threats and exploits, protecting your data and your system’s integrity.
Essential Preparations Before You Install: A Pre-Installation Checklist
Before embarking on the driver installation process, a few critical preparatory steps can save you a lot of headache and ensure a smooth, successful update. These steps are designed to prevent conflicts, ensure system recovery options, and streamline the entire procedure.
1. Identify Your NVIDIA Graphics Card
Knowing the exact model of your NVIDIA GPU is fundamental. While GeForce Experience can auto-detect this, it’s good practice to know it yourself, especially if you’re installing manually.
- For Windows users: Right-click on your Desktop and select “NVIDIA Control Panel” (if installed). Go to “System Information” in the bottom left. Alternatively, press
Win + R, typedxdiagand hit Enter, then navigate to the “Display” tab. The GPU model will be listed there. - Physical Inspection: If you built your PC, you might also know the model from the card itself or its original packaging.
2. Download the Latest Official Driver
Always download your drivers directly from NVIDIA’s official website. Avoid third-party sites, as they may offer outdated, modified, or even malicious drivers.
- Go to
www.nvidia.com/drivers. - Use the “Manual Driver Search” option: Select your Product Type (e.g., GeForce), Product Series (e.g., GeForce RTX 40 Series), Product (your specific card model), Operating System (e.g., Windows 11), and Language.
- Click “Search,” then “Download” the latest Game Ready Driver (GRD) or Studio Driver (SD), depending on your primary use case. GRD is optimized for gaming, while SD is optimized for creative applications and stability.
3. Back Up Your System (Optional, but Highly Recommended)
While driver updates are usually straightforward, unforeseen issues can occur. Creating a system restore point or a full system backup provides a safety net, allowing you to revert your system to a previous stable state if anything goes wrong.
- System Restore Point (Windows): Search for “Create a restore point” in the Windows search bar. In the System Properties window, go to the “System Protection” tab, select your main drive, and click “Create…”. Give it a descriptive name like “Before NVIDIA Driver Update.”
- Full System Backup: For critical systems, consider using Windows’ built-in backup tools or third-party backup software to create a full image of your OS drive.
4. Uninstalling Old Drivers (Optional, but Recommended for a “Clean” Install)
For a truly clean installation, especially if you’re encountering issues or switching between driver types (e.g., from GRD to SD), completely removing previous driver files is advisable.
- NVIDIA GeForce Experience: This software can manage driver updates directly. If you plan to use it for future updates, you can just let it handle the clean install option.
- Display Driver Uninstaller (DDU): This is a powerful, free third-party utility designed to remove all traces of graphics drivers (NVIDIA, AMD, Intel) from your system.
- Download DDU from its official source (often found on reputable forums like Guru3D).
- Boot your PC into Windows Safe Mode (search online for “how to boot into Windows Safe Mode” for your specific Windows version).
- Run DDU, select “NVIDIA” as the driver vendor, and choose “Clean and restart.” DDU will meticulously remove all driver components and then reboot your system.
- Note: Using DDU is generally recommended only when experiencing issues or if you desire the absolute cleanest install. For routine updates, the NVIDIA installer’s “Perform a Clean Installation” option is usually sufficient.
5. Close All Background Applications
Before initiating the installation, close all open programs, especially games, video players, and any applications that heavily utilize your GPU. This minimizes potential conflicts and ensures that all driver files can be updated without interference. Disable any temporary antivirus or anti-malware software if you encounter issues during installation, but remember to re-enable them afterward.
The Core Process: Step-by-Step NVIDIA Driver Installation
With your preparations complete, you’re ready to proceed with the actual driver installation. There are generally two primary methods: using the NVIDIA installer directly (which you downloaded) or through NVIDIA GeForce Experience.
Method 1: Using the NVIDIA Driver Installer (Manual Installation)
This method provides the most control and is essential if you don’t use GeForce Experience or want to perform a completely fresh installation.
- Locate the Downloaded Driver: Navigate to the folder where you saved the NVIDIA driver executable file (e.g.,
GeForce_Game_Ready_Driver_xxxx.xx.exe). - Run as Administrator: Right-click on the executable and select “Run as administrator.” This ensures the installer has the necessary permissions to modify system files.
- Extraction Process: The installer will first prompt you to choose an extraction path. You can usually leave this as default. Click “OK” to begin extracting the driver files.
- License Agreement: Read the NVIDIA Software License Agreement and click “AGREE AND CONTINUE” if you accept the terms.
- Installation Options: This is a crucial step where you decide between:
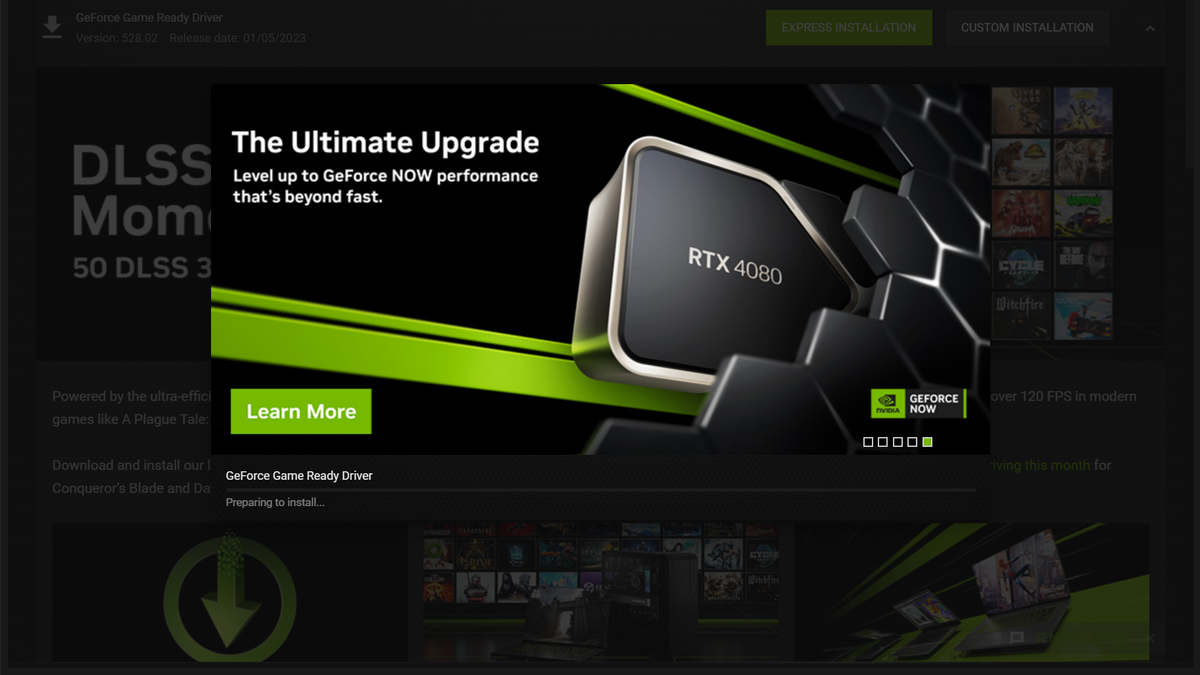
- Express Installation (Recommended): This is the easiest and most common option. It automatically installs the driver and other essential NVIDIA components (like GeForce Experience if not present, and the NVIDIA Control Panel). It performs an in-place upgrade over your existing driver files.
- Custom (Advanced) Installation: This option allows you to select which components to install (e.g., you might uncheck 3D Vision if you don’t use it). Crucially, this is where you can select the “Perform a clean installation” checkbox.
- Perform a clean installation: If you select “Custom (Advanced)” and check this box, the installer will remove previous driver files and settings before installing the new ones. This helps prevent conflicts and is highly recommended for troubleshooting or if you skipped the DDU step.
- Recommendation: For routine updates, “Express” is fine. If you want a fresh start or are troubleshooting, choose “Custom” and check “Perform a clean installation.”
- Installation Progress: The installer will now proceed to install the selected components. Your screen may flicker, go black, or change resolution several times during this process. This is normal as the graphics driver is being updated.
- Restart Your System: Once the installation is complete, the installer will prompt you to restart your computer. It is critical to restart immediately to finalize the installation and ensure all new driver components are properly loaded. Do not skip this step.
Method 2: Installing via NVIDIA GeForce Experience
GeForce Experience is a powerful companion application that simplifies driver management, optimizes game settings, and provides additional features like ShadowPlay for recording gameplay.
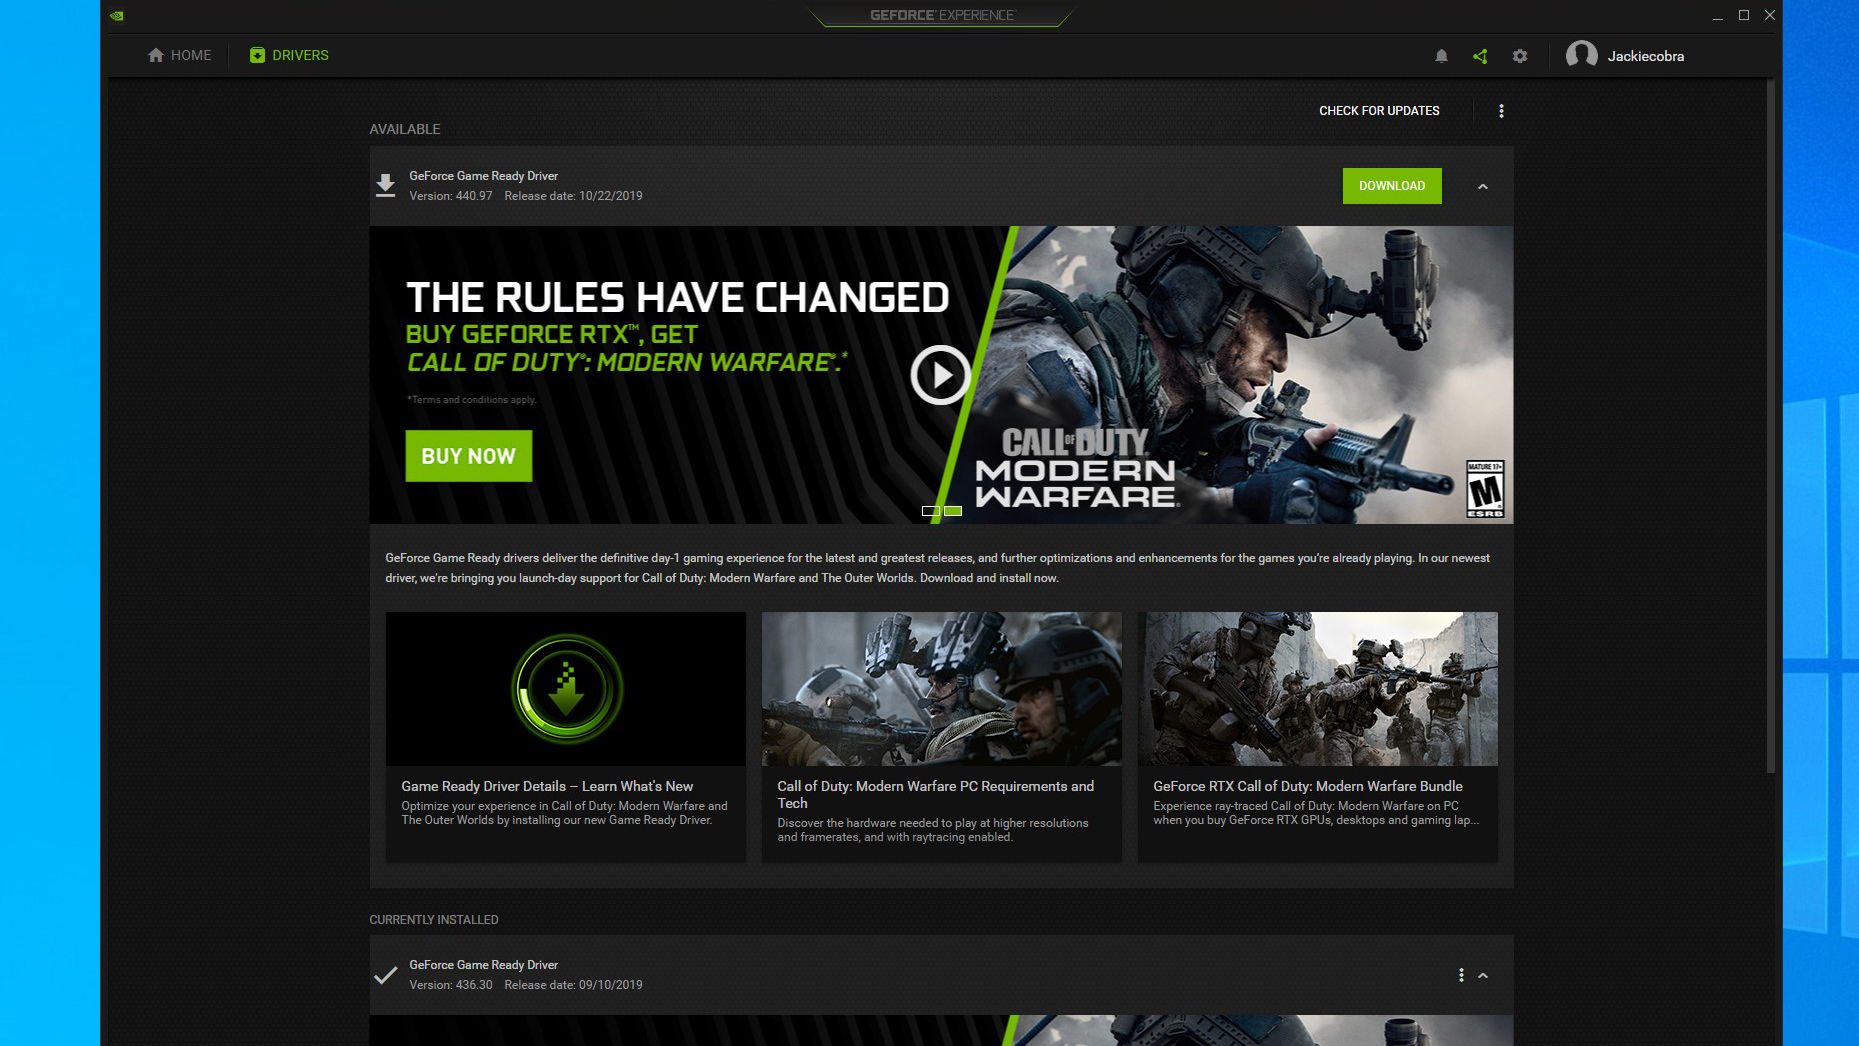
- Launch GeForce Experience: If you don’t have it installed, you can download it from NVIDIA’s website or install it during a custom driver installation. Launch the application from your desktop shortcut or Start Menu.
- Navigate to Drivers Tab: In GeForce Experience, click on the “Drivers” tab located at the top of the window.
- Check for Updates: GeForce Experience will automatically check for new drivers. If an update is available, you will see a notification.
- Download the Driver: Click the “Download” button next to the available driver. The application will download the necessary files.
- Choose Installation Type: Once downloaded, you’ll be presented with two options:
- Express Installation: Similar to the manual installer, this is the quickest way to update.
- Custom Installation: This allows you to select components and, critically, includes a “Perform a Clean Installation” option.
- Recommendation: For most users, “Express Installation” is sufficient. If you encounter issues or want a pristine setup, choose “Custom” and select “Perform a Clean Installation.”
- Installation Progress: The installation will proceed, similar to the manual method, with screen flickering and resolution changes.
- Restart Your System: After the installation finishes, you will be prompted to restart your computer. Restart immediately to complete the process.
Post-Installation: Verification and Optimization
Once your drivers are installed and your system has restarted, it’s essential to verify that everything is working as expected and to take a few steps to optimize your setup.
1. Verify Driver Installation
- NVIDIA Control Panel: Right-click on your desktop and select “NVIDIA Control Panel.” In the bottom-left corner, click “System Information.” Check the “Driver version” to ensure it matches the version you just installed.
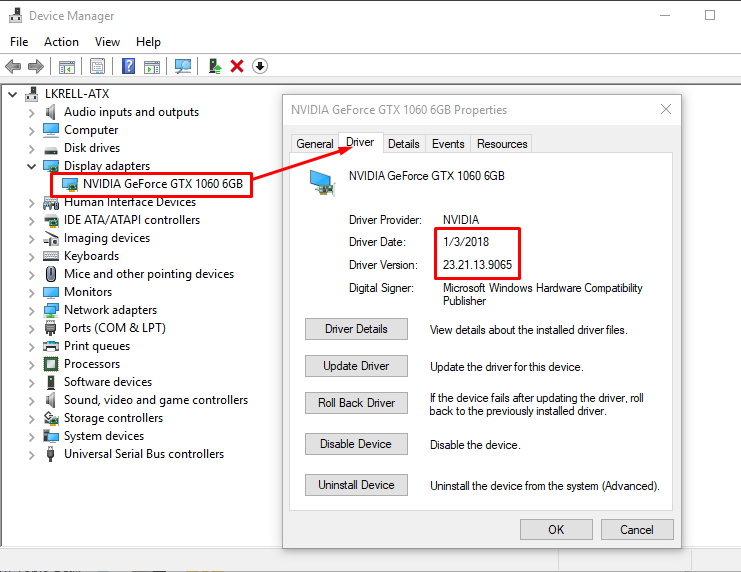
- Device Manager (Windows): Press
Win + Xand select “Device Manager.” Expand “Display adapters.” Right-click on your NVIDIA GPU, select “Properties,” then navigate to the “Driver” tab. The Driver Version and Date should reflect your recent update. - Quick Test: Launch a game or a GPU-intensive application that you frequently use. Check for any immediate performance improvements, graphical glitches, or instability.
2. Optimize Settings with NVIDIA Control Panel
The NVIDIA Control Panel offers a wealth of settings to fine-tune your graphics experience.
- 3D Settings: Under “Manage 3D settings,” you can configure global settings or program-specific settings. Experiment with options like “Image Scaling,” “Low Latency Mode,” or “Max Frame Rate” to balance performance and visual quality according to your preferences. For gamers, ensure “Preferred refresh rate” is set to “Highest available” for your monitor.
- Display Settings: Adjust resolution, refresh rate, and set up multiple displays. Ensure your monitor is running at its native resolution and highest supported refresh rate for the best visual experience.
- G-SYNC/FreeSync (if applicable): If you have a compatible monitor, enable G-SYNC (or FreeSync with NVIDIA’s compatibility) in the Control Panel for tear-free gaming.
3. Monitor Performance and Stability
Keep an eye on your system’s performance and stability over the next few days. Play your favorite games, run your usual applications. If you notice any unexpected performance drops, crashes, or visual artifacts, it might indicate a driver issue. In such cases, you might consider troubleshooting or reverting to a previous, stable driver version.
Troubleshooting Common NVIDIA Driver Issues
Even with careful preparation, issues can sometimes arise during or after driver installation. Knowing how to diagnose and address these problems can save you considerable frustration.
1. Installation Failures
- Error Messages: Pay close attention to any error messages the installer provides. They often hint at the underlying problem (e.g., “installation failed,” “driver not compatible,” “insufficient disk space”).
- Solutions:
- Re-download the driver: The download might have been corrupted.
- Disable antivirus temporarily: Your antivirus software might be interfering.
- Run as administrator: Ensure you have elevated privileges.
- Use DDU in Safe Mode: Perform a truly clean install using DDU as described earlier, then attempt the driver installation again.
- Check system requirements: Ensure your GPU and OS are actually supported by the driver version you’re trying to install.
2. Black Screen or Display Issues After Installation
This is a common, albeit alarming, problem where your screen goes black, displays no signal, or shows incorrect resolutions after a driver update.
- Solutions:
- Reboot in Safe Mode: If your screen is black, force shut down your PC (hold power button) and try to boot into Safe Mode. If you can get into Safe Mode, use DDU to uninstall the problematic driver, then reboot normally and try installing an older, known-stable driver, or the latest driver with a clean installation.
- Connect to integrated graphics (if available): If your CPU has integrated graphics, connect your monitor to the motherboard’s video output. This might allow you to see your desktop and troubleshoot the NVIDIA driver.
- Wait: Sometimes the display driver might take a few moments to initialize properly after a restart. Give it a minute or two.
3. Performance Degradation or Crashes
If your games perform worse or applications crash more frequently after an update, the new driver might be the culprit.
- Solutions:
- Roll back the driver: In Device Manager, right-click your NVIDIA GPU, go to “Properties,” then the “Driver” tab, and select “Roll Back Driver” if the option is available.
- Install an older, stable driver: Download a previous version of the driver from NVIDIA’s website (they usually keep an archive) that you know was stable for your system. Perform a clean installation using DDU before installing the older driver.
- Check game/application settings: Ensure that your game or application settings haven’t reset or changed after the driver update.
4. Driver Crashes (TDR Errors)
Transparent Device Driver Recovery (TDR) errors manifest as brief black screens followed by a message like “Display driver stopped responding and has successfully recovered.”
- Solutions:
- Clean installation: Perform a clean driver installation using DDU.
- Check GPU temperatures: Overheating can cause TDR errors. Monitor your GPU temperatures during load.
- Under-clocking/Over-clocking: If you have over-clocked your GPU, try reverting to default clock speeds. If issues persist, slightly under-clocking might provide stability.
- Power supply: Ensure your power supply unit (PSU) is sufficient for your GPU and other components.
- Windows Updates: Ensure your Windows OS is fully up to date.
Maintaining Your NVIDIA Drivers for Optimal Performance
Driver installation isn’t a one-time event; it’s an ongoing process to keep your system performing at its best. Establishing a routine for driver maintenance will ensure you continuously benefit from NVIDIA’s advancements and optimizations.
Regular Driver Updates
Aim to check for new driver updates monthly or whenever a major new game or software update is released that impacts your workflow. While not every update brings revolutionary changes, staying relatively current prevents your system from falling too far behind and ensures compatibility with the latest software. NVIDIA typically releases Game Ready Drivers every few weeks, especially around major game launches, and Studio Drivers less frequently but with a focus on stability for creative applications.
Utilizing GeForce Experience for Seamless Updates
For most users, NVIDIA GeForce Experience is the most convenient tool for managing driver updates.
- Automatic Checks: Enable GeForce Experience to automatically check for driver updates in the background. It will notify you when a new driver is available.
- One-Click Installation: With just a few clicks, you can download and install the latest drivers directly through the application, often choosing between Express and Custom installations. This streamlines the entire process, removing the need to manually browse NVIDIA’s website.
- Game Optimization: Beyond drivers, GeForce Experience can also automatically optimize your game settings for the best balance of performance and visual quality, further enhancing your gaming experience.
Manual Checks and Archiving
Even if you use GeForce Experience, it’s wise to occasionally visit NVIDIA’s official driver download page manually. This helps ensure you’re aware of all available drivers, including Studio Drivers if you toggle between them, and to download specific versions if needed for troubleshooting. Some advanced users also keep an archive of known-stable driver versions on their local drive, providing a quick fallback option if a new driver introduces unforeseen issues.
By following these guidelines, you transform the potentially daunting task of driver installation into a manageable and beneficial routine. A well-maintained NVIDIA driver ensures your system remains a high-performance, stable, and secure platform, ready to tackle any technological challenge or entertainment pursuit you throw its way. Embracing these practices is not just about keeping up with technology; it’s about making the most of your investment and ensuring a smooth, productive, and enjoyable computing experience for years to come.
aViewFromTheCave is a participant in the Amazon Services LLC Associates Program, an affiliate advertising program designed to provide a means for sites to earn advertising fees by advertising and linking to Amazon.com. Amazon, the Amazon logo, AmazonSupply, and the AmazonSupply logo are trademarks of Amazon.com, Inc. or its affiliates. As an Amazon Associate we earn affiliate commissions from qualifying purchases.