In today’s rapidly evolving digital landscape, staying at the forefront of technological trends is paramount for individuals and businesses alike. Whether you’re a seasoned developer, an aspiring entrepreneur, or simply curious about the tools that power modern web applications, understanding core technologies like Node.js is a significant step. Node.js has transformed server-side JavaScript development, offering a powerful, efficient, and scalable platform for building everything from real-time applications to robust APIs and microservices. For those operating within the Windows ecosystem, getting Node.js up and running is a straightforward process that unlocks a world of possibilities, impacting everything from tech innovation to brand development and even potential revenue streams.

This comprehensive guide will walk you through the various methods of installing Node.js on your Windows machine, ensuring you have the foundational knowledge to embark on your development journey. We’ll cover the official installer, streamlined package managers, and even version management tools, arming you with the flexibility and control needed to master this essential technology.
Understanding Node.js: Why It’s Indispensable for Modern Development
Before diving into the installation process, it’s crucial to grasp what Node.js is and why it has become such a cornerstone in the world of web development. Its rise is a testament to its efficiency and versatility, making it a key component in the modern tech stack.
What is Node.js?
At its core, Node.js is an open-source, cross-platform JavaScript runtime environment that executes JavaScript code outside a web browser. Built on Chrome’s V8 JavaScript engine, Node.js allows developers to use JavaScript for server-side programming, database interactions, command-line tools, and more. Historically, JavaScript was confined to client-side browser execution, but Node.js liberated it, enabling a unified language approach across the entire web stack – a concept often referred to as “full-stack JavaScript.”
Node.js operates on an event-driven, non-blocking I/O model, which makes it incredibly lightweight and efficient. This architecture is particularly well-suited for data-intensive real-time applications that run across distributed devices, such as chat applications, online gaming, and streaming services.
The Power and Versatility of Node.js
The widespread adoption of Node.js isn’t just a trend; it’s a reflection of its inherent strengths that align perfectly with the demands of modern digital products and services.
- Unified Language Stack: By allowing both frontend and backend development in JavaScript, Node.js streamlines the development process. This reduces the cognitive load for developers, enables easier code sharing between client and server, and often leads to faster development cycles. For businesses, this translates to reduced costs and quicker time-to-market for new features and products, directly impacting brand agility and competitive edge.
- High Performance and Scalability: Node.js’s non-blocking, asynchronous nature makes it highly performant, capable of handling a large number of concurrent connections with minimal overhead. This scalability is vital for applications that experience fluctuating traffic or require real-time interactions, ensuring a smooth user experience even under heavy load. This is a critical factor for maintaining brand reputation and customer satisfaction.
- Rich Ecosystem (npm): Node.js boasts the largest ecosystem of open-source libraries in the world, managed by npm (Node Package Manager). npm provides access to millions of packages, offering pre-built solutions for almost any functionality imaginable. This vast resource significantly accelerates development, allowing developers to leverage existing, well-tested code rather than reinventing the wheel. From a productivity standpoint, npm is a game-changer.
- Cross-Platform Compatibility: As a cross-platform runtime, Node.js runs seamlessly on Windows, macOS, and Linux. This flexibility ensures that development teams can work in their preferred operating environments without compatibility issues, fostering collaboration and broad appeal for tools built with Node.js.
- Diverse Use Cases: Node.js powers a diverse array of applications, including:
- Web Applications: Server-side rendering, APIs (RESTful, GraphQL).
- Real-time Applications: Chat apps, collaboration tools, online gaming.
- Streaming Applications: Video and audio streaming.
- Command-Line Tools: Automating tasks, build tools.
- Microservices: Breaking down large applications into smaller, manageable services.
For individuals exploring online income, Node.js proficiency can open doors to freelancing, building SaaS products, or even starting a tech-driven business. For established brands, it offers the technical foundation to build cutting-edge digital experiences that differentiate them in a crowded market.
Preparing Your Windows Environment & Choosing an Installation Method
Before you begin the Node.js installation, a few preliminary steps and considerations will ensure a smooth process. Understanding your options will help you select the method best suited to your development workflow.
System Requirements and Prerequisites
Node.js is designed to be lightweight and generally doesn’t demand excessive system resources. However, ensuring your Windows system meets a few basic criteria is always good practice:
- Operating System: Windows 7 or newer (Windows 10/11 is recommended for best compatibility and performance).
- Administrator Privileges: Most installation methods, especially the official installer, require administrator rights to modify system paths and install software globally.
- Internet Connection: Required to download the Node.js installer or packages.
- Disk Space: A minimal amount of disk space (typically tens to a few hundreds of MBs) is needed for the Node.js runtime and npm packages.
Choosing the Right Installation Method
There are several ways to install Node.js on Windows, each with its own advantages. Your choice will depend on your familiarity with command-line tools, your need for version management, and personal preference.
- Official MSI Installer (Recommended for most users): This is the most straightforward method. You download an executable file from the official Node.js website and run it like any other Windows application. It handles all necessary configurations, including setting up environment variables. This is ideal for beginners or those who primarily need a single, stable version of Node.js.
- Chocolatey (Windows Package Manager): For developers who prefer managing software through the command line, Chocolatey is an excellent choice. It simplifies the process of installing, upgrading, and removing applications. If you’re accustomed to package managers on Linux (like
aptoryum), Chocolatey offers a similar experience on Windows. - NVM for Windows (Node Version Manager): If your development work requires switching between different versions of Node.js for various projects, NVM for Windows is indispensable. It allows you to install and manage multiple Node.js versions on the same machine, easily switching between them as needed. This is particularly useful for maintaining legacy projects while working on newer ones that require the latest Node.js features.
For this guide, we will detail all three methods, starting with the most common and recommended approach.
The Primary Methods for Installing Node.js on Windows
Let’s walk through the step-by-step process for the official MSI installer and Chocolatey.
Method 1: Installing Node.js via the Official MSI Installer (Recommended)
This method is the easiest and most user-friendly way to get Node.js on your Windows system.
Step-by-Step Installation Process
-
Download the Installer:
- Open your web browser and navigate to the official Node.js website: https://nodejs.org/en/download/
- You will see two main options: “LTS” (Long Term Support) and “Current.”
- LTS: This is the recommended version for most users and production environments. It’s stable, well-tested, and receives long-term support.
- Current: This version includes the latest features but might be less stable. It’s generally preferred by developers who want to experiment with cutting-edge functionalities.
- Click on the Windows Installer link (usually 64-bit) for the LTS version. The download will start automatically.
-
Run the Installer:
- Once the
.msifile is downloaded, locate it (usually in yourDownloadsfolder) and double-click to run it. - The Node.js Setup Wizard will appear. Click Next to proceed.
- Once the
-
Accept the License Agreement:
- Read the End-User License Agreement. If you agree, select “I accept the terms in the License Agreement” and click Next.
-
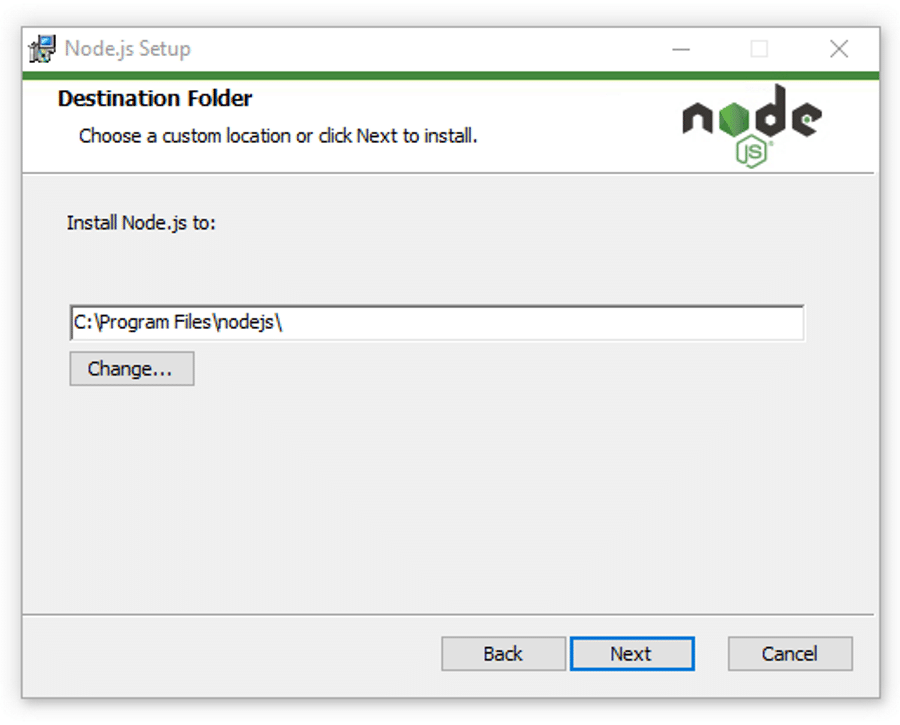
Choose Destination Folder:
- The installer will suggest a default installation path (e.g.,
C:Program Filesnodejs). You can change this if you wish, but the default is usually fine. Click Next.
- The installer will suggest a default installation path (e.g.,
-
Select Custom Setup (Optional but Recommended):
- On the “Custom Setup” screen, you’ll see a list of components to install. By default, “Node.js runtime,” “npm package manager,” and “Online documentation shortcuts” are selected.
- It’s highly recommended to also select “Tools for Native Modules” (sometimes labeled “Chocolatey for Node.js”). This option automatically installs necessary tools like Python and Visual Studio Build Tools, which are often required to compile native add-ons for Node.js modules. This saves a lot of troubleshooting later.
- Click Next.
-
Initiate Installation:
- Click the Install button to begin the installation process.
- You might be prompted by User Account Control (UAC) to allow the app to make changes to your device. Click Yes.
- If you selected “Tools for Native Modules,” a command prompt window might open during the process to install Chocolatey, Python, and other build tools. This can take some time, so be patient and allow it to complete. Follow any on-screen prompts (e.g., press any key to continue).
-
Finish the Installation:
- Once the installation is complete, click Finish.
Verifying Your Node.js and npm Installation
After installation, it’s crucial to verify that Node.js and npm (Node Package Manager) were installed correctly and are accessible from your command line.
-
Open Command Prompt or PowerShell:
- Press
Win + R, typecmd, and press Enter, or search for “PowerShell” and open it. - Alternatively, you can open Windows Terminal if you have it installed.
- Press
-
Check Node.js Version:
- In the command prompt, type:
bash

node -v
- Press Enter. You should see the installed Node.js version (e.g.,
v18.17.0).
- In the command prompt, type:
-
Check npm Version:
- Next, type:
bash

npm -v
- Press Enter. You should see the installed npm version (e.g.,
9.6.7).
- Next, type:
If both commands return version numbers, congratulations! Node.js and npm are successfully installed on your Windows machine.
Method 2: Streamlining Installation with Chocolatey (Package Manager)
For those who prefer a command-line approach and the convenience of a package manager, Chocolatey offers a quick and clean way to install Node.js.
What is Chocolatey and Why Use It?
Chocolatey is a free, open-source package manager for Windows. It provides a reliable way to automate the installation, configuration, and management of software. Think of it as apt-get or brew but for Windows applications. Its benefits include:
- Automation: Install software with a single command.
- Consistency: Ensures consistent installations across multiple machines.
- Ease of Updates: Update installed software easily.
Installing Chocolatey

If you don’t already have Chocolatey installed, you’ll need to do that first.
-
Open PowerShell as Administrator:
- Search for “PowerShell” in the Windows Start Menu.
- Right-click on “Windows PowerShell” and select “Run as administrator.”
-
Allow Script Execution:
- First, ensure that
Get-ExecutionPolicyis notRestricted. You might need to set it toBypassfor the current session orAllSignedfor broader use. - Type the following command and press Enter:
powershell

Set-ExecutionPolicy Bypass -Scope Process -Force; [System.Net.ServicePointManager]::SecurityProtocol = [System.Net.ServicePointManager]::SecurityProtocol -bor 3072; iex ((New-Object System.Net.WebClient).DownloadString('https://community.chocolatey.org/install.ps1'))
- This command downloads and runs the Chocolatey installation script. It may take a few moments.
- First, ensure that
-
Verify Chocolatey Installation:
- Once the script finishes, close and reopen PowerShell (as administrator) to ensure the
chococommand is available. - Type:
bash

choco -v
- You should see the Chocolatey version number.
- Once the script finishes, close and reopen PowerShell (as administrator) to ensure the
Installing Node.js with Chocolatey
With Chocolatey installed, installing Node.js is incredibly simple.
-
Open PowerShell as Administrator.
-
Install Node.js (LTS version):
- To install the recommended LTS version of Node.js (which includes npm), type:
bash

choco install nodejs-lts
- If you need the current version, you can use
choco install nodejs. - When prompted to run the script, type
Yand press Enter. Chocolatey will download and install Node.js and npm automatically.
- To install the recommended LTS version of Node.js (which includes npm), type:
-
Verify Installation:
- After the installation completes, close and reopen PowerShell.
- Run
node -vandnpm -vto confirm the installation, as described in Method 1.
Method 3: Managing Multiple Node.js Versions with NVM for Windows
For developers working on multiple projects that might require different Node.js versions (e.g., one project needs Node 14, another needs Node 18), NVM for Windows is an essential tool.
Why Use NVM for Windows?
NVM (Node Version Manager) allows you to:
- Install multiple versions of Node.js.
- Switch between different Node.js versions easily.
- Set a default Node.js version.
- Install specific npm versions for each Node.js version.
This flexibility is crucial for maintaining compatibility with various project dependencies and ensuring a smooth development workflow, particularly in agency or enterprise settings where diverse tech stacks are common.
Installation Steps for NVM for Windows
Important: If you have previously installed Node.js via the official MSI installer or Chocolatey, you must uninstall it first. NVM manages its own Node.js installations and conflicts can arise if another version is globally installed.
-
Uninstall Existing Node.js (if any):
- Go to
Control Panel > Programs > Programs and Features. - Find “Node.js” in the list, right-click, and select “Uninstall.”
- If you installed via Chocolatey, open PowerShell as administrator and run:
choco uninstall nodejs-lts(ornodejs).
- Go to
-
Download NVM for Windows:
- Go to the official NVM for Windows GitHub repository releases page: https://github.com/coreybutler/nvm-windows/releases
- Download the latest
nvm-setup.zipfile.
-
Run the Installer:
- Unzip the downloaded file and run
nvm-setup.exe. - Follow the on-screen prompts.
- The installer will ask for two paths: the NVM installation directory and the Node.js installation directory. Accept the defaults unless you have a specific reason to change them.
- Complete the installation.
- Unzip the downloaded file and run
-
Verify NVM Installation:
- Open a new Command Prompt or PowerShell window (do not use an existing one, as environment variables need to refresh).
- Type:
bash

nvm -v
- You should see the NVM for Windows version number. If not, check your system’s PATH environment variable to ensure
nvmis correctly added.
Managing Node.js Versions with NVM
Now that NVM is installed, you can start managing Node.js versions.
-
List Available Node.js Versions:
- To see all available Node.js versions you can install, type:
bash

nvm list available
- To see all available Node.js versions you can install, type:
-
Install a Specific Node.js Version:
- To install the latest LTS version (e.g.,
18.17.0):
bash

nvm install lts
- To install a specific version (e.g.,
16.17.0):
bash

nvm install 16.17.0
- Repeat for any other versions you need (e.g.,
nvm install 20.9.0).
- To install the latest LTS version (e.g.,
-
List Installed Node.js Versions:
- To see all Node.js versions currently installed on your system:
bash

nvm list
- The output will show your installed versions and which one is currently active.
- To see all Node.js versions currently installed on your system:
-
Switch Between Node.js Versions:
- To activate a specific installed version (e.g.,
18.17.0):
bash

nvm use 18.17.0
- You can switch as often as needed.
- To activate a specific installed version (e.g.,
-
Set a Default Node.js Version:
- To set a version that NVM should use by default whenever you open a new terminal:
bash

nvm alias default 18.17.0
- Replace
18.17.0with your preferred default version.
- To set a version that NVM should use by default whenever you open a new terminal:
-
Uninstall a Node.js Version:
- To remove an installed version:
bash

nvm uninstall 16.17.0
- To remove an installed version:
Post-Installation: Verifying, Troubleshooting, and Next Steps
Once Node.js is installed, there are a few final checks and considerations to ensure your development environment is fully ready.
Running Your First Node.js Application
To confirm everything works, let’s create and run a simple Node.js script:
-
Create a File:
- Open a text editor (like Notepad, VS Code, or Sublime Text).
- Type the following code:
javascript

// myapp.js

console.log("Hello from Node.js on Windows!");
- Save the file as
myapp.js(or any name with a.jsextension) in a directory of your choice (e.g.,C:UsersYourUserDocumentsNodeProjects).
-
Run the Script:
- Open your Command Prompt or PowerShell.
- Navigate to the directory where you saved
myapp.jsusing thecdcommand (e.g.,cd C:UsersYourUserDocumentsNodeProjects). - Type:
bash

node myapp.js
- Press Enter. You should see “Hello from Node.js on Windows!” printed in your console.
This simple exercise confirms that Node.js is correctly set up and executing JavaScript code outside the browser.
Essential Node.js Development Tools
To maximize your productivity and leverage the full power of Node.js, consider these complementary tools:
- Integrated Development Environment (IDE):
- Visual Studio Code (VS Code): A free, open-source, and highly popular code editor from Microsoft. It offers excellent Node.js support with built-in debugging, IntelliSense, Git integration, and a vast ecosystem of extensions.
- WebStorm: A powerful commercial IDE specifically tailored for JavaScript and Node.js development, offering advanced features for larger projects.
- Git: A distributed version control system essential for tracking changes in your code, collaborating with others, and managing project history.
- Package Managers: While npm comes with Node.js, alternatives like Yarn are also popular, offering performance improvements and slightly different feature sets. You can install Yarn globally via npm:
npm install -g yarn.
Troubleshooting Common Node.js Installation Issues
While Node.js installation is generally smooth, you might encounter some issues:
'node' is not recognized as an internal or external command:- Cause: Node.js executable path is not in your system’s PATH environment variable, or your terminal session hasn’t refreshed.
- Solution: Restart your command prompt/PowerShell after installation. If the issue persists, manually check and add
C:Program Filesnodejs(or your custom installation path) to your system’s PATH variable.
npm installfails due to Python/Build Tools:- Cause: Many Node.js packages have native dependencies that require C++ compilers and Python to build.
- Solution: Re-run the Node.js MSI installer and ensure “Tools for Native Modules” (or “Chocolatey for Node.js” if using that method) is selected. Alternatively, you can manually install the
windows-build-toolspackage via npm:npm install --global --production windows-build-tools.
- Permissions Errors:
- Cause: Trying to install global npm packages without administrator privileges.
- Solution: Always run your command prompt or PowerShell as an administrator when installing global npm packages (
npm install -g <package-name>).
- NVM not working after fresh install:
- Cause: You still have a globally installed Node.js conflicting with NVM, or the PATH variable hasn’t updated.
- Solution: Ensure you’ve uninstalled any previous Node.js installations before installing NVM. Close and reopen your terminal.
Conclusion: Unlocking Your Development Potential with Node.js
Successfully installing Node.js on your Windows machine is a foundational step that opens the door to a vast and exciting realm of software development. You’ve now equipped yourself with a powerful JavaScript runtime that’s at the heart of countless modern web applications, real-time services, and innovative digital products.
The choice of installation method – whether the simplicity of the official MSI installer, the command-line efficiency of Chocolatey, or the version management prowess of NVM for Windows – empowers you with the flexibility to tailor your development environment to your specific needs. From building interactive user interfaces to crafting robust backend APIs, Node.js provides the engine for bringing your ideas to life.
For those focused on Tech, this installation means access to the latest development tools and trends, fostering continuous learning and skill enhancement. For Brands, mastering Node.js translates into the capability to build faster, more scalable, and more engaging digital experiences, directly influencing market presence and customer loyalty. And for those eyeing Money, Node.js proficiency unlocks opportunities in freelancing, startup ventures, and contributing to high-value projects that demand modern, efficient technology stacks.
With Node.js ready on your system, the next exciting chapter of your development journey awaits. Dive into its rich ecosystem, explore its capabilities, and start building the next generation of applications that will shape our digital future.
aViewFromTheCave is a participant in the Amazon Services LLC Associates Program, an affiliate advertising program designed to provide a means for sites to earn advertising fees by advertising and linking to Amazon.com. Amazon, the Amazon logo, AmazonSupply, and the AmazonSupply logo are trademarks of Amazon.com, Inc. or its affiliates. As an Amazon Associate we earn affiliate commissions from qualifying purchases.