In the rapidly evolving landscape of web development, Node.js stands out as a critical technology, enabling developers to build fast, scalable network applications using JavaScript on the server-side. If you’re looking to dive into modern web development, build powerful backend services, or explore cutting-edge AI tools and applications, installing Node.js on your Windows machine is an essential first step. This guide will walk you through various methods of installation, catering to different preferences and needs, ensuring you have a robust development environment ready for your next big project.

Understanding Node.js: The Foundation for Modern Web Applications
Before we delve into the “how-to,” let’s clarify “what” Node.js is and “why” it’s become an indispensable tool for developers worldwide. Understanding its core utility will help you appreciate the importance of a correct and efficient installation process.
What is Node.js and Why is it Essential?
Node.js is an open-source, cross-platform JavaScript runtime environment that allows developers to execute JavaScript code outside of a web browser. Built on Chrome’s V8 JavaScript engine, Node.js is renowned for its non-blocking, event-driven architecture, making it incredibly efficient and suitable for data-intensive real-time applications. From building robust web servers and APIs to crafting command-line tools and desktop applications, Node.js’s versatility is unmatched. It powers the backends of countless modern websites and applications, from small startups to tech giants, proving its reliability and performance at scale.
For developers, Node.js means using a single language (JavaScript) across the entire application stack – frontend and backend – simplifying development, reducing context switching, and often accelerating project timelines. This unified language approach fosters greater team cohesion and makes it easier to onboard new developers, contributing significantly to overall productivity in tech teams.
The Power of npm: Node Package Manager
Alongside Node.js, you’ll inevitably encounter npm, the Node Package Manager. npm is the world’s largest software registry, hosting hundreds of thousands of free and reusable code packages. When you install Node.js, npm is automatically installed with it, becoming your gateway to an enormous ecosystem of tools, libraries, and frameworks.
npm allows you to easily install, share, and manage project dependencies. Whether you need a utility for handling dates, a framework for building web APIs (like Express.js), or tools for bundling your JavaScript (like Webpack), npm has a package for it. Mastering npm is crucial for efficient Node.js development, as it streamlines the process of integrating third-party code and managing project dependencies, making complex software development more manageable and organized. It’s a cornerstone for building applications that are both robust and maintainable, directly impacting the quality and longevity of your software projects.
Preparing Your Windows Environment for Node.js Installation
Before proceeding with any installation method, it’s wise to perform a quick check and understand your options. A little preparation can save you from potential headaches down the line.
System Requirements and Prerequisites
Node.js is designed to be lightweight and efficient, so it doesn’t demand excessive system resources. Any modern Windows operating system (Windows 7, 8, 10, 11) with sufficient disk space for the installation and your projects will suffice. You’ll typically need around 100-200 MB of free disk space for the Node.js runtime itself, plus more for your project files and npm packages. An internet connection is required for downloading the installer and installing npm packages.
While not strictly required, a basic understanding of using the Windows Command Prompt or PowerShell will be beneficial. You’ll be using these command-line interfaces to verify installations, run Node.js scripts, and manage npm packages. If you’re new to the command line, this is a great opportunity to familiarize yourself with basic commands.
Choosing the Right Installation Method for Your Workflow
There isn’t a single “best” way to install Node.js on Windows; the ideal method depends on your experience level and specific development needs.
- Official MSI Installer: This is the most straightforward and recommended method for beginners or those who primarily work with a single version of Node.js. It’s a simple executable that guides you through the process.
- NVM for Windows (Node Version Manager): If you’re a seasoned developer or anticipate working on multiple projects that require different Node.js versions, NVM is indispensable. It allows you to install, switch, and manage multiple Node.js versions seamlessly.
- Chocolatey: This is a popular package manager for Windows, favored by many developers for its ability to automate software installations from the command line. If you’re already using Chocolatey for other tools, it can be a convenient option.
- WSL (Windows Subsystem for Linux): For developers who prefer a Linux-like development environment, WSL provides a powerful way to run Node.js (and other Linux tools) directly on Windows. This is ideal for those who want to mirror production environments, which often run on Linux servers.
We’ll cover each of these methods in detail, allowing you to pick the one that best fits your workflow.
Method 1: The Official MSI Installer (Recommended for Beginners)
The official Node.js installer is the easiest and most direct way to get Node.js and npm up and running on your Windows machine. This method integrates Node.js into your system’s PATH automatically, making it accessible from any command line.
Step-by-Step Installation Using the Official Installer
-
Download the Installer:
- Navigate to the official Node.js website: https://nodejs.org/en/download/
- You will see two main download options for Windows:
- LTS (Long Term Support) version: This is the most stable and recommended version for most users and production environments. It receives long-term maintenance and critical bug fixes.
- Current version: This includes the latest features and improvements but might be less stable. It’s suitable for experimentation and bleeding-edge development.
- For most users, download the Windows Installer (.msi) for the LTS version (e.g.,
node-vXX.XX.X-x64.msi). Choose the 64-bit installer unless you have a specific reason for the 32-bit version.
-
Run the Installer:
- Once the download is complete, locate the
.msifile and double-click it to launch the Node.js Setup Wizard. - Click Next on the welcome screen.
- Accept the End-User License Agreement and click Next.
- Choose the Destination Folder where Node.js will be installed (the default path is usually fine). Click Next.
- On the Custom Setup screen, ensure “Node.js runtime” and “npm package manager” are selected. It’s also recommended to select “Add to PATH” and “Node.js runtime” (these are usually selected by default). The “Tools for Native Modules” option (which installs Python and Visual Studio Build Tools) can be useful if you plan to compile native add-ons, but it’s not strictly necessary for basic Node.js development and can be installed later if needed. For now, you can leave it unchecked to keep the installation quick. Click Next.
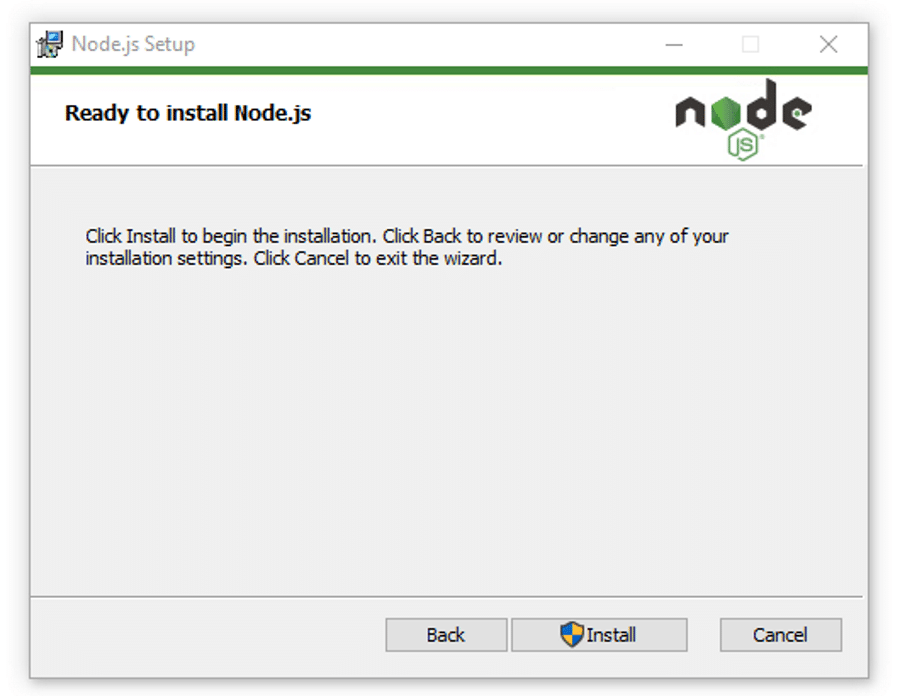
- Click Install to begin the installation process.
- If prompted by User Account Control (UAC), click Yes to allow the installer to make changes to your system.
- Once the installation is complete, click Finish.
- Once the download is complete, locate the
Verifying Your Node.js and npm Installation
After the installation, it’s crucial to verify that Node.js and npm are correctly installed and accessible from your command line.
-
Open Command Prompt or PowerShell:
- Press
Win + R, typecmd(for Command Prompt) orpowershell(for PowerShell), and pressEnter. - Alternatively, search for “Command Prompt” or “PowerShell” in the Start Menu and open it.
- Press
-
Check Node.js Version:
- In the command line, type:
bash

node -v
- Press
Enter. You should see the installed Node.js version (e.g.,v18.17.0).
- In the command line, type:
-
Check npm Version:
- In the command line, type:
bash

npm -v
- Press
Enter. You should see the installed npm version (e.g.,9.6.7).
- In the command line, type:
If you see the version numbers, congratulations! Node.js and npm are successfully installed and ready to use. If you encounter errors like ” ‘node’ is not recognized as an internal or external command,” it usually indicates an issue with the system PATH variable. In such cases, try restarting your computer or manually adding the Node.js installation directory to your system’s PATH. (The official installer usually handles this automatically.)
Method 2: Managing Multiple Node.js Versions with NVM for Windows
For developers working on various projects, some might require an older Node.js version, while others demand the latest features. Manually installing and uninstalling different versions is cumbersome. This is where a Node Version Manager (NVM) becomes invaluable. NVM for Windows allows you to install, switch between, and manage multiple Node.js versions effortlessly.
Why Use a Node Version Manager?
The primary advantage of NVM is its flexibility. Imagine working on Project A that relies on Node.js v14 and Project B that needs Node.js v18. Without NVM, you’d have to continually uninstall one version and install another. NVM simplifies this by allowing you to issue a simple command to switch between versions, ensuring each project runs with its required Node.js environment without conflicts. This is a best practice for maintaining project stability and avoiding “it works on my machine” scenarios, which can save considerable time and effort in the long run.
Installing NVM for Windows
Unlike its Linux/macOS counterpart, NVM for Windows is a separate project.
-
Uninstall Existing Node.js (if any):
- If you’ve previously installed Node.js using the MSI installer, it’s highly recommended to uninstall it first via “Add or remove programs” in Windows settings. This prevents conflicts with NVM.
-
Download NVM for Windows:
- Go to the NVM for Windows GitHub repository releases page: https://github.com/coreybutler/nvm-windows/releases
- Download the latest
nvm-setup.zipfile.
-
Install NVM:
- Unzip the
nvm-setup.zipfile. - Run the
nvm-setup.exeinstaller. - Follow the prompts, accepting the license agreement.
- Choose the NVM installation directory and the Node.js symbiont link directory. The defaults are usually fine (
C:Users<YourUser>AppDataRoamingnvmandC:Program Filesnodejs). Ensure these paths are accessible and do not contain spaces or special characters if possible. - Click Install and then Finish.
- Unzip the
-
Verify NVM Installation:
- Open a new Command Prompt or PowerShell window (important, as NVM modifies system PATH variables).
- Type:
bash

nvm -v
- You should see the installed NVM for Windows version. If not, check your system’s PATH variables or restart your computer.
Installing and Switching Node.js Versions with NVM
Once NVM is installed, you can easily manage Node.js versions:
-
Install a Node.js Version:
- To install the latest LTS version:
bash

nvm install lts
- To install a specific version (e.g., 18.17.0):
bash

nvm install 18.17.0
- To install the latest current version:
bash

nvm install latest
- To install the latest LTS version:
-
List Installed Versions:
- To see all Node.js versions you’ve installed with NVM:
bash

nvm list
This will show you a list of versions, with an arrow (->) indicating the currently active version.
- To see all Node.js versions you’ve installed with NVM:
-
Use a Specific Version:
- To switch to a particular version (e.g., 18.17.0):
bash

nvm use 18.17.0
- After switching, verify Node.js and npm versions:
bash

node -v

npm -v
- To switch to a particular version (e.g., 18.17.0):
NVM for Windows empowers you to seamlessly adapt your environment to project requirements, a crucial capability for professional developers and those managing diverse client portfolios.
Method 3: Streamlining Installation with Chocolatey (Windows Package Manager)
Chocolatey is a widely adopted package manager for Windows, akin to apt on Debian/Ubuntu or brew on macOS. It simplifies the installation and management of software by allowing you to install applications directly from the command line. If you’re accustomed to using package managers, Chocolatey offers a familiar and efficient way to handle Node.js.
What is Chocolatey and How Does it Help?

Chocolatey acts as a centralized repository for Windows software. Instead of manually downloading installers and clicking through wizards, you can simply type a command in your terminal, and Chocolatey handles the download, installation, and PATH configuration for you. This automation saves time, ensures consistency, and makes it easier to set up a new development machine or maintain multiple systems. For developers, this means spending less time on system administration and more time coding. Its benefits extend beyond Node.js, allowing you to manage a wide array of development tools, from Git to Python.
Installing Node.js via Chocolatey
If you don’t have Chocolatey installed, you’ll need to install it first.
-
Install Chocolatey (if not already installed):
- Open PowerShell as an Administrator.
- Ensure
Get-ExecutionPolicyis notRestricted. If it is, runSet-ExecutionPolicy AllSignedorSet-ExecutionPolicy Bypass -Scope Processto temporarily allow script execution. - Run the Chocolatey installation command:
powershell

Set-ExecutionPolicy Bypass -Scope Process -Force; [System.Net.ServicePointManager]::SecurityProtocol = [System.Net.ServicePointManager]::SecurityProtocol -bor 3072; iex ((New-Object System.Net.WebClient).DownloadString('https://community.chocolatey.org/install.ps1'))
- After installation, close and reopen PowerShell (as Administrator) and verify with
choco -v.
-
Install Node.js using Chocolatey:
- Open PowerShell or Command Prompt as an Administrator.
- To install the LTS version of Node.js:
bash

choco install nodejs-lts
- To install the latest current version of Node.js:
bash

choco install nodejs
- Chocolatey will download and install Node.js and npm, configuring the PATH automatically. Confirm any prompts during the installation.
-
Verify Installation:
- Open a new Command Prompt or PowerShell window.
- Check Node.js and npm versions:
bash

node -v

npm -v
- You should see the installed versions.
Chocolatey provides a robust and repeatable way to install Node.js, making it a favorite for developers who value automation and command-line efficiency.
Method 4: Developing in a Linux Environment with WSL (Windows Subsystem for Linux)
For developers who crave a Linux development experience while still using Windows, the Windows Subsystem for Linux (WSL) is a game-changer. WSL allows you to run a full-fledged Linux distribution (like Ubuntu, Debian, or Fedora) directly within Windows, providing access to Linux command-line tools, utilities, and development environments without the overhead of a traditional virtual machine. This method is particularly appealing for Node.js developers whose production environments are typically Linux-based, offering better parity between development and deployment.
Bridging Windows and Linux for Development
WSL essentially virtualizes a Linux kernel on Windows, allowing you to install and run Linux distributions as if they were native applications. This means you can have a separate Linux filesystem, install Linux-specific packages (including Node.js and NVM for Linux), and use tools like Bash, Git, and various compilers within a familiar Linux environment, all while still being able to access your Windows files. This integration is powerful, offering the best of both worlds and simplifying cross-platform development. It’s an excellent choice for those looking to deepen their understanding of Linux environments, critical knowledge for backend and DevOps roles.
Installing Node.js within WSL
The process of installing Node.js within WSL is akin to installing it on a native Linux machine. It’s often recommended to use nvm (the Linux version) inside your WSL distribution for version management.
-
Enable WSL:
- Open PowerShell as an Administrator.
- Run:
wsl --install - This command will enable the necessary WSL features and typically install Ubuntu by default. You might need to restart your computer.
- After restarting, the Ubuntu installation will continue, and you’ll be prompted to create a Linux username and password.
-
Open Your WSL Distribution:
- Search for “Ubuntu” (or whichever distribution you installed) in the Windows Start Menu and launch it. A Linux terminal window will open.
-
Update Linux Packages:
- It’s good practice to update your package lists and upgrade existing packages:
bash

sudo apt update

sudo apt upgrade
- It’s good practice to update your package lists and upgrade existing packages:
-
Install NVM (Node Version Manager) for Linux:
- We’ll use NVM to manage Node.js versions within WSL. First, install
curl(if not already present):
bash

sudo apt install curl
- Then, install NVM using its official install script:
bash

curl -o- https://raw.githubusercontent.com/nvm-sh/nvm/v0.39.5/install.sh | bash
(Check the NVM GitHub page for the latest version number ifv0.39.5is outdated). - After installation, close and reopen your WSL terminal.
- Verify NVM installation:
bash

nvm -v
- We’ll use NVM to manage Node.js versions within WSL. First, install
-
Install Node.js with NVM in WSL:
- Install the latest LTS version of Node.js:
bash

nvm install --lts
- Set it as the default:
bash

nvm use --lts

nvm alias default lts
- Verify Node.js and npm versions:
bash

node -v

npm -v
- Install the latest LTS version of Node.js:
Now you have a fully functional Node.js environment within your WSL distribution, allowing you to develop with Linux tooling and greater consistency with production environments.
Post-Installation Essentials and Best Practices
Once Node.js is installed, your journey has just begun. There are a few essential steps and best practices to ensure a smooth and productive development experience.
Running Your First Node.js Application
To confirm everything is working correctly and to get a taste of Node.js, let’s create and run a simple “Hello, World!” application.
-
Create a New Directory:
- Open your Command Prompt/PowerShell (or WSL terminal).
- Navigate to your desired development folder (e.g.,
cd C:UsersYourUserDocumentsProjects). - Create a new directory for your project:
bash

mkdir my-first-node-app

cd my-first-node-app
-
Create a JavaScript File:
-
Open a text editor (like VS Code, Notepad++, or even Notepad).
-
Create a new file named
app.jsinsidemy-first-node-app. -
Add the following code to
app.js:console.log("Hello from Node.js!"); const http = require('http'); const hostname = '127.0.0.1'; const port = 3000; const server = http.createServer((req, res) => { res.statusCode = 200; res.setHeader('Content-Type', 'text/plain'); res.end('Hello Node.js World!n'); }); server.listen(port, hostname, () => { console.log(`Server running at http://${hostname}:${port}/`); });
-
-
Run the Application:
- In your command line, while inside the
my-first-node-appdirectory, execute:
bash

node app.js
- You should see
Hello from Node.js!andServer running at http://127.0.0.1:3000/. - Open your web browser and navigate to
http://127.0.0.1:3000/. You should see “Hello Node.js World!”. - To stop the server, press
Ctrl + Cin your terminal.
- In your command line, while inside the
This simple exercise confirms that Node.js is correctly interpreting and executing your JavaScript code.
Updating Node.js and npm
Keeping your Node.js and npm versions up-to-date is crucial for security, performance, and access to the latest features.
- If you used the MSI installer: Download the new installer from the official website and run it. It will typically detect your existing installation and update it.
- If you used NVM for Windows:
bash

nvm install <new_version_number>

nvm use <new_version_number>
You can then uninstall older versions withnvm uninstall <old_version_number>. - If you used Chocolatey:
bash

choco upgrade nodejs-lts
or
bash

choco upgrade nodejs
- If you used WSL with NVM (Linux version):
bash

nvm install --lts

nvm use --lts
(Or specific versions as needed).
npm is generally updated automatically with Node.js. However, you can update npm separately if needed:
npm install -g npm@latest
Troubleshooting Common Installation Issues
- ‘node’ or ‘npm’ is not recognized: This almost always indicates a PATH environment variable issue. Ensure the Node.js installation directory (e.g.,
C:Program FilesnodejsorC:Users<YourUser>AppDataRoamingnvmvX.Y.Z) is correctly added to your system’s PATH. Restarting your terminal or computer often resolves this. - Permissions errors during npm install: When installing global npm packages (
npm install -g), you might encounter permissions issues.- For Windows installations, try running your Command Prompt/PowerShell as an Administrator.
- For WSL, ensure you use
sudowith apt commands and follow NVM installation guidelines carefully;npm install -gusually works withoutsudoinside NVM contexts.
- Installation stuck or failed: Check your internet connection. If using Chocolatey or NVM, ensure your firewall isn’t blocking the download. Try redownloading the installer or running the command again.
Beyond Installation: The Strategic Value of Node.js Proficiency
Installing Node.js is merely the first step. Mastering it opens doors to significant opportunities across various facets of the digital world.
Driving Innovation in Technology and Software Development
Node.js is at the forefront of modern software development. Its asynchronous, event-driven nature makes it ideal for building real-time applications, such as chat applications, live dashboards, and online gaming platforms. It’s a backbone for microservices architectures, enabling developers to build small, independent services that communicate efficiently. Furthermore, Node.js can be integrated into solutions for AI tools and machine learning, particularly for serving models, building APIs for AI inference, or even for data processing pipelines. Its strong community and vast npm ecosystem mean developers have access to cutting-edge libraries and frameworks, allowing them to innovate faster and build more sophisticated applications with greater security and productivity. For companies, investing in Node.js expertise translates to more agile development cycles, robust software solutions, and a competitive edge in rapidly evolving markets.
Boosting Your Brand and Career in the Digital Economy
For individuals, proficiency in Node.js is a significant asset in today’s job market. As demand for full-stack developers and backend specialists continues to soar, knowing Node.js can elevate your personal brand and career trajectory. It demonstrates your ability to work with modern, high-performance technologies, making you an attractive candidate for roles in web development, DevOps, and even data engineering.
Beyond employment, Node.js skills empower you to pursue entrepreneurial ventures. Building side hustles, developing your own apps, or offering freelance services become much more accessible. A strong understanding of Node.js, combined with a portfolio of projects, communicates your technical prowess and dedication, strengthening your professional reputation and opening doors to diverse opportunities in the digital economy.
Node.js and Financial Growth: Opportunities and Efficiency
From a financial perspective, Node.js offers multiple avenues for growth. For businesses, adopting Node.js can lead to substantial cost savings. Its efficiency and scalability reduce infrastructure costs, while the single-language paradigm (JavaScript for both frontend and backend) can streamline development teams, reducing recruitment and training expenses. Rapid development cycles enabled by Node.js mean faster time-to-market for products and services, directly impacting revenue generation.
For individual professionals, Node.js skills often command higher salaries due to the demand for specialized talent. It facilitates the creation of online income streams through freelancing, building SaaS products, or developing lucrative applications. Its versatility allows developers to pivot across industries, from fintech to e-commerce, ensuring a wide range of financially rewarding opportunities. In essence, mastering Node.js isn’t just about coding; it’s a strategic investment in your financial future and an enabler for innovation and business success.
Conclusion: Empowering Your Development Journey
Installing Node.js on Windows is a fundamental step toward unlocking a world of modern web development. Whether you opted for the simplicity of the official MSI installer, the version management power of NVM, the automation of Chocolatey, or the Linux development experience of WSL, you’re now equipped with a powerful runtime environment and access to the vast npm ecosystem.
With Node.js successfully set up, you are poised to build dynamic web applications, scalable APIs, and innovative tools that can drive technology forward. Embrace the journey of learning and creation. The skills you gain with Node.js will not only enhance your technical abilities but also significantly contribute to your professional brand, open new career paths, and provide avenues for substantial financial growth in the ever-expanding digital landscape. Start coding, experimenting, and building – your next great project awaits!
aViewFromTheCave is a participant in the Amazon Services LLC Associates Program, an affiliate advertising program designed to provide a means for sites to earn advertising fees by advertising and linking to Amazon.com. Amazon, the Amazon logo, AmazonSupply, and the AmazonSupply logo are trademarks of Amazon.com, Inc. or its affiliates. As an Amazon Associate we earn affiliate commissions from qualifying purchases.