
Minecraft, the sandbox phenomenon, has captivated millions worldwide with its limitless creative potential. Yet, for many seasoned players, the vanilla experience, as robust as it is, can eventually feel familiar. This is where the vibrant world of Minecraft mods comes into play, offering an unparalleled avenue for customization, expansion, and a complete reimagining of the game. Modding transforms Minecraft from a great game into an infinite canvas, allowing players to introduce new creatures, dimensions, tools, biomes, and even fundamental gameplay mechanics that Mojang never envisioned.
This guide is your definitive resource for navigating the exciting, sometimes complex, landscape of Minecraft mod installation. We’ll delve into the essential prerequisites, explore the primary mod loaders that serve as the backbone for your modded adventures, provide detailed, step-by-step installation instructions, and equip you with the knowledge to troubleshoot common issues and maintain a healthy modded game environment. Whether you’re aiming for minor quality-of-life improvements or a complete overhaul, understanding how to properly install and manage mods is the first step towards unlocking an entirely new realm of Minecraft experiences. Prepare to elevate your gameplay and craft your truly unique blocky universe.

Understanding Minecraft Mods and Why You Need Them
Before diving into the technicalities of installation, it’s crucial to grasp what Minecraft mods are, their diverse functionalities, and the compelling reasons why millions of players choose to enhance their game with community-created content. Modding is more than just adding new features; it’s about tailoring the game to your specific desires, addressing perceived shortcomings, and extending its longevity beyond its original design.
The Allure of Modding: Expanding Your Minecraft Universe
At its core, a Minecraft mod (short for “modification”) is a piece of software that alters the game’s original code, adding new content, changing existing features, or improving performance and functionality. These modifications range from subtle tweaks to monumental expansions, each offering a unique flavor to your gameplay.
- Quality of Life (QoL) Improvements: Many mods focus on enhancing the user experience without drastically altering the core game. Examples include mini-maps, inventory management tools, improved crafting interfaces, or precise block placement helpers. These mods streamline repetitive tasks and make the game more intuitive and enjoyable.
- New Content and Features: This category represents the vast majority of mods, introducing entirely new elements. Imagine discovering new biomes teeming with unique flora and fauna, battling never-before-seen monsters, wielding powerful magical spells, exploring intricate dungeons, or constructing complex automated factories. These mods effectively expand the game world, providing countless hours of fresh exploration and creation.
- Performance Enhancements: For players experiencing lag or wishing for smoother gameplay, performance mods like OptiFine or Sodium can be game-changers. These mods optimize the game’s rendering and processing, leading to higher frame rates and a more fluid experience, especially beneficial for players with less powerful hardware or those running large modpacks.
- Visual Overhauls: Beyond performance, mods can dramatically alter Minecraft’s aesthetic. High-resolution texture packs, advanced shaders (often paired with OptiFine), and weather effects mods can transform the game’s blocky graphics into a visually stunning, immersive world.
- Technical and Automation Mods: For the engineers and redstone enthusiasts, mods like Applied Energistics 2, IndustrialCraft, or Create introduce complex machinery, automated systems, and advanced logistics, allowing for unparalleled industrial automation and resource management.
The allure of modding lies in its ability to cater to every playstyle and preference. Whether you’re a builder, explorer, combatant, or technical wizard, there’s a mod (or a hundred) out there that can enrich your Minecraft experience beyond imagination. It fosters a vibrant community of creators and players, constantly pushing the boundaries of what’s possible within the game engine.
Essential Preparations Before You Begin
Embarking on your modding journey requires a few crucial preparatory steps to ensure a smooth and successful installation. Skipping these can lead to frustration, crashes, or even data loss. Think of these as the foundational “Tech” checks before diving into advanced customization.
-
Backup Your Worlds: This is paramount. Before making any significant changes to your Minecraft installation, always back up your existing save files. Modding inherently alters game files, and while rare, conflicts or errors can corrupt worlds. To back up, locate your
.minecraftfolder (details below), then copy thesavesfolder to a safe location on your computer. This simple step can save you immense heartache if something goes wrong.- Windows: Press
Win + R, type%appdata%, and hit Enter. Open the.minecraftfolder. - macOS: Open Finder, press
Cmd + Shift + G, type~/Library/Application Support/minecraft, and hit Enter. - Linux: Navigate to
~/.minecraft.
- Windows: Press
-
Ensure Java is Installed and Up-to-Date: Minecraft (Java Edition) runs on Java. Most modern Minecraft versions require a specific Java version (e.g., Minecraft 1.17+ requires Java 17). Ensure you have the correct Java Runtime Environment (JRE) installed. You can usually download the latest version directly from Oracle or adoptium.net. Incorrect or outdated Java versions are a common cause of modding issues, leading to crashes or inability to launch.
-
Know Your Minecraft Version: Mods are highly version-specific. A mod designed for Minecraft 1.16.5 will not work on 1.18.2, and vice-versa. Before downloading any mod or mod loader, confirm the exact version of Minecraft you intend to mod. This is visible in your Minecraft Launcher.
-
A Clean Minecraft Installation (Recommended): While not strictly mandatory, starting with a fresh, unmodded Minecraft installation for your target version can prevent conflicts. You can easily create a new game profile in the Minecraft Launcher to achieve this without deleting your existing profiles.
-
Understand Mod Loaders: Unlike simply installing texture packs, most significant mods require a “mod loader.” This is a piece of software that modifies Minecraft’s core code to allow multiple mods to run simultaneously and interact with the game. The three dominant mod loaders are Forge, Fabric, and Quilt. You must choose one, and your chosen mods must be compatible with that loader. We’ll explore these in detail next.
By taking these preparatory steps, you establish a solid foundation for a seamless and enjoyable modding experience, minimizing potential technical roadblocks and protecting your valuable game data.
Choosing Your Modding Foundation: Forge vs. Fabric vs. Quilt
The decision of which mod loader to use is perhaps the most critical choice you’ll make when venturing into Minecraft modding. These loaders are not interchangeable; mods are specifically built for one or the other. Your choice will dictate the range of mods available to you and influence the overall performance and stability of your modded game.
Minecraft Forge: The Venerable Standard
Minecraft Forge is the oldest and most established mod loader. For many years, it was the de facto standard for modding Minecraft, boasting the largest library of available mods. Its longevity means that many iconic and large-scale mods (especially those focused on technology, magic, and industrial automation) were initially, or are still primarily, developed for Forge.
Pros:
- Vast Mod Library: Forge has the most extensive collection of mods, particularly for older Minecraft versions and complex, content-heavy modpacks.
- Maturity and Stability: Being the oldest, Forge has undergone extensive development and refinement, generally offering a stable platform.
- Strong Community Support: Due to its popularity, finding tutorials, troubleshooting guides, and community help for Forge mods is relatively easy.
Cons:
- Performance Overhead: Forge can sometimes be more resource-intensive compared to newer loaders, potentially leading to lower frame rates on less powerful systems, especially with many mods.
- Slower Updates: Adapting to new Minecraft versions can sometimes take longer for Forge, as its underlying architecture is more complex.
- Less Focus on Client-Side Optimization: While it supports performance mods, Forge itself doesn’t inherently prioritize lightweight client-side operation as much as Fabric.
Best for: Players looking to run well-established, large-scale modpacks (like FTB, Tekkit, etc.), or those who prioritize access to the widest possible range of content-rich mods, especially for older game versions.
Fabric Loader: Lightweight and Modern
Fabric emerged as a newer, more lightweight, and modular alternative to Forge, gaining significant traction with Minecraft versions 1.14 and later. It was designed with a more minimalist API (Application Programming Interface), making it faster for developers to update mods to new Minecraft versions. Fabric quickly became popular for its focus on performance and client-side mods.
Pros:
- Lightweight and Performant: Fabric has less overhead than Forge, often resulting in better frame rates and smoother gameplay, even with a decent number of mods.
- Rapid Updates: Its modular design allows developers to update mods and the loader itself much faster when new Minecraft versions are released.
- Excellent for Client-Side Mods: Many popular performance (e.g., Sodium, Lithium, Phosphor) and QoL mods are developed exclusively for Fabric due to its performance benefits.
- Simple Development: Easier for new mod developers to get started, leading to a diverse range of innovative mods.
Cons:
- Smaller Content Mod Library (Historically): While growing rapidly, Fabric’s content mod library, particularly for older versions, might not be as extensive or mature as Forge’s.
- Different API: Mods made for Forge are not compatible with Fabric and vice versa, requiring careful selection.
Best for: Players prioritizing performance, those who want the latest Minecraft version mods quickly, and those interested in client-side performance enhancements and quality-of-life additions.
Quilt Loader: The Evolving Alternative
Quilt Loader is a relatively new player, having forked from Fabric in late 2021. It was created by a group of developers who sought to expand Fabric’s API to support a wider range of modding possibilities while maintaining its lightweight nature and fast update cycle. Quilt aims to be a more community-driven, open-source project with enhanced compatibility features.
Pros:
- Fabric Compatibility: Quilt is largely compatible with Fabric mods, meaning you can often run Fabric mods on Quilt.
- Expanded API: Offers additional features and hooks for mod developers beyond what Fabric currently provides, potentially leading to more innovative mods in the future.
- Community-Driven: Focuses on open governance and community contributions.
- Performance-Oriented: Retains the lightweight and performant characteristics inherited from Fabric.
Cons:
- Newer and Less Established: Being the youngest, its mod ecosystem is still developing. While it can run many Fabric mods, dedicated Quilt-only mods are fewer.
- Potential for Minor Incompatibilities: While generally compatible with Fabric, some specific Fabric mods might encounter minor issues on Quilt.
Best for: Players who want the benefits of Fabric (performance, rapid updates) but are also interested in supporting an evolving, community-driven loader that aims for broader compatibility and advanced modding capabilities. It’s a forward-looking choice for those who are early adopters.
Making Your Choice: The best way to decide is to first identify the specific mods you want to play with. Check which loader they support, as this will be the primary determinant. If your desired mods are available on multiple loaders, consider your system’s capabilities and your preference for performance vs. a vast, established content library.
Step-by-Step Installation Guides
Once you’ve decided on your mod loader, the installation process is relatively straightforward. This section will walk you through installing Forge, Fabric, and Quilt, and then, crucially, how to add your chosen mods to your game.
Finding and Downloading Mods Safely
Before installing any loader or mod, a critical “Tech” consideration is digital security. Always download mods and loaders from reputable sources to avoid malware, viruses, or outdated, broken versions.
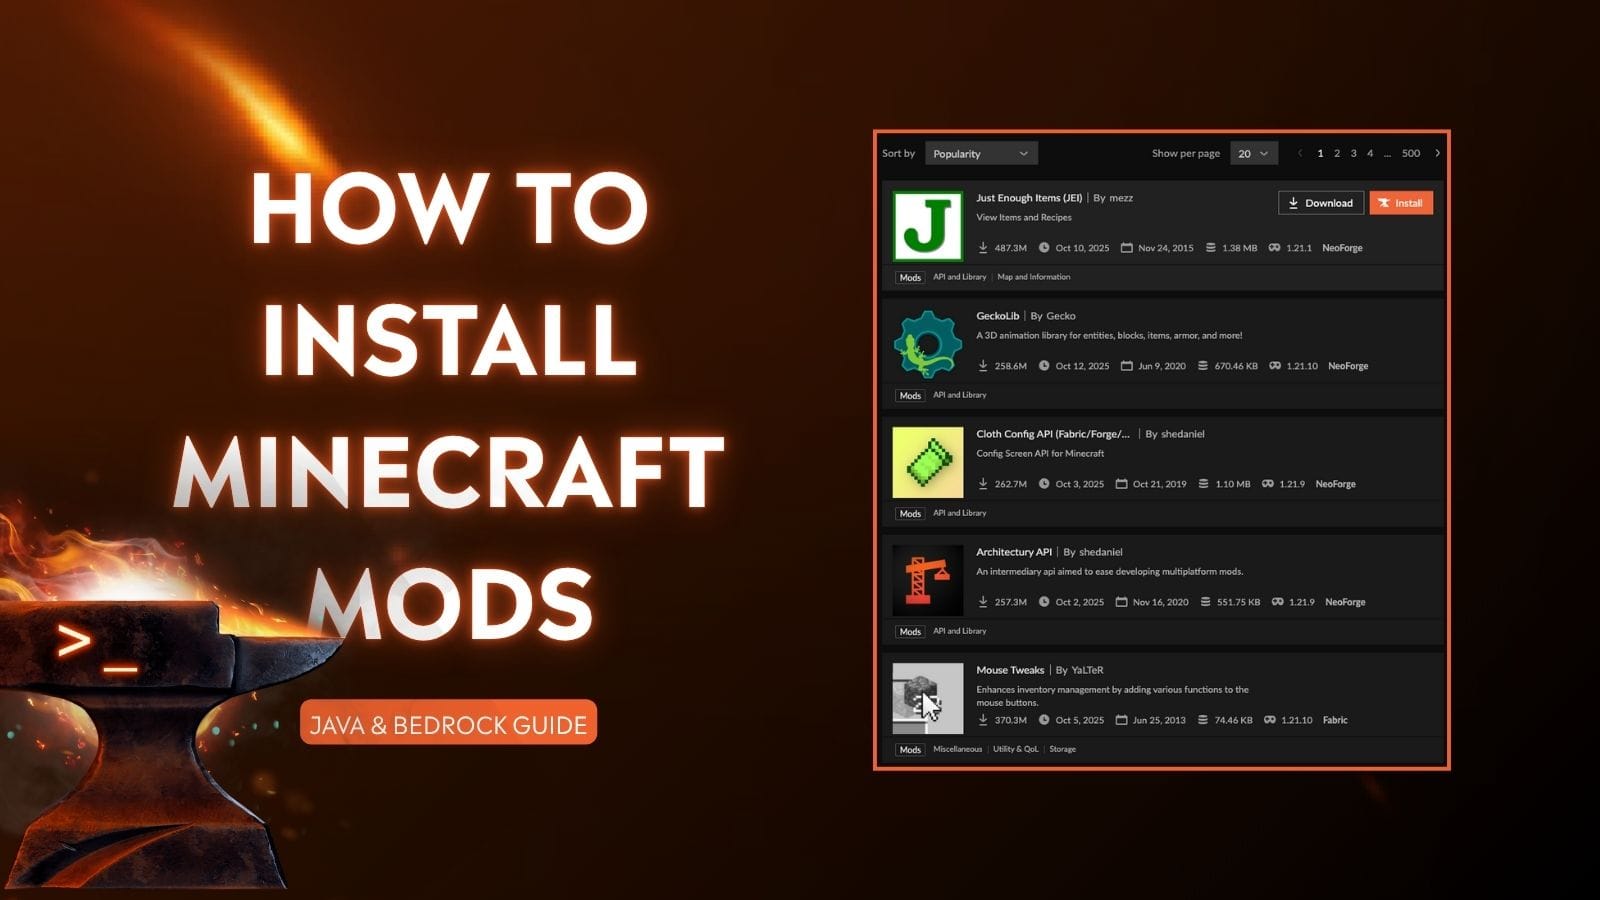
- CurseForge: The largest and most trusted repository for Minecraft mods. Most major mods are hosted here.
- Modrinth: A growing, open-source alternative to CurseForge, also highly reputable and developer-friendly.
- Official Developer Websites: Some mod developers host their mods on their own sites, but always verify the authenticity.
Never download mods from random, unverified sites or pop-up ads. These can be vectors for malware.

Installing Minecraft Forge
- Download the Forge Installer: Go to the official Minecraft Forge website (files.minecraftforge.net).
- Select Your Minecraft Version: On the left sidebar, choose the exact Minecraft version you want to mod (e.g., 1.20.1).
- Download the Recommended Version: Under “Download Recommended,” click the “Installer” button. You might see an ad; wait for the “Skip” button to appear in the top right corner and click it.
- Run the Installer: Once downloaded, locate the
.jarfile and double-click it. This will open the Forge Installer window. - Install Client: Ensure “Install client” is selected. The installer will automatically detect your
.minecraftdirectory. Click “OK.” - Confirm Installation: A message will appear confirming successful installation.
- Launch Minecraft: Open your Minecraft Launcher. You should now see a new profile named “Forge” (or similar, like “1.20.1-Forge”) in the lower-left corner. Select this profile and click “Play” once to let Forge create its necessary files, including the
modsfolder. The game will load, but it won’t look different yet as no mods have been added.
Installing Fabric Loader
- Download the Fabric Installer: Visit the official Fabric website (fabricmc.net/use/).
- Download Universal JAR: Click on the “Download universal JAR” button.
- Run the Installer: Double-click the downloaded
.jarfile. This opens the Fabric Installer window. - Select Minecraft and Loader Version:
- Minecraft Version: Choose the exact Minecraft version you wish to mod from the dropdown menu.
- Loader Version: Select the recommended Fabric Loader version.
- Install Location: Ensure the “Install Location” points to your correct
.minecraftdirectory.
- Install: Click the “Install” button.
- Confirm Installation: A confirmation message will appear.
- Install Fabric API (Crucial): Most Fabric mods require the Fabric API. This is not installed automatically by the loader.
- Go to CurseForge or Modrinth and search for “Fabric API.”
- Download the correct version of Fabric API (
.jarfile) for your Minecraft version. - Place this
Fabric API.jarfile into yourmodsfolder (explained below).
- Launch Minecraft: Open your Minecraft Launcher. A new profile named “fabric-loader-
” should appear. Select it and click “Play” once to generate the modsfolder.
Installing Quilt Loader
- Download the Quilt Installer: Go to the official Quilt website (quiltmc.org/install).
- Download Universal JAR: Click the “Download Universal Jar” button.
- Run the Installer: Double-click the downloaded
.jarfile. This opens the Quilt Installer window. - Select Minecraft and Loader Version:
- Minecraft Version: Choose your target Minecraft version.
- Loader Version: Select the desired Quilt Loader version.
- Install Location: Verify your
.minecraftdirectory.
- Install: Click the “Install” button.
- Confirm Installation: A confirmation message will appear.
- Install Quilted Fabric API (Crucial for Fabric Compatibility): If you plan to use Fabric mods with Quilt, you’ll likely need the Quilted Fabric API.
- Search for “Quilted Fabric API” on CurseForge or Modrinth.
- Download the correct version (
.jarfile) for your Minecraft version. - Place this
.jarfile into yourmodsfolder (explained below).
- Launch Minecraft: Open your Minecraft Launcher. A new profile named “quilt-loader-
” should appear. Select it and click “Play” once to generate the modsfolder.
Adding Mods to Your Game
Now that your chosen mod loader is installed and you’ve launched Minecraft at least once with its profile (which creates the mods folder), it’s time to add your actual mods.
-
Locate Your
.minecraft/modsFolder:- Windows: Press
Win + R, type%appdata%, hit Enter, and open.minecraft. You should see amodsfolder. - macOS: Open Finder, press
Cmd + Shift + G, type~/Library/Application Support/minecraft, hit Enter, and open themodsfolder. - Linux: Navigate to
~/.minecraft/mods. - If the
modsfolder doesn’t exist, launch Minecraft with your mod loader profile selected once, then check again. If it still doesn’t appear, you can manually create a new folder namedmods(all lowercase) inside your.minecraftdirectory.
- Windows: Press
-
Download Your Chosen Mods: From reputable sites like CurseForge or Modrinth, download the
.jarfiles for the mods you want. Crucially, ensure each mod is for your exact Minecraft version and compatible with your chosen mod loader (Forge, Fabric, or Quilt). -
Drag and Drop: Move the downloaded mod
.jarfiles into themodsfolder you located in step 1. Do not extract the.jarfiles. -
Launch Minecraft: Open your Minecraft Launcher, select the profile for your installed mod loader (Forge, Fabric, or Quilt), and click “Play.” Minecraft will now load with your installed mods. If everything is successful, you’ll likely see new options in the main menu (like a “Mods” button) or notice the changes within the game itself.
Congratulations! You have successfully installed mods in Minecraft.
Troubleshooting Common Issues and Best Practices
While the modding process can be exhilarating, it’s not always entirely smooth. Mod conflicts, crashes, and performance issues are common hurdles. Understanding how to diagnose and resolve these problems, along with adopting best practices for security and maintenance, is key to a sustainable and enjoyable modded Minecraft experience. This section blends “Tech” problem-solving with “Digital Security” awareness.
Navigating Mod Conflicts and Crashes
Crashes are perhaps the most common frustration in modding. Often, they manifest as the game failing to launch or abruptly closing with an “Exit Code” error.
-
Read the Crash Log: When Minecraft crashes, it typically generates a crash report (
.txtfile) in thecrash-reportsfolder within your.minecraftdirectory. This log contains invaluable information. Look for keywords like “Caused by:”, “Error details:”, or the name of a specific mod or method. The crash log is your first and best diagnostic tool. Many dedicated modding communities (like r/feedthebeast on Reddit) are excellent resources for deciphering these logs. -
Isolate the Problematic Mod (Binary Search): If you’ve installed multiple mods and experience a crash, the quickest way to find the culprit is to remove half of your mods from the
modsfolder, then launch the game.- If the game launches, the problematic mod is in the half you removed.
- If it still crashes, the problematic mod is in the half you kept.
- Repeat this process, halving the problematic set each time, until you pinpoint the single mod causing the issue. This method is highly efficient for large modpacks.
-
Check Mod Compatibility: Not all mods play nicely together, even if they’re for the same version and loader. Some mods might inherently conflict due to overlapping functionalities or specific coding choices. Check the mod’s official page (CurseForge, Modrinth) for any known incompatibilities listed by the developer.
-
Update Mods and Loader: Ensure both your mod loader (Forge/Fabric/Quilt) and all your individual mods are up-to-date. Developers frequently release bug fixes and compatibility updates. Sometimes, an older version of a mod might conflict with a newer version of the loader, or vice versa.
-
Check Java Version: As mentioned in the preparation section, ensure you have the correct Java Runtime Environment (JRE) installed for your Minecraft version. An incorrect Java version is a very common cause of launch failures.
-
Allocate More RAM: Modded Minecraft often requires more RAM than vanilla. In your Minecraft Launcher, edit your mod loader profile and go to “More Options” or “JVM Arguments.” You’ll typically see
-Xmx2G(allocating 2 gigabytes). Increase this value to-Xmx4Gor-Xmx6G(4 or 6 GB), depending on your system’s total RAM (never allocate more than 50-75% of your total RAM). Insufficient RAM can lead to crashes, especially with large modpacks.
Safety and Security in the Modding World
Beyond technical stability, digital security is a paramount concern when downloading and running third-party code.
-
Stick to Reputable Sources: Reiterate the importance of CurseForge, Modrinth, and official developer websites. These platforms actively moderate content for malicious code. Downloads from sketchy, unverified websites are a significant risk. Such sites might bundle malware, adware, or viruses with the mod files, compromising your system.
-
Beware of Outdated Mods: An outdated mod might not just crash your game; it could potentially contain security vulnerabilities that have since been patched. Always strive to use the latest version of a mod compatible with your Minecraft and loader version.
-
Read Reviews and Comments: Before downloading a mod, quickly scan the comments section and reviews on CurseForge or Modrinth. If other users are reporting crashes, performance issues, or suspicious behavior, it’s a red flag. Look for mods with active communities and responsive developers. This is where the “Brand” reputation of a mod developer or modpack creator comes into play.
-
Antivirus Software: While not foolproof, having up-to-date antivirus software can provide an additional layer of protection against potentially malicious downloads.
-
Backup Regularly: We mentioned backing up your worlds, but it’s worth reiterating. Regular backups are your ultimate safety net against data loss due to modding errors or unexpected issues.
Maintaining Your Modded Minecraft Installation
A bit of proactive maintenance can save you a lot of headaches in the long run.
-
Keep Mods Organized: As your mod list grows, it can become unwieldy. Consider using dedicated mod launchers like MultiMC, ATLauncher, or Prism Launcher. These tools allow you to create separate “instances” of Minecraft, each with its own specific Minecraft version, mod loader, and set of mods. This is a massive “productivity” booster, letting you switch between different modpacks or vanilla without conflicts.
-
Regularly Review Your Mod List: Periodically go through your
modsfolder. Are there any mods you no longer use? Remove them. Unused mods can still consume resources or introduce potential conflicts. -
Stay Informed: Follow modding news, developer updates, and community discussions. New versions of Minecraft, mod loaders, and popular mods are constantly being released. Staying informed helps you anticipate compatibility issues and discover new enhancements.
-
One Mod at a Time (Initially): When building a new modpack or trying out new mods, add them one by one or in small batches. Test the game after each addition. If a problem arises, you’ll immediately know which mod caused it, making troubleshooting much simpler.
By adhering to these best practices, you can mitigate many common modding challenges, ensuring a more stable, secure, and enjoyable experience as you delve deeper into the customized world of Minecraft.
Conclusion: Unlocking Limitless Minecraft Adventures
The journey of installing mods in Minecraft, while involving a few technical steps, opens up an incredibly vast and diverse universe of gameplay possibilities. From subtle quality-of-life enhancements that streamline your resource gathering to monumental content additions that introduce entirely new dimensions and challenges, mods empower you to sculpt Minecraft into precisely the game you envision.
We’ve covered the crucial groundwork, from understanding the “why” behind modding and preparing your system, to making informed decisions about mod loaders like Forge, Fabric, and Quilt. The detailed step-by-step instructions for installation should provide a clear path for even novice modders, while the troubleshooting tips and best practices for digital security and maintenance will ensure your modded adventures are as smooth and secure as possible.
Minecraft’s modding community is a testament to the game’s enduring appeal and its open-ended design. It thrives on innovation, shared creativity, and a collective desire to push the boundaries of what’s possible within the blocky landscape. As you venture forth with your newly modded game, remember to always prioritize safety by downloading from reputable sources and maintaining regular backups.
Embrace the power of customization, experiment with different mod combinations, and allow your imagination to run wild. Whether you’re building a technologically advanced base, exploring magical realms, or simply making your vanilla game a little more convenient, installing mods in Minecraft is an essential skill for any player looking to truly master their blocky world and craft an experience that is uniquely their own. Your next great Minecraft adventure awaits, limitless and enhanced.
aViewFromTheCave is a participant in the Amazon Services LLC Associates Program, an affiliate advertising program designed to provide a means for sites to earn advertising fees by advertising and linking to Amazon.com. Amazon, the Amazon logo, AmazonSupply, and the AmazonSupply logo are trademarks of Amazon.com, Inc. or its affiliates. As an Amazon Associate we earn affiliate commissions from qualifying purchases.