
Team Fortress 2 (TF2) stands as a testament to the enduring appeal of well-crafted multiplayer games. Launched over a decade and a half ago, its vibrant art style, distinct character classes, and highly competitive gameplay have garnered a dedicated global following. Yet, part of TF2’s remarkable longevity isn’t just due to Valve’s occasional updates but largely to the passionate creativity of its community, which continuously contributes a wealth of user-generated content in the form of “mods.”
Mods, short for modifications, allow players to personalize nearly every aspect of their game, from the visual aesthetics of weapons and character models to the layout of their Heads-Up Display (HUD) and the sound effects accompanying gameplay actions. Far from being a niche pursuit, modding TF2 is a widespread practice that injects fresh life into the game, enhances personalization, and can even provide competitive advantages through clearer interfaces or optimized performance.
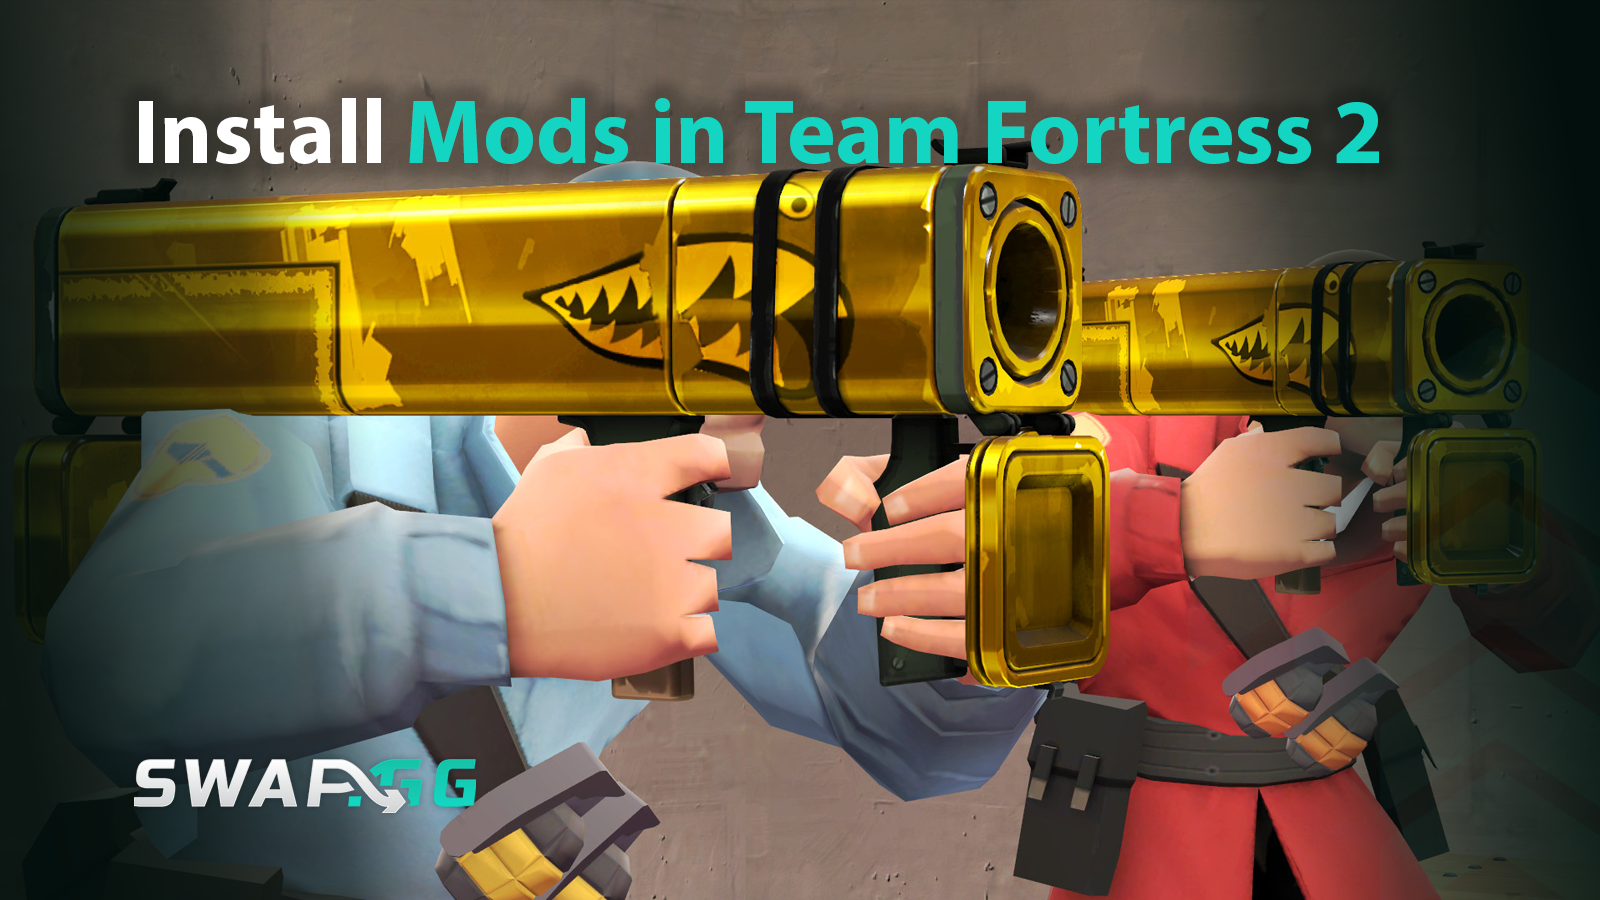
This comprehensive guide will walk you through the process of installing mods for TF2, ensuring a smooth and enjoyable experience. We’ll delve into understanding different mod types, pinpointing reliable sources, and navigating the nuances of manual installation, complete with troubleshooting tips to get you back in the action swiftly. Whether you’re looking to refresh your visual experience, streamline your HUD, or just add a quirky sound effect, mastering TF2 mod installation opens up a new dimension of gameplay customization.
Understanding Team Fortress 2 Modding
Before diving into the technical steps, it’s crucial to grasp what TF2 mods are, why they’re popular, and what essential knowledge you’ll need. This foundational understanding will demystify the process and equip you to make informed choices about the modifications you introduce to your game.
The Vibrant TF2 Modding Community
The sheer volume and diversity of TF2 mods are a direct reflection of its passionate community. Platforms like GameBanana serve as central hubs where modders from around the world share their creations, collaborate on projects, and receive feedback. These sites are invaluable resources not just for finding mods but also for understanding installation instructions, compatibility notes, and user reviews. Beyond dedicated modding sites, various community forums, subreddits (like r/tf2 and r/tf2mods), and even Discord servers foster a collaborative environment where players discuss and create custom content. This ecosystem of shared creativity is a significant reason why TF2 continues to feel fresh and engaging for millions, years after its release. Engaging with this community also often means gaining access to direct support from mod creators, which can be invaluable when troubleshooting unique issues. It’s a testament to how user-generated content, a core tenet of modern digital platforms, enhances and extends the lifespan of a game beyond its original scope.
Types of Mods and Their Impact
TF2 mods can generally be categorized by the aspect of the game they alter. Understanding these categories will help you identify what you’re looking for and anticipate their impact on your gameplay:
- Skins and Reskins: These are purely aesthetic changes to weapon models, character outfits, textures, or even maps. They don’t affect gameplay mechanics but allow players to customize their visual experience. Examples include custom textures for a specific weapon, unique character models, or environmental tweaks. These are generally the safest and most common types of mods, as they have no bearing on performance or competitive fairness.
- Custom HUDs (Heads-Up Displays): HUD mods are among the most popular for competitive players. They reorganize, resize, or recolor elements of the user interface (like health, ammo, killfeed, and scoreboards) to improve readability, provide more critical information at a glance, or simply suit personal aesthetic preferences. A well-designed HUD can significantly enhance situational awareness and player efficiency, making them a quality-of-life improvement with a tangible competitive edge for some users.
- Sound Packs: These mods replace default sound effects with custom ones. This could range from new hit sounds and kill sounds to custom announcer voice lines or redesigned weapon firing noises. Sound mods are purely for personal enjoyment and can add a unique auditory flair to your matches without impacting gameplay fairness.
- Model Changes: Beyond simple reskins, some mods alter the actual 3D models of characters or weapons. This can be for aesthetic reasons, but some performance-focused players use “low-poly” or “simplified” models to reduce graphical load and potentially increase frame rates on older or less powerful systems. While generally acceptable, players should be mindful of mods that might cross into unfair advantages (e.g., significantly altering enemy hitboxes, which is rare for client-side mods but important to note conceptually).
- Performance Mods & Configs: These aren’t always traditional “mods” in the visual sense but are custom configurations or small scripts designed to optimize game performance. Examples include “No-Hats” mods that remove cosmetic items for a slight performance boost, or extensive
autoexec.cfgfiles that fine-tune graphical settings beyond the in-game options. While they can greatly improve FPS, they require a deeper understanding of TF2’s console commands and configuration files.
Essential Prerequisites Before You Begin
Before you embark on your modding journey, ensure you have the following in place:
- Team Fortress 2 Installed: This might seem obvious, but a fresh, fully updated installation of TF2 is the best starting point.
- Basic File Navigation Skills: You should be comfortable locating folders, creating new directories, and moving files within Windows Explorer (or macOS Finder).
- Understanding Your Steam Directory: Knowing the default installation path for Steam and your games is crucial. Typically, this is
C:Program Files (x86)Steamon Windows. - Familiarity with Archive Extraction Tools: Most mods come compressed in
.zip,.rar, or.7zformats. You’ll need software like WinRAR, 7-Zip, or a built-in operating system utility to extract their contents. - The ‘tf’ and ‘custom’ Folders: These are the primary locations where you’ll be interacting with your game files. The
tffolder contains core game data, and thecustomfolder is Valve’s designated area for user-made modifications, making it easy to install and remove them without tampering with original game files.
Step-by-Step Guide to Manual Mod Installation
The majority of TF2 mods are installed manually, providing you with direct control over your game files. This section will walk you through the precise steps required, from locating your game directory to correctly placing various mod formats.
Locating Your TF2 Game Directory
The very first step is to find where Team Fortress 2 is installed on your computer. This path is critical as all mod installations will stem from this location.
- Open Steam: Launch the Steam client on your computer.
- Navigate to Library: Click on “Library” at the top of the Steam window.
- Find Team Fortress 2: In your list of games, locate “Team Fortress 2.”
- Access Properties: Right-click on “Team Fortress 2” and select “Properties” from the context menu.
- Go to Local Files: In the properties window, click on the “Local Files” tab.
- Browse Local Files: Click the “Browse…” button. This will open your file explorer directly to the Team Fortress 2 game directory.
The typical path you’ll see will look something like this: C:Program Files (x86)SteamsteamappscommonTeam Fortress 2. Within this folder, you will find another critical folder named tf. This tf folder is your primary destination for modding. All mods will ultimately reside within a specific subfolder inside tf. Make a mental note of this location or keep the window open.
The Crucial ‘custom’ Folder
Valve implemented the custom folder system as a robust and user-friendly way to manage client-side modifications. Its purpose is to centralize all user-added content, preventing direct alteration of core game files. This design ensures that game updates are less likely to break your mods and makes it incredibly easy to remove or troubleshoot them simply by deleting or renaming folders within custom.
- Navigate to the ‘tf’ folder: From your main Team Fortress 2 game directory (
...Team Fortress 2), open thetffolder. - Check for the ‘custom’ folder: Look for a folder named
custom. It’s often already present, especially if you’ve played TF2 for a while or installed community content before. - Create ‘custom’ if missing: If the
customfolder does not exist, simply right-click in an empty space within thetffolder, select “New,” then “Folder,” and name itcustom(all lowercase).
Inside this custom folder, you will create a separate subfolder for each mod you install. This practice is vital for organization and ease of management. For example, if you install a HUD called “AHUD” and a weapon skin called “BSkin,” your custom folder might look like this:
tf/custom/A_HUD/
tf/custom/B_Skin/
This structure isolates each mod, making it simple to activate, deactivate (by renaming the subfolder), or remove them without affecting other customizations or core game files.
Downloading and Preparing Your Mods
Finding and preparing mods before installation requires a few careful steps to ensure safety and proper functionality.
-
Source Your Mods Responsibly:
- GameBanana (gamebanana.com): This is by far the largest and most reputable source for TF2 mods. It hosts a vast collection of skins, HUDs, sound packs, and more, complete with user ratings, comments, and clear instructions.
- Community Forums/Subreddits: Official TF2 forums or relevant subreddits often feature mod releases and discussions.
- Mod Creator Websites: Some modders host their creations on personal sites or GitHub repositories.
Always prioritize downloading from well-established sites or directly from creators known within the community. Avoid downloading from obscure, unverified sources to minimize the risk of malware.
-
Download the Mod File: Once you’ve found a mod you like, download the compressed archive (usually
.zip,.rar, or.7z). -
Extract the Mod Files:
- Locate the downloaded archive file.
- Right-click on it and select an option like “Extract All” (Windows built-in), “Extract files…” (WinRAR), or “7-Zip -> Extract here/files…” (7-Zip).
- Extract the contents to a temporary location, such as your desktop or a dedicated “TF2 Mods Download” folder.
-
Examine the Extracted Contents: After extraction, open the newly created folder. What you see here dictates how you’ll install the mod:
- Single
.vpkfile: This is the easiest scenario. - Folders like
materials,models,sound,resource,scripts: This indicates a folder-based mod. - Another folder containing the above: Sometimes, the archive will extract into a folder with the mod’s name, and inside that will be the actual mod content (e.g.,
ModName/materials/). You’ll need to go one level deeper.
- Single
Installing Different Mod Formats
The placement of mod files within your custom folder is crucial. Incorrect placement is the most common reason for mods failing to load.
Installing VPK Files
VPK (Valve Pack) files are proprietary archive files used by Valve’s Source engine to package game assets. They are essentially self-contained mod packages, making their installation straightforward.
- Create a dedicated subfolder: Inside your
tf/custom/folder, create a new subfolder for your mod. Name it something descriptive, likemy_new_hudorfancy_weapon_skin. For example,tf/custom/my_new_hud/. - Place the VPK file: Drag and drop the
.vpkfile you extracted earlier directly into this newly created subfolder.- Example: If your mod is
newhud.vpk, it should be located attf/custom/my_new_hud/newhud.vpk.
That’s it for VPK files! The game’s engine is designed to automatically detect and load VPKs found within thecustomdirectory’s subfolders.
- Example: If your mod is
Installing Folder-Based Mods (materials, models, sound, resource, scripts, etc.)

Many mods, especially older ones or those with complex structures, come as collections of folders (like materials, models, sound, resource, scripts, cfg, particles, shaders). These require careful placement to ensure the game can find the modified assets.
-
Create a dedicated subfolder: Just like with VPKs, start by creating a new, descriptive subfolder inside
tf/custom/for this specific mod (e.g.,tf/custom/fancy_sound_pack/). -
Identify the mod’s root folder: Look at the contents you extracted. You’re searching for the folder(s) that directly contain
materials,models,sound, etc.- Scenario A: Extracted content is
materials,models,soundfolders directly. In this case, you would copy these folders directly into your mod’s custom subfolder.- Correct path:
tf/custom/fancy_sound_pack/sound/player/killsound.wav
- Correct path:
- Scenario B: Extracted content is a single folder (e.g., “FancySoundPack”) which then contains
materials,models,soundfolders. In this scenario, you would copy the contents of that “FancySoundPack” folder (i.e., thematerials,models,soundfolders themselves) into yourtf/custom/fancy_sound_pack/folder. Do not copy the “FancySoundPack” folder itself intofancy_sound_pack/resulting intf/custom/fancy_sound_pack/FancySoundPack/sound/.- Correct path:
tf/custom/fancy_sound_pack/sound/player/killsound.wav - Incorrect path:
tf/custom/fancy_sound_pack/FancySoundPack/sound/player/killsound.wav
- Correct path:
The key is to ensure that the
materials,models,sound,resource, orscriptsfolders are directly underneath your mod’s dedicated subfolder withincustom. The game engine looks for these specific directories at this relative path. - Scenario A: Extracted content is
Installing HUD Mods
HUD mods often have unique installation instructions due to their complex structure and reliance on resource and scripts folders. While they follow the general folder-based mod principle, pay extra attention.
-
Consult Mod-Specific Instructions: This is paramount for HUDs. Many HUDs come with detailed README files or installation guides provided by the creator. These often outline specific prerequisites, recommended settings, or alternative installation methods.
-
Create a subfolder: As always, create a unique subfolder for your HUD within
tf/custom/(e.g.,tf/custom/toonhud_v2/). -
Place the HUD files: Typically, HUDs will contain a
resourcefolder and often ascriptsfolder. You will place these folders directly inside yourtf/custom/toonhud_v2/folder.- Example:
tf/custom/toonhud_v2/resource/ui/hudlayout.res - Example:
tf/custom/toonhud_v2/scripts/hudanimations.txt
If the HUD comes with additional configurations or custom fonts, follow the mod’s instructions precisely, as these might require slightly different placement or additional steps like installing fonts to your operating system.
- Example:
Advanced Tips and Troubleshooting Common Issues
Even with careful installation, mods can sometimes be finicky. Understanding how to verify your installation and troubleshoot common problems will save you time and frustration.
Verifying Your Installation
After installing a mod, always verify its functionality in-game.
- Launch Team Fortress 2: Start the game and join a local server or a casual match.
- Check for Changes:
- Visual Mods (Skins, Models): Observe the weapons, characters, or environment you modified.
- HUD Mods: Check your health bar, ammo display, scoreboard, and other UI elements.
- Sound Mods: Perform actions that trigger the specific sounds you replaced (e.g., getting a kill for a kill sound, taking damage for a hit sound).
- Use the Developer Console (Optional but Recommended):
- Enable the developer console in your TF2 advanced options.
- Press the
~key (tilde) to open the console. - Some mod creators provide console commands to verify installation or troubleshoot. For example, typing
snd_restartcan sometimes fix issues with custom sounds not loading. - Pay attention to any error messages that might appear in the console.
Common Pitfalls and Solutions
Modding inevitably comes with its quirks. Here are the most frequent issues and how to resolve them:
Mod Not Appearing
This is the most common problem and almost always boils down to incorrect file pathing.
- Incorrect File Path:
- Cause: The mod’s files are not in the exact location the game expects. This usually means the
materials,models,sound,resource, orscriptsfolders are not directly under your mod’s subfolder withincustom. - Solution: Double-check your
tf/custom/your_mod_name/directory. Ensure that the core mod folders (e.g.,materials) are immediately insideyour_mod_name, not nested one level deeper (e.g., nottf/custom/your_mod_name/YourModNameAgain/materials/). Re-read the “Installing Folder-Based Mods” section carefully.
- Cause: The mod’s files are not in the exact location the game expects. This usually means the
- Missing ‘custom’ Subfolder:
- Cause: You forgot to create a unique subfolder for your mod within
tf/custom/and just dropped the mod files directly intocustom/. While some simple VPKs might work this way, it’s bad practice and often fails for folder mods. - Solution: Create the
your_mod_namesubfolder and move the mod’s contents into it.
- Cause: You forgot to create a unique subfolder for your mod within
- Conflicting Mods:
- Cause: Two or more mods are trying to replace the same game asset (e’g., two different custom hit sounds, or two HUDs). TF2 loads mods in alphabetical order of their subfolder names within
custom. The mod loaded last (alphabetically) will override any conflicting assets from earlier loaded mods. - Solution: Experiment by renaming mod folders to change their load order (e.g.,
_my_first_modvs.z_my_last_mod). More practically, identify which mods conflict and choose one, or use a mod manager (if available for TF2 for that specific conflict type, though less common) or a custom merge if you know how.
- Cause: Two or more mods are trying to replace the same game asset (e’g., two different custom hit sounds, or two HUDs). TF2 loads mods in alphabetical order of their subfolder names within
- Server Restrictions (
sv_pure):- Cause: Many official Valve servers and community servers run with
sv_pure 1enabled. This command forces clients to use only original game files for certain asset types, usually preventing visual mods (skins, models) from appearing to ensure a “pure” environment. - Solution: Your mod is likely installed correctly but is being blocked by the server. Try joining a server with
sv_pure 0(often community servers dedicated to modding or casual play) to confirm the mod works. HUDs and sound mods are generally unaffected bysv_pure 1as they don’t replace core game assets.
- Cause: Many official Valve servers and community servers run with
Game Crashing/Performance Issues
- Incompatible or Outdated Mods:
- Cause: TF2 updates can sometimes break older mods that modify core game mechanics or rely on outdated file structures.
- Solution: Check the mod’s page for recent updates or compatibility notes. Remove recently added mods one by one to identify the culprit.
- Too Many Mods / Poorly Optimized Mods:
- Cause: While TF2 can handle many mods, an excessive number, especially those with high-resolution textures or complex scripts, can impact performance or even lead to crashes, particularly on less powerful hardware.
- Solution: Prioritize essential mods. Remove non-critical ones. Check for “lite” versions of texture packs or HUDs.
- Corrupted Download:
- Cause: The mod file itself might have been corrupted during download.
- Solution: Redownload the mod from its source.
- Verify Game Files:
- Cause: In rare cases, core game files might have become corrupted, conflicting with mods or causing instability.
- Solution: In Steam, right-click TF2 -> Properties -> Local Files -> “Verify integrity of game files…”. This will detect and redownload any missing or corrupted official game files, effectively restoring your vanilla game. Note: This process will not remove files in your
customfolder but might revert any changes made directly to core game files if you didn’t use thecustomfolder correctly.
Best Practices for a Smooth Modding Experience
To minimize issues and maximize your enjoyment, adopt these best practices:
- Read All Mod Documentation: Never skip the README or installation guide provided by the mod creator. They often contain critical information specific to that mod.
- Install One Mod at a Time: Install a single mod, test it in-game, and confirm it works before adding the next one. This makes it infinitely easier to pinpoint which mod is causing a problem if one arises.
- Keep Your Mods Organized: Use descriptive subfolder names within
tf/custom/(e.g.,_rayshud,spy_butterfly_knife_skin). - Back Up Custom Files (Optional but Wise): While the
customfolder prevents alteration of core game files, if you spend a lot of time configuring specific mods or have created your own unique combinations, consider backing up your entiretf/customfolder periodically. - Stay Updated: Periodically check GameBanana or the mod’s source for updates. Mod creators often release fixes or compatibility patches.
- Respect Server Rules and VAC: Always ensure your mods are purely client-side and aesthetic. Avoid anything that gives a clear, unfair advantage or interacts with server-side mechanics. While purely visual mods are generally safe from VAC (Valve Anti-Cheat), any mod that attempts to alter game logic or network communication could potentially trigger it. Stick to well-known, aesthetic, and performance-enhancing mods from trusted sources.
The Broader Impact of TF2 Modding
Beyond individual customization, the modding community significantly contributes to the broader health and cultural richness of Team Fortress 2. It’s a prime example of how user-generated content acts as a powerful catalyst for a game’s enduring legacy, showcasing the intertwining of technology, creativity, and community engagement.
Enhancing Longevity and Personalization
In an era where many games fade into obscurity after a few years, TF2’s ability to maintain a massive player base is remarkable. A significant part of this stems from the freedom players have to personalize their experience. Mods allow players to continuously refresh their perception of the game without waiting for official updates. Whether it’s a new weapon skin that revives interest in a particular class, a streamlined HUD that makes competitive play more engaging, or simply a collection of custom sound effects that bring a smile, mods provide a constant stream of newness. This personalization fosters a deeper connection between the player and the game, turning a mass-market product into a unique digital space tailored to individual tastes. It’s a testament to the idea that empowering users with tools for creation can extend the value proposition of a digital product exponentially.
Community Contributions and Creativity
The TF2 modding scene is a hotbed of technological and artistic talent. Modders often leverage advanced skills in 3D modeling, texturing, animation, UI/UX design, and scripting to bring their visions to life. Platforms like GameBanana not only serve as repositories but also as informal portfolios and collaborative spaces, allowing these creators to showcase their work, receive feedback, and even gain recognition within the broader gaming community. This ecosystem acts as a feeder for talent, with many modders eventually pursuing careers in game development or related tech industries. Their contributions transform TF2 from a static product into a dynamic, evolving canvas, demonstrating the power of grassroots innovation in shaping digital entertainment. This aspect resonates with the “Brand” topic of the website, as it speaks to the cultivation of a community brand and the positive reputation built around player empowerment.
Performance Optimization for Older Systems
Not all mods are about aesthetics or competitive edge; a significant portion focuses on improving game performance. For players with older hardware or those who prioritize maximum frame rates, performance-oriented mods and custom configurations are invaluable. “No-hats” mods remove cosmetic items, simplifying character models. Low-violence configs reduce particle effects and gore, easing the strain on GPUs. Optimized texture packs can replace high-resolution assets with lighter versions. These technical tweaks ensure that TF2 remains accessible and playable for a wider audience, extending its reach and preventing it from becoming graphically demanding for those without cutting-edge machines. This directly ties into the “Tech” aspect of the website, highlighting how software modifications can bridge hardware limitations and improve user experience through practical application of technology.

Conclusion
Modding Team Fortress 2 is a rewarding endeavor that unlocks a vast realm of personalization and creative expression. By following the steps outlined in this guide – from understanding the types of mods available and responsibly sourcing them, to meticulously installing them within your tf/custom folder – you gain the power to reshape your TF2 experience to your exact preferences.
While the process of manual installation requires attention to detail, the robust custom folder system implemented by Valve significantly simplifies management and minimizes the risk of damaging your core game files. Remember to always create unique subfolders for each mod, double-check your file paths, and consult mod-specific documentation for any unique installation instructions. Should you encounter any issues, leverage the troubleshooting tips provided, and don’t hesitate to engage with the vibrant TF2 modding community for further assistance.
Ultimately, installing mods isn’t just about changing a few textures or sounds; it’s about embracing the collaborative spirit of the TF2 community and taking ownership of your gameplay experience. It’s a testament to the game’s design that it supports such extensive user customization, allowing it to remain fresh and engaging for a devoted player base over many years. So, dive in, experiment with different modifications, and most importantly, enjoy your uniquely tailored Team Fortress 2 adventure.
aViewFromTheCave is a participant in the Amazon Services LLC Associates Program, an affiliate advertising program designed to provide a means for sites to earn advertising fees by advertising and linking to Amazon.com. Amazon, the Amazon logo, AmazonSupply, and the AmazonSupply logo are trademarks of Amazon.com, Inc. or its affiliates. As an Amazon Associate we earn affiliate commissions from qualifying purchases.