
In an increasingly interconnected digital landscape, the lines between operating systems are blurring, empowering users with unprecedented flexibility. For years, developers, system administrators, and technology enthusiasts have grappled with the choice between Windows and Linux, often resorting to dual-boot setups or resource-intensive virtual machines. However, with the advent of the Windows Subsystem for Linux (WSL), Microsoft has revolutionized this dynamic, offering a seamless and powerful way to run a full-fledged Linux environment directly within Windows 10. This integration not only streamlines workflows but also democratizes access to the robust tools and open-source ecosystems that Linux is renowned for.
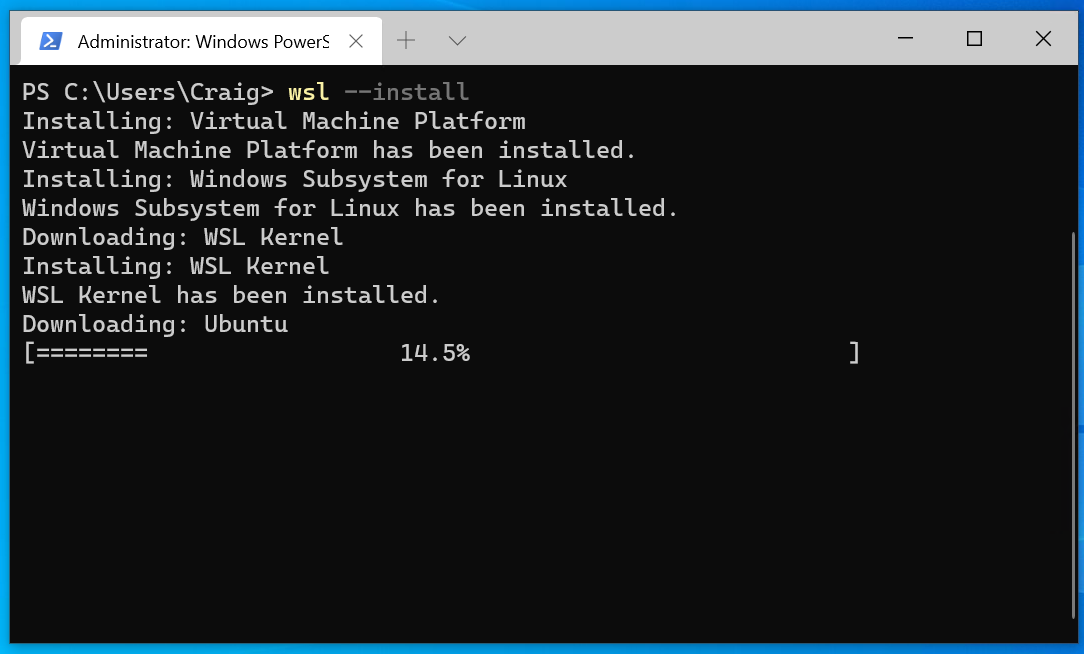
This comprehensive guide will walk you through the process of installing Linux on your Windows 10 machine, primarily focusing on the modern and highly efficient WSL method. Whether you’re a developer looking for a powerful command-line interface, a cybersecurity enthusiast exploring tools like Kali Linux, or simply curious about the world of open-source software, integrating Linux into your Windows environment can unlock a new realm of productivity and innovation. We’ll delve into the necessary preparations, step-by-step installation instructions, and provide insights into optimizing your new hybrid setup, making the most of both operating systems.
Why Linux on Windows 10? Unlocking a World of Possibilities
The idea of running Linux within Windows 10 might seem counterintuitive to some, but the convergence offers a multitude of compelling advantages that cater to a diverse range of users. This symbiotic relationship leverages the strengths of both operating systems, creating a powerful and flexible computing environment.
For developers, the benefits are immediately apparent. Linux has long been the gold standard for software development, offering a rich ecosystem of tools, compilers, libraries, and frameworks. With WSL, developers can access Bash, a vast array of GNU utilities, popular package managers like apt or dnf, and development environments tailored for web development (Node.js, Python, Ruby), cloud computing, and even cutting-edge AI tools. This eliminates the need for maintaining separate machines or complex virtual machine configurations, allowing for a more agile and efficient development workflow directly from their Windows desktop. Imagine building and testing Linux-specific applications without ever leaving your familiar Windows environment, or using powerful command-line tools that simply aren’t available natively on Windows.
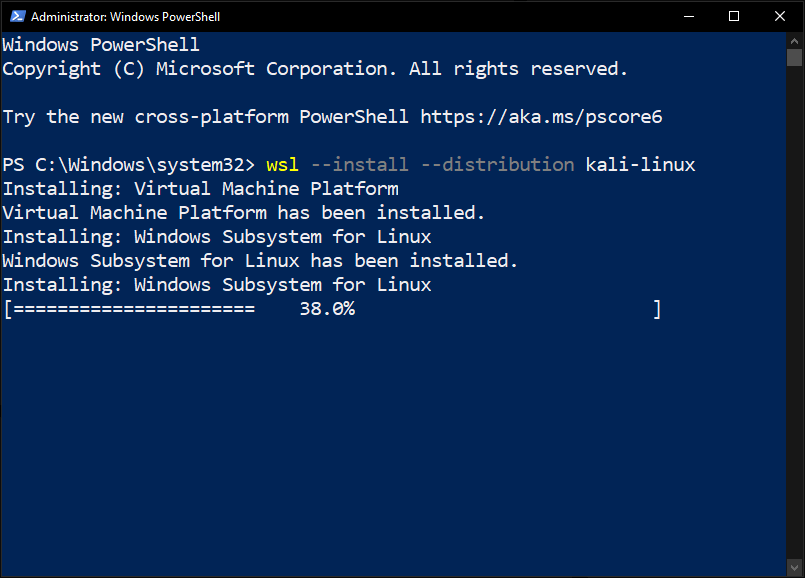
Beyond development, Linux offers superior command-line control, making it a favorite among power users and system administrators. The ability to script complex tasks, manage servers, and troubleshoot networks using standard Linux tools directly from Windows enhances productivity significantly. For those interested in digital security and ethical hacking, distributions like Kali Linux can be installed via WSL, providing access to a suite of penetration testing and forensic tools without the overhead of a dedicated installation. This hybrid approach enables users to maintain their Windows productivity applications while seamlessly switching to a robust Linux terminal for specialized tasks.
Furthermore, integrating Linux fosters a deeper understanding of technology trends and software architecture. It exposes users to the philosophy of open-source, community-driven development, which is at the heart of much of the innovation we see today. By breaking down the barrier between these two dominant operating systems, Microsoft has not only made Linux more accessible but has also opened doors for Windows users to explore new software, learn new skills, and expand their technical capabilities, ultimately enhancing their personal and professional growth within the broader tech landscape.
Preparing Your Windows 10 System for Linux Integration
Before embarking on the installation of Linux via the Windows Subsystem for Linux (WSL), it’s crucial to ensure your Windows 10 system is properly prepared. A little preliminary work can prevent common issues and guarantee a smoother, more efficient setup process. These steps are foundational for integrating a robust Linux environment into your Windows ecosystem.
Essential System Requirements
First and foremost, verify that your version of Windows 10 supports WSL. WSL is available on Windows 10 version 1607 (Anniversary Update) or later. For optimal performance and access to the latest features, including WSL 2, you’ll need Windows 10 version 1903 or higher, with Build 18362 or newer. To check your Windows version and build number, press Windows key + R, type winver, and press Enter.
You’ll also need to ensure your system has sufficient resources. While WSL itself is relatively lightweight, the Linux distribution you choose and the applications you run within it will consume RAM and CPU cycles. We recommend at least 4GB of RAM, though 8GB or more will provide a much smoother experience, especially if you plan on running multiple applications concurrently. Disk space is another consideration; a fresh Linux distribution typically requires a few gigabytes, but this will grow as you install more software and store files. It’s wise to allocate at least 20-30GB of free disk space on your primary drive. Lastly, you’ll need an active internet connection for downloading the necessary components and Linux distributions from the Microsoft Store.
Updating Windows for Optimal Compatibility
Keeping your Windows 10 operating system up-to-date is paramount for the successful installation and operation of WSL. Microsoft frequently releases updates that improve WSL’s performance, stability, and compatibility. Outdated versions can lead to unexpected errors during installation or limit your access to the most advanced features, such as WSL 2.
To ensure your system is fully updated:
- Go to
Start>Settings>Update & Security. - Click on
Windows Update. - Click
Check for updates. - Install any available updates, including optional updates that might relate to system components or drivers. You may need to restart your computer multiple times to complete all installations.
It’s also a good practice to ensure that your system’s virtualization features are enabled in the BIOS/UEFI firmware, especially if you plan to use WSL 2. While WSL 2 primarily uses Hyper-V technology, which often relies on these settings, Windows usually prompts you if they are disabled. Look for settings like “Intel VT-x,” “AMD-V,” “Virtualization Technology,” or “SVM Mode” and ensure they are enabled. Accessing your BIOS/UEFI typically involves pressing a specific key (e.g., F2, F10, Del) immediately after powering on your computer. Refer to your motherboard or computer manufacturer’s documentation for exact instructions.
With these preparations complete, your Windows 10 machine will be ready to embrace the power and flexibility of a seamlessly integrated Linux environment.
The Modern Approach: Installing Linux via Windows Subsystem for Linux (WSL)
The Windows Subsystem for Linux (WSL) is the most efficient and recommended method for running Linux on Windows 10. It offers a native-like experience, integrating deeply with your Windows file system and allowing for powerful cross-platform workflows. This section will guide you through the entire process, from enabling WSL to running your first Linux commands.
Enabling WSL: Step-by-Step
The first step is to enable the necessary Windows features. This involves activating two key components: “Windows Subsystem for Linux” and, for the enhanced performance of WSL 2, “Virtual Machine Platform.”
-
Open PowerShell as Administrator:
- Click the
Startbutton, typePowerShell, right-click on “Windows PowerShell,” and select “Run as administrator.” Confirm the User Account Control prompt.
- Click the
-
Enable the “Windows Subsystem for Linux” Feature:
- In the PowerShell window, enter the following command and press Enter:
powershell

dism.exe /online /enable-feature /featurename:Microsoft-Windows-Subsystem-Linux /all /norestart
- This command uses the Deployment Image Servicing and Management (DISM) tool to enable the WSL feature.
- In the PowerShell window, enter the following command and press Enter:
-
Enable the “Virtual Machine Platform” Feature (for WSL 2):
- For the best performance and compatibility with WSL 2, you’ll also need to enable the Virtual Machine Platform. Enter this command in the same PowerShell window:
powershell

dism.exe /online /enable-feature /featurename:VirtualMachinePlatform /all /norestart
- WSL 2 utilizes virtualization technology, which is why this feature is required.
- For the best performance and compatibility with WSL 2, you’ll also need to enable the Virtual Machine Platform. Enter this command in the same PowerShell window:
-
Restart Your Computer:
- After executing both commands, you’ll be prompted to restart your computer. It’s crucial to restart to apply these changes fully. You can do this by typing
shutdown /r /t 0in PowerShell or by simply restarting through the Start Menu.
- After executing both commands, you’ll be prompted to restart your computer. It’s crucial to restart to apply these changes fully. You can do this by typing
Installing Your Chosen Linux Distribution from the Microsoft Store
Once WSL features are enabled and your system has restarted, you can proceed to install a Linux distribution. The Microsoft Store offers a variety of popular choices.
-
Open the Microsoft Store:
- Click the
Startbutton, typeMicrosoft Store, and open the application.
- Click the
-
Search for a Linux Distribution:
- In the Microsoft Store’s search bar (top right), type the name of your preferred Linux distribution. Popular choices include:
- Ubuntu: A widely used, beginner-friendly distribution known for its extensive community support.
- Debian: A stable and robust distribution, often favored by experienced users.
- Kali Linux: A specialized distribution for penetration testing and digital forensics, popular among cybersecurity professionals.
- openSUSE: Another robust option with a strong focus on enterprise and developer needs.
- In the Microsoft Store’s search bar (top right), type the name of your preferred Linux distribution. Popular choices include:
-
Select and Install:
- Click on the distribution you wish to install (e.g., “Ubuntu”).
- Click the
GetorInstallbutton on the distribution’s page. The store will download and install the distribution. This may take a few minutes depending on your internet speed.
-
Launch Your Linux Distribution:
- Once the installation is complete, you can launch your new Linux environment in two ways:
- Click the
Launchbutton directly from the Microsoft Store page. - From the
Startmenu, find your installed Linux distribution (e.g., “Ubuntu”) and click on it.
- Click the
- Once the installation is complete, you can launch your new Linux environment in two ways:
Initial Setup and Understanding Your Linux Environment
The first time you launch your installed Linux distribution, it will take a moment to “finalize” the installation. You will then be prompted to create a new user account and password for your Linux environment.

-
Create a UNIX Username and Password:
- Follow the prompts to create a new username and password. This account will be your default user within the Linux environment and will have root privileges via
sudo. Remember this password, as you’ll need it for administrative tasks. - Note: This username and password are separate from your Windows account credentials.
- Follow the prompts to create a new username and password. This account will be your default user within the Linux environment and will have root privileges via
-
Update Your Linux System:
- Once your user account is set up, you’ll be dropped into the Linux command line (Bash shell). The very first thing you should do is update the package lists and upgrade any installed software. This ensures you have the latest security patches and software versions.
- Enter the following commands, pressing Enter after each:
bash

sudo apt update

sudo apt upgrade
sudotemporarily grants root privileges.apt updaterefreshes the list of available packages, andapt upgradeinstalls newer versions of the packages you already have. You’ll need to enter your Linux password when prompted bysudo.
-
Explore Basic Commands:
- Now you have a fully functional Linux command line! Try some basic commands to get started:
ls: Lists the contents of the current directory.pwd: Prints the current working directory.cd ~: Changes directory to your home folder.mkdir myproject: Creates a new directory namedmyproject.nano hello.txt: Opens thenanotext editor to create/edithello.txt.
- Now you have a fully functional Linux command line! Try some basic commands to get started:
WSL1 vs. WSL2: Choosing the Right Architecture
WSL has evolved, and with it came WSL 2, offering significant improvements over its predecessor, WSL 1. Understanding the differences will help you choose the right architecture for your needs.
- WSL 1: This was the initial version. It uses a compatibility layer to translate Linux system calls into Windows system calls. While it offered excellent file system performance between Windows and Linux, it lacked full Linux kernel compatibility, leading to some limitations and slower performance for certain Linux applications (especially those involving heavy I/O or networking).
- WSL 2: This is the newer, recommended version. It runs a real Linux kernel inside a lightweight virtual machine (VM). This provides full system call compatibility, dramatically improved file I/O performance (especially for Linux-native operations), and supports features like Docker Desktop without requiring a separate VM. The trade-off is slightly slower file access when accessing Linux files from Windows directly, but for most use cases, the benefits far outweigh this.
How to set WSL 2 as the default architecture:
- Open PowerShell as Administrator.
- Run the command:
powershell

wsl --set-default-version 2
This command ensures that any new Linux distributions you install will use WSL 2.
How to convert an existing distribution to WSL 2:
- First, check your installed distributions and their current WSL versions:
powershell

wsl --list --verbose
(orwsl -l -v) - To convert a specific distribution (e.g., Ubuntu) to WSL 2:
powershell

wsl --set-version Ubuntu 2
Replace “Ubuntu” with the name of your distribution. This conversion might take a few minutes.
For most users, especially developers and those running demanding Linux applications, WSL 2 is highly recommended due to its superior performance and full kernel compatibility.
Interacting Between Windows and Linux Filesystems
One of the most powerful features of WSL is the seamless interoperability between your Windows and Linux filesystems.
-
Accessing Windows Files from Linux:
- Your Windows drives are automatically mounted under
/mnt/. For example, your C: drive is accessible at/mnt/c. You can navigate to it usingcd /mnt/cand access all your Windows files and folders directly from your Linux terminal. This is incredibly useful for processing Windows-stored data with Linux tools.
- Your Windows drives are automatically mounted under
-
Accessing Linux Files from Windows:
- You can access your Linux distribution’s filesystem directly from Windows File Explorer. Open File Explorer and type
\wsl$in the address bar. This will show you a list of your installed Linux distributions. Clicking on one will allow you to browse its entire Linux filesystem, including your home directory (\wsl$Ubuntuhomeyourusername). - Caution: While you can edit Linux files from Windows, it’s generally recommended to modify Linux files using Linux tools for better compatibility, especially when using WSL 2, as modifying Linux files from Windows might lead to permissions issues or data corruption for certain files.
- You can access your Linux distribution’s filesystem directly from Windows File Explorer. Open File Explorer and type
Unleashing GUI Applications with WSLg
A significant advancement in WSL has been the introduction of WSLg (Windows Subsystem for Linux GUI). Previously, running Linux GUI applications on WSL required complex X server setups. WSLg, however, provides out-of-the-box support for running graphical Linux applications seamlessly on your Windows desktop. This feature is available on Windows 10 versions 21H2 (Build 19044) and later, and requires WSL 2.
How to use WSLg:
- Ensure your Windows 10 is updated to a compatible version and your distribution is running on WSL 2.
- Simply install a GUI application within your Linux distribution using its package manager. For example, to install
gedit(a simple text editor):
bash

sudo apt install gedit
- Once installed, you can launch it directly from the Linux terminal:
bash

gedit &
(The&allows the application to run in the background, freeing up your terminal.)
The application will then appear as a native Windows application, with its own icon in the taskbar and Start Menu. You can pin it, resize it, and interact with it just like any other Windows app, demonstrating the true integration power of WSL.
WSLg opens up possibilities for using Linux-native IDEs, image editors, browser versions, and other graphical tools directly on your Windows desktop, making the Linux-on-Windows experience more complete and user-friendly than ever before. This truly bridges the gap, offering the best of both worlds.
Alternative Methods: When WSL Isn’t Your Only Option
While WSL stands out as the most integrated and user-friendly method for running Linux on Windows 10, it’s not the only approach available. Depending on your specific needs, technical expertise, and desired level of isolation or performance, alternative methods like dual-booting or using virtual machines might still be relevant. These options, while often more resource-intensive or complex, offer different advantages.
Dual Booting for Dedicated Performance
Dual booting involves installing two or more operating systems on separate partitions of your hard drive, allowing you to choose which one to boot into at startup. This means that when you select Linux, it runs directly on the hardware, providing native performance without any virtualization overhead.
- Pros: Full, uncompromised Linux performance; direct access to hardware; ideal for high-performance tasks like gaming or intensive video editing that benefit from dedicated resources.
- Cons: Requires partitioning your hard drive, which can be risky if not done carefully; you can only use one OS at a time, requiring a reboot to switch; system resources are exclusively dedicated to the booted OS.
- Use Case: Best suited for users who need maximum Linux performance, want to completely isolate their Windows and Linux environments, or plan to spend significant time exclusively in Linux for specific tasks. This method is more complex to set up and manage, often requiring a deeper understanding of disk management and bootloaders.
Virtual Machines for Isolated Environments
A virtual machine (VM) creates a simulated computer system, or “guest” OS, within your existing operating system, the “host.” Software like VirtualBox or VMware Workstation Player allows you to install various Linux distributions within a virtual environment, complete with virtual hardware like CPU, RAM, and storage.
- Pros: Complete isolation between the host (Windows) and guest (Linux) OS; easy to create, clone, and revert snapshots; ideal for testing new software, experimenting with different distributions, or running applications that require a sandboxed environment. You can run both OS concurrently.
- Cons: Performance overhead due to virtualization layer, meaning the guest OS won’t perform as well as a native installation; consumes host system resources (RAM, CPU, disk) while running; may require more manual setup for seamless integration (like file sharing).
- Use Case: Excellent for learning, testing, or running specific Linux applications without modifying your host system. It provides a safe sandbox for experimentation, especially for those new to Linux or who need to run multiple isolated environments. While less performant than WSL 2 for command-line tasks, it offers a full desktop experience (if desired) for the guest OS.
While these alternative methods have their place, WSL remains the most convenient and integrated solution for most users who wish to leverage Linux tools and environments alongside their Windows 10 workflow.
Troubleshooting and Pro Tips
Even with a streamlined process like WSL installation, minor hitches can occur. Here are some common troubleshooting tips and professional advice to enhance your Linux-on-Windows experience:
- “WSL 2 Requires an update to its kernel component” error: If you encounter this, it means you need to download and install the latest WSL 2 Linux kernel update package. You can typically find this on Microsoft’s official WSL documentation page (search for “WSL2 Linux kernel update package”). Install the
.msifile, then try setting your distribution to WSL 2 again. - Network Connectivity Issues: If your Linux environment can’t access the internet, ensure your Windows firewall isn’t blocking WSL. Also, check your DNS settings within Linux (
/etc/resolv.conf). Sometimes, restarting the WSL service (wsl --shutdownin PowerShell, then relaunch your distro) can resolve temporary network glitches. - Permission Denied Errors: If you’re encountering permission errors when trying to install software or modify system files, remember to use
sudobefore your commands (e.g.,sudo apt install <package>). If you’re modifying files owned by root,sudois essential. For files accessed from Windows to Linux, ensure you’re using Linux tools to modify them, especially for files in the Linux filesystem (\wsl$). - Disk Space Management: WSL 2 distributions use a virtual hard disk (VHDX file) that grows dynamically. If you notice your C: drive filling up, you can compress the VHDX file. In PowerShell (as admin), first shut down WSL:
wsl --shutdown. Then navigate to the location of your VHDX file (usuallyC:Users<YourUsername>AppDataLocalPackages<DistroName>LocalStateext4.vhdx) and rundiskpartthenselect vdisk file="<path_to_vhdx>",attach vdisk readonly,compact vdisk,detach vdisk. - Running WSL Commands from Windows: You can execute Linux commands directly from Windows Command Prompt or PowerShell. Simply prepend
wslto your command:wsl ls -la. This is incredibly useful for scripting and automation. - Alias Creation: In your Linux environment, you can create aliases in your
~/.bashrc(or~/.zshrc) file for frequently used commands or to shorten paths, boosting your productivity. For example:alias ll='ls -la'. - Terminal Emulators: While the default WSL terminal is functional, consider using a more feature-rich terminal emulator like Windows Terminal, which allows you to manage multiple command-line interfaces (PowerShell, CMD, WSL distros) in tabs, customize themes, and offers a better user experience.
- Understanding File Paths: Always be mindful of whether you are in the Windows file system (
/mnt/c/Users/...) or the Linux file system (/home/youruser/...). Mistakes in pathing are a common source of error.
By keeping these tips in mind, you can effectively troubleshoot common issues and optimize your Linux-on-Windows experience, transforming your desktop into a versatile powerhouse for development, learning, and exploration.
Conclusion
The journey of installing Linux in Windows 10, particularly through the elegant solution of Windows Subsystem for Linux (WSL), marks a significant step forward in desktop computing. This integration shatters traditional barriers, offering a powerful, flexible, and highly productive environment that leverages the best features of both operating systems. From empowering developers with native Linux toolchains to providing cybersecurity enthusiasts with specialized utilities and opening doors for general users to explore the vast world of open-source software, WSL has truly democratized access to Linux.
By following this guide, you’ve successfully transformed your Windows 10 machine into a hybrid powerhouse, capable of running Linux command-line tools, applications, and even graphical user interfaces seamlessly. You’ve navigated the initial setup, chosen your preferred Linux distribution, and hopefully gained an understanding of the interoperability and performance enhancements offered by WSL 2 and WSLg.
As technology trends continue to push the boundaries of what’s possible, the ability to effortlessly blend different computing environments will become even more crucial. Mastering these tools not only enhances your technical skillset – a valuable asset for personal branding and career advancement in a tech-driven world – but also opens doors to new opportunities, from coding and scripting to system administration and digital security. Embrace this newfound power, experiment with different distributions and tools, and continue to explore the endless possibilities that this modern Linux-on-Windows setup provides. Your integrated digital workspace is now ready for innovation.
aViewFromTheCave is a participant in the Amazon Services LLC Associates Program, an affiliate advertising program designed to provide a means for sites to earn advertising fees by advertising and linking to Amazon.com. Amazon, the Amazon logo, AmazonSupply, and the AmazonSupply logo are trademarks of Amazon.com, Inc. or its affiliates. As an Amazon Associate we earn affiliate commissions from qualifying purchases.