
LED light strips have rapidly transformed from niche decorative items to mainstream technological solutions for enhancing living spaces. Their versatility, energy efficiency, and customizable nature make them an appealing choice for a wide range of applications, from accent lighting and mood setting to functional task illumination. Whether you’re a tech enthusiast looking to integrate smart home features, a creative individual aiming to elevate your personal space’s aesthetic, or someone seeking cost-effective and visually striking lighting solutions, understanding how to properly install LED light strips is key to achieving your desired results.
This guide will walk you through the entire process, from initial planning and preparation to the final connection and troubleshooting. We’ll cover everything you need to know to confidently tackle this DIY project, ensuring a professional-looking and long-lasting installation.
Understanding Your LED Light Strip Kit
Before diving into the installation, it’s crucial to familiarize yourself with the components that typically come in an LED light strip kit. While specific kits may vary, most will include the following essential parts:
The LED Strip Itself
This is the core of your lighting system. LED light strips are flexible circuit boards populated with Light Emitting Diodes. They come in various lengths, colors (single color, RGB, or RGBW/WW), and densities (number of LEDs per meter). The back of the strip usually has an adhesive backing for easy mounting.
Power Supply
LEDs require a specific voltage to operate, and the power supply (often an AC-to-DC adapter or a power brick) converts your home’s standard AC power into the DC voltage required by the LEDs. It’s essential to match the power supply’s wattage to the total wattage of your LED strip to prevent overheating or insufficient power.
Controller (for RGB/Addressable Strips)
If you have an RGB (Red, Green, Blue), RGBW (Red, Green, Blue, White), or RGBWW (Red, Green, Blue, Warm White) strip, you’ll need a controller. This device manages the color mixing and various lighting effects. Controllers can be simple infrared (IR) remotes, radio frequency (RF) remotes, or advanced Wi-Fi/Bluetooth enabled smart controllers that integrate with smartphone apps and smart home ecosystems. Addressable LED strips, which allow individual control of each LED, require specialized controllers.
Connectors and Accessories
These are vital for piecing together your LED strip, especially if you need to make turns, bridge gaps, or extend the length. Common connectors include:
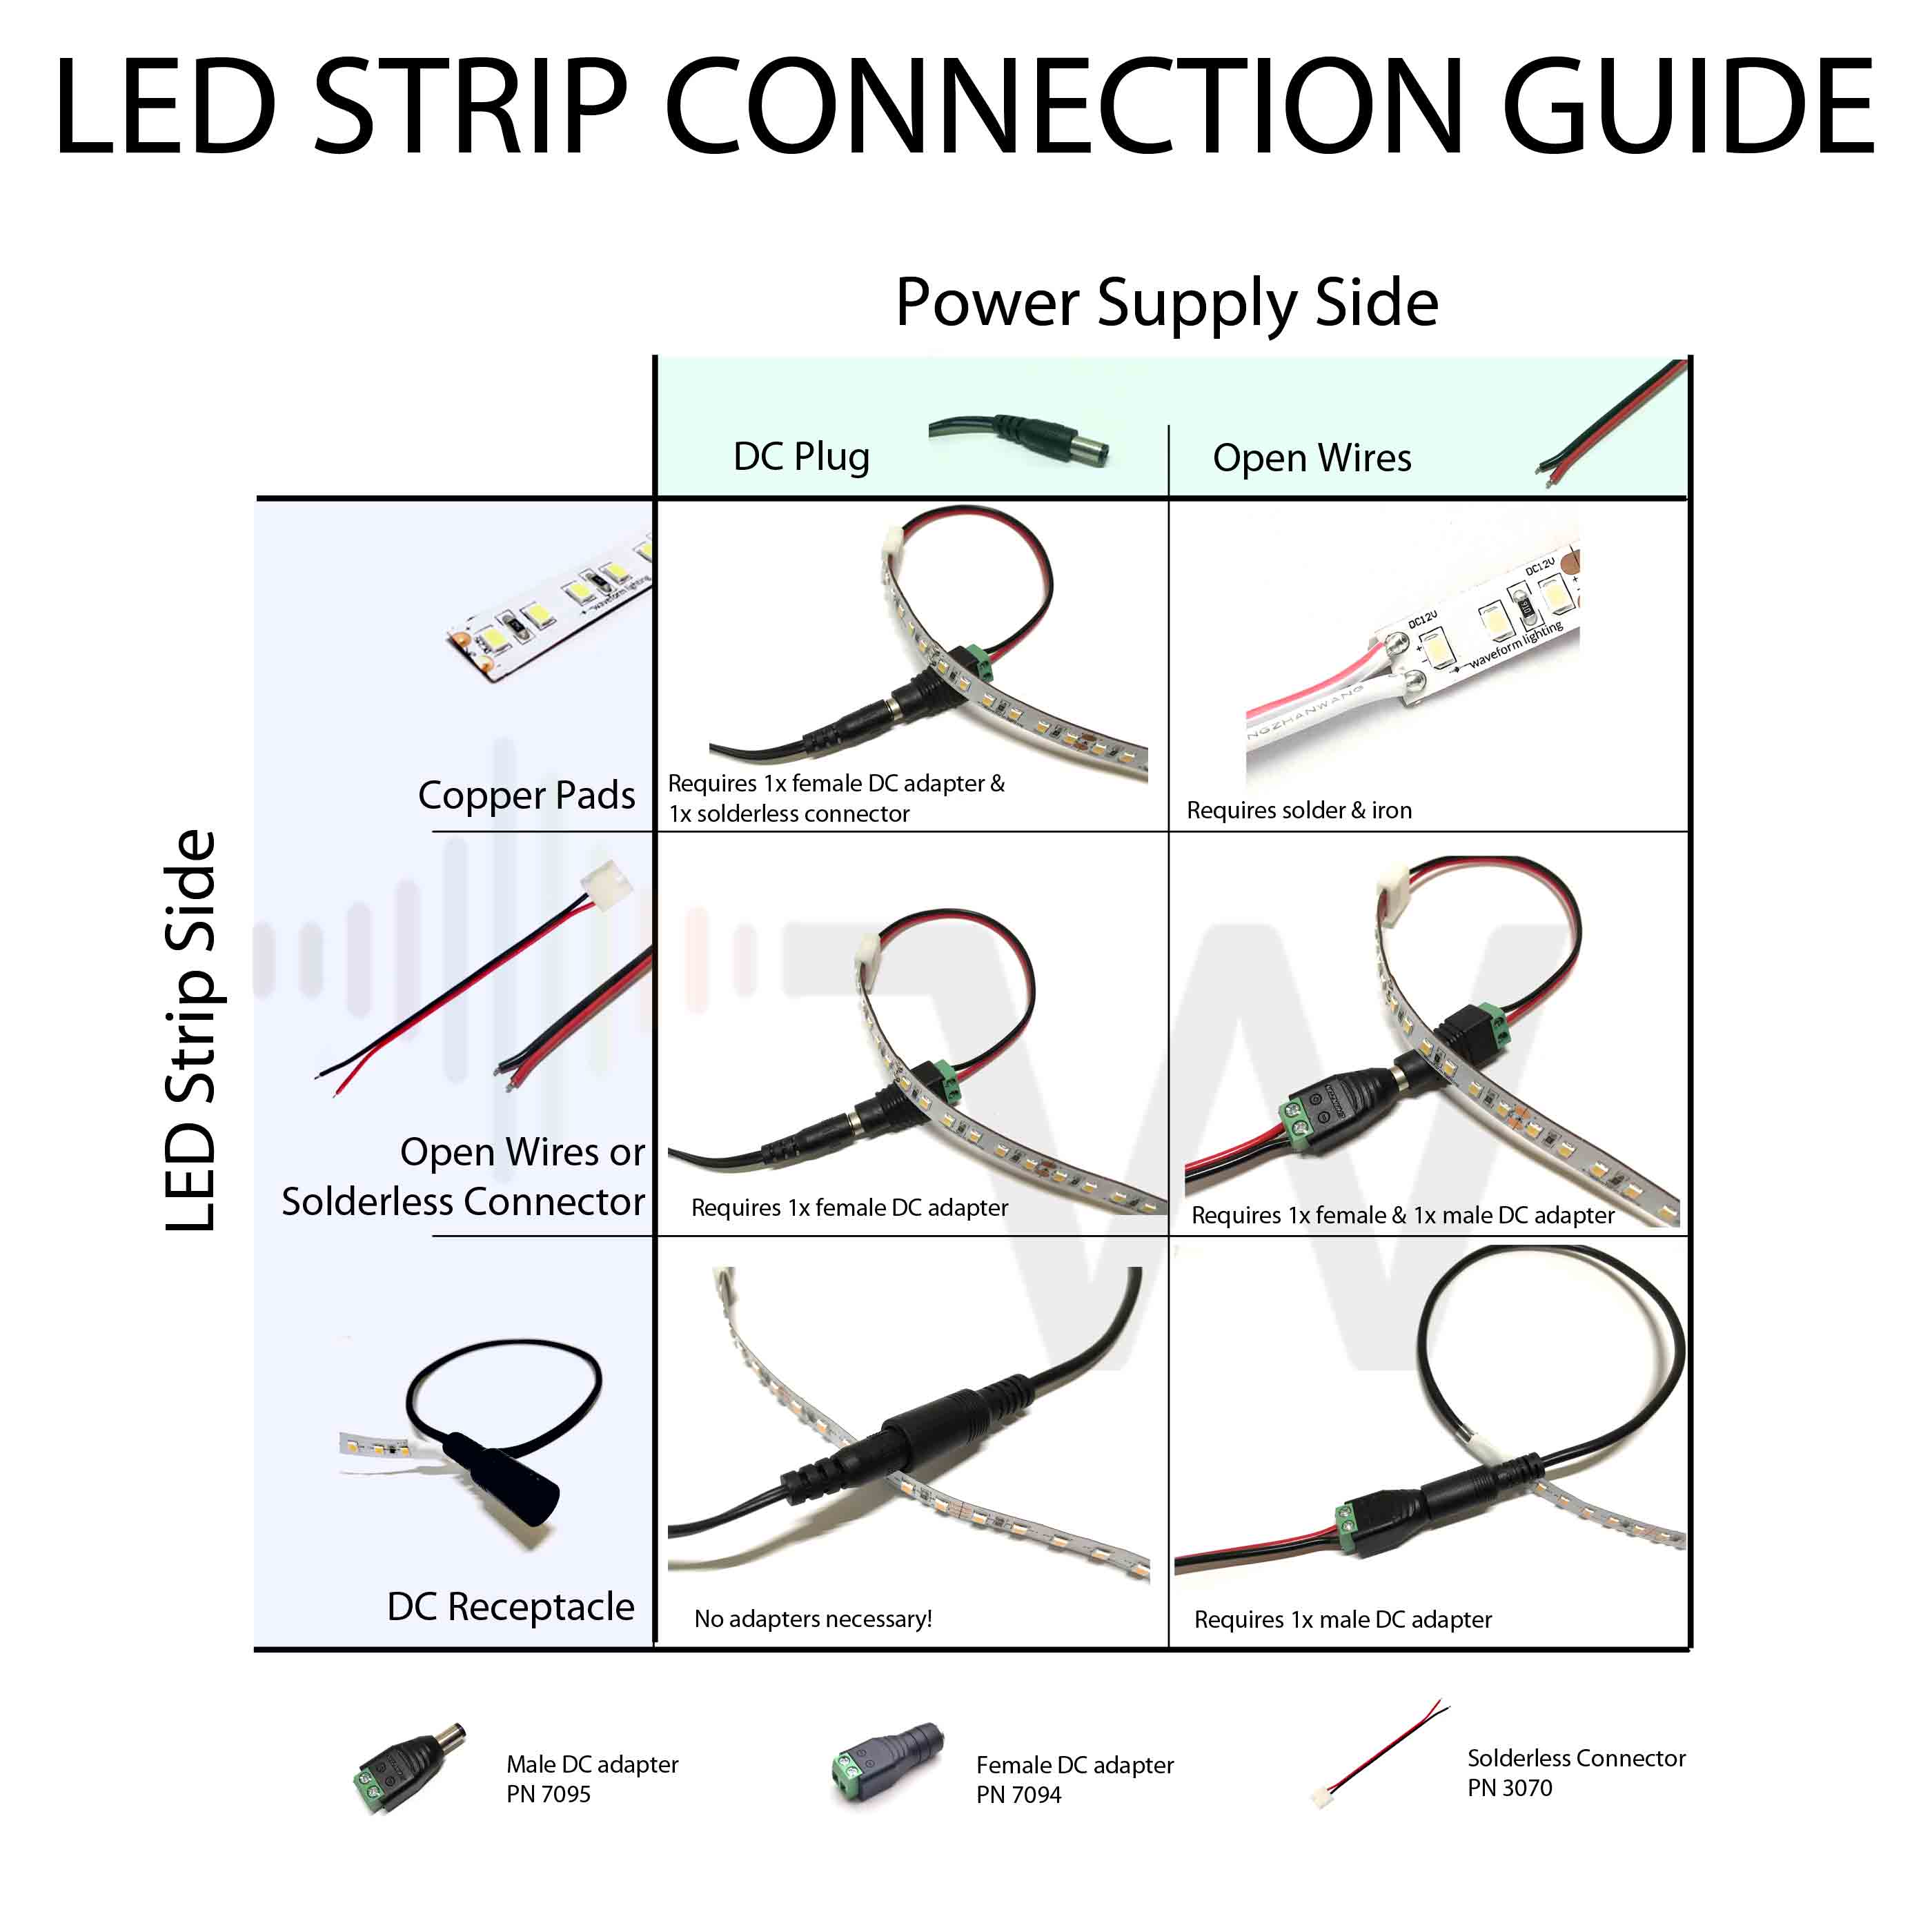
- Solderless Connectors: These clip onto the strip and wires, offering a quick and easy way to join sections.
- Wire Connectors: For more permanent and secure connections, soldering might be required.
- Corner Connectors: L-shaped connectors designed to navigate 90-degree turns.
- End Caps: To seal the ends of the strip, providing a clean finish and protection.
- Mounting Clips: Sometimes included to provide additional support for the strip, especially in high-stress areas.
Planning Your Installation: Location, Length, and Power
A successful LED strip installation begins with careful planning. Rushing this stage can lead to frustration, wasted materials, and a less-than-ideal aesthetic.
1. Determine Your Lighting Goals and Placement
- Purpose: What is the primary function of these lights? Are they for ambient mood lighting in a living room, accentuating architectural features, task lighting under cabinets, or creating a vibrant gaming setup? Your purpose will dictate the type of strip (color, brightness) and its placement.
- Location: Identify the specific areas where you want to install the LED strips. Consider walls, ceilings, cabinets, furniture, or even outdoor spaces (ensure you use waterproof strips for such applications).
- Visual Impact: How do you want the light to appear? Do you want it to be directly visible, or do you prefer an indirect glow (e.g., behind a valance or under a shelf)? This will influence how you mount the strips.
2. Measure and Calculate
- Length: Accurately measure the total length of the area where the LED strips will be installed. It’s always a good idea to add a little extra to your measurement to account for any potential miscalculations or future modifications.
- Power Requirements: Once you know the total length of the strip you’ll be using, you can calculate the total power consumption. This information is usually found on the LED strip’s packaging or specifications, typically listed in watts per meter (W/m). Multiply the watts per meter by the total length in meters to get the total wattage required. For example, a 5-meter strip rated at 10W/m will require a total of 50W.
- Power Supply Selection: Choose a power supply with a wattage rating that is at least 10-20% higher than the total calculated wattage of your LED strips. This provides a buffer and ensures the power supply isn’t constantly running at its maximum capacity, which can shorten its lifespan and lead to overheating.
3. Consider the Controller and Power Source
- Controller Type: If using an RGB or addressable strip, select a controller that suits your needs. Smart controllers offer the most flexibility with app control and integration with smart home systems like Alexa or Google Assistant. IR and RF remotes are simpler but less versatile.
- Power Outlet Access: Ensure there’s a convenient power outlet near where your power supply will be located. If not, you may need to consider extending existing circuits or using power strips.
Preparing for Installation: Tools and Materials

Gathering all the necessary tools and materials before you begin will make the installation process smoother and more efficient.
Essential Tools:
- Measuring Tape: For accurate length measurements.
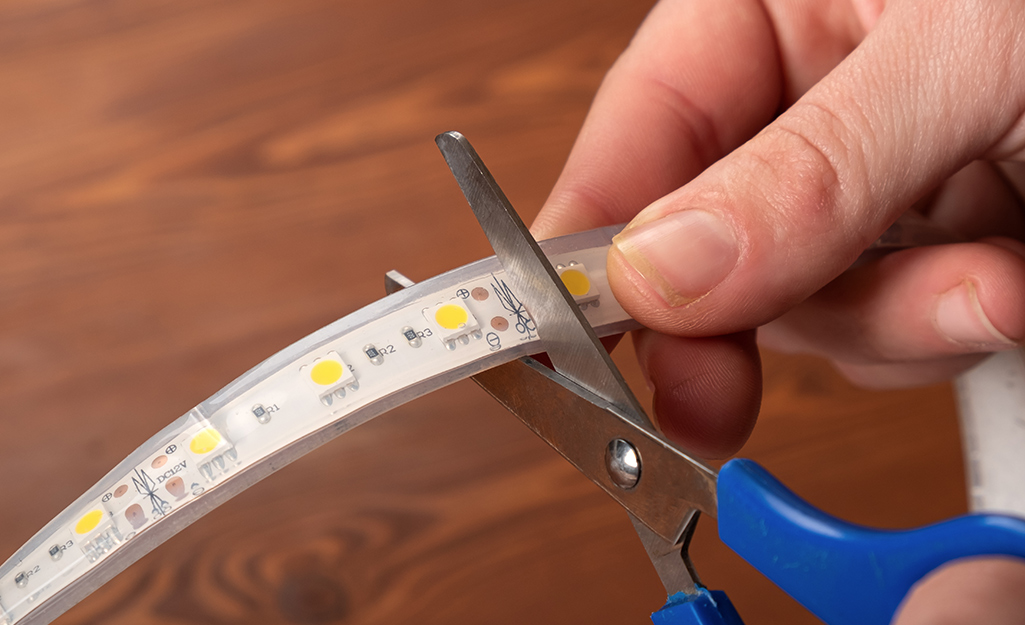
- Scissors or Utility Knife: To cut the LED strip to the desired length. Crucially, only cut at the designated cut marks on the strip. Cutting elsewhere will damage the circuit.
- Wire Strippers: If you’re soldering connections.
- Soldering Iron and Solder: For permanent and reliable connections, especially for longer runs or if you’re not using solderless connectors.
- Screwdriver: If your chosen mounting method involves screws.
- Drill (with appropriate bits): For creating holes for wires or mounting clips if needed.
- Level: To ensure your strips are mounted straight.
- Cleaning Supplies: Isopropyl alcohol and a clean cloth to prepare the surface for the adhesive.
- Gloves: To keep the LED strip clean from oils and dirt, which can affect adhesive adhesion.
Additional Materials:
- Mounting Clips (optional but recommended for long-term stability): Especially for textured surfaces or areas with significant movement.
- Wire (if extending reach): Use appropriate gauge wire for the current.
- Cable Management Solutions: Zip ties, raceways, or tape to keep wires neat and tidy.
- Safety Glasses: Always wear safety glasses when drilling or soldering.
Step-by-Step Installation Process
With your plan in place and your tools ready, you’re prepared to begin the installation. Follow these steps carefully for a professional finish.
Step 1: Surface Preparation
This is a critical step for ensuring the adhesive on the LED strips adheres properly.
- Clean the Surface: Thoroughly clean the surface where you intend to mount the LED strips. Use a degreaser or isopropyl alcohol and a clean cloth to remove any dust, dirt, oil, or residue.
- Dry the Surface: Ensure the surface is completely dry before proceeding. Damp surfaces will compromise the adhesive’s grip.
Step 2: Cutting and Connecting the LED Strips
- Measure and Mark: Based on your plan, measure and mark the LED strip for cutting. Remember to only cut at the designated cutting points, which are usually indicated by a pair of scissors icon or copper pads.
- Cut the Strip: Use sharp scissors or a utility knife to make a clean cut at the marked point.
- Connectors (if applicable):
- Solderless Connectors: Gently push the cut end of the LED strip into the solderless connector, ensuring the copper pads on the strip align with the connector’s contacts. Close the connector firmly. If connecting multiple strips end-to-end with a connector, ensure you have the correct type (e.g., a straight connector).
- Soldering: If soldering, strip a small amount of insulation from the wires you’ll be connecting to the strip. Align the wires with the corresponding copper pads on the LED strip (positive to positive, negative to negative). Heat the pad with the soldering iron and apply a small amount of solder. Be quick and precise to avoid overheating the strip.
- Corner Turns: For corners, use L-shaped connectors or cut the strip and bridge the gap with wires, ensuring proper polarity is maintained.
Step 3: Mounting the LED Strips
- Peel and Stick: Carefully peel back a section of the adhesive backing from the LED strip.
- Align and Press: Align the strip with your desired location and gently press it into place. Work in small sections, peeling the backing as you go and applying firm, even pressure. This ensures the strip adheres well and avoids creating air bubbles.
- Use Mounting Clips (Optional but Recommended): For added security and longevity, especially on uneven surfaces or in high-traffic areas, use mounting clips. Position the clips along the strip at regular intervals and secure them with screws.
Step 4: Connecting the Power Supply and Controller
- Connect to Controller: If you have an RGB or smart strip, connect the LED strip to the controller. The controller will have designated input terminals for the strip, usually marked with arrows or color codes. Ensure correct polarity.
- Connect Controller to Power Supply: Connect the controller to the power supply. This connection varies depending on the controller and power supply type, but typically involves a DC barrel connector or screw terminals.
- Connect Power Supply to Outlet: Plug the power supply into a wall outlet.
Step 5: Testing and Troubleshooting
Before you finalize everything, it’s essential to test your installation.
- Power On: Turn on the LED lights using the remote, app, or switch.
- Check Functionality: Cycle through all colors and effects to ensure everything is working as expected.
- Troubleshooting Common Issues:
- Lights Don’t Turn On: Check all connections, ensure the power supply is plugged in and functional, and verify the outlet has power.
- Flickering Lights: This can indicate a loose connection, an undersized power supply, or a faulty component. Double-check all connections and ensure your power supply is adequate.
- Incorrect Colors (RGB): This is usually a sign of incorrect polarity in the connections between the strip and the controller. Re-check your wiring.
- Adhesive Not Sticking: The surface may not have been properly cleaned, or the temperature might be too cold or too hot. You might need to re-clean the surface or use mounting clips.
Final Touches and Maintenance
Once your LED light strips are installed and functioning correctly, consider these final steps for a polished look and long-term enjoyment.
- Cable Management: Neatly tuck away any excess wires using cable ties, raceways, or adhesive clips. This not only improves aesthetics but also prevents tripping hazards.
- Concealment: If you want a more integrated look, consider ways to conceal the power supply and controller, such as placing them in a cabinet or behind furniture.
- Maintenance: LED light strips are generally low maintenance. Periodically dust them and ensure connections remain secure. If you notice any issues, refer back to the troubleshooting steps.
By following this comprehensive guide, you can confidently install LED light strips to enhance your home’s ambiance, functionality, and overall appeal. Enjoy your new, vibrant lighting!
aViewFromTheCave is a participant in the Amazon Services LLC Associates Program, an affiliate advertising program designed to provide a means for sites to earn advertising fees by advertising and linking to Amazon.com. Amazon, the Amazon logo, AmazonSupply, and the AmazonSupply logo are trademarks of Amazon.com, Inc. or its affiliates. As an Amazon Associate we earn affiliate commissions from qualifying purchases.