
In the dynamic world of technology, navigating the installation of software packages is a fundamental skill. Among the various package management systems, RPM (Red Hat Package Manager) stands out as a cornerstone, particularly within the Linux ecosystem. If you’ve encountered an .rpm file and are wondering how to integrate it into your system, this comprehensive guide is designed to equip you with the knowledge and practical steps needed. Whether you’re a seasoned Linux administrator or a curious tech enthusiast venturing into new software territories, understanding RPM installation is a valuable asset.
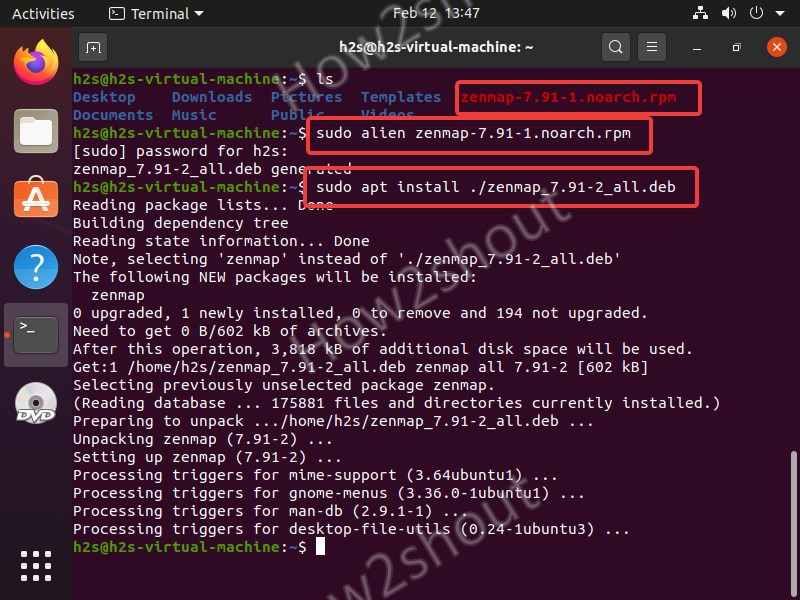
The .rpm file format is essentially a standardized archive that contains compiled software, metadata about the software, and installation scripts. It’s a highly efficient way to distribute and manage applications on Linux distributions that are based on Red Hat, such as Fedora, CentOS, RHEL (Red Hat Enterprise Linux), and others. While graphical tools often simplify this process, the command line offers a powerful and flexible approach, providing greater control and enabling automation.
This article will delve into the intricacies of installing RPM packages, covering everything from the basic command-line syntax to more advanced considerations like dependency management and verification. We’ll explore the tools at your disposal, the potential pitfalls to avoid, and best practices to ensure a smooth and successful software installation experience.
Understanding the RPM Package Manager
Before we dive into the installation process, it’s crucial to grasp what RPM is and why it’s so prevalent. RPM is more than just a file format; it’s a robust package management system that simplifies the entire software lifecycle. It handles installation, uninstallation, upgrades, queries, and verification of software packages.
The Power of Package Management
Think of software installation without a package manager. You’d be manually downloading files, copying them to specific directories, configuring them, and then hoping everything works harmoniously. This is where package managers like RPM shine. They introduce order and efficiency by:
- Dependency Resolution: Software often relies on other software components (libraries, other programs) to function. RPM can automatically identify and install these dependencies, preventing “missing library” errors.
- Standardization: RPM provides a consistent format for packaging software, making it easier for developers to distribute their applications and for users to install them.
- System Integrity: By tracking installed files, RPM helps prevent conflicts between different software packages and allows for clean uninstallation.
- Verification: RPM can verify the integrity and authenticity of installed packages, ensuring they haven’t been tampered with.
- Upgrades and Rollbacks: It facilitates seamless upgrades to newer versions of software and, in some cases, allows for rolling back to previous versions if issues arise.
Core RPM Commands for Installation
The primary tool for interacting with RPM packages is the rpm command itself. While it’s powerful, it’s also relatively low-level. For many users, higher-level tools like yum (Yellowdog Updater, Modified) or dnf (Dandified YUM) are often preferred because they build upon RPM’s capabilities by adding features like automatic repository management and more user-friendly dependency resolution. However, understanding the fundamental rpm commands is essential for troubleshooting and for situations where you have a standalone .rpm file.
Here are the key rpm subcommands you’ll commonly use for installation:
rpm -i <package.rpm>: This is the basic command to install an RPM package.rpm -U <package.rpm>: This command upgrades an existing package to the version in the specified.rpmfile. If the package isn’t installed, it will install it. The-Uflag is generally preferred over-ias it handles both new installations and upgrades.rpm -e <package_name>: This command erases (uninstalls) a package. Note that you typically use the package name, not the.rpmfilename, for uninstallation.
Let’s break down the common installation scenarios.
Installing an RPM Package: Step-by-Step
The most straightforward way to install an RPM package is using the rpm command directly from your terminal. This method is particularly useful when you’ve downloaded an .rpm file from a website or received it from a colleague.
The rpm -i and rpm -U Commands
As mentioned, rpm -i installs a package, while rpm -U upgrades it. For most situations where you’re installing a new piece of software, rpm -U is the recommended choice. It offers more flexibility as it can either install the package if it’s not present or upgrade it if an older version already exists on your system.
Syntax for Installation:
sudo rpm -i /path/to/your/package.rpm
Syntax for Upgrade (Recommended):
sudo rpm -U /path/to/your/package.rpm
Explanation of Options:
sudo: This is crucial because installing software typically requires root privileges to modify system directories.-i: The installation flag.-U: The upgrade flag./path/to/your/package.rpm: This is the absolute or relative path to the.rpmfile you wish to install.
Example:
If you’ve downloaded a package named my-awesome-app-1.0-1.x86_64.rpm to your Downloads directory, the command would look like this:
sudo rpm -U ~/Downloads/my-awesome-app-1.0-1.x86_64.rpm
Upon execution, rpm will attempt to install the software. If all goes well, you won’t see any output, which usually signifies a successful installation. If there are errors, they will be printed to the console, providing clues about what went wrong.
Handling Dependencies: The Challenge and the Solution
One of the most common hurdles when installing RPM packages directly is dependency management. An .rpm file might require other libraries or software components that are not present on your system. When this happens, rpm -i or rpm -U will typically fail with an error message indicating the missing dependency.
Example Dependency Error:
error: Failed dependencies:
    libgstreamer-1.0.so.0()(64bit) is needed by my-awesome-app-1.0-1.x86_64
    gstreamer1-plugins-base is needed by my-awesome-app-1.0-1.x86_64
This error clearly states that my-awesome-app requires specific libraries and packages to function. Manually finding and installing each missing dependency can be a tedious and error-prone process.
The Role of Higher-Level Package Managers (yum and dnf)
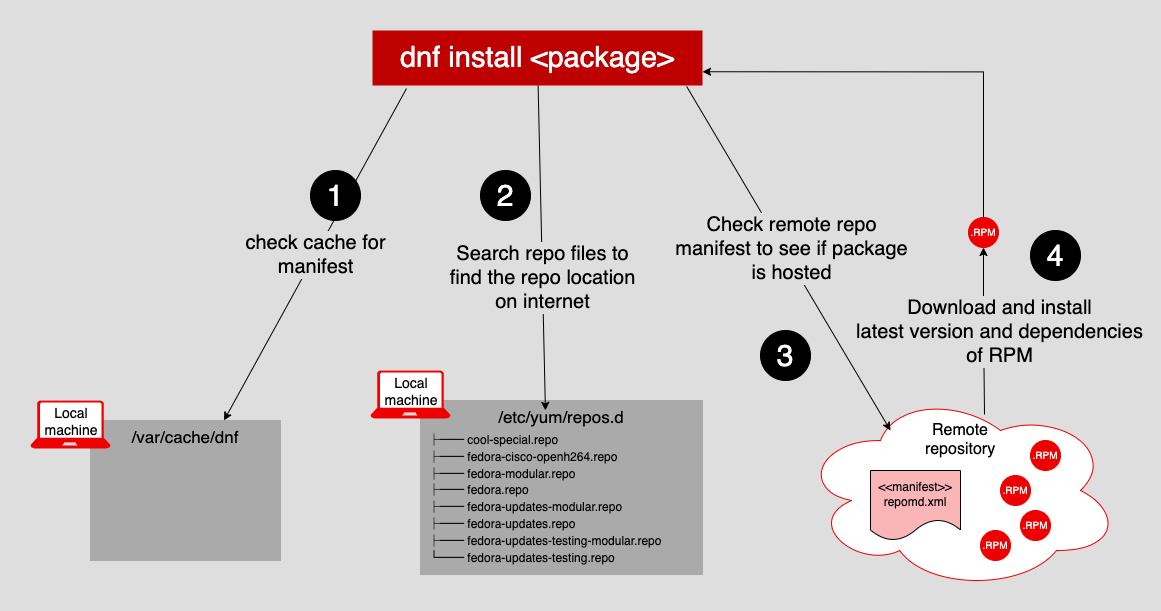
This is where yum and dnf come into play. These are package managers that use RPM as their underlying technology but add a vital layer of functionality: repository management.
- Repositories: These are online or local locations that store RPM packages and their metadata.
yumanddnfare configured to access these repositories. - Automatic Dependency Resolution: When you instruct
yumordnfto install a package, they first query the configured repositories for that package. If dependencies are identified,yumordnfwill automatically find and install those dependencies from the repositories before installing your target package.
Using yum or dnf for Local RPM Files:
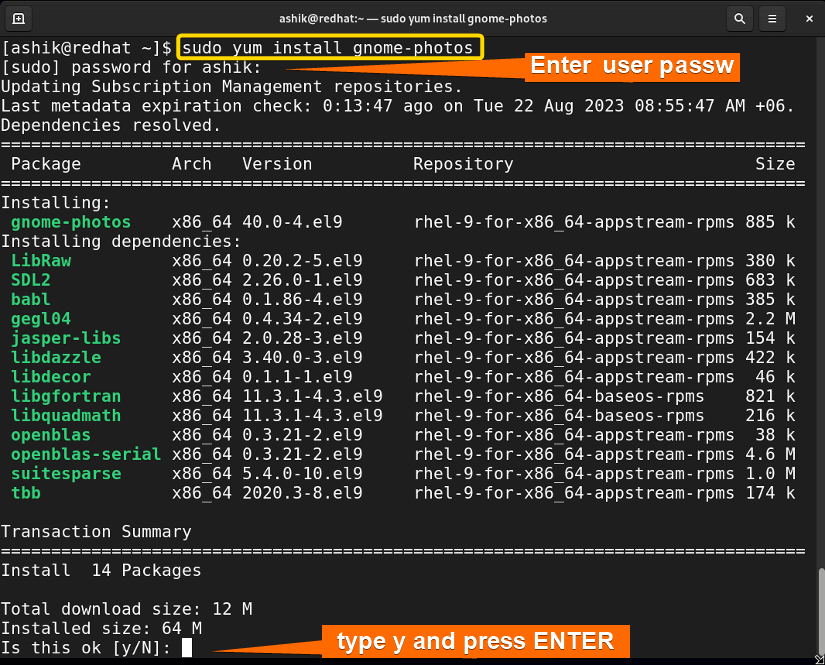
Even when you have a local .rpm file, you can still leverage yum or dnf for their dependency resolution capabilities.
Using yum:
sudo yum localinstall /path/to/your/package.rpm
Using dnf:
sudo dnf install /path/to/your/package.rpm
These commands will first attempt to install the specified .rpm file. If any dependencies are unmet, yum or dnf will search its configured repositories to find and install them. This is often the most reliable way to install local RPMs, as it significantly reduces the likelihood of encountering dependency issues.
Verifying and Managing Installed Packages
Once you’ve successfully installed an RPM package, it’s good practice to verify its installation and understand how to manage it in the future.
Verifying the Installation
RPM provides a way to query your system for information about installed packages, including verifying their integrity.
Checking if a Package is Installed:
To see if a specific package is installed, you can use the -q (query) flag.
rpm -q <package_name>
Replace <package_name> with the actual name of the package (often without the version or architecture in this context, though sometimes the full name works).
Example:
rpm -q my-awesome-app
If the package is installed, this command will output its full name and version. If it’s not installed, you’ll see a message like package my-awesome-app is not installed.
Verifying Package Integrity:
The rpm -V command verifies the integrity of installed packages. It checks the size, MD5 checksum, permissions, owner, and group of each file belonging to an installed package against the information stored in the RPM database.
rpm -V <package_name>
If all files are as expected, there will be no output. If there are discrepancies, rpm -V will report them. This is a powerful tool for detecting if files have been accidentally modified or if a package has been corrupted.
Querying Package Information
Beyond just checking installation status, RPM allows you to retrieve detailed information about installed packages.
Getting Detailed Package Information:
rpm -qi <package_name>
This command displays verbose information about the package, including its name, version, release, architecture, installation date, build date, packager, license, and a description.
Listing Files Belonging to a Package:
To see all the files that were installed by a particular RPM package, use the -l flag with the query option.
rpm -ql <package_name>
This is incredibly useful for understanding where a piece of software has placed its files on your system.
Uninstalling RPM Packages
When you no longer need a piece of software installed via RPM, you can remove it cleanly using the rpm -e command.
Uninstalling a Package:
sudo rpm -e <package_name>
Again, use the package_name here. For example:
sudo rpm -e my-awesome-app
This command removes all files associated with the package from your system. It’s essential to uninstall software properly to avoid leaving behind unnecessary files and to prevent potential conflicts.
Important Note on Uninstalling with Dependencies:
If you uninstall a package that other software depends on, those other programs might break. Higher-level package managers like yum and dnf also help manage this by identifying packages that depend on the one you’re trying to remove and warning you accordingly.
Advanced RPM Installation Techniques and Best Practices
While the basics cover most common scenarios, there are advanced techniques and best practices that can enhance your RPM package management experience.
The -h (Hash) and --verbose Flags
When installing large packages, the process can sometimes seem to hang without any feedback. The -h or --hash flag can be added to display a hash mark (#) for every 100 packages installed or upgraded, providing a visual progress indicator. The --verbose flag provides more detailed output during the installation process, which can be helpful for troubleshooting.
Example with progress indicator:
sudo rpm -Uvh /path/to/your/package.rpm
Installing from an RPM Repository
For most users on systems like Fedora or RHEL, the standard way to install software is not by downloading individual .rpm files but by configuring the system to use software repositories.
/etc/yum.repos.d/directory: This directory contains.repofiles that define the configuration for different software repositories.yumanddnfcommands: You typically usesudo yum install <package_name>orsudo dnf install <package_name>which then consults these.repofiles to find and download the package and its dependencies.
While this article focuses on installing a single .rpm file, understanding repositories is key to a complete RPM ecosystem experience.
Best Practices for RPM Installation:
- Always use
sudo: Installing software requires elevated privileges. - Prefer
rpm -Uoverrpm -i: It handles both new installations and upgrades gracefully. - Leverage
yumordnffor Dependency Resolution: When installing local.rpmfiles, useyum localinstallordnf installto let these tools handle dependencies from configured repositories. - Verify Installations: Use
rpm -qto check if a package is installed andrpm -Vto verify its integrity. - Keep your system updated: Regularly updating your system using
yum updateordnf upgradeensures you have the latest security patches and a stable base for installing new software. - Be Cautious with Untrusted Sources: Only download and install RPM packages from trusted and reputable sources. Installing packages from unknown origins can expose your system to security risks.
- Understand Package Names: When querying or uninstalling, use the correct package name, which might differ slightly from the
.rpmfilename (e.g.,my-awesome-appinstead ofmy-awesome-app-1.0-1.x86_64.rpm).
Conclusion
Mastering the installation of RPM packages is a fundamental skill for anyone working with Linux systems. Whether you’re a developer compiling code, a system administrator deploying applications, or a curious user exploring new software, the rpm command and its higher-level counterparts, yum and dnf, provide the tools necessary for efficient and reliable software management. By understanding the concepts of package management, the nuances of the rpm command, and the power of dependency resolution, you can confidently navigate the world of RPMs, ensuring your software is installed correctly and your system remains stable and secure. Remember to always practice safe installation habits, and you’ll be well on your way to becoming a proficient RPM user.