
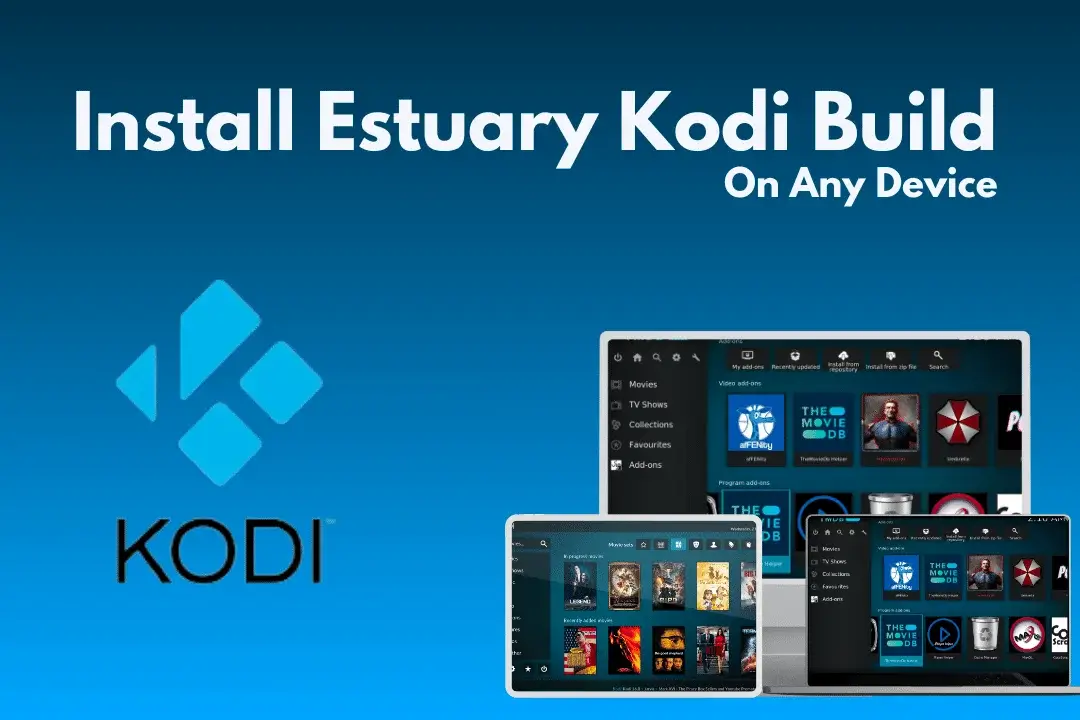
Kodi, an immensely popular open-source media center software, offers unparalleled flexibility for users to manage and stream their digital content. While Kodi’s default interface is robust, its true power often lies in the custom configurations known as “Kodi Builds.” These builds are pre-packaged versions of Kodi that include a curated selection of add-ons, skins, settings, and customizations, designed to transform the user experience from the ground up. They offer a streamlined way to get a fully functional, aesthetically pleasing, and content-rich Kodi setup without the tedious manual configuration of individual components.
For tech enthusiasts, media streamers, and even casual users looking to enhance their home entertainment system, understanding how to install Kodi builds is a crucial skill. This guide will walk you through the process, from understanding what builds are to executing a flawless installation, ensuring you can unlock the full potential of your Kodi media center. We’ll delve into the necessary preparations, the step-by-step installation process, and essential maintenance tips to keep your system running smoothly.
Understanding Kodi Builds: What They Are and Why Use Them
Before diving into the installation process, it’s vital to grasp the concept of Kodi builds, their advantages, and the considerations that come with their use. This foundational knowledge ensures you make informed decisions about which build to choose and how to manage it effectively.
The Anatomy of a Kodi Build
At its core, a Kodi build is essentially a pre-configured version of the Kodi software. Think of it as a complete makeover for your Kodi application. It typically includes:
-
Skins: Custom interfaces that dramatically change Kodi’s look and feel, offering diverse themes, layouts, and navigation styles.
-
Add-ons: A collection of video, music, program, and picture add-ons pre-installed and configured, providing immediate access to a vast array of content sources.
-
Settings: Optimized settings for performance, playback, and network connectivity, tailored to provide the best possible user experience.
-
Wizards: Small programs that facilitate the installation and maintenance of the build itself, often containing tools for cleaning cache, backups, and restoring settings.
Developers and communities create these builds to cater to specific user preferences, whether it’s a build focused on movies, sports, live TV, or a general-purpose entertainment hub.
Advantages of Adopting a Kodi Build
The primary allure of Kodi builds lies in their convenience and enhanced functionality.
-
Instant Gratification: Instead of spending hours selecting, installing, and configuring individual add-ons and tweaking settings, a build provides an “out-of-the-box” solution. You install it, and it’s ready to go.
-
Improved Aesthetics and User Experience: Many builds boast professional-grade designs and intuitive navigation, making Kodi more visually appealing and user-friendly than its default skin.
-
Curated Content Libraries: Builds often come with a selection of popular and reliable add-ons, saving you the effort of researching and finding them yourself. This can be particularly beneficial for new Kodi users.
-
Optimized Performance: Many builds are optimized for performance, with settings pre-tuned for smoother playback and faster navigation, especially on less powerful hardware.
Potential Drawbacks and Essential Considerations
While builds offer significant benefits, it’s important to be aware of their potential downsides.
-
Resource Intensity: Many builds can be quite large and resource-intensive due to the multitude of add-ons and high-definition skins. This can lead to slower performance on older or underpowered devices like some streaming sticks.
-
Stability and Bloat: A build might include add-ons you don’t need or want, leading to unnecessary “bloat.” Furthermore, a large number of pre-installed add-ons can sometimes lead to instability or conflicts.
-
Security and Privacy Concerns: Not all builds are created equal. Installing a build from an untrusted source can expose your system to malicious software or compromise your privacy. Always choose reputable builds from trusted developers.
-
Learning Curve: While simplifying initial setup, troubleshooting problems within a complex build can sometimes be more challenging than with a simple Kodi installation.
Essential Preparations Before Installation
A smooth Kodi build installation hinges on proper preparation. Taking a few precautionary steps can save you significant time and frustration.
Enabling “Unknown Sources”
Kodi, by default, restricts installations from sources other than its official repository for security reasons. To install most builds, which come from third-party repositories, you must enable “Unknown Sources.”
-
From the Kodi home screen, click the Settings icon (gear icon) in the top-left corner.
-
Navigate to System.
-
On the left-hand menu, select Add-ons.
-
Toggle on Unknown sources.
-
A warning message will appear; read it carefully and click Yes to proceed.
This step is fundamental for any third-party add-on or build installation.
Backing Up Your Current Kodi Configuration
If you have an existing Kodi setup that you value, it’s highly recommended to back it up before installing a new build. Installing a build often wipes your current configuration, and a backup ensures you can revert if needed.
-
Install a backup add-on from the official Kodi repository (e.g., “Kodi Backup”).
-
Configure the add-on to save your data to a local drive, network share, or cloud storage.
-
Perform a full backup of your
Add-on data,Media sources, andDatabase.
This is a critical step for preserving your custom settings, library, and installed add-ons. If you are performing a fresh Kodi installation, this step can be skipped.
Choosing a Reliable Kodi Build
The internet is awash with Kodi builds, but quality and safety vary significantly. Researching and selecting a reputable build is paramount.
-
Look for well-known builds: Builds like Titanium, No Limits Magic, Diggz Xenon, or Ezra have generally good reputations.
-
Check community reviews: Forums, Reddit communities, and dedicated Kodi websites often provide reviews and discussions about the latest builds.
-
Consider your device’s capabilities: Opt for lighter builds if you’re using an underpowered device. Heavy builds can lead to lag and crashes.
-
Verify active development: Choose builds that are regularly updated, indicating ongoing support and bug fixes.
Understanding Different Installation Methods
Kodi builds are typically installed via a “wizard” add-on. The general flow involves adding a source URL, installing a repository, installing the wizard from that repository, and then running the wizard to install the build. Some builds offer a “fresh install” option, which wipes Kodi clean before installation, or a “standard install,” which installs over your existing setup. A fresh install is generally recommended for optimal performance and to avoid conflicts.
Step-by-Step Installation Guide for a Typical Kodi Build
While the exact steps might vary slightly depending on the build and wizard, the general procedure for installing a Kodi build remains consistent. We’ll outline a generic, yet comprehensive, guide that applies to most installations.
1. Adding the Source Repository
The first step is to tell Kodi where to find the files for the build’s wizard.
-
From the Kodi home screen, go to Settings (gear icon).
-
Click on File manager.
-
Select Add source.
-
Click on
<None>and enter the exact URL for the build’s repository (e.g.,http://example.com/repo/). Double-check for typos. -
Give the source a memorable name (e.g.,
BuildRepo). Click OK.
2. Installing the Repository Add-on
Once the source is added, you need to install the repository itself.
-
Go back to the Kodi home screen and click on Add-ons.
-
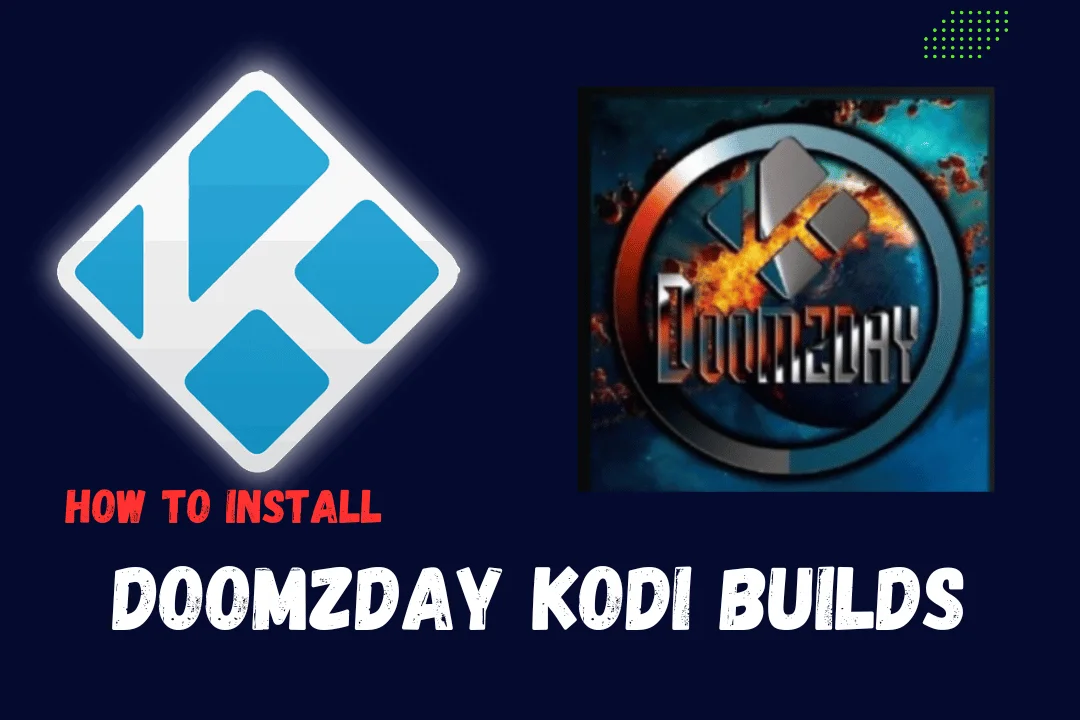
Click the Package installer icon (open box icon) in the top-left corner.
-
Select Install from zip file.
-
Choose the source name you just created (e.g.,
BuildRepo). -
Locate and click the
repository.buildname.zipfile. A notification will appear in the top-right corner once the repository is installed.
3. Installing the Build’s Wizard
With the repository installed, you can now install the wizard add-on that will handle the build installation.
-
From the Package installer screen, select Install from repository.
-
Choose the repository you just installed (e.g.,
Build Name Repository). -
Navigate to Program add-ons.
-
Find and select the build’s wizard (e.g.,
Build Name Wizard). -
Click Install. You might be prompted to install dependencies; click OK. Wait for the installation complete notification.
4. Running the Wizard to Install the Build
After the wizard is installed, it will typically launch automatically or prompt you to do so.
-
If prompted, click Continue or Ignore if there’s a welcome message.
-
Navigate to the Builds section within the wizard.
-
Browse the list of available builds. Select your desired build (e.g.,
Build Name). -
Choose between Fresh Install (recommended) or Standard Install. Confirm your choice.
-
The wizard will now download and install the build. This process can take several minutes, depending on your internet speed and the size of the build.
-
Once installation is complete, the wizard will usually prompt you to Force Close Kodi. This is crucial for the new build to initialize correctly. Do not skip this step.
5. Post-Installation Cleanup
After force closing Kodi, restart it. The new build should load with its custom skin, add-ons, and settings.
-
Allow Kodi some time to complete any initial setup tasks, update add-ons, and build menus. This might involve several “first run” dialogues or background processes.
-
It’s a good practice to go to the wizard again and use its “Clear Cache” or “Maintenance” tools to remove any residual files and optimize performance.
Maintaining and Troubleshooting Your Kodi Build
Installing a build is just the first step. Proper maintenance and knowing how to troubleshoot common issues are key to a long-lasting and enjoyable Kodi experience.
Regular Updates and Maintenance
Kodi builds, like any software, require ongoing attention.
-
Update Add-ons: Periodically check for updates for the add-ons within your build. Many builds’ wizards have an “Update All Add-ons” function.
-
Clear Cache: Over time, Kodi accumulates temporary files in its cache, which can slow down performance. Regularly use the wizard’s built-in tools to clear cache and purge packages.
-
Build Updates: Reputable build developers periodically release updates to their builds, adding new features, fixing bugs, and updating add-ons. Check for these updates through the wizard.
Dealing with Buffering and Performance Issues
Buffering is a common complaint among Kodi users. If your build feels sluggish or streams constantly buffer:
-
Check Internet Speed: Ensure your internet connection is stable and fast enough for streaming high-quality content.
-
Clear Cache: As mentioned, a bloated cache is a frequent culprit.
-
Adjust Advanced Settings: Some wizards or add-ons allow you to tweak advanced settings related to buffering (e.g., increasing cache size).
-
Consider a Lighter Build: If your device is struggling, migrating to a less resource-intensive build might be necessary.
-
Use a VPN: A VPN can sometimes resolve buffering issues caused by ISP throttling, especially during peak hours.
Troubleshooting Common Errors
Encountering errors is part and parcel of using complex software like Kodi.
-
“Dependency Failed” Error: This often means a required component for an add-on or the build itself couldn’t be installed. Check your internet connection, ensure “Unknown Sources” is enabled, and try reinstalling the repository or wizard.
-
“Could Not Connect to Source” / “Couldn’t Retrieve Directory Information”: This typically indicates an incorrect URL for your source or that the repository server is temporarily down. Double-check the URL for typos and try again later.
-
Add-on Errors: If specific add-ons are failing, try clearing their individual cache or uninstalling and reinstalling them. If the issue persists across multiple add-ons, a fresh install of the build might be needed.
The Importance of a VPN for Kodi Users
While not directly an installation step, integrating a Virtual Private Network (VPN) into your Kodi setup is a critical aspect of digital security and privacy for many users.
-
Privacy Protection: A VPN encrypts your internet traffic, preventing your Internet Service Provider (ISP) or other third parties from monitoring your online activities, including what you stream on Kodi.
-
Bypassing Geo-Restrictions: Many add-ons and content sources are geo-restricted. A VPN allows you to mask your IP address and appear as if you’re browsing from a different location, unlocking content.
-
Preventing ISP Throttling: ISPs sometimes throttle bandwidth for certain types of traffic (like streaming). A VPN can circumvent this by making your traffic appear generic, thus potentially improving streaming performance.
Always choose a reputable VPN provider with a strong no-logs policy to ensure maximum privacy.
Advanced Tips and Best Practices for Kodi Users
To truly master your Kodi experience, consider these advanced tips and best practices.
Customizing Your Build
Even with a pre-configured build, you’re not stuck with its defaults.
-
Skin Settings: Most skins offer extensive customization options, allowing you to change colors, fonts, menu items, and backgrounds to perfectly match your preferences.
-
Add/Remove Add-ons: While builds come with many add-ons, you can always remove those you don’t use to reduce bloat, or install additional ones from reputable repositories to expand your content options.
-
Create Favorites: Utilize Kodi’s favorites system to quickly access your most used add-ons, shows, or movies, irrespective of the build’s default navigation.
The Power of a “Fresh Start”
When experimenting with new builds or encountering persistent issues, a “fresh start” is often the most effective solution. This involves completely resetting Kodi to its default state, wiping all existing data, add-ons, and settings. Many build wizards offer a “Fresh Start” option, or you can manually delete Kodi’s user data folder. This ensures a clean slate, preventing conflicts and often resolving stubborn problems.
Ethical Considerations and Legal Implications
It’s crucial to address the ethical and legal landscape surrounding Kodi. While Kodi itself is legal software, the legality of the content accessed through certain third-party add-ons and builds can be ambiguous.
-
Copyrighted Content: Many third-party add-ons provide access to copyrighted material without proper licensing. Users are responsible for understanding and adhering to copyright laws in their jurisdiction.
-
Trusted Sources: Stick to official and well-vetted third-party add-ons and builds to minimize legal risks and exposure to potentially malicious content.
-
Always Use a VPN: As discussed, a VPN adds a layer of privacy that can be crucial when navigating the complexities of online streaming.
By understanding these nuances, users can make more responsible choices about how they configure and use their Kodi builds.
Installing Kodi builds can transform your media consumption experience, offering a world of curated content and stunning interfaces with minimal effort. By following this guide, you’re now equipped with the knowledge to select, install, and maintain your preferred build, ensuring a powerful and personalized entertainment hub. Remember to prioritize security, perform regular maintenance, and explore the vast customization options to truly make Kodi your own.
aViewFromTheCave is a participant in the Amazon Services LLC Associates Program, an affiliate advertising program designed to provide a means for sites to earn advertising fees by advertising and linking to Amazon.com. Amazon, the Amazon logo, AmazonSupply, and the AmazonSupply logo are trademarks of Amazon.com, Inc. or its affiliates. As an Amazon Associate we earn affiliate commissions from qualifying purchases.