
In the dynamic world of software development and system administration, efficiency and streamlined workflows are paramount. macOS, renowned for its robust Unix foundation, unfortunately lacks a native package manager akin to apt on Debian/Ubuntu or yum/dnf on Red Hat/Fedora systems. This gap historically posed a challenge for developers and power users seeking to install, update, and manage command-line tools and software packages with ease. Enter Homebrew – the “missing package manager for macOS (and Linux).”
Homebrew is a free and open-source software package management system that simplifies the installation of software on Apple’s macOS operating system and, more recently, Linux. It allows users to install a vast array of open-source tools, utilities, and applications directly from the command line, bypassing the often cumbersome processes of manual compilation, dependency resolution, and system-wide path configuration. For anyone working with development environments, scripting, or simply seeking greater control over their macOS or Linux system, Homebrew is not merely a convenience; it’s an indispensable utility. This comprehensive guide will walk you through the process of installing Homebrew, ensuring you’re equipped to harness its full potential for managing your software ecosystem.
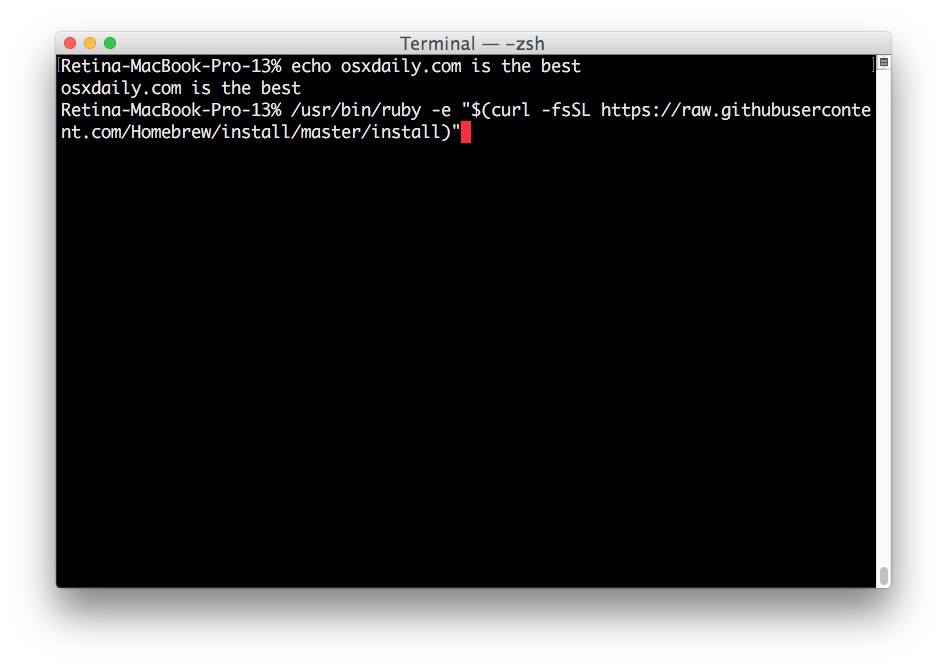
Understanding Homebrew: The macOS and Linux Package Manager
Before diving into the installation process, it’s crucial to grasp what Homebrew is and why it has become such a cornerstone tool for tech professionals.
What is a Package Manager?
At its core, a package manager is a collection of software tools that automate the process of installing, upgrading, configuring, and removing computer programs for a computer’s operating system in a consistent manner. Think of it as an app store, but for command-line utilities and developer tools. Instead of manually downloading .zip files, compiling source code, and resolving complex dependencies, a package manager handles all of that automatically. When you request a piece of software, it fetches the correct version, ensures all necessary prerequisite software (dependencies) are also installed, places everything in the right directories, and sets up configuration files. This not only saves immense time but also drastically reduces the potential for errors and conflicts within your system.
Why Homebrew Stands Out
Homebrew was initially conceived to fill a critical void in the macOS ecosystem. While Apple provides Xcode and its command-line tools, managing individual open-source packages without a central system was a constant struggle. Homebrew addresses this by offering:
-
Simplicity and Ease of Use: With just a few simple commands, you can install, update, and manage software packages. Its command-line interface is intuitive and mirrors the logic of other popular package managers.
-
Vast Repository of Software (“Formulae” and “Casks”): Homebrew maintains a massive collection of “formulae” (definitions for installing command-line tools like Git, Node.js, Python, wget, etc.) and “casks” (definitions for installing graphical applications like Google Chrome, Visual Studio Code, Docker Desktop). This breadth ensures that most commonly used development tools and applications are readily available.
-
Non-Invasive Installation: Homebrew installs packages into its own directory (typically
/opt/homebrewfor Apple Silicon Macs or/usr/localfor Intel Macs) and then symlinks them to the system’s PATH. This design ensures that Homebrew-managed software doesn’t interfere with the operating system’s core files or services, maintaining system stability and cleanliness. -
Community-Driven and Open-Source: Homebrew is a project built by and for the community. Its open-source nature means it’s constantly being improved, reviewed, and expanded by thousands of contributors worldwide, ensuring high quality, rapid updates, and robust support.
-
Dependency Management: It automatically identifies and installs all necessary dependencies for a given package, saving users from the tedious and often error-prone task of manually tracking down required libraries and tools.
Key Terminology
Familiarizing yourself with Homebrew’s terminology will enhance your understanding and usage:
-
Formulae: These are Ruby scripts that define how to install command-line tools. When you run
brew install git, Homebrew uses thegitformula. -
Casks: Similar to formulae, but specifically for installing graphical user interface (GUI) applications. For example,
brew install --cask visual-studio-codeinstalls VS Code. -
Taps: These are third-party repositories of formulae or casks. While Homebrew’s core repositories are extensive, developers can create “taps” to host their own software or specialized collections.
-
Brewfile: A file that lists all the formulae and casks you want to install, allowing you to easily reproduce your development environment on a new machine.
Prerequisites and System Preparation
Before initiating the Homebrew installation, a few preliminary steps are necessary to ensure a smooth and successful setup. These steps primarily involve confirming your system’s readiness and installing essential developer tools that Homebrew relies upon.
Essential System Requirements
Homebrew is designed to run efficiently on modern macOS versions. While it also supports Linux (as “Linuxbrew”), our focus here will be on macOS, given its primary association with Homebrew.
-
macOS Operating System: Ensure your macOS is up to date, or at least running a supported version. Homebrew actively supports the latest stable releases of macOS.
-
Hardware: Homebrew functions seamlessly on both Intel-based Macs and the newer Apple Silicon (M1/M2/M3) Macs. The installation script intelligently detects your architecture and installs the appropriate version.
-
Internet Connection: A stable internet connection is crucial, as Homebrew downloads numerous files, including the Homebrew installer script, Xcode Command Line Tools, and various software packages.
Installing Xcode Command Line Tools
The most critical prerequisite for Homebrew is the Xcode Command Line Tools. These tools provide essential Unix utilities, compilers (like gcc and clang), Git, and other developer utilities that Homebrew needs to compile and install software. Without them, Homebrew cannot function correctly.
To install the Xcode Command Line Tools, open your Terminal application (you can find it in Applications/Utilities or by searching with Spotlight Cmd + Space and typing “Terminal”) and execute the following command:
xcode-select --install
Upon running this command, a software update pop-up window will appear, prompting you to install the tools. Click “Install” and then “Agree” to the terms and conditions. The download and installation process may take some time, depending on your internet speed.
Troubleshooting:
-
If you see a message like “xcode-select: error: command line tools are already installed, use “Software Update” to install updates,” it means you already have them.
-
If the installation fails, ensure you have sufficient disk space and a stable internet connection. Restarting your Mac and trying again can sometimes resolve transient issues.
Verifying Internet Connection and Permissions
While Homebrew generally handles permissions well, it’s good practice to ensure your system is configured correctly.
-
Stable Internet: Double-check your internet connection. A quick ping test (
ping google.com) or visiting a website in your browser can confirm connectivity. -
User Permissions: Homebrew is designed to be installed by a regular user, not
root. It typically doesn’t requiresudofor package installations, which is a major security and convenience benefit. The installer script might prompt for your user password if it needs to adjust permissions for its install directory, but subsequent operations rarely require it. -
Shell Profile: Homebrew needs to be added to your system’s PATH so that your shell (e.g., Zsh, Bash) knows where to find the
brewcommand. The installer handles this automatically, but it’s good to be aware of the configuration files it modifies (like~/.zshrcfor Zsh or~/.bash_profilefor Bash).
The Installation Process: A Step-by-Step Guide
With the prerequisites in place, installing Homebrew is surprisingly straightforward, involving a single command that automates the entire setup.
Executing the Installation Command
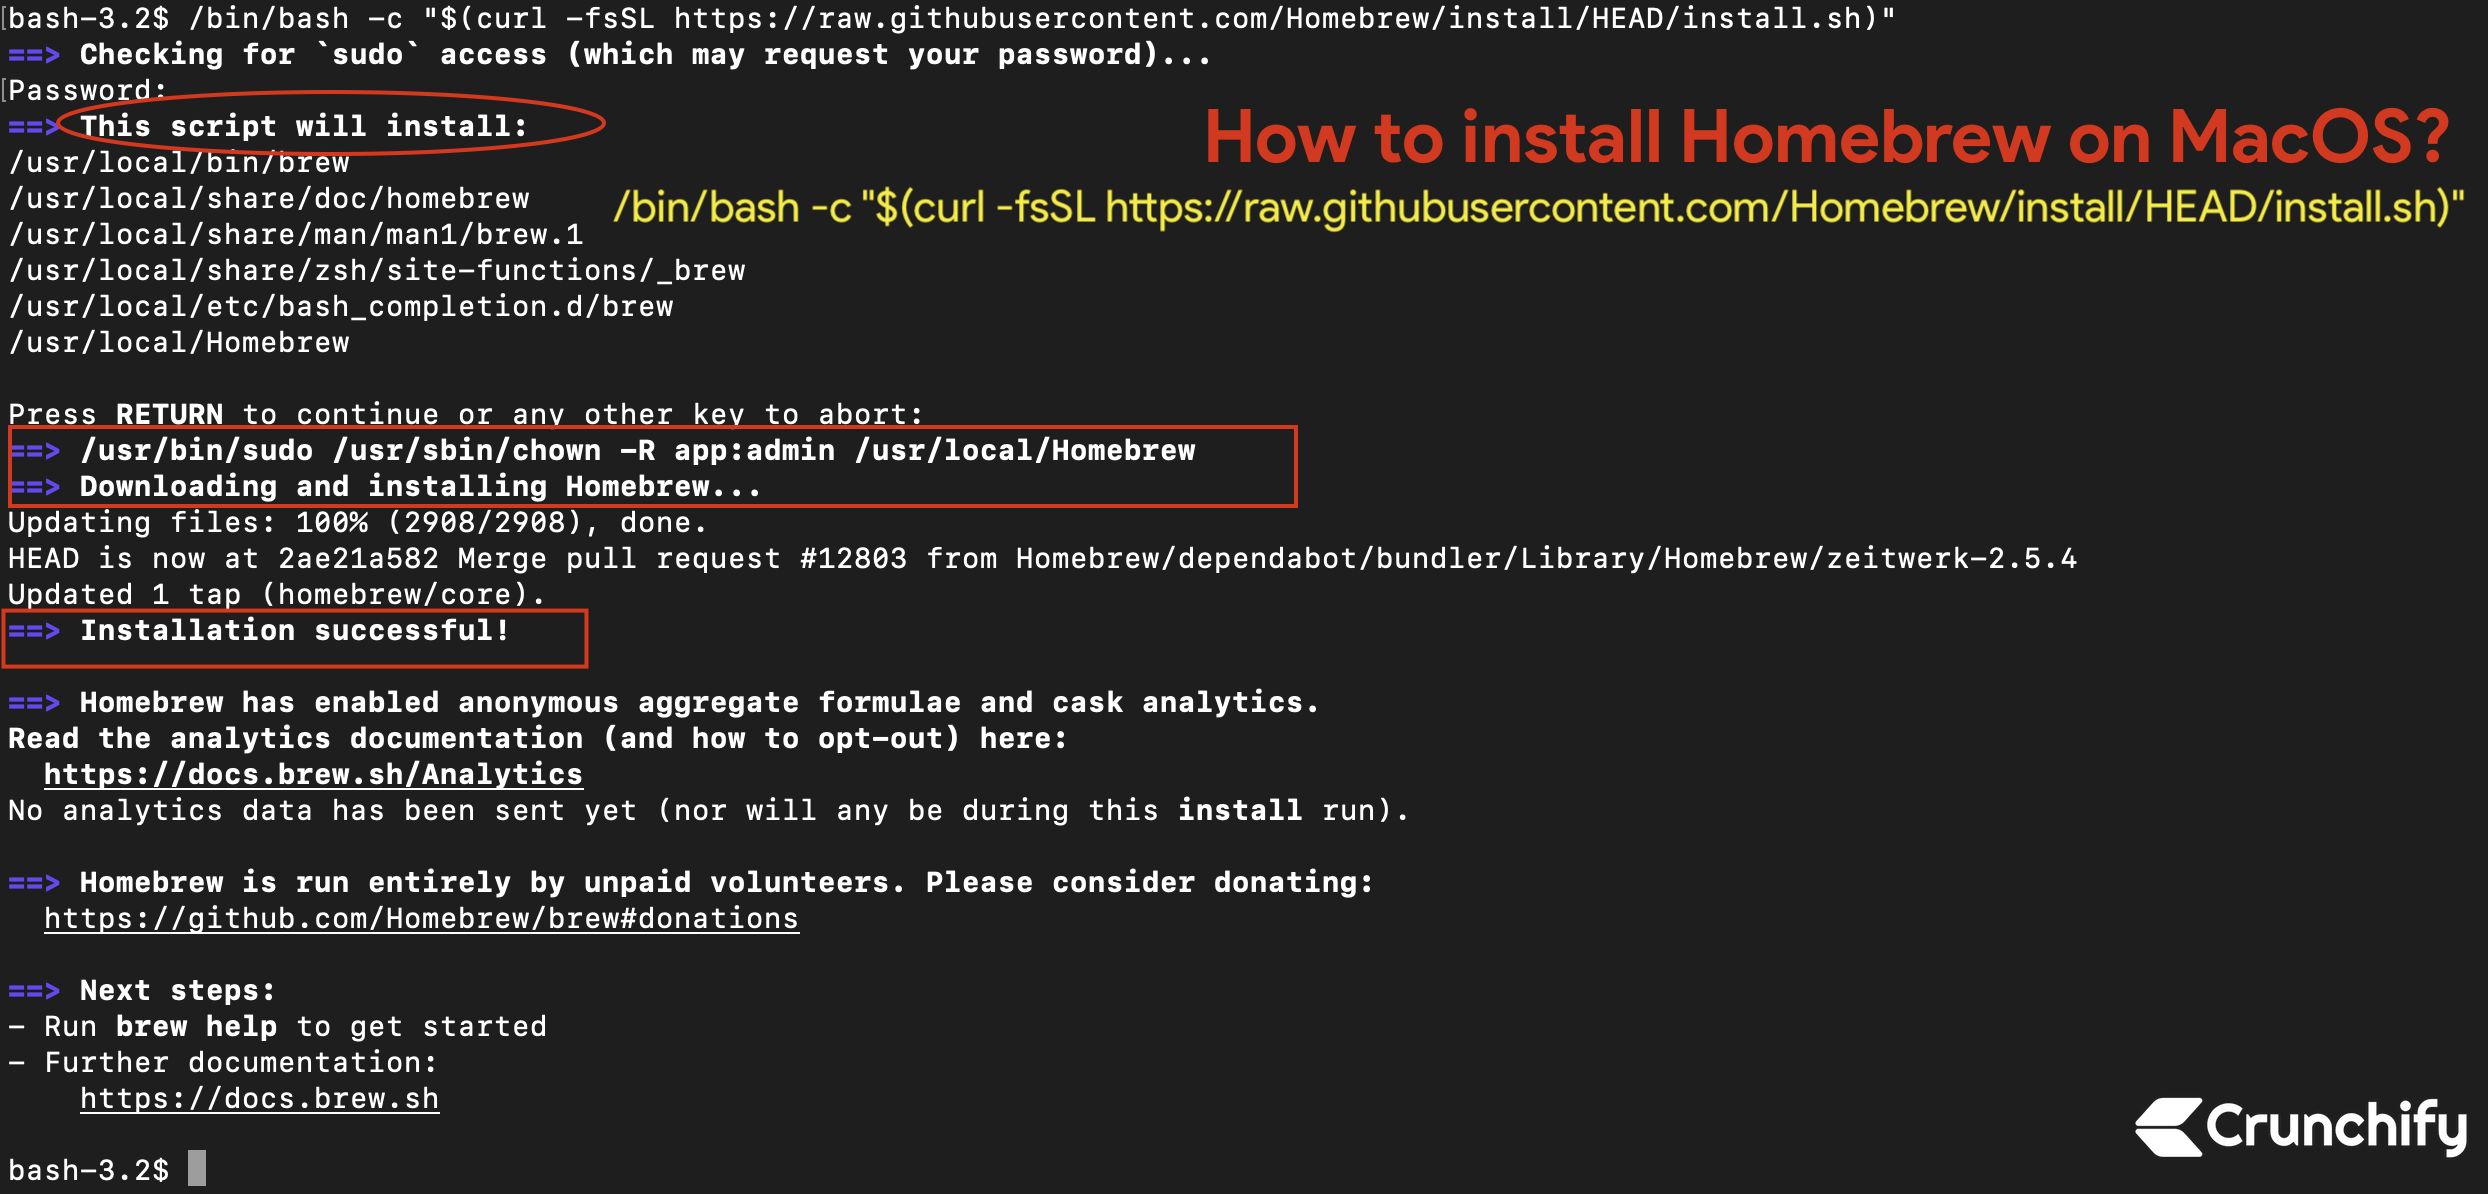
Open your Terminal application. The installation of Homebrew is initiated by running a script hosted on GitHub. Copy and paste the following command into your Terminal and press Enter:
/bin/bash -c "$(curl -fsSL https://raw.githubusercontent.com/Homebrew/install/HEAD/install.sh)"
Let’s break down what this command does:
-
curl -fsSL https://raw.githubusercontent.com/Homebrew/install/HEAD/install.sh: This part downloads the Homebrew installation script from its official GitHub repository.-
curl: A command-line tool for transferring data with URLs. -
-f: Fail silently (no output at all) on server errors. -
-s: Silent mode. Don’t show progress meter or error messages. -
-S: Show error. When used with-s, it makescurlshow an error message if it fails. -
-L: Follow redirects.
-
-
| /bin/bash -c "...": The output of thecurlcommand (the installation script) is “piped” (|) directly to the/bin/bashinterpreter, which then executes the script.
Upon running the command, the script will:
-
Prompt for your password: It might ask for your user password to ensure it has the necessary permissions to create or modify directories like
/opt/homebrew(for Apple Silicon) or/usr/local(for Intel). -
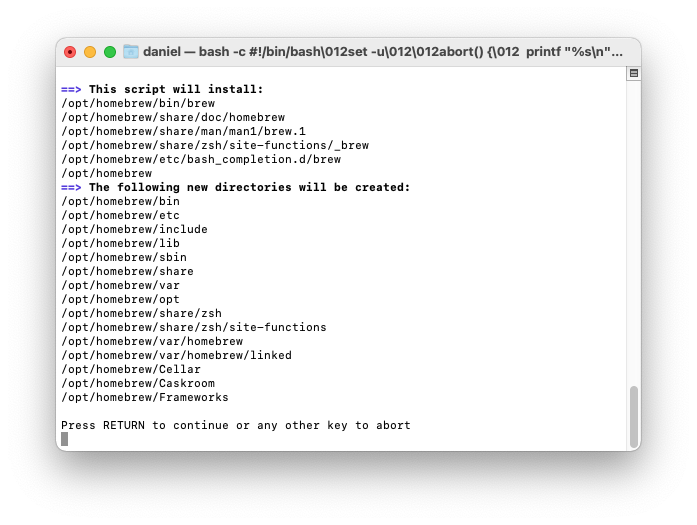
Display installation details: It will show you what it plans to install and where.
-
Download and install Homebrew: This involves downloading the necessary files and setting up the Homebrew core components.
Allow the script to complete its process. This could take a few minutes, depending on your internet speed and system performance.
Security Consideration: Piping a script directly from the internet to your shell is a common practice for many open-source tools. While convenient, it’s crucial to ensure you trust the source. Homebrew is a widely used and trusted project, and its installation script is regularly audited by the community.
Post-Installation Setup and Path Configuration
Once the main installation script finishes, Homebrew will typically provide instructions on how to add it to your system’s PATH environment variable. This step is crucial because it tells your shell where to find the brew command when you type it.
For Apple Silicon Macs (M1/M2/M3), Homebrew installs into /opt/homebrew. The script will usually recommend adding the following lines to your shell configuration file (e.g., ~/.zshrc if you’re using Zsh, which is the default for macOS Catalina and later):
echo 'eval "$(/opt/homebrew/bin/brew shellenv)"' >> ~/.zshrc

eval "$(/opt/homebrew/bin/brew shellenv)"
If you are using Bash, replace ~/.zshrc with ~/.bash_profile or ~/.bashrc.
For Intel Macs, Homebrew installs into /usr/local. The script typically handles this path automatically, but if you encounter issues, you might need to add something similar (though usually brew shellenv automatically detects the path):
eval "$(/usr/local/bin/brew shellenv)"
After adding the line to your configuration file, you need to reload your shell to apply the changes. You can do this by:
-
Closing and reopening your Terminal window, OR
-
Running
source ~/.zshrc(orsource ~/.bash_profile) in your current Terminal session.
Verifying the Installation
To confirm that Homebrew has been installed correctly and is accessible from your shell, run the following commands:
-
Check Homebrew’s health:
brew doctorThis command checks for any potential issues with your Homebrew installation, such as outdated components, missing permissions, or conflicting installations. Ideally, it should output “Your system is ready to brew.” If it reports warnings, address them as suggested by the output.
-
Display available commands:
brew helpThis will show a list of all
brewcommands and their brief descriptions, indicating that Homebrew is successfully installed and recognized. -
Confirm Homebrew version:
brew --versionThis command will display the installed version of Homebrew, confirming its successful setup.
If all these commands run without errors and provide meaningful output, congratulations! Homebrew is now fully installed on your system.
Beyond Installation: Basic Usage and Best Practices
With Homebrew installed, you’re now ready to unlock a new level of productivity and control over your macOS environment.
Installing Your First Package
The fundamental command for installing software with Homebrew is brew install. Let’s install a popular utility like wget (a command-line tool for downloading files from the internet), which isn’t pre-installed on macOS:
brew install wget
Homebrew will download the wget formula, fetch its dependencies (if any), compile it if necessary, and install it into your Homebrew directory, linking it to your PATH. You can then use wget directly from your terminal.
Other common packages you might install:
-
brew install git -
brew install node(Node.js runtime) -
brew install python(Python 3) -
brew install nvm(Node Version Manager)
Managing Software with Homebrew
Homebrew provides a suite of commands for comprehensive package management:
-
brew update: This command updates Homebrew itself and all its formulae and casks from the remote repositories. It’s good practice to run this regularly to get the latest package definitions. -
brew upgrade: After updating Homebrew’s definitions,brew upgradewill upgrade all your installed packages to their latest versions, provided new versions are available in the updated formulae. -
brew uninstall <package_name>: Removes a specific package from your system. -
brew list: Shows all currently installed formulae. -
brew search <keyword>: Helps you find packages in Homebrew’s repositories. For example,brew search pythonwill list all Python-related formulae. -
brew info <package_name>: Displays detailed information about a specific package, including its version, dependencies, and installation options. -
brew cleanup: Removes older versions of installed packages and stale downloads, freeing up disk space.
Installing GUI Applications with Homebrew Cask
One of Homebrew’s most powerful features is Cask, which extends its functionality to include graphical applications. This means you can manage CLI tools and GUI apps from the same package manager.
To install a GUI application:
brew install --cask <app_name>
For example:
-
brew install --cask google-chrome -
brew install --cask visual-studio-code -
brew install --cask docker -
brew install --cask vlc
This centralizes your software management, making it easier to install, update, and remove applications.
Advanced Tips and Troubleshooting
-
Consult
brew doctorregularly: If you ever encounter issues with Homebrew or installed packages,brew doctoris your first stop. It often provides clear, actionable advice to resolve problems. -
Check logs: Homebrew’s output often contains clues. If an installation fails, scroll up to review the error messages.
-
Permissions: While Homebrew generally manages permissions well, occasionally issues can arise. If you suspect a permission problem,
brew doctorwill usually highlight it. -
brew untapandbrew tap: If you’re working with custom repositories or need to resolve conflicts, these commands allow you to manage additional formula repositories. -
Brewfiles for reproducible environments: For developers, creating a
Brewfile(a simple text file listing all your desired formulae and casks) is a best practice. You can then usebrew bundle installto automatically set up your entire development environment on a new machine.
Conclusion and Future Prospects
Installing Homebrew is a transformative step for any macOS (or Linux) user who regularly interacts with command-line tools or develops software. By streamlining the installation, update, and management of packages, Homebrew frees you from the tedious complexities of dependency resolution and manual compilation, allowing you to focus on more productive tasks.
Its elegant simplicity, robust community support, and extensive repository of formulae and casks make it an essential utility in modern technical workflows. As the technology landscape continues to evolve, Homebrew’s open-source nature ensures its continuous adaptation and improvement, promising to remain at the forefront of package management solutions.
Now that you’ve successfully installed Homebrew, the vast world of open-source software is at your fingertips. Experiment with new tools, simplify your development environment, and enjoy the efficiency that this powerful package manager brings to your digital life. Explore its capabilities further, and you’ll quickly discover why Homebrew is celebrated as one of the most vital tools for developers and power users alike.
aViewFromTheCave is a participant in the Amazon Services LLC Associates Program, an affiliate advertising program designed to provide a means for sites to earn advertising fees by advertising and linking to Amazon.com. Amazon, the Amazon logo, AmazonSupply, and the AmazonSupply logo are trademarks of Amazon.com, Inc. or its affiliates. As an Amazon Associate we earn affiliate commissions from qualifying purchases.