
In the rapidly evolving world of technology, understanding the fundamental processes that power our digital lives is more crucial than ever. From setting up a new operating system to breathing fresh life into an aging machine, the ability to install software from an ISO file is a cornerstone skill for any tech enthusiast, IT professional, or even the savvy home user. This guide will walk you through the entire process, demystifying complex steps and equipping you with the knowledge to confidently manage your computer’s core software. We’ll explore everything from what an ISO file is to the critical post-installation steps, ensuring you have a robust, efficient, and secure system.

Demystifying ISO Files: The Digital Blueprint for Your OS
Before we dive into the practical steps of installation, it’s essential to understand the core component: the ISO file. This foundational knowledge empowers you to not only follow instructions but also to troubleshoot and adapt to various scenarios, making you a more proficient user of today’s diverse tech tools.
What Exactly is an ISO File?
At its heart, an ISO file, often referred to as an “ISO image,” is a single file that contains an exact, sector-by-sector copy of an entire optical disc, such as a CD, DVD, or Blu-ray. Think of it as a perfect digital replica, encapsulating all the data, file structures, and even the bootable information that was originally present on the physical disc. The “ISO” in its name comes from the ISO 9660 file system, which is commonly used for optical media.
These files are incredibly versatile. While historically used for distributing software suites and multimedia collections, their primary modern application is in the distribution of operating systems. When you download Windows, Linux distributions like Ubuntu, or even certain diagnostic tools, you’ll almost invariably receive them in an ISO format. This compact, self-contained package ensures that all necessary components for installation are bundled together, preventing missing files or compatibility issues during the setup process. It’s a testament to digital packaging efficiency, central to how modern software and operating systems are managed and deployed.
The Strategic Advantage of Using ISOs for Installation
The widespread adoption of ISO files for system installation isn’t just a matter of convenience; it offers several strategic advantages that align perfectly with contemporary tech trends focused on efficiency, reliability, and security.
Firstly, ISOs provide unparalleled reliability. Because they are exact copies, they virtually eliminate the risk of corrupted or incomplete installation media. Unlike physical discs that can be scratched or degraded, an ISO file, once downloaded and verified, remains pristine, ensuring that the installation process runs smoothly from start to finish. This reduces the time and frustration associated with failed installations, boosting productivity for IT professionals and individual users alike.
Secondly, they offer exceptional portability and flexibility. With physical media becoming increasingly obsolete (many modern laptops no longer even include DVD drives), ISO files allow you to store multiple operating systems or software packages on a single USB drive or network share. This digital format simplifies deployment across various machines, whether you’re setting up a new office workstation, refreshing a personal laptop, or experimenting with different Linux distributions on a virtual machine. This flexibility is a key aspect of modern tech management, where resources need to be adaptable and accessible.
Lastly, ISOs are instrumental in digital security and authenticity. Most official ISOs come with checksums (like SHA256 or MD5 hashes) that allow you to verify the integrity of your downloaded file against the original source. This ensures that the file hasn’t been tampered with or corrupted during download, safeguarding your system from potentially malicious software. In an era where digital security is paramount, the ability to confirm the authenticity of your installation source is an invaluable layer of protection, directly contributing to a safer computing environment.
Essential Preparations: Setting the Stage for a Seamless Installation
A successful ISO installation isn’t just about clicking “next.” It hinges on thorough preparation, ensuring you have all the necessary components, tools, and precautions in place. Skipping these preliminary steps can lead to frustration, data loss, or a compromised system. This section outlines the critical prerequisites for a smooth and secure installation process.
Acquiring Your ISO: The Importance of Official Sources
The very first step is obtaining the ISO file itself. While it might seem straightforward, the source of your ISO is critically important. Always download operating system ISOs directly from the official website of the operating system vendor. For Windows, this means Microsoft’s official download page. For popular Linux distributions like Ubuntu, Fedora, or Mint, visit their respective project websites.
Why is this crucial? Unofficial sources or torrent sites, while sometimes offering faster downloads, pose significant security risks. These unofficial ISOs can be tampered with, injected with malware, viruses, or spyware, potentially compromising your entire system from the moment of installation. Using an official source guarantees that you receive a clean, unaltered copy of the operating system, protecting your digital assets and privacy. Furthermore, official sites often provide checksums (like SHA256 hashes) that you can use to verify the integrity of your downloaded file, confirming that it matches the original and hasn’t been corrupted or altered during transmission. This simple verification step is a fundamental aspect of digital security best practices.
Choosing Your Bootable Medium: USB Drives vs. Optical Discs
Once you have your ISO file, you need a way to transfer it onto a medium that your computer can “boot” from. Today, the choice largely boils down to two options: a USB flash drive or an optical disc (DVD/CD).
- USB Flash Drives (Recommended): USB drives have become the dominant choice due to their speed, portability, and reusability. Most modern computers, especially laptops, no longer include optical drives, making USB the only viable option for many. For most operating systems, an 8GB USB drive is the minimum, but a 16GB or 32GB drive offers more flexibility for larger ISOs or multiple tools. They write data much faster than optical drives, significantly reducing the time it takes to create your bootable media.
- Optical Discs (DVD/CD): While less common, burning an ISO to a DVD is still an option if your target computer has an optical drive and you have blank discs available. This method is generally slower and the media is less durable. However, it can be a reliable fallback if USB booting is problematic or unavailable. A standard DVD-R typically offers 4.7GB of storage, which is sufficient for many older OS versions or smaller Linux distributions.
The best choice depends on your specific hardware and preferences, but the versatility and performance benefits of USB drives make them the clear winner in most contemporary scenarios.
The Right Tools for the Job: Software for Bootable Media Creation
Turning an ISO file into a bootable USB drive or DVD requires specialized software. These tools correctly extract the ISO’s contents and write them to your chosen medium in a way that your computer’s BIOS/UEFI can recognize and boot from.
- For Windows Users (USB):
- Rufus: This is arguably the most popular and highly recommended tool for Windows. Rufus is a lightweight, open-source utility that is incredibly fast and efficient. It offers various options for partition schemes (MBR, GPT) and boot systems (BIOS, UEFI), making it versatile for different hardware configurations. Its user-friendly interface makes the process straightforward, even for novices.
- Ventoy: An excellent alternative to Rufus, Ventoy allows you to make a USB drive bootable once, and then simply copy multiple ISO files directly onto it. You can then choose which ISO to boot from at startup, making it ideal for carrying multiple operating systems or diagnostic tools on a single drive.
- For macOS Users (USB):
- BalenaEtcher: This cross-platform tool (also available for Windows and Linux) is renowned for its simplicity and robust performance. Its clean interface makes the process of flashing an ISO to a USB drive incredibly intuitive. Etcher also includes a validation step to ensure the data was written correctly, adding an extra layer of reliability.
- For Linux Users (USB):
- Many Linux distributions have built-in utilities for creating bootable USB drives (e.g., “Startup Disk Creator” in Ubuntu).
- dd command: For command-line enthusiasts, the
ddcommand is a powerful, low-level tool that can write an ISO directly to a USB drive. While powerful, it requires careful syntax to avoid accidentally overwriting the wrong drive. - BalenaEtcher: As mentioned, Etcher is also an excellent graphical option for Linux users.
- For DVD Burning (Windows):
- Windows has a built-in “Windows Disc Image Burner” that can be accessed by right-clicking an ISO file. Third-party options like ImgBurn or Nero also offer more advanced features.
Choosing the right tool ensures that your installation media is prepared correctly, preventing potential boot failures and saving you valuable time.
The Golden Rule: Backing Up Your Data
This is perhaps the most critical preparatory step, yet it’s often overlooked. Before proceeding with any operating system installation, especially if you’re installing on a machine that already contains data, you MUST back up all important files, documents, photos, and any other critical information.
Operating system installations, particularly fresh installs, often involve formatting the hard drive. This process erases all data on the selected partition or drive, making recovery extremely difficult, if not impossible. Even if you plan to install alongside an existing OS, mistakes during partitioning can lead to accidental data loss.
Use an external hard drive, cloud storage services (like Google Drive, OneDrive, Dropbox), or a network-attached storage (NAS) device to securely store your backup. Verify that your backup is complete and accessible before you begin the installation. This seemingly simple step is your ultimate safeguard against irreversible data loss and is a non-negotiable part of responsible system management.
Crafting Your Installation Media: From ISO to Bootable Drive
With your ISO file acquired, your chosen medium ready, and your data safely backed up, the next step is to transform the static ISO file into dynamic, bootable installation media. This process is where the raw data of the operating system is imprinted onto your USB drive or DVD, making it recognizable by your computer’s firmware.
Creating a Bootable USB Drive (Recommended Method)
Creating a bootable USB drive is the most common and efficient method for installing operating systems today. We’ll use Rufus as an example, given its popularity and ease of use for Windows users.
- Insert Your USB Drive: Plug your USB flash drive into an available port on your computer. Ensure it’s the correct drive you intend to use, as the process will erase all data on it.
- Download and Launch Rufus: If you haven’t already, download Rufus from its official website (rufus.ie). Rufus is a portable application, so you can simply run the executable file directly without installation.
- Configure Rufus:
- Device: From the “Device” dropdown menu, select your USB flash drive. Double-check that you’ve selected the correct one, especially if you have multiple USB devices connected.
- Boot selection: Click the “SELECT” button and navigate to the location where you saved your ISO file. Select the ISO file (e.g.,
Windows.isoorubuntu.iso). - Image Option: For standard OS installations, “Standard Windows installation” or “Standard ISO image” is usually appropriate. Rufus might automatically detect the correct option based on your ISO.
- Partition scheme and Target system: Rufus will often intelligently pre-fill these based on your ISO. Generally, for modern systems, “GPT” (GUID Partition Table) for “UEFI (non CSM)” is recommended. For older systems or specific compatibility needs, “MBR” (Master Boot Record) for “BIOS (or UEFI-CSM)” might be necessary. If unsure, consult your computer’s documentation or stick with Rufus’s default suggestion.
- Volume label: You can leave this as default or give your USB a descriptive name.
- File system and Cluster size: Leave these at their default settings unless you have specific requirements.
- Start the Process: Click the “START” button. Rufus will warn you that all data on the USB drive will be destroyed. Confirm this warning to proceed.
- Wait for Completion: The process can take anywhere from a few minutes to over half an hour, depending on the size of the ISO, the speed of your USB drive, and your computer’s performance. A progress bar will keep you informed. Once complete, Rufus will display a “READY” status. You can then close Rufus and safely eject your USB drive.
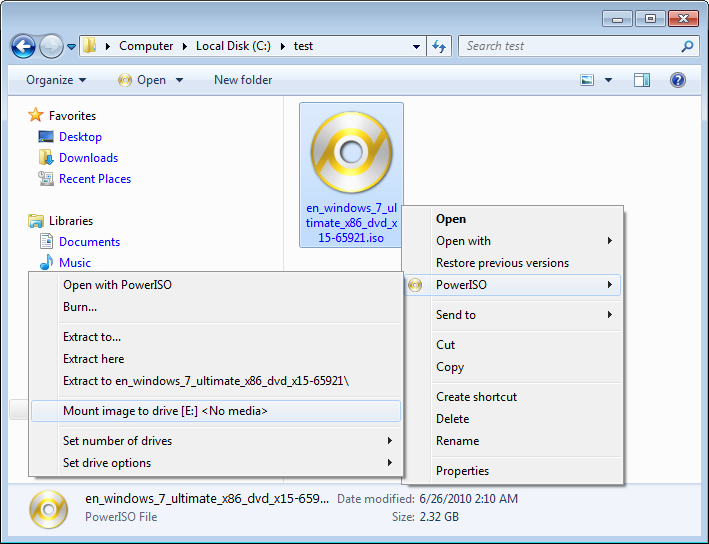
Your bootable USB drive is now ready to initiate the operating system installation.
Burning an ISO to a DVD (An Alternative Approach)
While less common, burning an ISO to a DVD remains a viable option, particularly for older machines or specific use cases where a USB boot is problematic.
- Insert a Blank DVD: Place a blank, writable DVD (DVD-R or DVD+R) into your computer’s optical drive.
- Use Disc Burning Software:
- Windows: Simply right-click on the ISO file. You should see an option like “Burn disc image” or “Open with > Windows Disc Image Burner.” Select this option, choose your DVD burner drive, and click “Burn.”
- Third-party Software: Tools like ImgBurn (for Windows) or the built-in Disc Utility (for macOS) offer more control. In these applications, you’ll typically select a “Burn image to disc” or “Write image file to disc” option, choose your ISO, select your optical drive, and start the burning process.
- Wait for Completion: Burning a DVD is generally slower than creating a bootable USB. The software will indicate when the process is finished. Once done, the DVD will be ejected, and it’s ready for use.
Though a bit slower, a properly burned DVD can be a reliable installation medium when circumstances call for it.
The Installation Journey: Booting Up Your New System
With your bootable installation media prepared, the next phase is to introduce it to your target computer and initiate the operating system installation. This involves configuring your computer’s boot process to recognize and launch the installer from your USB drive or DVD.
Accessing the BIOS/UEFI: Your System’s Control Center
The BIOS (Basic Input/Output System) or its modern successor, UEFI (Unified Extensible Firmware Interface), is the firmware that initializes your computer’s hardware before the operating system loads. To boot from your installation media, you need to access this interface and tell your computer to prioritize booting from the USB drive or DVD.
To access BIOS/UEFI:
- Insert Your Installation Media: Ensure your bootable USB drive is plugged into a USB port or your bootable DVD is in the optical drive of the target computer.
- Restart Your Computer: Power off your computer completely, then power it back on.
- Press the BIOS/UEFI Key: Immediately after pressing the power button, repeatedly tap the designated key to enter BIOS/UEFI setup. This key varies by manufacturer:
- Dell: F2, F12 (Boot Menu)
- HP: F10, F9 (Boot Menu), Esc
- Lenovo: F1, F2, Fn+F2, Enter (then F1 or F2)
- Asus: Del, F2
- Acer: F2, Del
- Microsoft Surface: Volume Up button
- General: Look for a brief message on the screen during startup (e.g., “Press DEL to enter Setup,” “Press F2 for BIOS”).
If you miss it, restart and try again. Sometimes, fast boot settings in modern operating systems can make this tricky; you might need to perform an “Advanced Startup” from within Windows to access UEFI firmware settings.
Once you successfully enter the BIOS/UEFI interface, you’ll typically be presented with a text-based (BIOS) or graphical (UEFI) menu system.
Configuring the Boot Order: Guiding Your Computer to the Installer
Within the BIOS/UEFI, you’ll need to locate the “Boot” or “Boot Order” section. This is where you prioritize which devices your computer attempts to boot from.
- Navigate to Boot Options: Use your keyboard (arrow keys, Enter, Esc) to navigate through the BIOS/UEFI menus. The “Boot” section might be under a main tab or within an “Advanced” settings menu.
- Identify Your Media: Look for your USB drive (it might be listed by brand, like “SanDisk Cruzer,” or as “USB HDD/FDD”) or your optical drive (“DVD-ROM,” “ODD”).
- Change Boot Priority: Move your installation media (USB or DVD) to the top of the boot order list. This tells your computer to look for an operating system on that device first, before trying the internal hard drive.
- In traditional BIOS, you might use +/- keys to move items up/down.
- In UEFI, you might drag and drop, or use specific function keys indicated on-screen.
- Alternatively, some systems have a “Boot Menu” (often F12, F9, or Esc) which allows you to select a one-time boot device without permanently changing the boot order. This is often the quickest method.
- Save and Exit: Once you’ve adjusted the boot order, find the “Save and Exit” or “Exit Saving Changes” option (usually F10). Confirm your changes. Your computer will then restart, attempting to boot from your chosen installation media.
If successful, you will see a message like “Press any key to boot from USB…” or the operating system installer will begin loading.
Navigating the Operating System Installation Wizard
Once your computer successfully boots from the installation media, you will be greeted by the operating system’s setup wizard. While the exact steps vary between Windows, Linux, and specific versions, the general flow is similar:
- Language, Time, Keyboard Settings: The first screen typically asks you to select your preferred language, time zone, and keyboard layout. Choose options appropriate for your region.
- Install Now/Try Now (Linux): Click “Install Now” to begin the installation. Linux distributions often offer a “Try Now” or “Live CD” option, allowing you to test the OS without installing it, which is great for exploration.
- License Agreement: Read and accept the End User License Agreement (EULA). This is a standard legal step.
- Installation Type: This is a crucial step.
- Upgrade/Keep Files: If you are upgrading an existing OS, this option attempts to preserve your files and settings.
- Custom/Advanced/Erase Disk: For a fresh installation, or if you want to dual-boot, select “Custom” or “Advanced.” This option gives you control over disk partitioning.
- Disk Partitioning (Crucial Step):
- This is where you tell the installer where to put the operating system. You’ll see a list of available drives and partitions.
- For a clean install (erasing everything): Select the main partition where your old OS resided (e.g., Drive 0, Partition 2) and choose to “Delete” it. You might need to delete other small system partitions as well (EFI, Recovery, etc.) to get a single block of “Unallocated Space.” Then, select this unallocated space and click “New” to create a new partition, or simply click “Next” to let the installer create the necessary partitions automatically.
- WARNING: Deleting partitions will permanently erase all data on them. Ensure your backup is complete!
- For dual-booting: You would select an existing empty partition or create a new one from unallocated space without deleting your existing OS partition. This is more complex and requires careful planning.
- Start Installation: Once you’ve selected the target partition, click “Next” or “Install.” The installation process will now begin, copying files to your hard drive. This can take a significant amount of time, during which your computer may restart several times.
- Initial Setup and User Configuration: After the core files are installed, the system will restart and prompt you for initial setup details:
- Region and keyboard layout confirmation.
- Network connection (Wi-Fi or Ethernet).
- Creating a user account, setting a username, password, and possibly a PIN.
- Privacy settings (diagnostic data, location services, etc.).
- Signing in with a Microsoft account (Windows) or creating an online account (some Linux distros offer this).
Follow these prompts carefully, setting up your preferences. Once completed, your new operating system will boot to the desktop, signaling a successful installation. Remember to remove your installation media after the final restart to prevent the system from booting back into the installer.
Post-Installation Mastery: Optimizing and Securing Your New System
Installing an operating system from an ISO file is a significant achievement, but the process doesn’t end when you reach the desktop. The post-installation phase is equally crucial for ensuring your system is optimized, secure, and ready for productivity. This final stage involves installing essential software, configuring security measures, and performing routine maintenance.
Installing Drivers and System Updates: The Cornerstone of Performance
Immediately after a fresh OS installation, your system might be running on generic drivers. While these allow basic functionality, they don’t unlock the full potential of your hardware. Dedicated drivers are essential for optimal performance, stability, and access to all features of your graphics card, chipset, network adapter, sound card, and peripherals.
- Graphics Drivers: Head to the website of your graphics card manufacturer (NVIDIA, AMD, Intel) and download the latest drivers for your specific model and OS version. Updated graphics drivers are vital for gaming, video editing, and overall display performance.
- Chipset Drivers: Visit your motherboard manufacturer’s website (e.g., Asus, MSI, Gigabyte, Dell, HP) and download the latest chipset drivers for your motherboard model. These drivers ensure proper communication between your CPU, memory, and other components.
- Network Drivers: If your internet connection isn’t working, you might need to download network (Ethernet and Wi-Fi) drivers on another computer and transfer them via USB. This is often a critical first step if you have no internet access.
- Other Peripheral Drivers: Install drivers for any specific devices like printers, scanners, or specialized input devices.
- System Updates: Once your network drivers are installed and you have an internet connection, run the built-in system update utility (Windows Update, apt update/upgrade in Linux). These updates patch security vulnerabilities, improve stability, and often include updated generic drivers. Schedule automatic updates to ensure your system always benefits from the latest security patches and performance enhancements. This proactive approach to updates is a fundamental aspect of digital security in today’s tech landscape.
Essential Software and Digital Security: Your First Line of Defense
With your drivers in place and the OS updated, it’s time to equip your system with the software you’ll need and establish robust security practices.
- Web Browser: Download and install your preferred web browser (Chrome, Firefox, Edge, Brave). This is your gateway to the internet and most online services.
- Antivirus/Anti-Malware: While Windows Defender provides a baseline of protection, consider installing a reputable third-party antivirus solution for enhanced security, especially if you handle sensitive data or frequently visit less-trusted websites. Linux users generally face fewer direct virus threats but should still be mindful of software sources. Keep your antivirus software updated.
- Productivity Suite: Install your preferred office suite (Microsoft Office, LibreOffice, Google Workspace apps via browser).
- Communication Tools: Set up your email client, messaging apps (Discord, Slack, Zoom), and other communication essentials.
- Backup Software: Re-establish your backup routine. Whether it’s cloud synchronization or external drive backups, ensure your valuable data is continuously protected.
- Firewall: Ensure your operating system’s built-in firewall is active and properly configured. This acts as a barrier against unauthorized network access.
- Password Manager: Start using a strong password manager to generate and store unique, complex passwords for all your online accounts. This significantly enhances your online security.
- Ad-Blockers: Browser extensions like uBlock Origin can improve your browsing experience and reduce exposure to malicious ads.
By proactively installing these essential tools and adopting good security habits, you’re not just making your system functional, but also resilient against common cyber threats, safeguarding your digital life and enhancing your overall productivity.

Troubleshooting Common Installation Hiccups
Even with careful preparation, issues can sometimes arise during or after installation. Knowing how to troubleshoot common problems can save you considerable time and frustration.
- “No Boot Device Found” / “Operating System Not Found”:
- Check Boot Order: Re-enter BIOS/UEFI and ensure your installation media (USB/DVD) is correctly prioritized.
- Media Integrity: If booting from USB, try recreating it with a different tool or another USB drive. If DVD, try burning a new disc.
- Partitioning: During the OS installation, ensure you selected the correct drive and that partitions were created successfully.
- Installation Freezes/Crashes:
- Corrupt ISO: Redownload the ISO from an official source and verify its checksum.
- Faulty RAM: Run a memory diagnostic tool (Windows Memory Diagnostic or MemTest86) to check for RAM errors.
- Overheating: Ensure your computer’s cooling system is functioning correctly.
- Drivers Not Installing / Hardware Not Recognized:
- Download from Official Sources: Always get drivers from the hardware manufacturer’s website, not generic driver sites.
- Compatibility: Ensure the drivers are compatible with your specific OS version (e.g., 64-bit Windows 10).
- Device Manager (Windows): Check Device Manager for devices with warning signs (yellow exclamation marks) to identify specific driver issues.
- Slow Performance:
- Updates: Ensure all system updates and drivers are installed.
- Background Processes: Check Task Manager (Windows) or System Monitor (Linux) for resource-heavy applications.
- Disk Space: Ensure your system drive has sufficient free space.
Learning to diagnose and resolve these issues enhances your tech literacy and allows you to maintain a healthy, high-performing system.
In conclusion, installing an operating system from an ISO file is a fundamental skill that empowers you to take control of your computing environment. From understanding the digital blueprint of an ISO to meticulously preparing your installation media, navigating the setup wizard, and finally optimizing your post-installation setup, each step contributes to a robust and secure digital foundation. By following this comprehensive guide, you’re not just performing a technical task; you’re mastering an essential aspect of modern technology, ensuring your systems are always running smoothly, securely, and efficiently.
aViewFromTheCave is a participant in the Amazon Services LLC Associates Program, an affiliate advertising program designed to provide a means for sites to earn advertising fees by advertising and linking to Amazon.com. Amazon, the Amazon logo, AmazonSupply, and the AmazonSupply logo are trademarks of Amazon.com, Inc. or its affiliates. As an Amazon Associate we earn affiliate commissions from qualifying purchases.