
In the ever-evolving landscape of technology, the ability to empower computers with human-like vision capabilities has transitioned from science fiction to practical reality. At the heart of this transformation lies Computer Vision, a field that enables machines to see, process, and understand visual information. Whether you’re a budding AI enthusiast, a seasoned software developer, or a data scientist looking to add visual processing to your toolkit, mastering the installation of OpenCV (Open Source Computer Vision Library) in Python is an indispensable first step. Often referred to by its Python module name, cv2, OpenCV is an open-source library that offers a rich suite of tools for image and video analysis, machine learning algorithms, and real-time operations.

This guide will walk you through the process of installing OpenCV for Python, ensuring a smooth setup that aligns with best practices in software development and digital security. We’ll delve into everything from preparing your environment to verifying the installation and troubleshooting common pitfalls, all within the context of enhancing your productivity and leveraging cutting-edge AI tools.
Understanding OpenCV and Its Role in Modern Technology
OpenCV is not just another library; it’s a cornerstone for a vast array of applications that leverage visual data. Since its inception by Intel in 1999, it has grown into a global standard, supported by a vibrant community and continuously updated with state-of-the-art algorithms. Its versatility allows it to be used in diverse domains, making it a critical component in many technology trends.
From a software perspective, OpenCV provides over 2500 optimized algorithms, covering a broad spectrum of classic and state-of-the-art computer vision and machine learning methods. These include object detection, facial recognition, gesture analysis, image segmentation, 3D reconstruction, augmented reality, and much more. For developers, this means faster development cycles and robust solutions for complex visual tasks. In the realm of AI tools, OpenCV often serves as the data pre-processing layer for deep learning models, preparing visual inputs for neural networks to analyze. For instance, before a neural network can classify an object in an image, OpenCV might be used to resize, crop, or apply various filters to enhance the image quality and consistency.
Its applications are ubiquitous:
- Security and Surveillance: Real-time object tracking, anomaly detection, crowd analysis.
- Automotive Industry: Autonomous driving systems, driver assistance, traffic sign recognition.
- Healthcare: Medical image analysis, disease detection, surgical robotics.
- Retail: Customer behavior analysis, inventory management, augmented reality try-ons.
- Robotics: Navigation, object manipulation, human-robot interaction.
- Digital Content Creation: Image and video editing, special effects, virtual reality experiences.
Installing cv2 enables your Python environment to harness this incredible power, allowing you to experiment with and build sophisticated visual applications that contribute to innovation across various industries.
Preparing Your Python Environment for OpenCV
Before diving into the installation of OpenCV, it’s crucial to set up a clean and stable Python environment. This preparatory step is vital for avoiding conflicts, ensuring compatibility, and maintaining a productive workflow, especially when dealing with multiple projects or differing dependency requirements.
Essential Prerequisites: Python and Pip
The foundation of your OpenCV journey in Python begins with Python itself and its package installer, pip.
1. Python Installation:
First, ensure you have Python installed on your system. OpenCV for Python generally requires Python 3.x. While Python 2.x is officially deprecated, some legacy systems might still use it. For new projects and modern development, Python 3.6 or higher is strongly recommended.
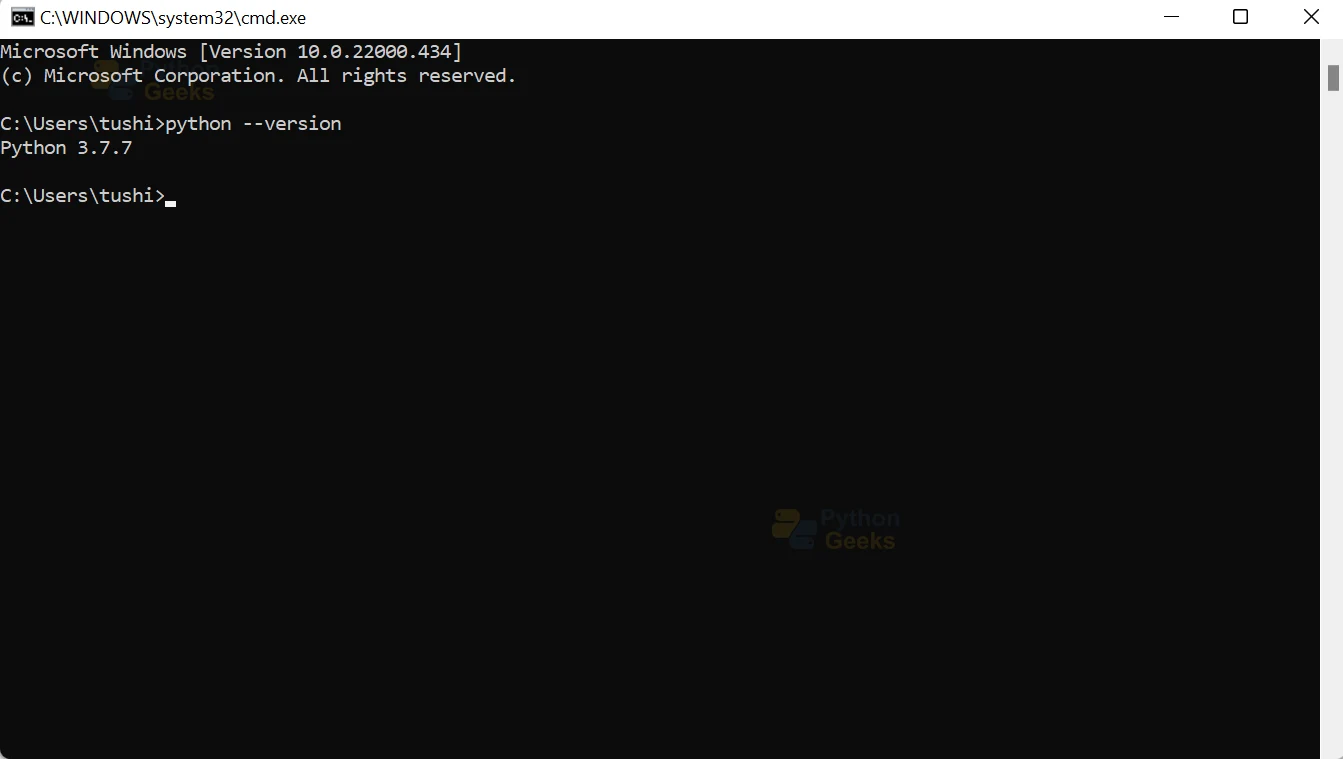
To check if Python is installed and to see its version, open your terminal or command prompt and type:
python --version
or, on some systems:
python3 --version
If Python is not installed, or if you have an older version, download the latest stable release from the official Python website (python.org). Follow the installation instructions for your operating system. For Windows users, make sure to check the “Add Python to PATH” option during installation, as this simplifies command-line usage.
2. Pip Installation and Update:
pip is Python’s package installer, which you will use to download and install OpenCV. It typically comes bundled with Python 3.4 and later.
To check if pip is installed and to ensure it’s up-to-date, run:
pip --version
or:
pip3 --version
If pip is missing or needs an update, you can update it using:
python -m pip install --upgrade pip
Keeping pip updated is a good practice as it often includes bug fixes and performance improvements that can streamline your package management.
The Importance of Virtual Environments
One of the most critical aspects of Python development, often overlooked by beginners, is the use of virtual environments. A virtual environment is a self-contained directory that holds a specific Python interpreter and its associated packages, isolated from other Python projects and the global Python installation. This practice offers significant benefits:
- Dependency Management: Different projects often require different versions of the same library (e.g., Project A needs NumPy 1.20, while Project B needs NumPy 1.23). Virtual environments prevent these conflicts by allowing each project to have its own set of dependencies.
- Cleanliness: It keeps your global Python installation clutter-free, containing only the base Python interpreter. All project-specific packages are installed within their respective virtual environments.
- Reproducibility: When sharing a project, you can easily provide a
requirements.txtfile generated from your virtual environment, allowing others to recreate the exact same environment and ensure the code runs as expected. - Security and Stability: Isolating project dependencies reduces the risk of unintended side effects from system-wide package updates or uninstallations.
How to Create and Activate a Virtual Environment:
Python 3.3+ includes the venv module, which is the recommended way to create virtual environments. For data science or more complex environments, Anaconda/Miniconda is another popular choice.
Using venv (recommended for general Python projects):
-
Navigate to your project directory:
cd my_opencv_projectIf you don’t have one, create it:
mkdir my_opencv_project && cd my_opencv_project. -
Create a virtual environment:
python -m venv venvReplace
venvwith your preferred name for the environment directory (e.g.,opencv_env). -
Activate the virtual environment:
- On Windows:
bash

.venvScriptsactivate
- On macOS/Linux:
bash

source venv/bin/activate
Once activated, your terminal prompt will usually show the environment’s name in parentheses (e.g.,(venv) C:my_opencv_project>). This indicates that any Python commands or package installations will now apply only to this isolated environment.
- On Windows:
Using Anaconda/Miniconda (popular for data science and complex environments):
-
Create a new Conda environment:
conda create -n opencv_env python=3.9This creates an environment named
opencv_envwith Python 3.9. You can choose any Python version. -
Activate the Conda environment:
bash

conda activate opencv_env
Your prompt will change to(opencv_env).
Always activate your virtual environment before installing OpenCV or any other project dependencies. This simple step can save you countless hours of troubleshooting later.
Step-by-Step Installation of OpenCV
With your Python environment properly set up and activated, installing OpenCV is a straightforward process using pip. There are a few variants of the OpenCV Python package, each designed for slightly different use cases.
Standard Installation with Pip
The most common and recommended way to install OpenCV for general-purpose use is via the opencv-python package. This package includes the main modules of OpenCV and is compiled with a set of commonly used features.
1. Ensure your virtual environment is active. (Refer to the previous section).
2. Install the opencv-python package:
Open your terminal or command prompt (with the virtual environment activated) and run:
pip install opencv-python
This command tells pip to find the opencv-python package in the Python Package Index (PyPI), download it, and install it along with any required dependencies. The installation might take a few moments, depending on your internet connection speed and system performance, as the package can be quite large.
Understanding opencv-python variants:
opencv-python: This is the official “vanilla” OpenCV package for Python. It includes the core functionalities and pre-compiled binaries for most common systems (Windows, macOS, Linux). It’s suitable for the vast majority of users and projects. This version does not include the “contrib” modules.opencv-contrib-python: This package includes all the features ofopencv-pythonPLUS the “contrib” modules (extra modules). Theopencv_contribrepository contains experimental, non-free (e.g., patented algorithms like SIFT/SURF, though these are now patent-free), or less stable algorithms. If your project requires features like SIFT/SURF, advanced face recognition, or specific machine learning algorithms not found in the core OpenCV, you might need this version. Crucially, you should only install one of these packages –opencv-pythonoropencv-contrib-python, not both. Installing both can lead to conflicts and unexpected behavior.opencv-python-headless: This is a “headless” version ofopencv-python, meaning it’s compiled without any GUI toolkits (like Qt or GTK). It’s primarily intended for server-side applications, cloud deployments, or environments where a graphical interface is not needed or desired (e.g., Docker containers, remote servers, CI/CD pipelines). This version saves disk space and reduces dependencies. If you plan to display images or videos usingcv2.imshow()or similar GUI functions, you should not use the headless version; stick withopencv-pythonoropencv-contrib-python.
For most beginners, pip install opencv-python is the appropriate choice. If you later discover you need contrib features, you can uninstall opencv-python and then install opencv-contrib-python.
Installing Specific Versions or Variants
Sometimes, you might need a specific version of OpenCV due to project requirements, compatibility issues with other libraries, or to reproduce an older environment. pip allows you to specify the version during installation.
1. Check available versions (optional):
You can search PyPI for available versions of a package:
pip index versions opencv-python
This will list all released versions.
2. Install a specific version:
To install a particular version, append ==<version_number> to the package name:
pip install opencv-python==4.5.5.64
Replace 4.5.5.64 with the desired version number.
3. Install a different variant (e.g., opencv-contrib-python):
If you determine you need the contrib modules, first uninstall any existing opencv-python package:
pip uninstall opencv-python
Confirm the uninstallation when prompted. Then, install the opencv-contrib-python package:
pip install opencv-contrib-python
Again, remember to never install opencv-python and opencv-contrib-python simultaneously in the same environment.
By following these steps, you should have OpenCV successfully installed within your designated Python virtual environment, ready for use.
Verifying Your OpenCV Installation and First Steps
Once the installation process completes, the next crucial step is to verify that OpenCV has been installed correctly and is accessible from your Python environment. This ensures that you can begin developing computer vision applications without any hidden issues.
Checking the Installation
To confirm that cv2 is properly installed, you can simply try to import it within your Python interpreter and check its version.
-
Activate your virtual environment (if it’s not already active).
-
Open a Python interpreter: Type
pythonorpython3in your terminal and press Enter.
Your prompt will change to>>>. -
Import
cv2and print its version:import cv2 print(cv2.__version__)If the installation was successful, you should see the OpenCV version number printed (e.g.,
4.9.0). If you encounter anImportError: No module named 'cv2', it indicates a problem with the installation or that your virtual environment is not correctly activated. In such a case, revisit the installation steps and ensure your virtual environment is active. -
Exit the Python interpreter: Type
exit()and press Enter.
This quick check is often sufficient to confirm basic functionality.
A Simple OpenCV Script: Hello, Computer Vision!
To truly celebrate your successful installation and take your first step into computer vision, let’s write a simple Python script that loads an image and displays it. This classic “Hello World” equivalent for computer vision demonstrates OpenCV’s core capability: image processing.
1. Prepare an Image:
You’ll need an image file (e.g., a .jpg or .png) to work with. Save a sample image (e.g., test_image.jpg) in the same directory where you’ll create your Python script.
2. Create the Python script:
Open a text editor or your favorite Integrated Development Environment (IDE) like VS Code or PyCharm, and create a new file named image_viewer.py.
3. Add the following code:
   import cv2
   import sys # To handle script arguments if needed, though not strictly for this basic example

   # Define the path to your image
   image_path = "test_image.jpg" # Make sure this image is in the same directory as your script

   # --- Check if OpenCV is loaded and functional ---
   print(f"OpenCV Version: {cv2.__version__}")

   # --- Load the image ---
   # cv2.imread() loads an image from the specified file.
   # cv2.IMREAD_COLOR loads a 3-channel color image.
   # cv2.IMREAD_GRAYSCALE loads a grayscale image.
   # If the image cannot be found or loaded, it returns None.
   img = cv2.imread(image_path, cv2.IMREAD_COLOR)

   # --- Check if the image was loaded successfully ---
   if img is None:
       print(f"Error: Could not load image from {image_path}. Please check the path and file existence.")
       sys.exit(1) # Exit the script with an error code
   else:
       print(f"Image '{image_path}' loaded successfully. Dimensions: {img.shape}")

   # --- Display the image ---
   # cv2.imshow() displays an image in a window.
   # The first argument is the window name (can be any string).
   # The second argument is the image matrix to display.
   cv2.imshow("My First OpenCV Image", img)

   # --- Wait for a key press ---
   # cv2.waitKey(0) waits indefinitely until a key is pressed.
   # It's necessary for the window to remain open.
   # If you pass a positive integer (e.g., cv2.waitKey(1000)), it waits for that many milliseconds.
   print("Press any key to close the image window...")
   cv2.waitKey(0)

   # --- Destroy all windows ---
   # cv2.destroyAllWindows() closes all OpenCV windows opened by the program.
   cv2.destroyAllWindows()

   print("Script finished.")
4. Run the script:
Save the file, ensure your virtual environment is active, and then run the script from your terminal:
python image_viewer.py
A window titled “My First OpenCV Image” should pop up, displaying your test_image.jpg. Press any key on your keyboard, and the window will close.
This simple script confirms that your OpenCV installation is fully functional, capable of interacting with image files and displaying visual output. It’s a foundational step that opens the door to countless computer vision possibilities.
Common Issues and Advanced Tips for a Smooth Experience
Even with the clearest instructions, installation processes can sometimes hit snags. Understanding common issues and knowing how to troubleshoot them, along with embracing advanced practices, can significantly enhance your productivity and maintain the digital security of your development environment.
Troubleshooting Installation Errors
Encountering an error during or after installation can be frustrating, but most issues have straightforward solutions.
-
ImportError: No module named 'cv2':- Virtual Environment Not Activated: This is the most common cause. Ensure your virtual environment is active before running
pip install opencv-pythonor executing your script. - Incorrect Package Name: You might have typed
pip install cv2instead ofpip install opencv-python. - Multiple Python Installations: If you have multiple Python versions,
pipmight be installing to a different Python interpreter than the one you’re using. Always usepython -m pip install ...orpython3 -m pip install ...to ensurepipis associated with the correct Python interpreter. - Failed Installation: The installation itself might have failed due to network issues, disk space, or permissions. Re-run the
pip installcommand and carefully read the output for error messages.
- Virtual Environment Not Activated: This is the most common cause. Ensure your virtual environment is active before running
-
DLL load failed while importing cv2(Windows specific):- This usually means a required dependency (like Visual C++ Redistributable) is missing or corrupted.
- Install Visual C++ Redistributable: For Python 3.x, you often need the Microsoft Visual C++ Redistributable for Visual Studio 2015, 2017, 2019, and 2022. You can download it from the official Microsoft website. Install both x86 and x64 versions if you’re unsure.
- Update PATH: Ensure that the path to your Python installation (and potentially its
Scriptsdirectory) is correctly added to your system’s PATH environment variable. - Antivirus Interference: Occasionally, antivirus software might interfere with the installation or loading of DLLs. Temporarily disabling it during installation might help, but remember to re-enable it.
-
Permission Errors:
- If you see “Permission denied” errors during
pip install, it usually means you’re trying to install globally without sufficient permissions. Never usesudo pip installor run your command prompt as administrator for virtual environments. Instead, ensure your virtual environment is active, andpipwill install packages into that environment without needing elevated permissions. If you are forced to install globally (not recommended), usepip install --user opencv-python.
- If you see “Permission denied” errors during
-
Network Issues:
- A stable internet connection is required to download the OpenCV package from PyPI. If your connection is unstable or you are behind a restrictive firewall, the download might fail. Try again later or check your network settings.
-
Unsupported Python Version:
- While OpenCV supports a wide range of Python 3 versions, extremely new or very old versions might have compatibility issues. Check the
opencv-pythonPyPI page for supported Python versions if you suspect this is the case.
- While OpenCV supports a wide range of Python 3 versions, extremely new or very old versions might have compatibility issues. Check the

Beyond Basic Installation: Performance and Productivity
For those looking to optimize their OpenCV workflow and integrate it seamlessly into larger projects, consider these advanced tips:
-
IDE Integration (VS Code, PyCharm):
- VS Code: When working with VS Code, configure your workspace to use the Python interpreter from your virtual environment. This ensures IntelliSense, debugging, and running scripts correctly recognize your installed
cv2module. Go toCtrl+Shift+P(orCmd+Shift+Pon Mac), type “Python: Select Interpreter”, and choose the interpreter located inside yourvenvfolder (e.g.,.venvScriptspython.exeon Windows). - PyCharm: PyCharm has excellent virtual environment support. When creating a new project, you can specify to create a new virtual environment or use an existing one. For existing projects, go to
File > Settings > Project: [Your Project Name] > Python Interpreterand select or add your virtual environment’s interpreter.
- VS Code: When working with VS Code, configure your workspace to use the Python interpreter from your virtual environment. This ensures IntelliSense, debugging, and running scripts correctly recognize your installed
-
Managing Dependencies with
requirements.txt:- After successfully installing
opencv-pythonand other necessary libraries in your virtual environment, generate arequirements.txtfile. This file lists all direct and indirect dependencies with their exact versions.
pip freeze > requirements.txtThis file is crucial for sharing your project and ensuring reproducibility. Others can then install all dependencies with:
pip install -r requirements.txt - After successfully installing
-
Building from Source (Advanced Users):
- While
pipinstallation is convenient, advanced users might choose to build OpenCV from source. This allows for custom compilation flags, integration with specific hardware (e.g., GPU acceleration with CUDA), and inclusion of specificcontribmodules or optimization libraries not available in the pre-compiledpippackages. This process is significantly more complex and time-consuming, requiring knowledge of CMake and C++ compilers, and is typically reserved for highly specific performance or feature requirements.
- While
-
Understanding
numpy:- OpenCV extensively uses NumPy for array operations. Images in OpenCV are represented as NumPy arrays. A good understanding of NumPy fundamentals will greatly enhance your ability to manipulate and process images efficiently. Ensure NumPy is updated (
pip install --upgrade numpy) within your virtual environment for optimal performance and compatibility.
- OpenCV extensively uses NumPy for array operations. Images in OpenCV are represented as NumPy arrays. A good understanding of NumPy fundamentals will greatly enhance your ability to manipulate and process images efficiently. Ensure NumPy is updated (
By embracing virtual environments, troubleshooting common issues systematically, and leveraging advanced productivity tools, you can ensure a robust and efficient development workflow for your computer vision projects. This proactive approach not only saves time but also strengthens your understanding of software management, a critical skill in today’s technology-driven world.
Embarking on your journey with OpenCV in Python opens up a fascinating realm of possibilities in computer vision, from simple image manipulations to complex AI-driven applications. The steps outlined in this guide provide a solid foundation, ensuring your environment is correctly set up for success. Remember, the world of technology is vast, and continuous learning and experimentation are key. Now that you have cv2 installed, the real fun begins. Dive into the documentation, explore tutorials, and start building your own visionary projects!