In the digital age, where visual communication reigns supreme, fonts are far more than mere text display tools. They are the silent architects of emotion, legibility, and brand identity, playing a pivotal role in everything from personal projects and professional documents to marketing campaigns and cutting-edge software interfaces. A well-chosen font can transform a plain message into a captivating story, convey professionalism, spark creativity, or define a unique brand voice. Conversely, limited font choices can stifle innovation and leave your designs feeling generic.

For anyone working on a PC – be it a graphic designer, a content creator, a marketer, a student, or simply someone who enjoys personalizing their digital experience – the ability to install and manage custom fonts is an essential skill. It unlocks a universe of design possibilities, allowing you to tailor your visual output precisely to your needs and preferences. This comprehensive guide will walk you through the entire process of installing fonts on your PC, primarily focusing on Windows, while also touching upon crucial considerations like font types, reliable sources, and best practices for management. We’ll explore how this seemingly simple technical task underpins aspects of technology, personal branding, and even financial considerations in design.
Understanding Font Types and Sourcing Reliable Fonts
Before diving into the installation process, it’s crucial to understand the different types of font files you’ll encounter and, perhaps more importantly, where to acquire them safely and legally. The world of digital typography is vast, and knowing the fundamentals will protect your system and empower your creative choices.
Common Font Formats: TrueType, OpenType, and Beyond
The digital font landscape has evolved, but two formats dominate: TrueType and OpenType. Understanding their differences is key to compatibility and functionality.
- TrueType Fonts (TTF): Developed by Apple and Microsoft in the late 1980s, TTF was designed to provide a universal standard for digital type. TrueType fonts are single files that contain both screen and print outline data, meaning they look the same on screen as they do when printed. They are widely supported across all operating systems and applications, making them a reliable choice for most users. If you’re looking for a straightforward, universally compatible font, a TTF file is often a safe bet.
- OpenType Fonts (OTF): A more advanced and flexible format, OpenType was developed jointly by Microsoft and Adobe. OTF fonts build upon the TrueType structure, offering enhanced capabilities, particularly for professional typography. Key advantages of OpenType include support for a much larger character set (including extended alphabets, ligatures, small caps, old-style figures, and other typographic features), and platform independence (they work identically on Windows and macOS). For designers and professionals requiring sophisticated typographic control and access to rich stylistic alternatives, OTF is the preferred format.
- Web Fonts (WOFF, WOFF2, EOT, SVG): While primarily used for web design, it’s worth noting that some font packages might include these formats. They are optimized for fast loading and display in web browsers but are not typically installed directly onto your operating system for general application use. However, understanding their existence highlights the diverse applications of digital fonts across various technological platforms.
Safe and Reliable Font Sources: Digital Security and Quality Control
When it comes to downloading fonts, exercising caution is paramount. Just like any other digital download, fonts from untrusted sources can potentially harbor malware or come with licensing issues. Prioritizing digital security is a core tenet of effective technology usage.
- Established Font Libraries:
- Google Fonts: An indispensable resource for designers and developers, offering hundreds of high-quality, open-source fonts. All fonts are free for personal and commercial use, making it an excellent starting point for anyone. It’s safe, reliable, and constantly updated.
- Adobe Fonts (formerly Typekit): Included with Adobe Creative Cloud subscriptions, Adobe Fonts provides access to thousands of professionally designed fonts. These fonts are automatically synced to your desktop applications, ensuring seamless integration into your design workflow. It’s a fantastic option for creative professionals already invested in the Adobe ecosystem.
- DaFont / Font Squirrel / MyFonts / UrbanFonts: These platforms host a vast collection of fonts, ranging from free to premium. DaFont and Font Squirrel are particularly popular for their extensive free offerings (always check licensing for commercial use!). MyFonts and UrbanFonts host a mix of free and paid options, often showcasing the work of independent type designers.
- Type Foundries and Independent Designers: Many reputable type foundries (e.g., Font Bureau, Hoefler&Co., Commercial Type) and individual type designers sell their fonts directly. Purchasing from these sources guarantees authenticity, quality, and proper licensing.
- Checking Licenses: This is where the “Money” aspect comes in. Not all free fonts are free for commercial use. Always read the licensing agreement (often found in a “Read Me” file or on the download page) to understand permissible uses. Using a font commercially without the proper license can lead to legal issues and financial penalties. Investing in a properly licensed font is often a wise decision for businesses and professionals.
By sticking to these reputable sources, you minimize security risks and ensure the quality and legality of your font collection, contributing to a more secure and productive digital environment.
Step-by-Step Font Installation on Windows
Windows remains the dominant PC operating system, and installing fonts is a straightforward process, offering a couple of methods depending on your preference and the number of fonts you’re installing.
Locating and Extracting Font Files
Most fonts you download from the internet will come compressed in a .zip file. This is a common practice to bundle multiple files (e.g., different weights or styles of a font family, along with licensing information) and reduce file size.
- Download the Font: Navigate to your chosen reliable font source and download the font file. It will typically save to your “Downloads” folder.
- Locate the
.zipfile: Open File Explorer and go to your Downloads folder (or wherever you saved the file). - Extract the Contents: Right-click on the
.zipfile. From the context menu, select “Extract All…” A new window will appear asking you to choose a destination. The default destination (a new folder with the same name as the.zipfile in the current directory) is usually fine. Click “Extract.”- Tech Tip: Ensure you have enough disk space, though font files are generally very small. After extraction, you’ll find the actual font files (e.g.,
.ttfor.otf) inside the newly created folder.
- Tech Tip: Ensure you have enough disk space, though font files are generally very small. After extraction, you’ll find the actual font files (e.g.,
Installing Fonts via Right-Click (The Quick Method)
This is the simplest and most common method for installing one or a few fonts.
- Navigate to the Extracted Folder: Open the folder where you extracted the font files.
- Select Font Files: Locate the actual font files (they will have
.ttfor.otfextensions and usually display a small font icon). If there are multiple styles (e.g., Bold, Italic, Light), you can select all of them. - Install: Right-click on the selected font file(s). In the context menu, you will see an option that says “Install” or “Install for all users.”
- “Install”: Installs the font for the current user account.
- “Install for all users”: Installs the font for every user profile on that PC. This is generally the recommended option for broader accessibility.
- Confirmation: Windows will display a small installation progress window. Once it disappears, the font is installed.
Installing Fonts via Settings or Control Panel (The Traditional Method)
This method is useful if you want to manage your installed fonts, preview them, or install a larger batch of fonts more systematically.
Using Windows 10/11 Settings:

- Open Settings: Click the Start button and select “Settings” (the gear icon), or press
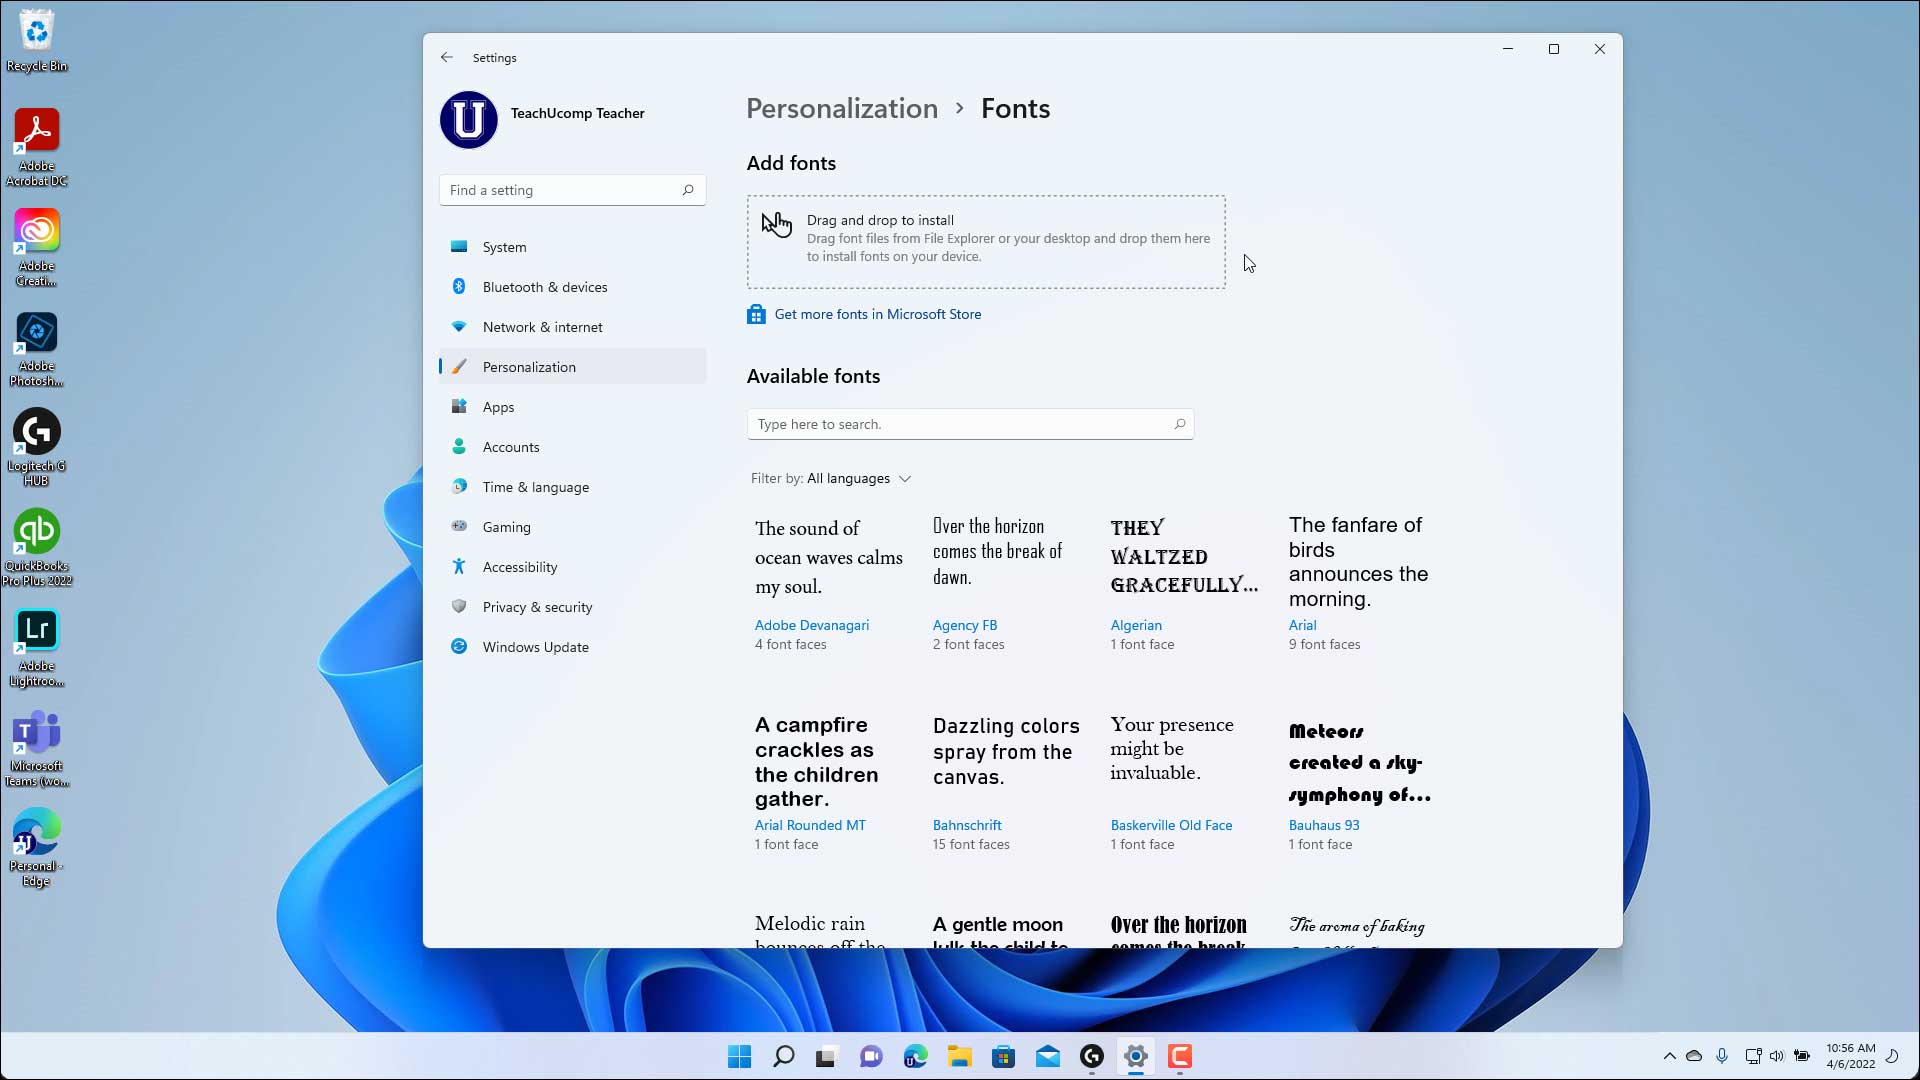
Windows key + I. - Navigate to Personalization: In the Settings window, click on “Personalization.”
- Go to Fonts: In the left-hand menu, select “Fonts.”
- Drag and Drop (or Browse):
- Drag and Drop: You can simply drag your extracted
.ttfor.otffont files from File Explorer directly into the “Drag and drop to install” area in the Fonts settings window. - Browse: Alternatively, you might find a “Browse” button (or similar) to manually locate and select font files from your computer.
- Drag and Drop: You can simply drag your extracted
- Installation: Windows will automatically install the fonts. Here, you can also see all your currently installed fonts, preview them, and uninstall them if needed.
Using the Control Panel (Older Windows Versions or for Advanced Management):
- Open Control Panel: Search for “Control Panel” in the Start Menu and open it.
- Navigate to Fonts: Change the “View by” option to “Large icons” or “Small icons,” then click on “Fonts.”
- Install New Font: In the Fonts window, you’ll see all your installed fonts. To add new ones, click “File” in the menu bar (if you don’t see it, press the
Altkey) and select “Install New Font…” - Browse and Install: A new “Add Fonts” dialog box will appear. Navigate to the folder where your extracted font files are located. Select the fonts you want to install and click “Install.”
Important Note After Installation
After installing fonts, it’s a good practice to:
- Restart Applications: If you were using applications like Microsoft Word, Adobe Photoshop, or any other program before installing the font, you might need to close and restart them for the new fonts to appear in their font lists.
- System Restart (Rarely Needed): In rare cases, especially with very old applications or if you encounter issues, a full system restart might be necessary, though this is less common with modern Windows versions.
Enhancing Your Workflow: Font Management and Troubleshooting
Installing fonts is only one part of the equation; effectively managing them ensures your system remains performant and your creative process smooth. This touches upon themes of productivity and digital organization within the broader “Tech” category.
Organizing Your Font Library
As your font collection grows, so does the potential for disorganization. A well-organized font library can significantly boost your productivity.
- Categorize Fonts: Create folders to categorize fonts by style (e.g., Serif, Sans-serif, Script, Display), project, or licensing (e.g., Free for Commercial, Paid).
- Use Font Manager Software: For extensive collections, consider third-party font managers like FontBase, NexusFont, or Suitcase Fusion. These tools allow you to:
- Preview Fonts: See how fonts look without installing them, saving system resources.
- Activate/Deactivate Fonts: Temporarily enable fonts for specific projects, preventing your system from being bogged down by hundreds of active fonts.
- Organize and Tag: Create custom tags, collections, and activate/deactivate fonts in groups.
- Find Duplicates: Identify and remove redundant font files.
- Backup Your Fonts: Always keep a backup of your font files, especially purchased ones, in cloud storage or an external drive. This protects your investment and ensures you don’t lose access to crucial design assets.
Uninstalling Unused Fonts
Just as you wouldn’t keep physical clutter, digital clutter can also slow down your system and make it harder to find what you need. Uninstalling unused fonts is a good maintenance practice.
- Using Windows 10/11 Settings: Go to
Settings > Personalization > Fonts. Click on any installed font to see its details, then click “Uninstall.” - Using Control Panel (Older Windows): Open the “Fonts” folder in the Control Panel. Select the font(s) you wish to remove, then click “Delete” (or right-click and choose “Delete”).
- Caution: Do not uninstall system fonts (e.g., Arial, Calibri, Times New Roman, Segoe UI). These are essential for Windows and its applications to function correctly. If you accidentally delete a system font, you might need to run a system restore or repair.
Common Installation Issues and Solutions
While font installation is generally reliable, you might occasionally encounter hiccups.
- Font Not Showing Up:
- Did you restart the application (e.g., Word, Photoshop) after installation? Most apps need a restart to refresh their font list.
- Is the font actually installed? Check your Windows Fonts folder or Settings > Fonts.
- Is it the correct font file type (TTF or OTF)?
- Did the installation process complete successfully?
- Corrupted Font File: If a font file seems to install but doesn’t display correctly or causes application crashes, it might be corrupted. Try re-downloading the font from a different, trusted source.
- Permissions Issues: In rare cases, especially in corporate environments, you might lack the necessary administrative permissions to install fonts. Contact your IT administrator.
- Too Many Fonts: While modern systems handle a large number of fonts better than older ones, having thousands of active fonts can still impact system performance and application load times. This is where font managers become invaluable for deactivating unused fonts.
The Impact of Fonts on Brand Identity and Design
Beyond the technical steps, it’s vital to reiterate why fonts matter, tying back directly to the “Brand” aspect of your website. Fonts are core to visual identity.
- Consistency: Using a consistent set of fonts across all your brand touchpoints (website, logos, marketing materials, documents) creates a cohesive and recognizable brand presence. This reinforces professionalism and trustworthiness.
- Readability and User Experience: The primary function of text is to be read. Choosing fonts that are clear, legible, and appropriate for their context significantly enhances the user experience, whether in an app, on a website, or in a printed report.
- Conveying Personality: Fonts have distinct personalities. A classic serif might suggest tradition and trustworthiness, a modern sans-serif implies innovation and clarity, while a whimsical script font might evoke creativity and playfulness. Matching the font’s personality to your brand’s values is crucial for effective branding.
- Digital Accessibility: Consider contrast and size for accessibility. While a creative choice, ensure your font selections don’t alienate parts of your audience with visual impairments.
For any individual building a personal brand, or a business cultivating a corporate identity, careful font selection and proper installation are foundational elements. They are an often-overlooked yet incredibly powerful tool in your design and communication arsenal.
Conclusion: Unleashing Your Digital Potential
The ability to install and manage custom fonts on your PC is a gateway to unparalleled creative freedom and enhanced productivity. It empowers you to break free from generic system defaults and inject personality, professionalism, and distinctiveness into every digital endeavor. From crafting compelling presentations and eye-catching marketing materials to designing stunning personal projects and refining your digital brand, the right font makes all the difference.
By understanding font types, sourcing from reliable platforms, mastering the installation process on Windows, and adopting smart management practices, you not only elevate your aesthetic output but also contribute to a more secure and efficient digital workflow. Remember that fonts are not just lines and curves; they are powerful tools that shape perception, convey messages, and ultimately, define your digital identity. So, go forth, explore the vast world of typography, and let your creativity flourish with every carefully chosen character.
aViewFromTheCave is a participant in the Amazon Services LLC Associates Program, an affiliate advertising program designed to provide a means for sites to earn advertising fees by advertising and linking to Amazon.com. Amazon, the Amazon logo, AmazonSupply, and the AmazonSupply logo are trademarks of Amazon.com, Inc. or its affiliates. As an Amazon Associate we earn affiliate commissions from qualifying purchases.